How to Annotate a PDF in Preview: A Clear Step-by-Step Guide
This guide shows you how to annotate a PDF in Preview using highlights, notes, and shapes with simple step-by-step instructions.
You have a PDF document open on your Mac and need to add notes or highlight key points quickly. Instead of downloading extra software, you want to use the built-in Preview app but aren't sure how to access or manage its annotation tools effectively.
This article guides you through how to annotate a PDF in Preview with clear, step-by-step instructions. You will learn how to add highlights, notes, shapes, and more, as well as how to view and manage all your annotations directly within Preview. This approach helps you avoid common pitfalls and confusion that many users encounter when first using Preview’s annotation features.
Key takeaways
- Access annotation tools via the Preview toolbar's Markup button.
- Use Highlights, Notes, and Shapes to annotate efficiently without extra software.
- View all annotations in the sidebar to manage them easily.
- Preview supports free PDF annotation on Mac without third-party apps.
- Common issues like missing annotation tools often relate to toolbar visibility or file permissions.
Before you start: What you need to annotate PDFs in Preview
Preview is a built-in app on macOS that allows you to view and annotate PDFs without needing to download any additional software. However, to use its annotation features effectively, your Mac should be running macOS Mojave (10.14) or later. Earlier versions may have limited annotation tools or lack some functionalities present in newer releases.
Before opening a PDF for annotation, check that the file is not password-protected or locked. Preview will not allow you to add or edit annotations if the PDF is secured, so removing restrictions beforehand is necessary to proceed.
It's also helpful to understand the type of PDF you have. If the document is a scanned image rather than text-based, annotation options like highlighting or text comments might be limited or unavailable, since Preview cannot select text in images. For image-only PDFs, you can still add shapes, drawings, or notes, but text-based annotations require selectable text.
Getting these basics right ensures a smoother experience when you begin annotating. Confirm your macOS version, verify the PDF’s security status, and know your document type to set realistic expectations for what Preview can do.
How to annotate on a PDF file using Preview
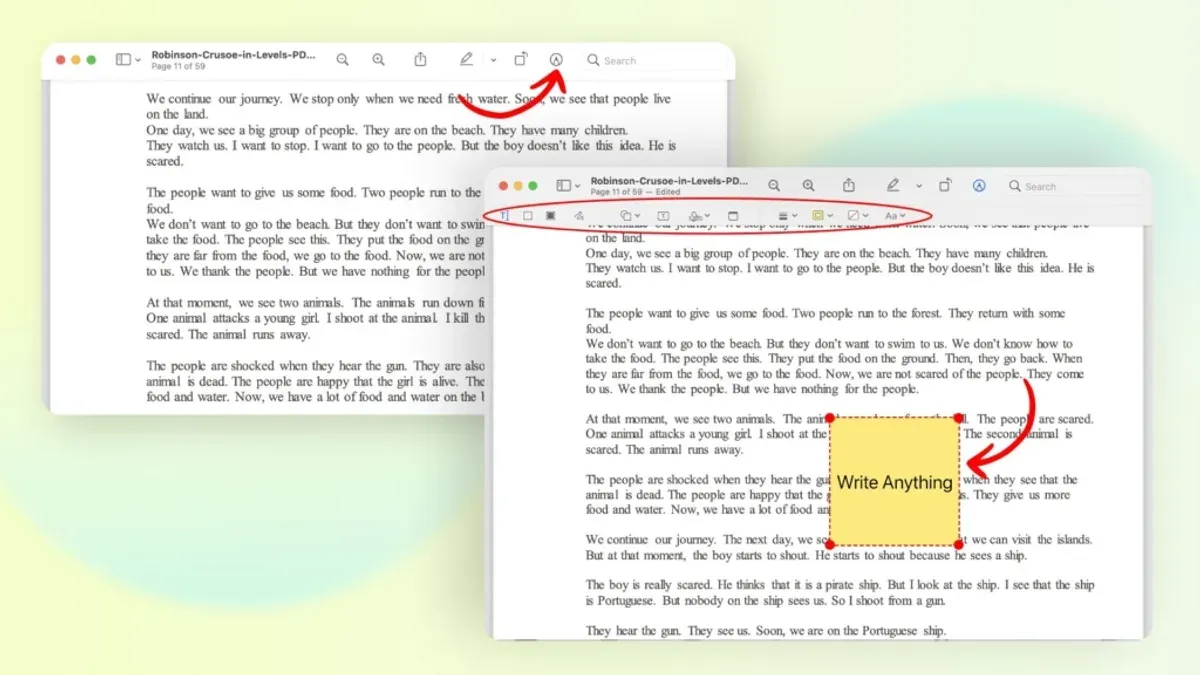
- Open your PDF file in Preview by double-clicking it or right-clicking and selecting Open With > Preview. Once the file is open, reveal the Markup Toolbar by clicking the Markup button, which looks like a pencil tip inside a circle, located near the top-right corner. When the toolbar appears, you’ll see various annotation tools available.
- To highlight text, click the Highlight button (a marker icon). Then click and drag over the text you want to emphasize. The text will appear with a colored background. To underline or strikethrough text, click the small dropdown arrow next to the Highlight button and select either Underline or Strikethrough. Apply these by dragging over the text as you did with highlighting.
- Add sticky notes by clicking the Note icon (a speech bubble). Click anywhere on the PDF to place the note. A text box will appear where you can type comments or reminders. You can move the note by dragging its icon to another spot.
- Insert text boxes by selecting the Text tool (a "T" icon). Click on the page where you want your text box and start typing. You can resize, move, and format the text box using the options in the Markup Toolbar.
- To draw shapes like rectangles, circles, or lines, click the Shapes icon (a square and circle). Choose the desired shape and drag on the PDF to place and size it. For freehand sketches, click the Sketch tool (a squiggly line), then draw directly on the document using your mouse or trackpad.
- Insert signatures by clicking the Signature icon (a cursive signature). If you haven’t created one yet, Preview will prompt you to add a signature using your trackpad, camera, or iPhone. Once saved, click the signature to place it anywhere on the document. Similarly, you can add stamps by clicking the Stamp tool and selecting from default options or creating custom stamps.
After each annotation, you will see the PDF visually update—highlighted text will show color changes, notes appear as icons, shapes overlay the page, and signatures or stamps become visible. This immediate feedback confirms your actions were successful.
How to view annotations on a PDF in Preview
To efficiently locate and read annotations within a PDF using Preview, start by opening the PDF document in Preview. Preview does not have a dedicated annotation summary panel like some other PDF readers, but it offers a sidebar that can display notes and highlights if these annotations exist. You can access this sidebar to quickly scan through your annotations without hunting for them on each page.
- Open your PDF in Preview.
- Click the View menu in the menu bar.
- Select Highlights and Notes from the dropdown. This opens a sidebar on the right showing all the highlights and notes in the document.
- Browse through the list of annotations in the sidebar. Clicking on any annotation will take you directly to the page and location of that annotation.
- To read the full content of a note or comment, click the highlighted text or annotation icon on the page. The comment box will appear adjacent to the annotation, allowing you to read or edit it.
- Use the sidebar navigation to jump between annotations quickly, especially in documents with many notes.
Keep in mind that Preview’s annotation viewing is more basic compared to Adobe Acrobat. Preview does not support all annotation types, such as advanced form comments or some multimedia notes, and it lacks an extensive annotation management panel. This means some annotations created in other software might not display fully or interactively. However, for most standard highlights, text notes, and shapes added within Preview, this method provides a straightforward way to view and navigate annotations.
For example, if you open a document with multiple highlights and notes, using the Highlights and Notes sidebar makes it simple to jump through each annotation. You avoid scrolling through the entire document and can focus on the relevant comments quickly.
How to view full annotations on a PDF
Preview offers several ways to ensure you can see all the annotations added to your PDF. First, make sure the Markup Toolbar is active by clicking the Markup button in the toolbar or selecting View > Show Markup Toolbar. This reveals tools and annotations visually on the page. However, note that some annotation types, especially advanced or embedded annotations created in Adobe Acrobat, may not display fully or interactively in Preview.
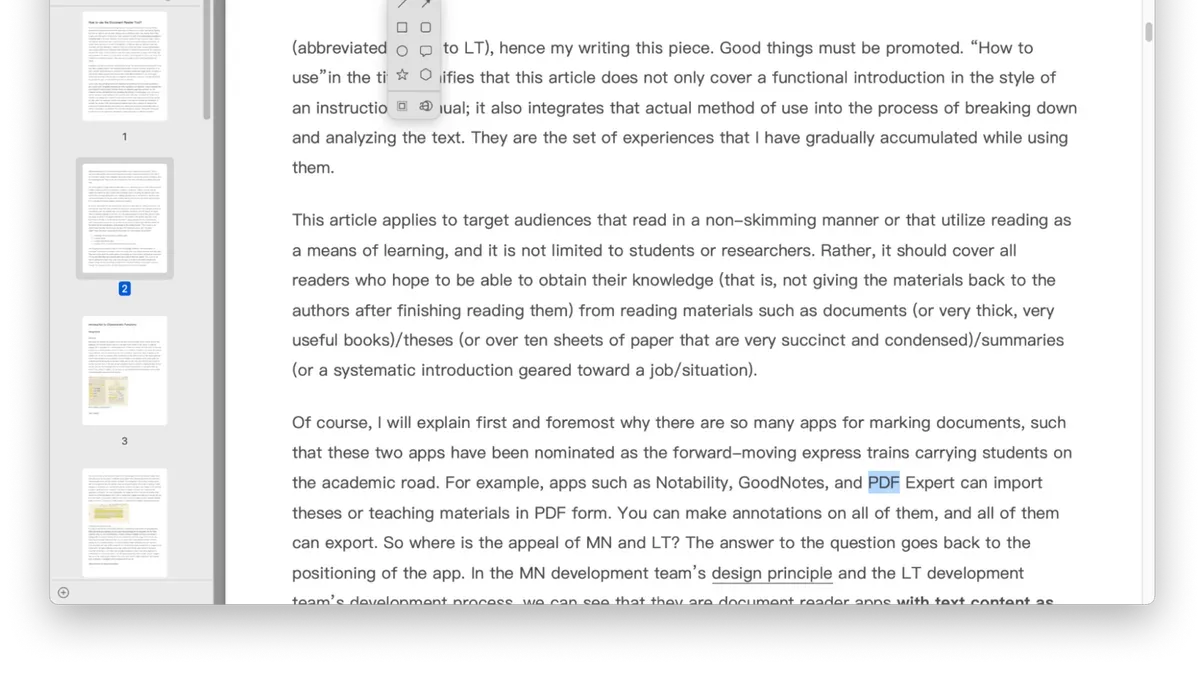
To toggle annotation visibility, use the sidebar by selecting View > Highlights and Notes. This sidebar lists text highlights and notes, but it may not include all annotation types like stamps or embedded multimedia. Therefore, some annotations might remain hidden or only partially accessible.
If you suspect annotations are missing or incomplete, exporting the PDF can help. Choose File > Export as PDF and open the exported file in Adobe Acrobat Reader or another robust PDF viewer to verify all annotations appear as intended. This comparison highlights how Preview simplifies annotations for quick viewing but lacks full support for complex annotation features.
- Open your PDF in Preview.
- Click the Markup button or go to View > Show Markup Toolbar to display annotation tools and visible marks on the document.
- Open the sidebar by selecting View > Highlights and Notes, where you will see a list of text-based annotations.
- Scroll through the document and the sidebar to check for all visible annotations.
- If some annotations look missing or incomplete, go to File > Export as PDF, save the file, then open it in Adobe Acrobat Reader to confirm full annotation visibility.
By following these steps, you can confirm which annotations Preview shows and identify any that require a more advanced viewer for full access.
How to annotate a PDF free using Preview
Preview on macOS provides a robust set of annotation tools at no cost, making it a reliable choice for users who want to add highlights, notes, shapes, and signatures without purchasing additional software. You can access all these features simply by opening the Markup Toolbar within Preview. While Preview covers basic to intermediate annotation needs well, it lacks some advanced functionalities found in paid PDF editors, such as extensive form-filling options, advanced redaction, or detailed comment management.
If your annotation requirements are straightforward—like marking up text, adding comments, or signing documents—Preview will serve you effectively and free of charge. However, if you require features like OCR (Optical Character Recognition), batch processing of annotations, or collaborative editing, you might consider dedicated paid tools.
Here’s a quick comparison of Preview’s free annotation features versus popular paid PDF annotation tools:
| Feature | Preview (Free) | Paid PDF Editors |
|---|---|---|
| Highlighting | Yes | Yes |
| Adding notes/comments | Yes | Yes |
| Drawing shapes | Yes | Yes |
| Adding signatures | Yes | Yes, often with more options |
| Advanced form filling | Limited | Yes |
| Redaction | No | Yes |
| Collaborative annotation | No | Yes |
| OCR and text recognition | No | Yes |
To start annotating your PDFs for free in Preview, follow these steps:
- Open your PDF file with Preview. You should see the document displayed.
- Click the Markup Toolbar button (it looks like a pen tip) in the Preview toolbar. The annotation tools will appear.
- Select the annotation tool you want, such as the highlighter, note, or shape tool, and apply it to your document. You will see your annotations immediately.
- Use the sidebar to manage and navigate through your annotations if needed.
- Save your PDF to keep all annotations embedded in the file.
This process requires no additional purchases and works smoothly for everyday annotation tasks. Should your needs grow beyond these capabilities, exploring paid PDF editors can provide more specialized features.
How to annotate Adobe PDF files in Preview
Adobe PDF files open seamlessly in Preview, allowing you to annotate them much like any other PDF. However, some annotation features created in Adobe Acrobat may not appear or behave exactly the same after editing in Preview due to differences in how each application handles PDF annotation structures. For example, certain interactive form fields or advanced annotation types might not transfer perfectly.
When you annotate an Adobe PDF in Preview, the basic tools like highlights, text notes, shapes, and signatures work well and will usually be visible when the file is reopened in Adobe Acrobat. To ensure your annotations remain intact and compatible, save your edited PDF using the “File” menu and select “Export as PDF” rather than just “Save.” This helps maintain the annotation data in a format Adobe Acrobat expects.
For example, if you highlight text and add notes in Preview, then open the same file in Adobe Acrobat, your annotations should appear as expected. However, if you use tools not supported by Preview, such as advanced stamps or 3D annotations created in Acrobat, those may not show or may flatten into static elements.
- Open the Adobe PDF file in Preview by double-clicking it or using "File > Open." You should see the document load normally with all original content visible.
- Click the Markup Toolbar icon (a pen tip) to access annotation tools. Use highlights, notes, or shapes to add your annotations. Confirm that your edits appear on the page.
- Save your annotated PDF by choosing "File > Export as PDF." Name the file and select a location. This ensures annotation compatibility with Adobe Acrobat.
- Open the saved PDF in Adobe Acrobat to verify your annotations appear correctly. Basic annotations like highlights and notes should be visible and editable.
Troubleshooting common issues when annotating PDFs in Preview
Sometimes, you may find that the annotation tools in Preview are greyed out or missing. This often occurs when the PDF is locked or set to read-only. To check, open the PDF and look for a padlock icon in the toolbar or in the file’s Info window. If the file is locked, you need to unlock it by saving a copy or requesting the password to enable editing.
Invisible annotations or annotation layers not showing can be confusing. This usually happens if the annotations are hidden behind the PDF content or if the Markup Toolbar is not active. To fix this, ensure the Markup Toolbar is visible by selecting View > Show Markup Toolbar. If annotations remain invisible, try zooming in or out, as sometimes scaling affects their display.
Saving and exporting annotated PDFs sometimes causes annotations to disappear when reopened. To preserve your changes, always use File > Export as PDF instead of Save, especially when working with Adobe PDFs. This method flattens the annotations into the document, ensuring they remain visible across different PDF viewers.
- Open the PDF in Preview. If annotation tools are greyed out, click File > Duplicate and save a copy. Then try annotating the new file. You should now be able to use the tools.
- If annotations do not appear, go to View > Show Markup Toolbar. The annotation buttons should now be accessible.
- After adding annotations, choose File > Export as PDF. Save with a new name to ensure annotations are embedded. When reopening, your annotations should be visible.
How to find a PDF viewer with annotation features beyond Preview
If you find Preview's annotation tools limiting, several other PDF viewers offer more advanced features. Popular options include Adobe Acrobat Reader DC, Foxit PDF Reader, and PDF Expert. These apps provide enhanced editing tools, better collaboration options, and more robust annotation management than Preview.
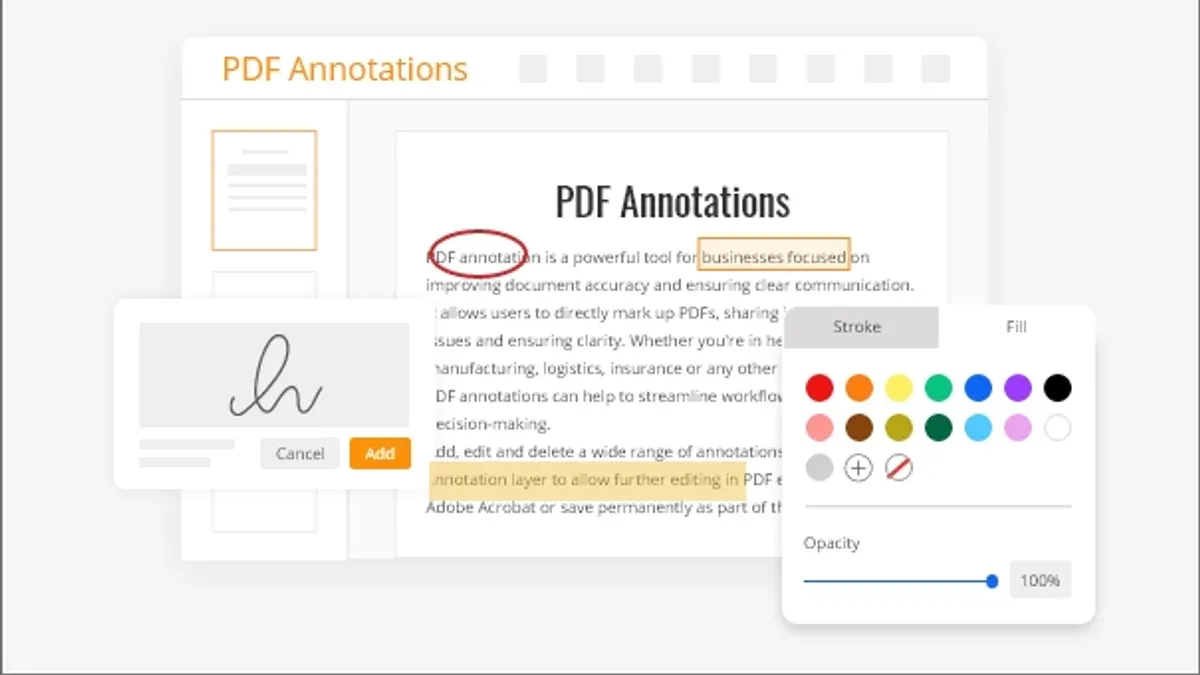
Preview lacks advanced features such as real-time collaboration, detailed comment threading, form filling with calculation support, and extensive shape or drawing tools. If you frequently need to collaborate with others, edit complex forms, or manage large volumes of annotations, switching to a dedicated PDF viewer may improve your workflow.
To choose the right tool, consider your annotation needs against the app's capabilities and pricing. Adobe Acrobat Reader DC is free with extensive viewing and commenting tools, but advanced editing requires a subscription. Foxit PDF Reader offers a free version with strong annotation features and paid upgrades for collaboration. PDF Expert is a paid app with a one-time purchase, known for a user-friendly interface and powerful editing.
- Identify your annotation needs, such as collaboration, form filling, or advanced drawing. Once clear, you’ll narrow down suitable apps.
- Visit the official website or Mac App Store for each app (e.g., Adobe Acrobat Reader DC, Foxit PDF Reader, PDF Expert). On the product page, check the list of annotation features and pricing options.
- Download and install a free version or trial when available. Open a PDF and test the annotation tools to confirm they meet your needs.
- Compare workflow with Preview by annotating typical documents. If the new app handles your tasks more efficiently, consider adopting it for those projects.
- For collaboration, test sharing and commenting features. Confirm that your collaborators can view and add annotations smoothly.
Frequently asked questions
How to annotate a pdf document?
Open your PDF in Preview, then use the markup toolbar accessible via the View > Show Markup Toolbar menu. From there, you can add highlights, notes, shapes, or text boxes by selecting the appropriate tool. Click or drag on the PDF to place your annotation.
How to see annotations on a pdf?
To view annotations in Preview, ensure the markup toolbar is visible. Annotations like highlights and notes appear directly on the PDF pages. For a detailed list, open the Annotations Sidebar by clicking the sidebar button and selecting Annotations to see all notes and comments at once.
How to annotate a pdf doc?
Launch Preview and open your PDF document. Activate the markup toolbar, then choose tools like the highlighter or note tool to add annotations. After making changes, save your document to keep the annotations embedded.
How to annotate on a pdf document?
With your PDF open in Preview, enable the markup toolbar via the View menu. Use tools such as highlight, underline, or shapes to add annotations. You can click on existing annotations to edit or delete them if needed.
How to annotate on a pdf?
Open the PDF in Preview and show the markup toolbar. Select your annotation tool—like text, highlight, or drawing—and click or drag on the document to apply it. Remember to save your file after annotating to preserve your changes.
When Preview’s Annotation Tools May Not Be Enough
Preview’s annotation features cover many common tasks, but they don’t offer advanced PDF editing such as creating interactive forms, performing OCR (optical character recognition), or supporting real-time collaboration with others. If you need to fill out complex forms, redact sensitive information securely, or track changes in a shared environment, specialized PDF software like Adobe Acrobat or dedicated collaboration platforms may be necessary. Additionally, Preview does not support adding multimedia elements or extensive document restructuring, which some professional workflows require.
To continue building your skills, the most useful next step is to explore Preview’s markup toolbar thoroughly. Familiarize yourself with lesser-known tools like the signature feature under the Markup menu or the sidebar’s Notes pane that helps organize your annotations. Mastering these will make your PDF review process smoother and help you get the most out of Preview without extra software.
See also: How to Sign a PDF in Preview: Step-by-Step Guide for Mac Users · How to Combine PDFs in Preview: A Clear Step-by-Step Guide · How to Export Notes to PDF in the Notes App: A Step-by-Step Guide