How to Change Backup Frequency in Time Machine: Step-by-Step Guide
Discover how to adjust Time Machine backup frequency using Terminal commands and third-party apps for better data management.
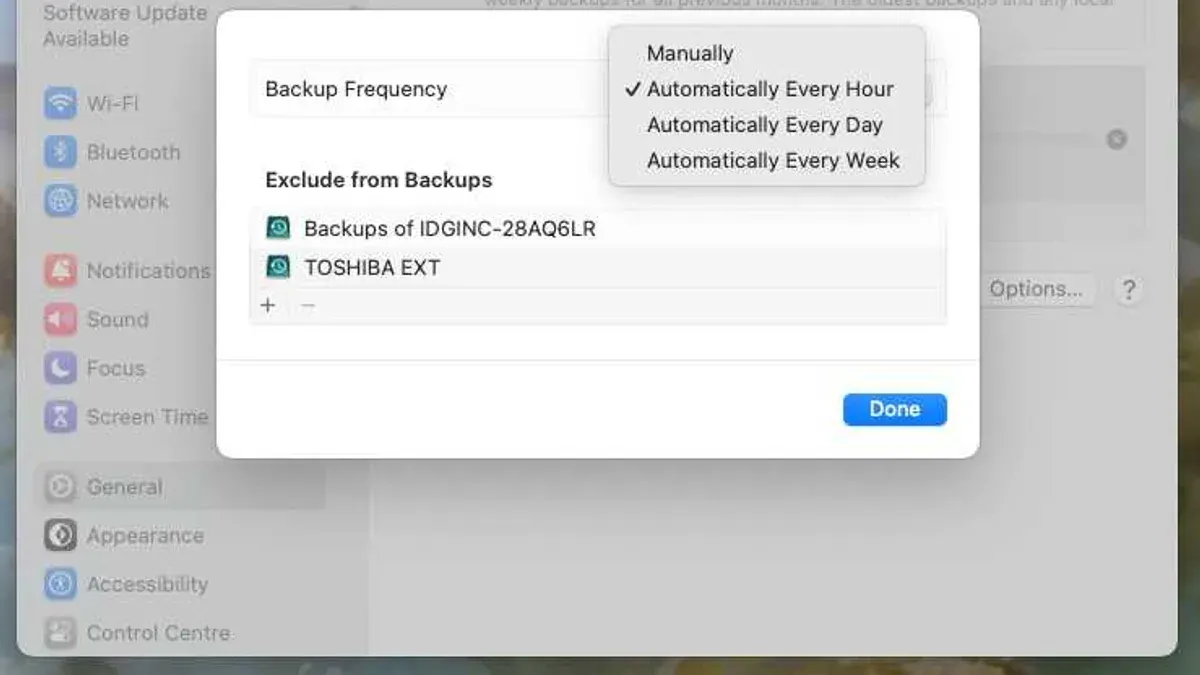
You rely on Time Machine to keep your Mac's data safe, but the hourly backup schedule sometimes feels too frequent or not frequent enough. Maybe your backup disk fills up quickly, or you want to reduce system interruptions during work hours. Understanding how to change backup frequency in Time Machine can help you find the right balance between data safety, storage use, and performance.
This article guides you through both native and advanced methods to adjust Time Machine's backup intervals. You'll learn how to use Terminal commands and third-party apps, manage backup exclusions to indirectly influence frequency, and troubleshoot common issues. Step by step, you'll gain the knowledge to customize your backups effectively without compromising your data protection.
Key takeaways
- Time Machine backs up hourly by default, which can't be changed via System Preferences.
- Using Terminal with launchd lets you schedule backups at custom intervals.
- Third-party apps like TimeMachineEditor provide user-friendly ways to adjust backup frequency.
- Excluding large or frequently changing files can reduce backup duration and indirectly affect frequency.
- Common issues include backup failures after scheduling changes, which can be fixed by resetting Time Machine preferences.
Before you start: Understand Time Machine’s default backup frequency
Time Machine backs up your Mac automatically every hour. This interval is fixed and cannot be changed through System Preferences or the Time Machine interface. Apple designed this hourly schedule to ensure your data stays protected with minimal intervention from you.
The hourly backups help by creating incremental snapshots, which means only the changes since the last backup are saved. This approach makes restoring individual files or entire systems easier and faster. It also reduces the storage space needed compared to full backups every time.
While hourly backups provide strong data safety, they also use disk space continuously and can slightly impact system performance during backup operations. Typical Time Machine backups grow over time, but macOS manages older backups by deleting the oldest snapshots when the backup disk is nearly full, maintaining balance between data retention and storage limits.
Change backup frequency using Terminal and launchd scheduling
You can manually adjust Time Machine’s backup frequency by modifying its system launch agent using Terminal. This method is for advanced users comfortable with command-line operations and system files. Be aware that incorrect changes may cause backup failures or system instability, and could increase the risk of data loss if backups become less frequent.
- Disable the default hourly backup: Open Terminal and enter
sudo launchctl unload -w /System/Library/LaunchDaemons/com.apple.backupd-auto.plist. If successful, Time Machine will stop its automatic hourly backups. - Create a custom launchd plist file: Using a text editor like nano, create a file named
com.custom.backupd.plistin~/Library/LaunchAgents/. This file will define your preferred backup interval. - Use this sample plist content to schedule backups every 3 hours:
<?xml version="1.0" encoding="UTF-8"?>
<!DOCTYPE plist PUBLIC "-//Apple//DTD PLIST 1.0//EN" "http://www.apple.com/DTDs/PropertyList-1.0.dtd">
<plist version="1.0">
<dict>
<key>Label</key>
<string>com.custom.backupd</string>
<key>ProgramArguments</key>
<array>
<string>/usr/bin/tmutil</string>
<string>startbackup</string>
<string>--auto</string>
</array>
<key>StartInterval</key>
<integer>10800</integer> <!-- 3 hours in seconds -->
</dict>
</plist> - Load your custom plist into launchd: Run
launchctl load -w ~/Library/LaunchAgents/com.custom.backupd.plist. This activates your custom schedule, triggering backups every 3 hours. - Verify operation: Monitor Time Machine preferences or use
tmutil statusin Terminal during expected backup times to confirm backups run as scheduled.
Adjusting backup frequency in this way gives you control but requires caution. Less frequent backups reduce system overhead and storage use but increase data loss risk if an issue occurs before the next backup. Always ensure your backups complete successfully after changes and consider keeping manual backups for critical data.
Use third-party apps to customize Time Machine backup intervals
If you prefer a safer, more user-friendly alternative to Terminal commands, several third-party apps let you customize Time Machine’s backup frequency with ease. These apps often provide simple graphical interfaces to schedule backups, pause them temporarily, or manage backup history without delving into complex system files.
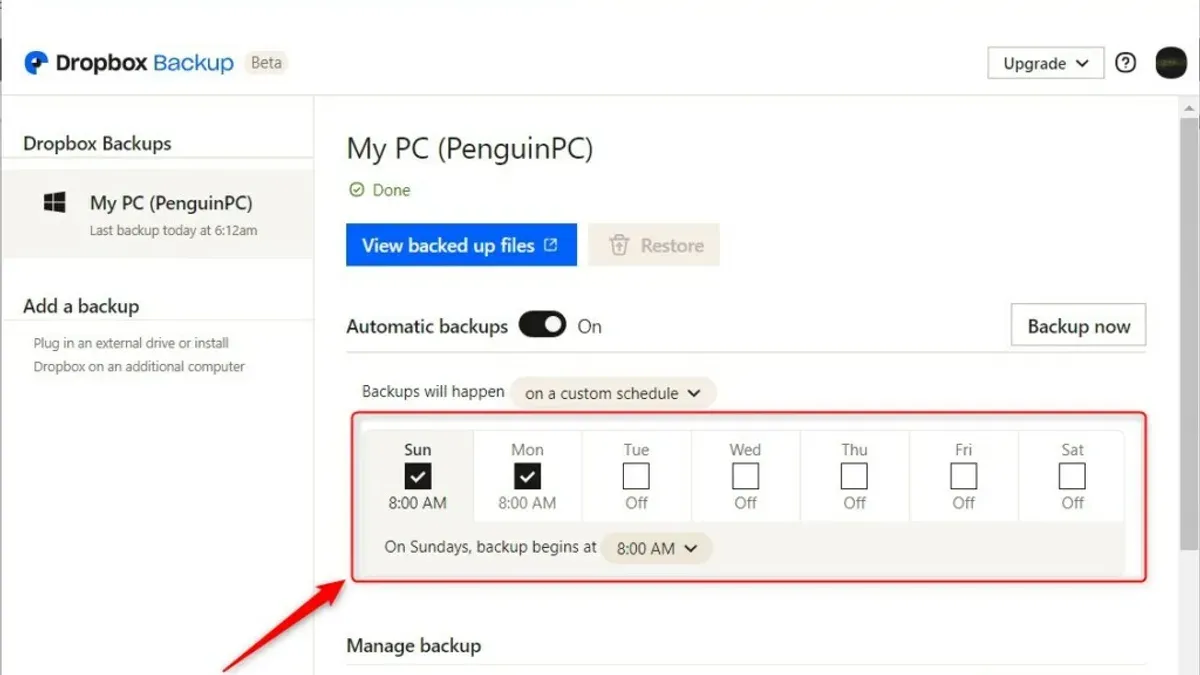
Popular options include TimeMachineEditor, BackupLoupe, and TimeMachineScheduler. TimeMachineEditor offers flexible scheduling options beyond the default hourly backups, supporting intervals from minutes to days. BackupLoupe adds features like detailed backup inspection and cleanup alongside scheduling tweaks. TimeMachineScheduler focuses solely on interval adjustments with a straightforward interface.
Before choosing software, consider user ratings, ongoing support, and compatibility with your macOS version to ensure reliability and security. Avoid apps from unverified sources to protect your system from vulnerabilities.
| App | Key Features | User Rating | Price |
|---|---|---|---|
| TimeMachineEditor | Custom intervals, pause/resume backups | Generally positive | Free |
| BackupLoupe | Backup inspection, cleanup, scheduling | Mixed to positive | Paid (trial available) |
| TimeMachineScheduler | Simple interval changes | Positive | Free |
- Download and install your chosen app from the official website.
- Open the app and navigate to its scheduling or interval settings panel.
- Set your preferred backup frequency, such as every 2 hours or once daily; the app should display a confirmation or preview of the schedule.
- Apply or save the settings; you may see a status message confirming the new schedule is active.
- Optionally, test by triggering a manual backup or waiting to see if the backups follow the new interval.
Using these apps can simplify managing Time Machine backups and reduce risks of misconfigurations while giving you control over how often your data is saved.
Adjust backup frequency indirectly by managing backup data and exclusions
While you cannot directly change Time Machine’s automatic backup intervals without advanced methods, you can influence how backups behave by controlling what data is backed up. Using exclusions to omit large or unnecessary folders reduces the backup size, which can significantly speed up each backup session and make hourly backups less burdensome on system resources.
For example, excluding folders containing large media files or virtual machine images can shrink backup sizes from several gigabytes to a fraction of that. This makes hourly backups complete faster and consume less disk space, creating a smoother overall backup experience.
Another way to manage backup frequency effects is by scheduling manual backups when needed. If the default hourly backups feel too frequent or too slow for your needs, you can temporarily disable automatic backups and run backups on your own schedule.
- Open System Preferences and go to Time Machine settings. You should see the main Time Machine window.
- Click on "Options" and then use the "+" button to add folders or files you want to exclude from backups. Confirm by clicking "Save." You will see those items listed under exclusions.
- To run a manual backup, click the Time Machine icon in the menu bar and select "Back Up Now." You should see the backup progress indicator showing the operation has started.
- If you want to temporarily pause automatic backups, open Terminal and enter the command: sudo tmutil disable. This stops automatic backups until you enable them again with sudo tmutil enable.
By reducing the volume of data to be backed up and controlling when backups occur, you optimize the balance between data safety and system performance without directly changing the backup frequency setting.
Troubleshoot common issues when changing Time Machine backup frequency
After adjusting your Time Machine backup frequency, you might encounter backup failures or skipped backups. Common error messages include "Backup failed" or "Time Machine couldn’t complete the backup." These often occur if the custom scheduling conflicts with the system’s default behavior. To resolve this, first verify your launchd plist settings or third-party app configurations to ensure intervals are properly defined.
System slowdowns or increased battery usage can also happen when backups run too frequently or overlap with other resource-intensive tasks. If your Mac feels sluggish during backups, try spacing out backup intervals to reduce performance impact. Keep an eye on battery drain reports in Activity Monitor to confirm if Time Machine is the cause.
If backups stop entirely or behave unpredictably, reverting changes is a safe approach. To do this, disable any custom launchd plist or third-party app you used and restart your Mac. This should restore Time Machine’s default hourly backup schedule. After reboot, open Time Machine preferences and check that the “Back Up Automatically” box is enabled.
- Open Terminal and run sudo launchctl list | grep backup. You should see your custom backup job listed; if not, the scheduler may not be loading correctly.
- Use sudo launchctl unload /path/to/your/custom.plist to disable the custom schedule; then restart your Mac. Upon reboot, Time Machine should revert to default behavior.
- Check Time Machine preferences to confirm automatic backups are enabled. You should see the last backup timestamp updating after some usage.
- Monitor backups over the next day. If backups proceed without errors, your issue is resolved. If not, consider removing exclusions or third-party apps that might interfere with backups.
Frequently asked questions
How to change time machine backup frequency?
You can change Time Machine's backup frequency by disabling its default hourly backups and setting up a custom schedule using Terminal commands combined with launchd scheduling. Alternatively, third-party apps like TimeMachineEditor allow you to select backup intervals without complex commands. Adjusting backup frequency requires balancing your backup needs with system performance and storage space.
how to change time machine backup frequency on mac
On a Mac, the native Time Machine app does not provide a direct option to alter backup frequency. To change it, you can use Terminal to stop the automatic hourly backups and then create a custom schedule with launchd. Using a third-party tool such as TimeMachineEditor is often simpler and provides a user interface for setting intervals like daily or every few hours.
can i make time machine backup less often
Yes, you can make Time Machine back up less often than the default hourly schedule. This can be done by disabling the automatic backups and using tools or scripts to run backups at longer intervals, such as every few hours or once daily. Keep in mind that less frequent backups may increase the risk of data loss between backup points.
how to set time machine backup to daily instead of hourly
To set Time Machine backups to daily, you need to turn off the default hourly backups and schedule a daily backup using launchd or a third-party app. For example, after disabling automatic backups with the command sudo tmutil disable, you can create a launchd plist file to run backups once every 24 hours, or use apps like TimeMachineEditor to select a daily interval easily.
is it safe to change time machine backup schedule
Changing the backup schedule is generally safe if done correctly, but it requires caution. Less frequent backups mean your data is not saved as often, which can increase risk if a failure occurs between backups. Always ensure your custom schedule still meets your data protection needs, and test new settings to confirm backups run reliably.
Understand the Limits of Changing Backup Frequency
This guide does not cover adjusting backup frequency on networked Time Machine backups such as those stored on Time Capsule or NAS devices, where system-imposed limitations and network factors can prevent changes from taking effect. Manual adjustments via Terminal commands or third-party apps carry inherent risks, including potential data loss or system instability, and they may void your Apple support eligibility. It's essential to maintain separate critical backups elsewhere before altering backup schedules to safeguard your data against unexpected issues.
Taking control of your Time Machine backup intervals can help balance your Mac’s performance, storage use, and data safety according to your workflow. The single most useful next step is to carefully test any changes on a non-critical backup first, observing how your Mac behaves and ensuring backups complete successfully before applying them to your primary backup drive.
See also: How to Exclude Folders from Backup in Time Machine: Step-by-Step Guide · How to Restore a Single File Using Time Machine on Mac