How to Enable and Use the Root User on Mac Safely and Effectively
This guide explains how to enable root user on Mac to access full system privileges safely and effectively for advanced troubleshooting and configuration.
You need to perform a system task on your Mac that requires higher privileges than your standard user account provides. Maybe you're troubleshooting or configuring advanced settings, and you're wondering how to gain full administrative control safely.
This article explains how to enable root user on Mac, guiding you through the precise steps to activate and switch to the root account. It also compares Mac's root user with Linux and Ubuntu root access, outlines how to grant root privileges properly, addresses common issues, and offers best practices to protect your system while using this powerful account.
Key takeaways
- Enable the root user via Directory Utility in System Settings for full system access.
- Switch to root using the Login Window or Terminal with 'su -' after enabling it.
- Mac root user differs from Linux root; Mac also uses sudo for many tasks.
- Grant root privileges cautiously to avoid security risks and system damage.
- Always disable root user when not needed to maintain system security.
Before you start: understanding root user access on Mac
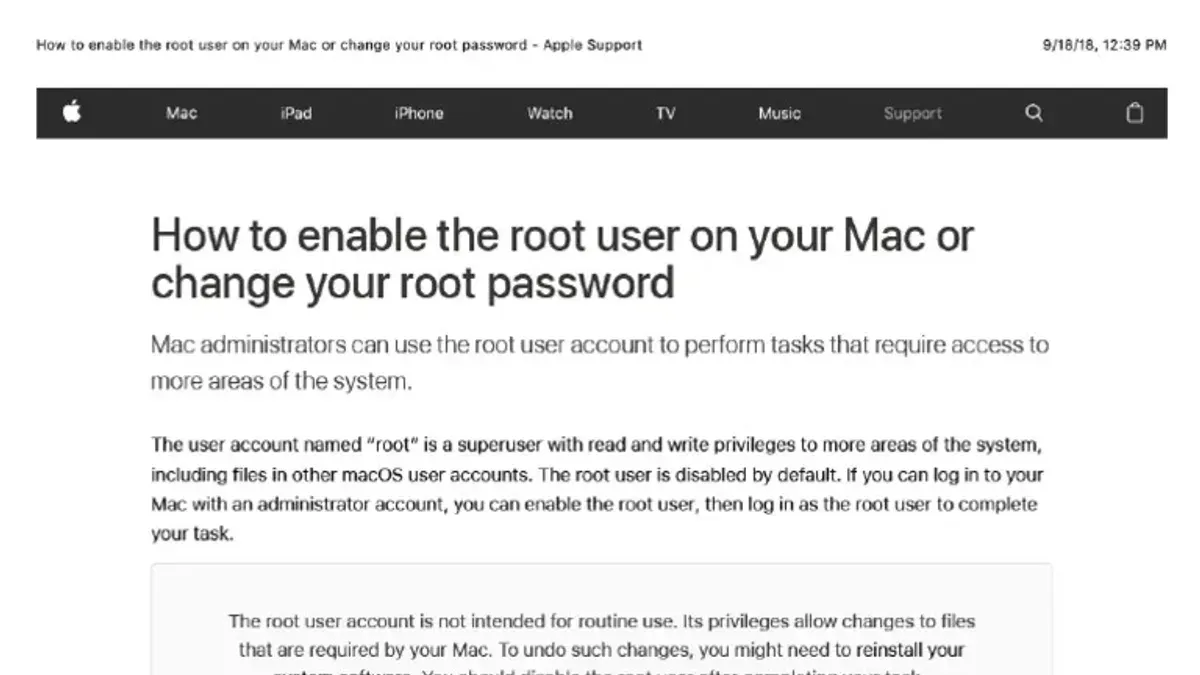
The root user on macOS is a superuser account with unrestricted access to all system files, settings, and processes. It has the highest level of privileges, allowing you to perform tasks that regular administrator accounts cannot. This includes modifying system files, managing system-wide configurations, and troubleshooting serious issues.
Common scenarios requiring root access include repairing disk permissions, troubleshooting kernel extensions, or running advanced system diagnostics. Developers and IT professionals often need root privileges to install low-level software or scripts that interact deeply with the OS.
By default, the root user is disabled on Macs to protect the system from accidental or malicious damage. Enabling root access increases the risk of system instability, data loss, and security vulnerabilities, especially if the root password is weak or shared. According to security reports, misconfigured root access is a frequent cause of escalated system errors and breaches in enterprise environments, underscoring the need for caution.
Before enabling root, ensure you have an administrator account with a strong password and a basic familiarity with Terminal commands, as many root tasks require command-line interaction. Without these prerequisites, enabling root may expose your Mac to unnecessary risks.
How to enable root user on Mac: step-by-step instructions
Enabling the root user on your Mac requires accessing Directory Utility or using Terminal commands. Follow these steps carefully to activate the root account and set a secure password.
- Open System Settings and go to Users & Groups.
- Click the lock icon at the bottom left and enter your administrator password to unlock settings.
- Click Login Options at the bottom of the user list, then click Join (or Edit depending on macOS version) next to Network Account Server.
- In the dialog that appears, click Open Directory Utility.
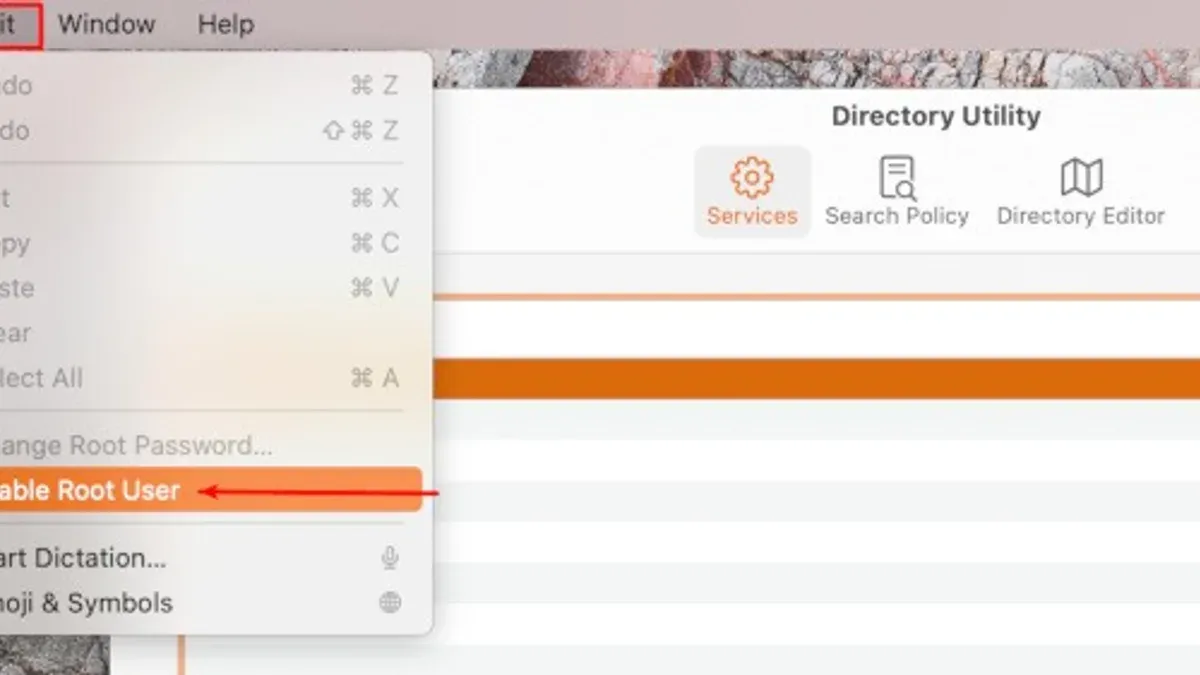
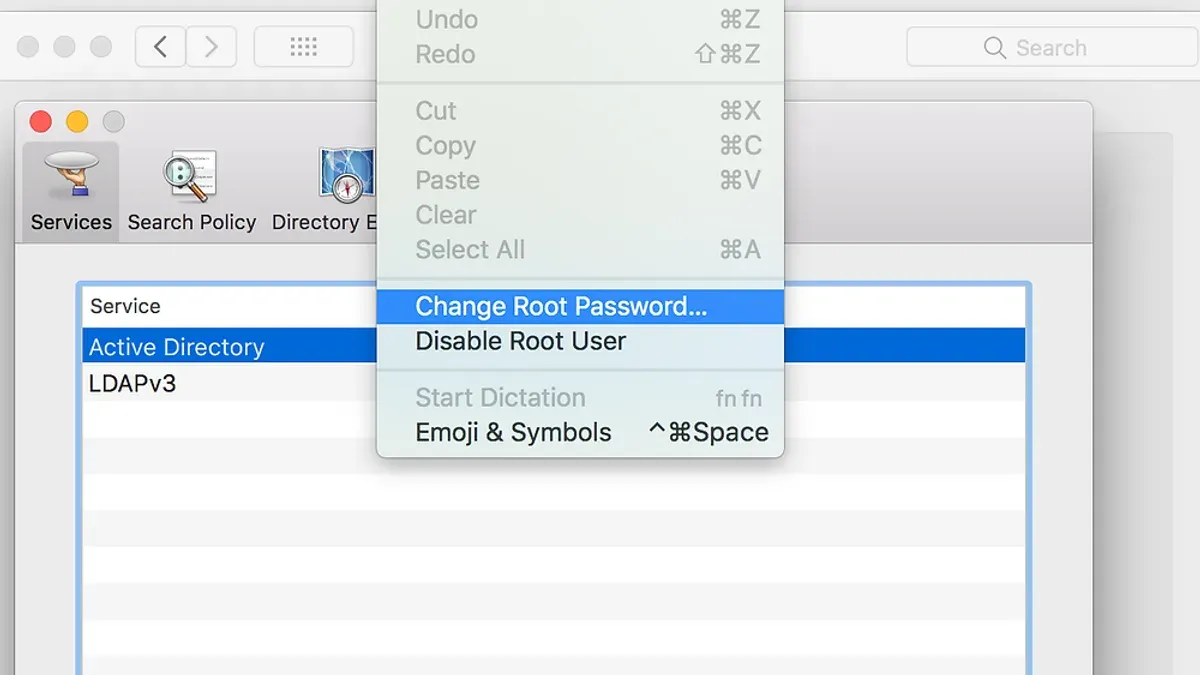
- In Directory Utility, from the menu bar, select Edit > Enable Root User. A prompt will appear to set a password.
- Enter a strong, unique password for the root user and confirm it. Click OK.
- To verify root user is enabled, go back to Directory Utility menu and confirm that Edit > Disable Root User is now an option.
Alternative method: Enable root user via Terminal
- Open the Terminal app.
- Type sudo dsenableroot and press Enter.
- Enter your administrator password when prompted.
- Enter and confirm a strong password for the root account when asked.
- Terminal will confirm root user activation with the message: "dsenableroot:: ***Successfully enabled root user."
Using either method activates the root user on your Mac. The Directory Utility method provides a graphical interface, while Terminal commands offer a quicker alternative. Always ensure your root password is strong and stored securely.
How to switch to the root user on Mac
You can switch to the root user on Mac either through the graphical login interface or the Terminal. Each method has its purpose and security implications.
Switching via the login screen
- Click the Apple menu and choose Log Out [your username]. This takes you to the login screen.
- At the login screen, click Other.
- Enter root as the username and provide the root user password you set when enabling root access.
- Press Return or click the arrow to log in as root. You should see the desktop environment as the root user.
This method fully logs you in as root, giving you unrestricted access. Use this cautiously, as any mistake can affect system integrity.
Switching users in Terminal
- Open the Terminal app.
- To switch to the root shell, enter
su -and press Return. Then enter the root password when prompted. You will see the prompt change, often ending with#, indicating root access. - Alternatively, use
sudo -ito open a root shell using your admin user credentials. This method does not require the root password but your own password and logs activities for auditing.
Both su - and sudo -i provide full root privileges temporarily within the Terminal session.
Running commands as root without full login
Instead of switching fully to root, you can run individual commands with elevated privileges using sudo [command]. For example, sudo nano /etc/hosts edits the hosts file as root without changing users. This reduces risk by limiting root access to specific tasks.
In summary, use the graphical login for full root sessions, Terminal commands su - or sudo -i for temporary root shells, and sudo for running single commands with root privileges. Prefer sudo when possible, as it offers better security tracking and less exposure.
How Mac root user compares to root on Linux and Ubuntu
On Mac, the root user is disabled by default, requiring deliberate activation, whereas on Ubuntu and many Linux distributions, the root account is locked but present. This distinction means that while both systems encourage using elevated privileges cautiously, their default configurations differ in approach.
Ubuntu typically emphasizes the use of sudo for administrative tasks instead of direct root login. When you run commands with sudo, you execute them with root privileges temporarily, reducing risks. Mac also uses sudo extensively, but enabling and logging in as root is less common and considered a higher security risk.
Enabling the root user on Ubuntu 18 involves a straightforward process in the terminal:
- Open the Terminal.
- Set a root password by typing
sudo passwd rootand pressing Enter. - Enter your user password when prompted.
- Type and confirm a new root password; if successful, you will see a confirmation message indicating password updated successfully.
- You can now switch to root by typing
su -and entering the root password.
This contrasts with Mac, where enabling root requires using the Directory Utility or Terminal commands like dsenableroot. Mac does not require setting a root password via sudo passwd but manages root enabling separately.
For users transitioning between systems, understanding these differences is crucial. Ubuntu's locked root with sudo usage encourages safer privilege escalation, whereas Mac's disabled root with optional enabling demands explicit action and awareness. Commands and access methods vary, so adapting your workflow and security mindset ensures effective and safe system management across platforms.
How to give root access to a user on Mac and Linux
Granting root privileges to a user without enabling the root account directly is a standard practice to maintain system security while allowing administrative tasks.
On Mac
- Open Terminal and run
sudo visudoto safely edit the sudoers file. You should see the sudoers file with syntax highlighting. - Locate the line
%admin ALL=(ALL) ALL. This allows all users in the 'admin' group to use sudo. - To grant root access to a specific user, add a line like
username ALL=(ALL) ALLreplacingusernamewith the actual user account. Save and exit; you should see no syntax errors. - Alternatively, add the user to the 'admin' group by running
sudo dseditgroup -o edit -a username -t user admin. Confirm membership withdscl. -read /Groups/admin GroupMembership.
On Linux
- Open a terminal and run
sudo visudoto edit the sudoers file safely. - Find the line
%sudo ALL=(ALL) ALLwhich allows users in the 'sudo' group to gain root privileges. - Add the user to the 'sudo' group with
sudo usermod -aG sudo username. Check withgroups usernameto confirm. - If you want to give specific sudo rights, add a line like
username ALL=(ALL) NOPASSWD: /path/to/commandin sudoers for fine-grained control.
Security implications: Giving root access via sudo is safer than enabling the root user because it requires the user's password and logs commands executed with elevated privileges. Direct root login bypasses these safeguards and increases risk. Therefore, prefer sudo delegation and restrict privileges as needed.
Example sudoers snippet for user 'alice':
| Line | Content |
|---|---|
| 1 | alice ALL=(ALL) ALL |
After configuration, test by running sudo -l -U alice to list the user's sudo privileges. You should see a list of permitted commands or ALL indicating full root access.
Troubleshooting common issues enabling or using root user on Mac
Unable to enable root user due to permissions or System Integrity Protection (SIP)
If you encounter the error “You do not have sufficient privileges to enable the root user”, ensure you are logged in with an administrator account. Standard users cannot enable root access.
System Integrity Protection (SIP) may also block enabling root. To check if SIP is active, open Terminal and run csrutil status. If it says "enabled," certain root modifications may be restricted.
Disabling SIP is possible but not recommended for typical users due to security risks. If necessary, reboot into Recovery Mode (Command + R at startup), open Terminal from Utilities, and run csrutil disable. Restart and try enabling root again.
Forgot root password and recovery approaches
If you forget the root password, you cannot log in as root until it is reset. To reset it, you must be logged in as an admin user and use Directory Utility.
- Open System Preferences > Users & Groups, then click the lock and authenticate.
- Launch Directory Utility from /System/Library/CoreServices/Applications/.
- From the menu bar, select Edit > Change Root Password.
- Enter a new password twice and confirm.
- Close all windows; you can now log in as root with the new password.
Problems switching user or running commands as root
When switching to root via Terminal with su -, you might see “Authentication failure”. This means the root password is incorrect or root is not enabled.
Using sudo for single commands avoids this issue and is safer. If sudo prompts for a password, enter your admin user password, not the root password.
Ensuring root user is disabled after use
Leaving the root user enabled creates a potential security risk. After completing necessary tasks, disable root by reopening Directory Utility, selecting Edit > Disable Root User, and confirming.
Alternatively, use Terminal with dsenableroot -d. Confirm root is disabled by attempting to switch with su -; it should fail.
Best practices for using root user on Mac safely
Using the root user on your Mac carries significant risks if not managed carefully. Many security experts recommend avoiding root login entirely unless absolutely necessary, as it bypasses many system safeguards.
Instead, use the sudo command to run single commands with elevated privileges. This approach limits potential damage by requiring your password each time and logs the commands for auditing.
If you enable the root user temporarily for specific tasks, make sure to disable it immediately after. Leaving root enabled indefinitely increases vulnerability to unauthorized access or accidental system changes.
Regularly monitor system logs for any unusual activity involving root access. You can review logs via the Console app under /var/log or use Terminal commands like log show --predicate 'process == "sudo"' to track sudo usage.
Examples of root misuse include accidental deletion of critical system files or malware exploiting root access to bypass security. Minimizing root usage and carefully controlling when and how it is enabled reduces these risks significantly.
- Assess if root access is truly necessary: Only proceed if your task cannot be done with admin privileges or sudo. You should see a clear justification for root use.
- Use sudo for individual commands: Open Terminal and prefix commands with
sudo. You should be prompted for your password and then see the command execute, limiting risk. - Enable root user temporarily if needed: Follow the enabling process, perform your tasks, and confirm completion without errors.
- Disable the root user immediately after use: Return to Directory Utility or Terminal and disable root. You should no longer see root as a login option or be able to switch to it.
- Regularly review system logs: Open the Console app or use Terminal commands to check for unexpected root or sudo activity. No unauthorized commands should appear.
Frequently asked questions
How to enable root on mac?
To enable the root user on Mac, open System Settings and navigate to Users & Groups. Click the lock to make changes, then access Login Options and select "Join" (or "Edit" depending on the macOS version). From there, open Directory Utility, click the lock again, and choose "Enable Root User" from the Edit menu. Set a strong password for the root account to complete the process.
How to go to root user?
You can switch to the root user on a Mac by opening Terminal and typing su -, then entering the root password when prompted. Alternatively, you can log out of your current account and log in directly as root if the root user is enabled. Use root access sparingly due to its broad system control.
How to enable root user in ubuntu?
Ubuntu disables the root account by default for security. To enable it, open Terminal and set a root password using sudo passwd root. After entering and confirming the new password, the root account becomes active. Be cautious as enabling root can expose the system to risks if misused.
How to get to root user linux?
On most Linux distributions, including Ubuntu, you can switch to the root user by typing su - in the terminal and entering the root password. If root access is disabled or no password is set, you can use sudo -i to gain root privileges temporarily. Proper permissions and caution are essential when operating as root.
How enable root user ubuntu 18?
For Ubuntu 18.04, enabling root involves setting a password with sudo passwd root in the terminal. After entering a new password, root is enabled. Remember that Ubuntu encourages using sudo for administrative tasks instead of logging in as root directly.
What this advice does not cover and who should proceed differently
This guide does not cover exploits, hacking techniques, or bypassing security mechanisms. Root access should be used responsibly and only by users who have a solid understanding of system administration and security principles. Enabling the root user can expose your Mac to risks such as unauthorized access or accidental system damage if not managed properly.
If you are uncomfortable using command-line tools, unfamiliar with Unix permissions, or unsure about system security, it is best to avoid enabling the root user. Instead, use the standard administrator account with elevated privileges via sudo commands when necessary, as this limits exposure to potential risks.
The single most useful next step is to familiarize yourself with the Directory Utility in /System/Library/CoreServices/Applications/, where you enable and manage the root user, and to practice enabling and disabling root access there. This approach helps maintain control over root privileges while minimizing security risks by ensuring you disable the root user immediately after completing advanced tasks.