How to Stabilize Shaky Footage in iMovie: Step-by-Step Guide
Discover easy steps to stabilize shaky footage in iMovie and improve your video quality without complicated tools or software.
You've just finished recording a video on your iPhone or iPad, but when you watch it, the footage is shaky and distracting. Instead of starting over, you want to know how to stabilize shaky footage in iMovie to improve your video's quality without complicated tools.
This guide walks you through stabilizing shaky videos step-by-step using iMovie's built-in features. Along the way, you'll also learn how to speed up clips for dynamic pacing and create stop motion effects to add a creative touch. Whether you're new to iMovie or have some experience, these practical tips will help you achieve smoother, more engaging videos.
Key takeaways
- Use the Stabilization checkbox in the Video Adjustments menu to reduce shakiness.
- Speed up video clips by adjusting the speed slider under the Speed settings.
- Create stop motion by trimming clips and adjusting speed frame-by-frame.
- Check video quality after stabilization, as heavy adjustments may crop or blur footage.
- Use the cropping tool to remove unwanted edges after stabilization if needed.
Before you start: What you need to stabilize shaky footage in iMovie
- Ensure you have the latest version of iMovie installed. Open the App Store on your Mac or iOS device, search for iMovie, and check if an update is available. When up to date, you’ll have access to the most reliable stabilization features.
- Identify the clips with shaky footage in your media library. Browse your video library and select the clips where the camera shake is noticeable but not extreme. These clips are the best candidates for stabilization.
- Confirm your footage is compatible with iMovie’s stabilization. iMovie supports common video formats like.mov and.mp4. Avoid very low resolution videos (such as clips recorded at 480p or lower) or highly compressed files, since stabilization may not work effectively on them.
- Check your device’s storage and power supply. Video editing requires ample storage space and sufficient battery life or connection to power. Make sure you have several gigabytes free and your device is charged or plugged in to prevent interruptions.
- Understand the limits of stabilization. iMovie’s stabilization works best on footage with moderate shake—like handheld phone videos walking slowly. Fast-moving action shots with heavy motion blur usually don’t stabilize well and may look distorted after processing.
For example, a handheld phone clip recorded while walking typically stabilizes smoothly, whereas a clip from a fast bike ride with rapid camera movement often shows artifacts after stabilization.
How to stabilize a shaky video in iMovie
- Open your iMovie project and select the shaky clip you want to stabilize in the timeline. When selected, the clip should be highlighted to indicate it’s active.
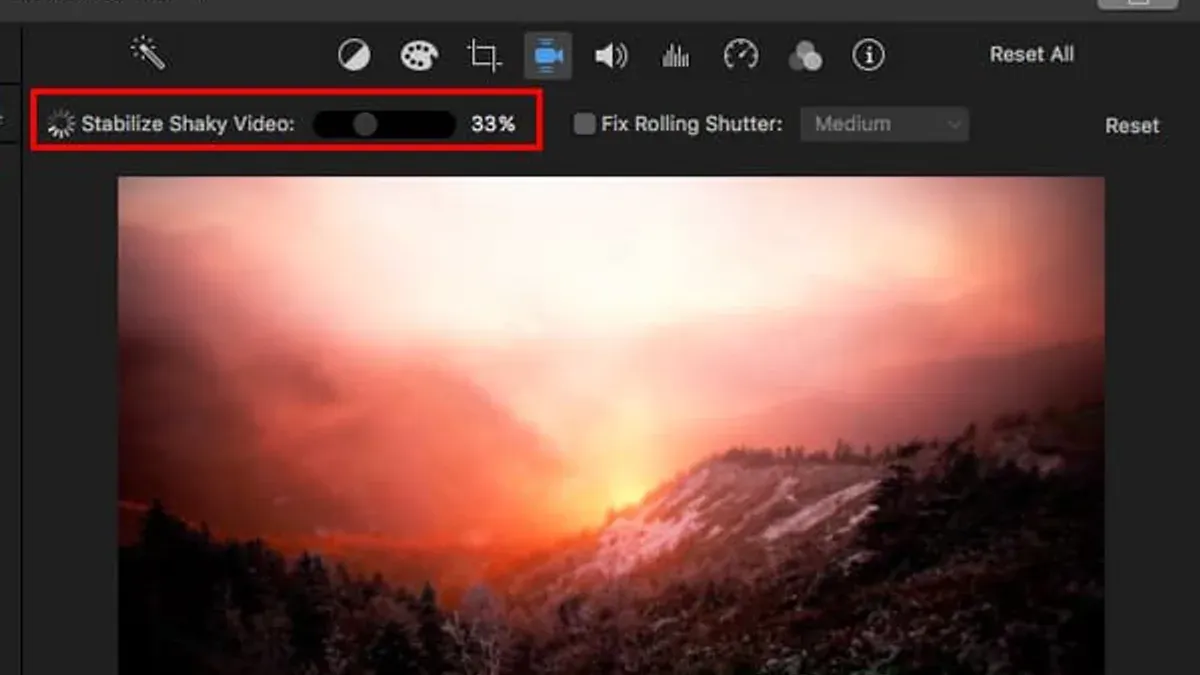
- Click the Video Inspector button above the preview window, represented by a small video camera icon. This opens the clip adjustments panel where you can find various editing tools.
- Locate the Stabilization checkbox within the adjustments panel. Click to enable it. iMovie will then begin analyzing the clip to detect and correct camera shake automatically.
- Wait for the stabilization analysis to complete. This process may take a few moments depending on the clip length and your device’s speed. You’ll see a progress indicator during this time.
- Preview the clip after stabilization is applied. If iMovie offers a stabilization strength slider, adjust it to increase or decrease the effect until the footage looks smooth but natural.
- For better results, consider trimming or splitting the clip before stabilization. Removing overly shaky sections or isolating problem areas allows iMovie to focus its correction more effectively.
Before stabilization, footage may show noticeable jitter or motion blur. After applying stabilization, the video should appear smoother with reduced shake, though some cropping or slight zooming might occur to maintain frame edges. Processing time can vary, but shorter clips stabilize faster than longer ones.
How to speed up video in iMovie
Speeding up your video clip in iMovie is a useful technique that can complement stabilization by reducing the visible effect of minor shakes. When you increase the playback speed, the clip duration shortens, which can make jitters less noticeable. You can also use this feature to create fast-forward or time-lapse effects, adding a creative touch to your project.
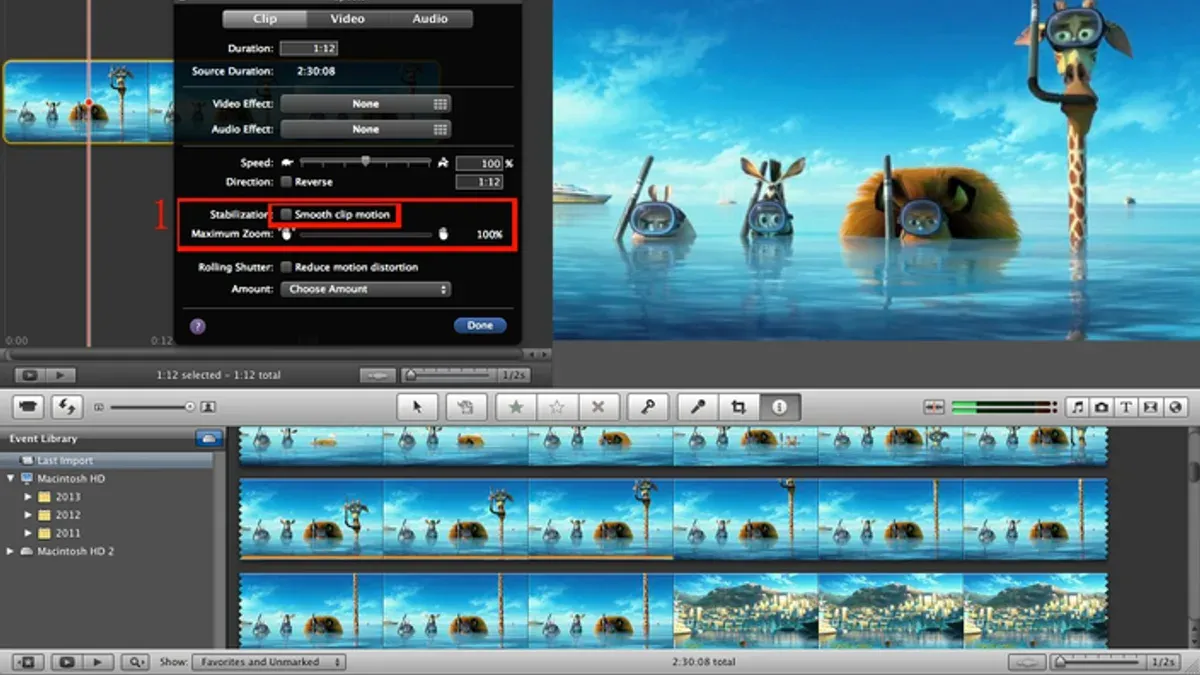
- Select the clip you want to speed up in the timeline. Once selected, the clip will be highlighted, indicating it is ready for editing.
- Open the Speed controls by clicking the speedometer icon in the video inspector above the preview window. You will see options to adjust the clip speed.
- Choose Fast from the speed menu, then select a multiplier such as 2x or 4x. For example, a 10-second clip sped up to 2x will play in 5 seconds, creating a noticeable fast-forward effect.
- Listen to the audio after speeding up the clip. Audio pitch often increases, making voices sound unnatural. You can mute the audio by clicking the speaker icon or adjust the pitch with additional audio tools if needed.
- Play back the clip to check the speed effect. Adjust the speed multiplier if the clip is too fast or the audio issues are distracting. This step helps balance smoothness, pacing, and sound quality.
How to fix a shaky video beyond stabilization: Additional iMovie tips and tricks
After stabilizing your shaky footage, you can enhance the smoothness further with several complementary techniques. Cropping and zooming are effective for hiding jittery edges that may appear post-stabilization. By zooming in slightly on the clip, you remove distracting frame movements, resulting in a cleaner image.
Applying slow motion or fast motion effects strategically can also improve perceived stability. Slowing down a clip softens abrupt movements, while speeding it up can mask minor shakes by creating a natural blur effect. Use these effects thoughtfully to maintain visual interest without compromising quality.
Incorporate cutaways or B-roll footage to break up prolonged shaky scenes. This editing approach diverts attention from unstable moments and adds storytelling variety. Using video filters available in iMovie, such as "Cinematic" or "Vivid," can reduce visual distractions caused by shake and can unify the overall look of your footage.
Finally, when exporting your project, select settings that preserve the stabilization quality. Choose higher resolution and bitrate options when possible to avoid compression artifacts that might emphasize residual shakiness.
- Open your stabilized clip in the timeline and select it.
- Click the Crop button above the preview window, then choose "Crop to Fill." Adjust the frame to zoom in slightly and hide jittery edges; you should see a steadier frame without black borders.
- With the clip selected, click the Speed button, then choose either "Slow" or "Fast". Set the speed to around 50% for slow motion or 200% for fast motion. Play the clip to confirm smoother perceived movement.
- Add a cutaway clip or B-roll by dragging a second clip above the shaky footage in the timeline. The main clip will momentarily hide, reducing viewer focus on shakiness.
- Apply a video filter by selecting the clip, clicking the Filters button, and choosing one like "Cinematic." The clip’s visual noise from shake should appear softened.
- When exporting, open the Share menu, select "File," set Resolution to 1080p or higher, and set Quality to "Best." Export and review the video to ensure stabilization effects remain intact.
Comparing clips before and after these steps reveals a noticeable improvement in visual smoothness and professionalism.
How to make stop motion in iMovie
Stop motion animation creates the illusion of movement by displaying a series of still images in quick succession. In iMovie, this effect is achieved by importing photos as clips and adjusting their duration to simulate frame-by-frame motion. Controlling clip speed is key, linking this technique directly to speeding up video but with individual frames as the source.
- Import your series of photos into iMovie by selecting File > Import Media and choosing all images for your stop motion sequence. You should see each photo appear as a separate clip in the timeline.
- Select all imported photos in the timeline, then click the Speed button above the preview window and choose Custom. Set the duration to around 0.1 seconds per photo for a smooth stop motion effect. The preview should now play the photos rapidly, simulating motion.
- To smooth out any unwanted jitter, select individual frames or small groups and apply Stabilization from the video inspector. This can reduce shake between frames while maintaining the stop motion style.
- Preview your sequence and adjust photo durations slightly if the motion feels too fast or slow. Typical stop motion clips run between 10 and 15 frames per second, so experiment within this range for best results.
- Keep in mind that iMovie’s stop motion capabilities are basic. For complex projects with advanced frame control or onion-skinning, consider dedicated stop motion software.
For example, a short stop motion clip with 30 photos set to 0.1 seconds each creates a 3-second animation. Stabilizing some frames helps maintain visual consistency, resulting in a smoother final video.
Troubleshooting common issues stabilizing footage in iMovie
If the stabilization option is grayed out or unavailable, first check that your clip is selected and is a video file format that iMovie supports. Sometimes, clips imported from unsupported sources or formats may cause this issue. Also, verify that your device has sufficient free storage and processing power, as iMovie disables stabilization when resources are limited.
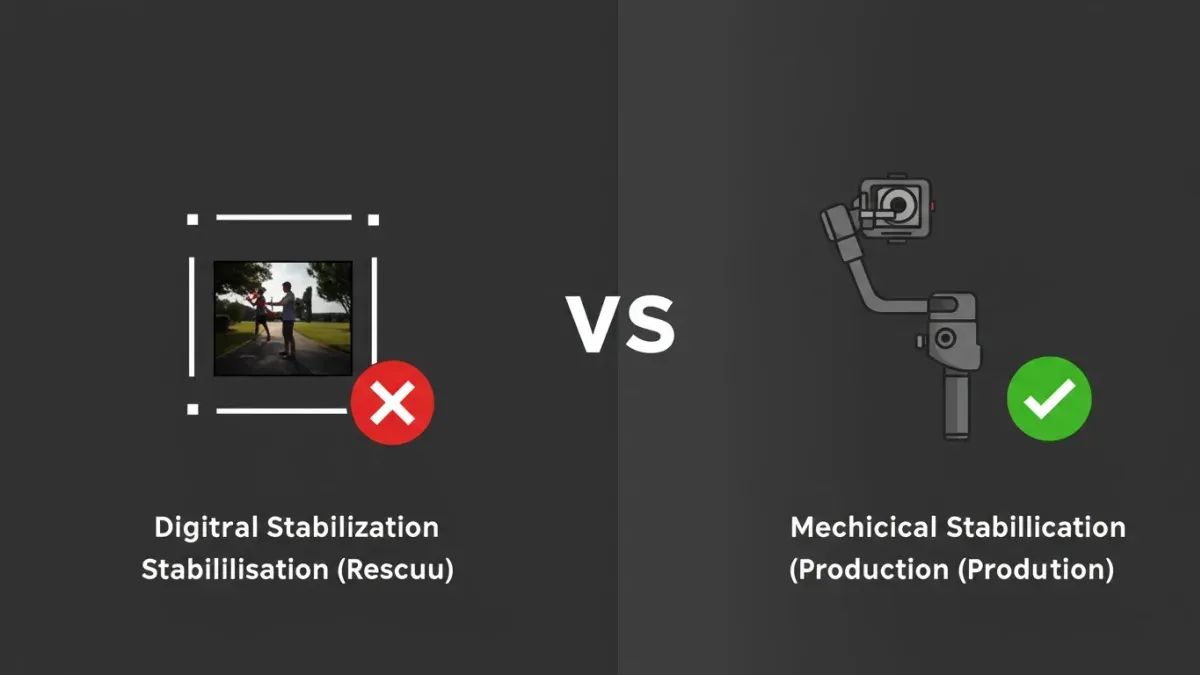
If your clip appears overly zoomed in or pixelated after stabilization, this happens because iMovie crops the video to compensate for motion. To reduce this effect, try trimming the clip to isolate the shakier sections or use a lower stabilization strength if available. Remember, heavy stabilization may also degrade image quality.
When you notice warping, unnatural motion, or jittery artifacts after stabilization, this usually indicates that the footage’s shake is too complex for iMovie’s algorithm. Try applying additional editing techniques such as cropping or speed adjustment to smooth the result.
For extremely shaky footage that iMovie cannot stabilize effectively, consider using specialized software with advanced stabilization features. Always save and back up your project before applying stabilization to avoid losing original quality or edits.
- Select the clip in the timeline. The stabilization checkbox should become active in the video inspector. If it remains grayed out, check the clip format and device resources.
- Apply stabilization and wait for the analysis to finish. Preview the clip carefully for zoom or pixelation.
- If zoom or artifacts appear, try trimming the clip or reducing stabilization strength and preview again.
- If artifacts persist, apply additional fixes like cropping or speed adjustment, then preview once more.
- Save your project and create a backup before heavy edits to protect your work.
Frequently asked questions
How to speed up an imovie?
To speed up a clip in iMovie, select the video in your timeline, then click the speedometer icon above the viewer. Choose "Fast" from the speed options and pick a multiplier such as 2x, 4x, or 8x. This will increase the playback speed, making your clip shorter and faster.
How to make stop motion imovie?
Create stop motion by importing a series of still photos into iMovie. Arrange the photos in the timeline and adjust their duration to a very short length, like 0.1 seconds per image. Play the sequence to see the stop motion effect, and tweak the timing to get a smoother animation.
How to speed up an iMovie?
Speeding up a video in iMovie works the same way regardless of how you phrase it. Select your clip, click the speed control button above the preview window, pick "Fast," and choose your desired speed increase. You can preview and adjust until it fits your project.
How to make slow motion in iMovie?
To create slow motion, select your clip and open the speed controls by clicking the speedometer icon. Choose "Slow" and select a percentage like 50%, 25%, or 10%. This reduces the playback speed, making the motion appear slower and smoother.
How to fix a shaky video in iMovie?
Fix shaky footage by selecting your clip, clicking the stabilization button (a shaky camera icon), and checking "Stabilize Shaky Video." iMovie will analyze and automatically reduce the shakiness. You can adjust the amount of stabilization with a slider to balance smoothness and cropping.
Understanding the Limits of iMovie’s Stabilization
iMovie’s stabilization feature works best for videos with moderate shake and minor jitters. If your footage suffers from extreme motion blur, rapid camera movements, or very erratic shaking, the built-in stabilization might not fully correct these issues. In such cases, professional video stabilization software like Adobe Premiere Pro or Final Cut Pro may offer more powerful tools to handle complex motion. Also, keep in mind that heavy stabilization can sometimes crop your footage noticeably or reduce sharpness, so balance stabilization strength with image quality.
For users with occasional shaky clips or those looking to improve video smoothness alongside creative editing techniques, iMovie offers a practical and accessible solution.
To continue improving your projects, try combining stabilization with speed adjustments or stop motion effects as described earlier. Experimenting with these features together will help you create more polished and engaging videos right within iMovie.
See also: How to Add Transitions in iMovie: Step-by-Step Guide for iPhone, iPad, and Mac · How to Record a Voiceover in iMovie: Step-by-Step Guide