
How to Detach Audio from Video in iMovie: Step-by-Step Guide
Master detaching audio from video in iMovie to edit soundtracks separately and enhance your projects with ease.
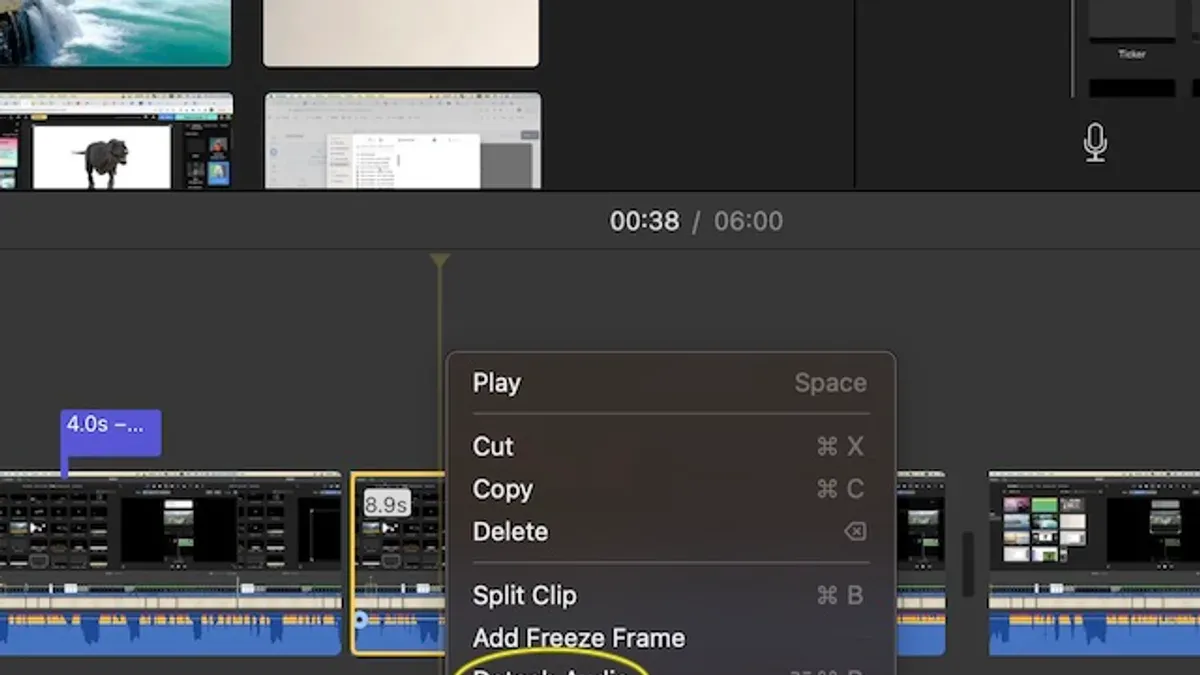
You’ve just recorded a video on your Mac or iPhone, but the background noise or original audio doesn’t fit your vision. Maybe you want to replace the sound with a voiceover or add music without losing control of the original clip’s visuals. Learning how to detach audio from video in iMovie is the key to confidently isolating soundtracks so you can edit or enhance them separately.
This guide walks you through the entire process: from preparing your project and detaching audio on different devices, to managing, editing, and even enhancing audio clips once separated. You’ll also discover practical tips on muting, removing, or overlaying visuals while working with detached audio, ensuring your final project sounds as polished as it looks.
Key takeaways
- Detach audio by right-clicking a clip and selecting “Detach Audio” on Mac or using the Modify menu on iPhone/iPad.
- After separation, audio appears as a green clip below the video, ready for individual editing.
- Use the built-in audio enhancer and volume controls to improve sound quality within iMovie.
- Mute or delete original audio clips to replace soundtracks without affecting video footage.
- Save and export your project ensuring detached audio edits are preserved accurately.
Before you start: Prepare your iMovie project and assets
Before detaching audio in iMovie, ensure the app is installed and updated on your Mac, iPhone, or iPad. Using the latest version helps avoid bugs and provides the most up-to-date features. Open iMovie and either create a new project or select an existing one where you want to work. Import your video clips into the project timeline by dragging them from your media library or using the import button; you should see your clips arranged sequentially in the timeline once imported.
Recognize that video clips imported directly from your device usually contain embedded audio tracks, which appear linked beneath the video in the timeline. Separate audio clips, such as background music or voiceovers, appear individually in the timeline. If you plan to replace or add new audio, have those files ready in compatible formats like.mp3 or.wav for smooth importing.
A typical timeline view shows video clips as horizontal bars with audio waveforms beneath them if embedded. Separate audio clips appear as distinct bars below or between video clips. This visual setup helps you identify which clips contain audio that can be detached or edited. Taking a moment to review your project layout ensures a smoother workflow when isolating and managing audio.
- Open iMovie and select your project; you should see the project timeline at the bottom with media above.
- Import video clips by clicking the Import Media button or dragging files directly; imported clips appear in the media library and timeline.
- Drag desired clips from the media library into the timeline; video clips show as horizontal bars with or without audio waveforms beneath.
- Verify the clips have audio by looking for the waveform below the video bar in the timeline.
- Prepare any replacement audio files by locating them on your device and noting their locations for easy import later.
Detach audio from a video clip in iMovie on Mac
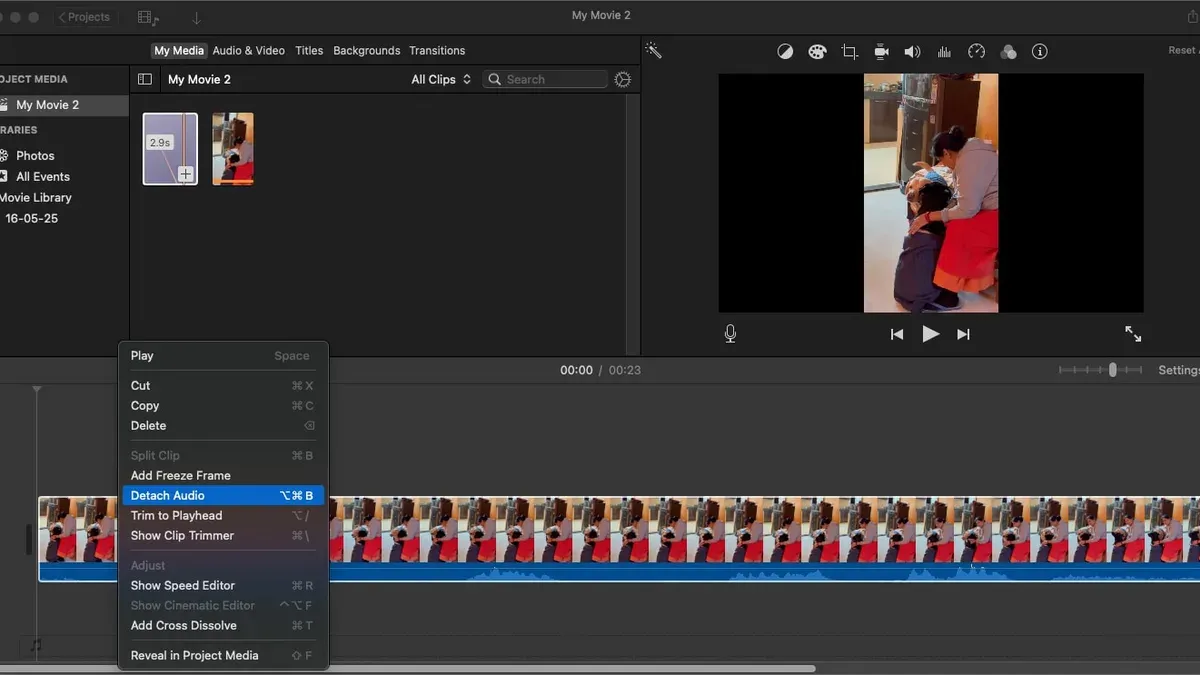
- Select the video clip in your timeline by clicking on it once. You will see the clip highlighted, indicating it is ready for editing.
- Go to the menu bar at the top of your screen and click Modify. From the drop-down menu, choose Detach Audio. Alternatively, you can right-click the selected clip and select Detach Audio from the context menu.
- After detaching, observe your timeline: the audio track will appear as a separate purple bar directly below the original video clip. This visual change confirms the audio is now independent.
- Click and drag the detached audio bar to move it anywhere on the timeline. You can also trim, delete, or apply audio effects to it without affecting the video clip.
- To verify successful detachment, try muting or deleting the purple audio track; the video will continue playing without sound or with the new audio edits you apply.
Detaching audio in this way allows you to isolate sound from your video clips, giving you flexibility to replace, enhance, or remove audio independently while keeping your video intact.
Detach audio from a video clip in iMovie on iPhone or iPad
To detach audio from a video clip using iMovie on your iPhone or iPad, start by opening your project and locating the clip in the timeline that contains the audio you want to separate. Tap the video clip once to select it, which will reveal editing options below the viewer. Look for the Actions icon, represented by a scissors symbol, and tap it to open the available clip actions.
From the menu that appears, select Detach Audio. The audio track will then separate from the video clip and appear as a purple bar directly below the video clip in the timeline. You can tap this audio clip independently to move, edit, or delete it. This separation allows you to manipulate the audio without affecting the original video.
Keep in mind that the iOS interface differs from the Mac version, with a more touch-optimized layout and fewer menu options visible at once. Once detached, you’ll see the audio clip distinctly in the timeline, making it easier to trim or enhance sound directly on your device.
- Open your iMovie project and tap the video clip in the timeline;
you see the clip highlighted and editing icons appear below the viewer. - Tap the Actions (scissors) icon;
a menu with clip options opens. - Select Detach Audio from the menu;
the audio separates and shows as a purple bar below the video clip. - Tap the detached audio clip to select it;
you can now move, trim, adjust volume, or delete it independently.
Below is an example screenshot showing the timeline after detaching audio on an iPad, with the video clip on top and the separated purple audio clip below it.
Add audio to iMovie: music, voiceover, and sound effects
After detaching or removing audio, you can enrich your project by adding new audio elements. iMovie lets you import your own music files or choose from its built-in soundtracks located under the Audio browser. These soundtracks are royalty-free and cover various moods and genres. You can also record voiceovers directly within iMovie, which is perfect for narrations or commentary. Positioning audio clips precisely in the timeline helps synchronize sound with your video.
- Open the Audio browser by clicking the Audio tab above the timeline. Here, you can browse iMovie’s soundtracks or import your own by clicking the Import Media button. Your chosen audio files will appear in the browser.
- Drag an audio clip from the browser into the timeline below your video clips. The audio clip displays as a green bar separate from the video, indicating it’s an independent track.
- To record a voiceover, click the microphone icon below the preview window. Select your input device, press the Record button, and speak. When finished, the voiceover clip appears in the timeline.
- Click the audio clip in the timeline to reveal volume controls above the preview window. Adjust the volume slider to increase or decrease the sound level. Use the fade handles on either end of the audio clip to create smooth fade-in and fade-out transitions.
- Play your project to check audio timing and levels, making further adjustments as needed to ensure the sound complements your video effectively.
Enhance and edit audio clips in iMovie
After detaching or adding audio clips in iMovie, improving sound quality and precise editing are crucial for a polished project. iMovie provides built-in tools to help you reduce background noise and adjust the audio tone using equalizer presets. These options appear in the audio inspector when you select an audio clip in the timeline.
- Select the audio clip you want to enhance. The audio controls will appear above the timeline or in the inspector panel.
- Enable Noise Reduction and Equalizer by checking the box labeled “Reduce background noise.” Adjust the slider to control how much noise is removed. You can also choose from equalizer presets like “Voice Enhance” or “Bass Booster” for tailored tonal adjustments. You should see the waveform become clearer and more balanced.
- To trim the audio clip, drag the clip’s edges in the timeline to shorten or extend it. This removes unwanted sections and tightens timing. The waveform view updates to reflect the trimmed audio.
- Split an audio clip by positioning the playhead where you want the cut, then right-click and select “Split Clip.” This allows you to edit sections independently. The waveform will show two separate clips.
- Apply fade effects by dragging the small fade handles at the start or end of the audio clip. This creates smooth fade-in or fade-out transitions in volume, visible as a gradual slope on the waveform edges.
- Adjust the clip’s volume with the volume slider or by dragging the horizontal volume line directly on the waveform. You can also balance left and right channels under audio settings for stereo clips.
These steps give you control to refine audio quality and timing, making your video’s sound clear and well integrated.
Remove or mute audio from video clips in iMovie
Sometimes you want to silence the audio in a video clip quickly without detaching it. Lowering the clip’s volume to zero mutes the sound while keeping the audio linked to the video. This method is ideal for temporary silencing or when you want to preserve the original audio track for easy restoration later.
Alternatively, if you have detached the audio and decided it’s unnecessary, you can simply delete the separated audio clip from the timeline to remove it entirely. This method is more permanent and useful when you want to free up space and avoid any accidental playback of the audio.
Here is how to mute audio or remove detached audio clips in iMovie:
- Select the video clip in the timeline. Below the viewer, drag the volume slider all the way left to 0%. You will see the speaker icon change to indicate muted audio.
- To remove audio already detached, click the purple audio clip below the video clip, then press the Delete key or right-click and choose Delete. The audio clip disappears from the timeline.
Comparing the two, muting audio leaves the audio clip intact but silent, while deleting detached audio removes it completely. Use muting for reversible silencing and deleting when you want to permanently eliminate unwanted sound.
Put an image or overlay over audio in iMovie
Combining images or overlays with your audio tracks can greatly enhance your storytelling in iMovie. To add an image over your video and audio, start by dragging the image clip above your main video clip in the timeline. When you drop it there, iMovie will prompt you to select how you want the image to appear. Choose either Picture in Picture to display the image in a smaller window over your video or Cutaway to have it temporarily replace the video background.
Once the image clip is placed, you will see the audio clips aligned beneath the visual layers. This layout allows you to manage audio independently while controlling the timing and duration of the image overlay. Adjust the length of the image clip by dragging its edges so that it synchronizes precisely with key moments in your detached audio, such as a voiceover phrase or sound effect.
For example, if you have a detached audio clip of a narrator describing a product, you can overlay an image of the product timed exactly to the narrator’s description. This approach helps maintain audience focus by aligning what they hear with what they see.
To balance audio and visual elements, consider lowering the volume of background music or other sounds during the image overlay to emphasize the narration or key sound effect. Preview your timeline regularly to ensure the overlay complements the audio without overpowering it.
- Drag the desired image clip above the video clip in the timeline. When the overlay options appear, select Picture in Picture or Cutaway. You should see the image appear layered over the video in the preview window.
- Adjust the image clip’s duration by dragging its edges in the timeline. The image overlay length should match the section of your detached audio you want to highlight. The timeline will show the image clip sitting above the audio waveforms.
- Play the project to check synchronization between the image overlay and the audio. You should hear and see the elements align as intended, with the image appearing exactly when the audio cue occurs.
- If needed, select the audio clip beneath and adjust its volume by clicking the volume control line. Lower the volume during the image overlay to emphasize narration or key sounds without distractions.
- Continue refining the timing and volume until the combination of image and audio creates a clear and engaging storytelling effect.
Save and export your iMovie project with detached audio
After finishing your edits, carefully review your timeline to ensure your detached audio tracks align perfectly with video clips. Play through the project to catch any timing or volume issues before exporting. This step helps prevent surprises in the final output and guarantees your audio edits stay intact.
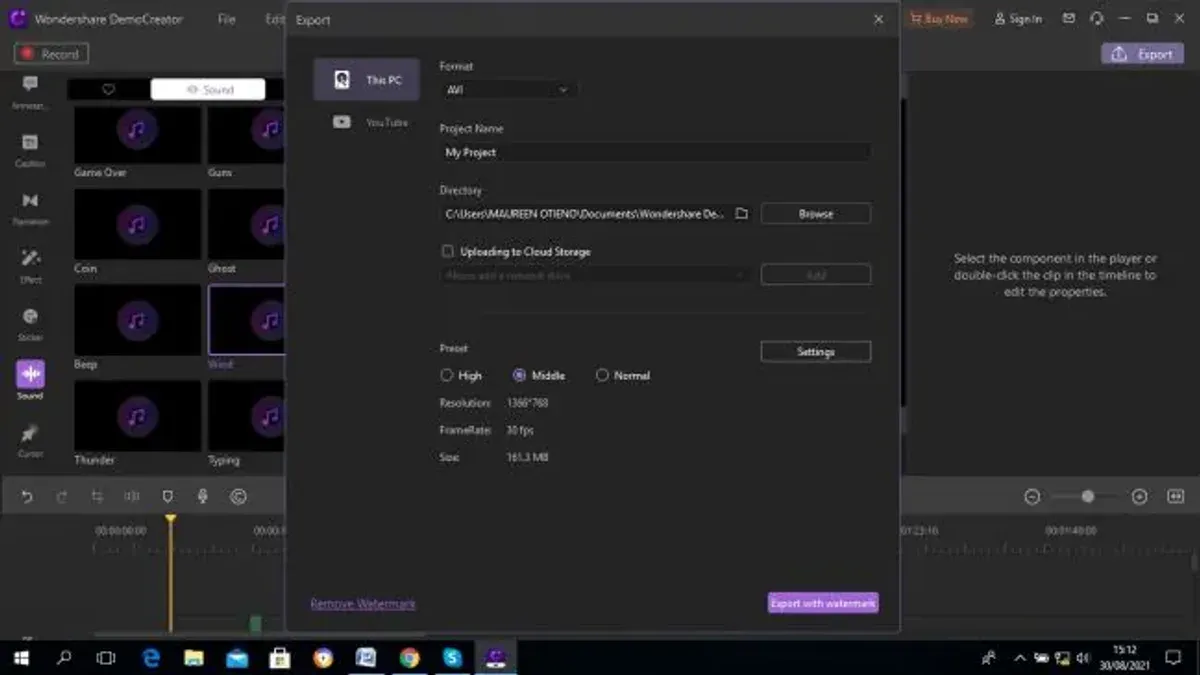
- Click the Share button in the upper-right corner of the iMovie window. You should see a dropdown menu with various export options.
- Select File to open the export dialog box, where you can customize your export settings. A preview thumbnail of your video appears here.
- In the export dialog, choose the desired Resolution (such as 720p, 1080p, or 4K) and Quality (Low, Medium, High, or Best). Higher quality settings retain better audio fidelity but result in larger file sizes.
- Confirm the Compress option is set to Better Quality to preserve audio clarity. Look for the file size estimate to understand the output size.
- Click Next and select a destination folder to save your exported video file. Name your file clearly to distinguish it from previous versions.
- Wait for the export progress bar to complete. A confirmation message should appear indicating your video has been saved successfully with all audio edits preserved.
- To avoid losing any unsaved work, click File > Save or press Command+S before exporting. This saves your iMovie project file including all detached audio edits for future revisions.
Troubleshoot common issues when detaching audio in iMovie
Sometimes the option to detach audio may be greyed out or missing. This often happens if the clip is a still image, a title, or a project clip that does not contain embedded audio. Ensure you are selecting a video clip with sound in the timeline and that the project is not locked or corrupted. If you see the message "Detach Audio option unavailable," double-check the clip type.
If you detach audio but it does not play or seems out of sync, verify that the audio and video tracks remain aligned on the timeline. Misalignment can occur after trimming or splitting clips. Try dragging the detached audio clip to match the video precisely. Scrubbing the timeline should play audio and video simultaneously without delay.
Lost or unsaved audio edits can be frustrating. iMovie autosaves frequently, but if you accidentally close the project before saving, your recent changes might be lost. To recover, check your project backups or duplicates in the iMovie library. Regularly save incremental versions of your project to avoid data loss.
Remember that iMovie’s audio editing capabilities are limited compared to professional software. Complex audio repair, multitrack mixing, or advanced effects require specialized tools. If you encounter persistent audio issues beyond basic detachment and trimming, consider exporting the audio to a dedicated audio editor and then re-importing for final assembly.
Frequently asked questions
How to extract audio from video imovie?
To extract audio from a video in iMovie, first select the video clip in the timeline. Then, right-click (or Control-click) the clip and choose "Detach Audio" from the context menu. The audio will appear as a separate green clip below the video, allowing you to edit or move it independently.
How to add audio to imovie?
To add audio in iMovie, click the "Audio" button above the browser to access your music and sound effects. Drag your chosen audio file into the timeline below your video clips. You can also record a voiceover by clicking the microphone icon and following the prompts to capture audio directly within your project.
How to detach audio from a video?
Detaching audio means separating the sound from the video clip so you can edit them independently. In iMovie, select the video clip, then right-click and choose "Detach Audio." The audio track will become a separate clip in the timeline that you can trim, move, or delete without affecting the video.
How to enhance audio on imovie?
To enhance audio in iMovie, select the audio clip and click the "Audio Adjustments" button above the preview window. Here you can adjust the volume, reduce background noise, apply equalizer presets, and add fade-in or fade-out effects. Experiment with these settings to improve clarity and balance.
How to detach audio from video in imovie on mac?
On a Mac, open your iMovie project and select the video clip in the timeline. Right-click the clip and choose "Detach Audio" from the menu. The audio will separate and appear as a green clip beneath the video, ready for independent editing or removal.
Limits of This Guide and When to Seek Other Tools
This article does not cover advanced audio mixing or multi-track editing beyond iMovie’s basic features. If you require professional-level audio editing, including detailed sound design, noise reduction, or complex layering, you should consider dedicated software like GarageBand, Logic Pro, or Adobe Audition. Additionally, the quality of voiceover recordings depends heavily on your device’s built-in microphone; for higher fidelity, using an external microphone is recommended. Finally, keep in mind that detached audio clips stay linked to the original video clip’s timing in iMovie. If you need extensive rearrangement or independent manipulation of audio tracks, exporting audio separately for editing in specialized software may be necessary.
Now that you understand how to detach and manage audio within iMovie, your next best step is to experiment with enhancing your audio clips using the built-in equalizer and volume controls. This hands-on practice will help you confidently improve sound quality and achieve the best balance between your video and audio elements before saving or exporting your project.



