
How to Fade Out Audio in iMovie: Step-by-Step Guide
Master fading out audio in iMovie with simple steps for smooth, professional-sounding video transitions on Mac and iPhone.
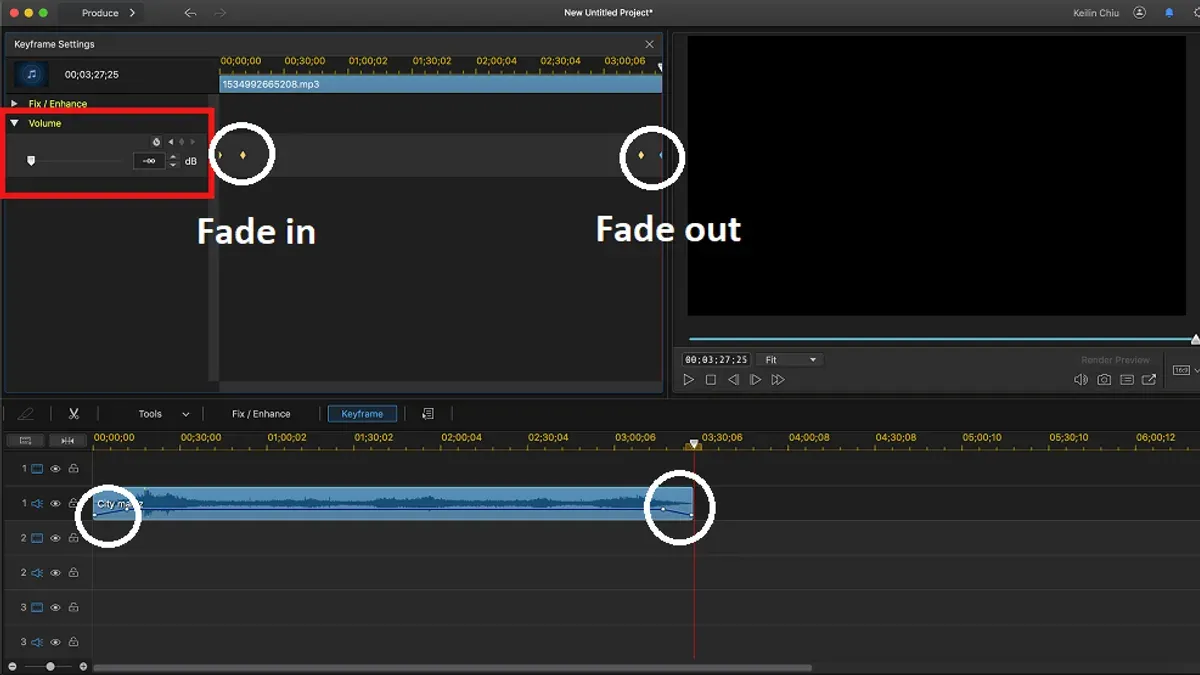
You’ve added background music to your video, but the ending feels abrupt or jarring. Knowing how to fade out audio in iMovie can help you create smooth transitions that enhance your project’s overall feel.
This guide walks you through fading out audio both on Mac and iPhone, with clear, step-by-step instructions. You’ll also get practical tips to make your fades sound natural and learn how to handle common challenges like uneven volume or unwanted background noise. Plus, there’s a quick comparison to other popular editing apps if you want to explore alternatives.
Key takeaways
- Use the fade handles in iMovie’s audio timeline for precise control on Mac.
- On iPhone, apply fades by adjusting clip audio settings and dragging fade sliders.
- Preview your fade multiple times to ensure smooth volume transitions.
- Separate audio from video clips to fine-tune or remove unwanted sounds.
- Other apps like Adobe Premiere Rush offer similar fading features with different interfaces.
Before you start: Prepare your tools and audio clips
Before fading out audio in iMovie, make sure you know which device you will be using. iMovie works on Mac computers running macOS 10.15 Catalina or later, and on iPhones or iPads with iOS or iPadOS 14 or newer. Confirm that your iMovie app is updated to the latest version available for your device to access all audio editing features smoothly.
Gather all the video clips and audio tracks you want to edit ahead of time. This includes any background music, voiceovers, or sound effects you plan to fade out. Having these files organized helps you work efficiently without interruptions.
Familiarize yourself with the iMovie timeline and audio controls before you begin. The timeline shows your video and audio layers visually, and the audio controls let you adjust volume and add fade effects. If you’re new to this, open a sample project and explore how clips and audio waveforms appear in the timeline.
For precise audio monitoring, consider using headphones. They help you catch subtle changes in volume and ensure your fade outs sound natural and balanced. While optional, headphones are highly recommended for accurate editing.
- Open iMovie on your Mac or iPhone/iPad. You should see the main project workspace with your timeline at the bottom (Mac) or center (iPhone/iPad). This confirms you’re ready to import and edit clips.
- Import your video and audio files by clicking the Import Media button (Mac) or tapping the + button (iPhone/iPad). When successful, your files appear in the media library for easy access.
- Drag your clips into the timeline. You should see video thumbnails and audio waveforms representing sound intensity. This visual feedback means you can now start editing your audio fades.
- Locate the audio controls icon (a speaker symbol) above the timeline or as a menu option. Clicking or tapping this opens volume adjustment tools, including fade handles if available.
By confirming your device compatibility, organizing your clips, and understanding the timeline and audio controls, you set a solid foundation for effective audio fading in iMovie.
How to fade music in iMovie on Mac
Fading out audio in iMovie on your Mac involves using the built-in fade handles to create a smooth volume decrease. This process helps your audio end naturally, avoiding abrupt stops that can distract viewers. Follow these steps carefully to achieve a professional fade out effect for your music or any audio track.
- Open your project in iMovie and locate the clip containing the audio you want to fade out. When selected, the clip should be highlighted in the timeline.
- Click on the audio waveform icon or select the clip and then click the audio adjustment button above the preview window. This opens the audio controls panel where you can adjust volume and fades.
- Look for small circular fade handles at the beginning and end of the audio waveform in the timeline. If you do not see these handles, make sure the clip is expanded in the timeline by dragging its lower edge down.
- Drag the fade out handle (the small circle at the right end of the waveform) to the left. This action creates a sloping volume envelope that gradually decreases the sound. Adjust the length to control how quickly or slowly the audio fades out.
- Customize the fade duration to match the video timing. For example, a typical fade out duration ranges from 1 to 3 seconds, depending on how gentle or noticeable you want the fade to be.
- Play back your clip to preview the fade out effect. Watch and listen carefully to ensure the fade sounds natural within the context of your video.
- If needed, adjust the fade handle again by dragging it to lengthen or shorten the fade until you are satisfied with the result.
Before adding a fade, the audio waveform is flat at the end, indicating a constant volume. After you drag the fade out handle, you will see the waveform slope downward, visually confirming the volume decrease. This volume envelope is the key visual cue that controls your fade.
How to fade out music in iMovie on iPhone
Fading out audio in iMovie on your iPhone is straightforward but slightly different from the Mac interface. Instead of dragging handles on a waveform, you use fade sliders within the audio settings. This method offers precise control over how quickly your audio volume decreases, allowing you to create smooth transitions even on a smaller screen.
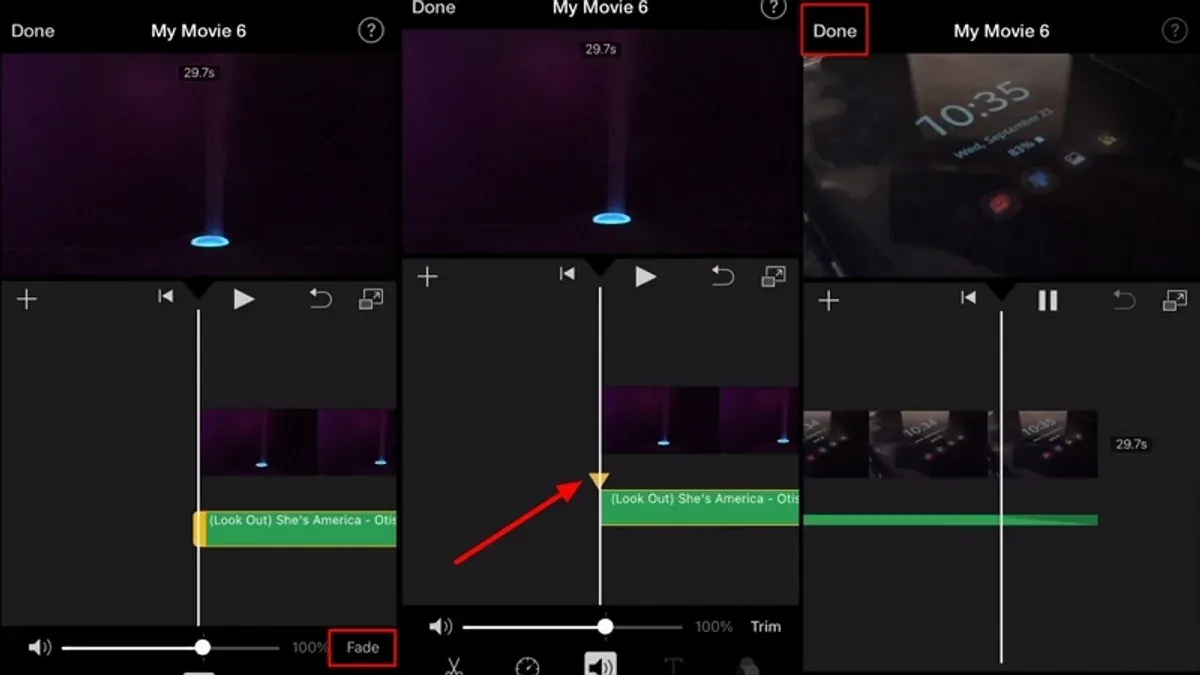
- Open your project in the iMovie app and tap the timeline to select the audio clip you want to fade out. When selected, the clip will highlight and display editing options below.
- Tap the audio settings button, which looks like a volume slider icon. This opens the audio controls panel where you’ll find both Fade In and Fade Out sliders.
- Adjust the Fade Out slider by dragging it to the right. You will see the slider visually represent how gradually the volume lowers at the end of the clip. Take your time to set a fade length that sounds natural with your video.
- Preview the fade effect by playing the clip within the project. Use headphones or speakers to ensure the transition sounds smooth and blends well, especially if you have background music or voiceovers overlapping.
- Tweak the fade length as needed by returning to the audio settings and refining the slider position. A longer fade-out is often better for background music, while voiceovers usually require a shorter fade to maintain clarity.
One common point to watch is that on iPhone, the waveform does not show detailed volume changes like on Mac, so relying on the slider and careful listening is essential. Also, if you have multiple audio layers, fading each separately helps avoid abrupt volume jumps.
How to make audio fade out smoothly in iMovie: tips and best practices
Creating a smooth fade out in iMovie involves more than just dragging a handle; it’s about matching the fade duration to your clip’s length and mood. For example, a short 2-second fade can give a subtle, quick ending ideal for upbeat or fast-paced scenes, while a longer 5-second fade creates a gentle, reflective close that suits slower or emotional moments. By choosing the right duration, you control the emotional impact and avoid jarring audio cuts.
Combining fade out with volume adjustments enhances naturalness. Gradually lowering volume before the fade starts prevents abrupt drops, making the transition seamless. You’ll notice the audio waveform tapering smoothly without sudden gaps, which keeps viewers engaged.
Avoid cutting off audio suddenly, as this breaks immersion and feels unprofessional. Instead, use fade in and fade out together to create fluid audio transitions between clips or scenes. This technique softens the start and end of audio segments, producing a polished overall sound.
- Identify the mood of your video segment to decide fade duration. When you adjust the fade handle on the waveform, set it to about 2 seconds for energetic scenes or around 5 seconds for calmer moments. You should see the fade handle extend accordingly, with the waveform’s height gradually decreasing over the chosen time.
- Before applying the fade out, reduce the clip’s volume slightly from the audio controls panel. This creates a gradual volume slope before the fade starts, visible as a steady decline in the waveform’s amplitude.
- Apply a fade in at the beginning of the next clip or audio segment. The waveform should rise smoothly from zero volume, ensuring there is no abrupt change between clips.
- Play back the transition to confirm the audio does not cut off abruptly and the fade feels natural. The waveform should show a continuous, gentle slope at both the start and end of clips.
- If the fade feels too sudden or too long, adjust the fade handles and volume levels incrementally until the audio flows smoothly to your satisfaction.
How to edit sound in iMovie beyond fading: separating audio and removing sound
iMovie offers several audio editing features beyond fading that give you more control over your project's sound. One useful technique is separating audio from video clips, allowing you to edit the sound independently. This is especially helpful if you want to replace or enhance the original audio without affecting the video.
- Select the video clip in your timeline. You should see it highlighted.
- Right-click the clip and choose Detach Audio from the context menu (or use the Modify > Detach Audio menu option).
- The audio track will appear as a separate blue bar below the video clip in the timeline. You can now move, trim, or delete this audio independently.
To remove unwanted sound entirely, simply select the audio clip and press the Delete key. If you want to mute audio instead of deleting, select the clip, then click on the volume icon above the viewer and drag the volume slider all the way down to zero. This keeps the clip intact but silences its sound.
Adding background music requires importing your audio file and placing it in the timeline’s audio track area. Once added, you can adjust its volume by selecting the clip and using the volume slider in the audio controls panel. A visible horizontal volume line on the audio clip lets you drag up or down for precise adjustments.
For improving audio quality, iMovie provides audio enhancement and noise reduction features. Select the audio clip, then click the sound icon to open audio adjustments. You can enable Noise Reduction and Equalizer options to reduce background noise and balance frequencies. Adjust the sliders and listen carefully to find the best setting for your clip.
How to fade out audio in other popular editing software: A quick comparison
Exploring audio fading in alternative editing software can help you choose the best fit for your projects. Here is a concise overview of fading audio in Avid Media Composer, Movavi Video Editor, and Adobe Audition, highlighting their steps and unique features compared to iMovie.
Fading Audio in Avid Media Composer
- Select the audio clip in the timeline; you should see the clip highlighted.
- Open the Audio Mixer or use the Audio Keyframe tool to add a fade effect.
- Drag the fade handle located at the start or end of the audio clip to adjust the fade duration; the waveform will show a gradual decrease in volume.
- Play back to confirm the fade sounds smooth and matches your video timing.
Avid offers detailed control with keyframes but requires familiarity with its interface, making it more complex than iMovie for beginners.
Fading Audio in Movavi Video Editor
- Click on the audio track in the timeline to select it.
- Look for fade handles at both ends of the audio clip; these appear as small dots.
- Drag the handle inward to create a fade in or fade out effect, watching the volume line adjust accordingly.
- Preview the clip to ensure the fade sounds natural.
Movavi’s fade controls are visually intuitive and similar to iMovie’s, suitable for users seeking straightforward fade adjustments.
Fading Audio in Adobe Audition
- Import your audio clip into the multitrack session.
- Locate the fade handles at the beginning and end of the audio clip in the timeline.
- Drag these handles to set the fade duration visually.
- For advanced control, open the Automation lane and create volume envelopes to customize fade curves precisely.
- Play back to verify the fade effect matches your desired smoothness.
Adobe Audition offers professional-level precision with automation but has a steeper learning curve compared to iMovie.
| Software | Fade Control Type | Ease of Use | Advanced Features |
|---|---|---|---|
| iMovie | Fade handles on audio clip or sliders (iPhone) | Beginner-friendly | Basic fade duration adjustment |
| Avid Media Composer | Audio Mixer and Keyframes | Intermediate to advanced | Fine keyframe control |
| Movavi Video Editor | Fade handles on audio clip | Beginner-friendly | Simple fade adjustments |
| Adobe Audition | Fade handles and Automation envelopes | Advanced | Custom fade curves and precise volume automation |
Overall, iMovie balances ease of use with effective fade features, while Avid and Adobe Audition provide deeper control for more complex audio editing, and Movavi offers a simple, user-friendly alternative.
Troubleshooting common issues when fading audio in iMovie
Sometimes, fading audio in iMovie doesn’t go as smoothly as expected. One frequent problem is that iMovie cuts off pictures or video clips when you apply a fade to the audio. This usually happens because your audio clip extends beyond the video clip’s length. To fix this, ensure your audio and video clips are properly aligned in the timeline, trimming any excess audio that runs past the video edge. When done correctly, your visuals will remain intact and synchronized with the fading sound.
If you find that fade handles are missing or unresponsive on your audio track, check that you have selected the clip correctly and that the waveform is fully visible. On Mac, zoom into the timeline to reveal fade handles—small circular dots at the start and end of the audio clip. If still invisible, try toggling the audio waveform view on and off via the View menu. On iPhone, fade sliders should appear in the audio settings panel; if not, confirm you are editing an audio clip and not a video-only clip.
Audio fades can sometimes sound abrupt or uneven. This often results from very short fade durations or abrupt volume changes elsewhere on the clip. Try increasing the length of the fade by dragging the fade handle further along the waveform and listen carefully as you adjust. Avoid stacking multiple volume adjustments that conflict with fades, as this can cause unnatural jumps in sound levels.
To recover unsaved audio edits or lost audio tracks, check the iMovie project’s autosave feature by reopening the project immediately after a crash or accidental exit. If audio tracks are missing, verify that the media files still exist in their original location or re-import them. Regularly saving incremental project versions can prevent significant loss.
Prevent audio clipping and distortion by keeping volume levels below 0 dB in the volume controls. If your audio peaks too high, reduce the clip’s volume or apply noise reduction and equalizer effects found in the Audio Adjustments panel. Listening through headphones during editing helps catch distortion early.
- Select your audio and video clips in the timeline and check their lengths. Trim any audio that extends beyond the video by dragging the clip edge inward. You should see the video and audio lengths match exactly.
- Zoom into the audio track until the waveform and fade handles become visible. Confirm you can drag the fade handles at both ends of the clip. If not, toggle waveform visibility in View > Show Waveforms.
- Drag the fade handle further along the clip to lengthen the fade out. Play the project to confirm the fade sounds smooth and gradual, without sudden volume jumps.
- If edits disappear, close and reopen the project promptly to trigger autosave recovery. If audio tracks are missing, re-import the original audio file from your media library.
- Open the Audio Adjustments panel and check volume levels. Reduce volume if peaks approach or exceed 0 dB to avoid clipping. Apply noise reduction if needed and test audio playback carefully.
Frequently asked questions
How to fade out audio in avid?
In Avid Media Composer, you can fade out audio by first selecting the audio clip in the timeline. Then, locate the audio keyframe line on the clip and add keyframes where you want the fade to start and end by holding down the Control key and clicking on the line. Drag the keyframes downward to gradually reduce the volume, creating a smooth fade out effect.
How to fade audio in movavi?
To fade audio in Movavi Video Editor, add your audio clip to the timeline and select it. Click on the 'Audio' tab above the timeline, then use the 'Fade in' and 'Fade out' sliders to control how gradually the sound appears or disappears. Adjust the sliders to your preferred duration to achieve a smooth transition.
How to fade out audio in audition?
Adobe Audition allows you to fade out audio by opening the waveform editor and selecting the portion you want to fade. Use the 'Fade Out' option under the 'Favorites' menu or manually create a fade by adding keyframes to the volume envelope and dragging it down toward the end of the clip. This gives you precise control over the fade duration and curve.
How to fade out music in movavi?
Fading out music in Movavi involves selecting the music track on the timeline and then accessing the 'Audio' settings. Use the 'Fade out' slider to set how long the music should take to decrease to silence. This method ensures the music ends smoothly without abrupt stops.
How to fade in audio after effects?
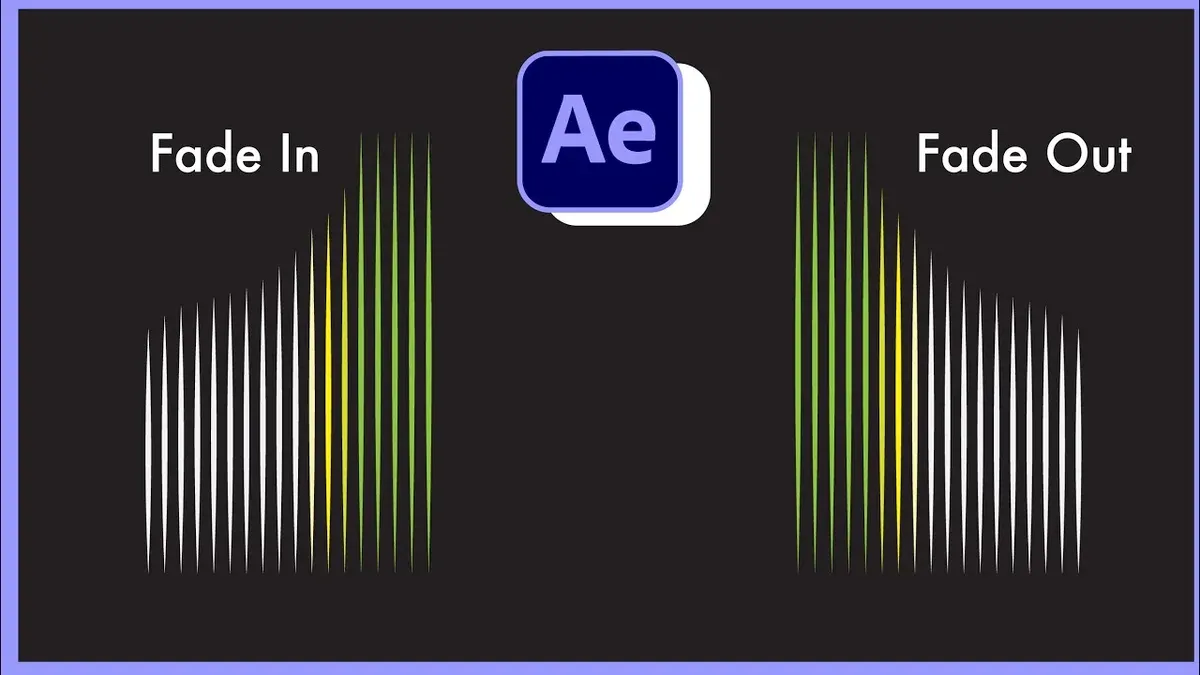
In Adobe After Effects, to fade in audio, first select the audio layer in the timeline. Press the 'L' key twice to reveal the audio levels, then click on the stopwatch icon next to 'Audio Levels' to create a keyframe at the start with the volume set to -∞ dB. Move forward in time and add another keyframe with the volume set to 0 dB to create a gradual fade-in effect.
What This Guide Does Not Cover
This guide focuses on fading audio within iMovie and basic related tasks; it does not cover advanced audio mixing or multi-track editing available in professional digital audio workstations (DAWs). If you need highly precise audio fades, complex sound effects, or layered audio tracks, dedicated audio editing software like Logic Pro or Adobe Audition will better suit your needs. Additionally, some steps described here might vary slightly depending on your specific iMovie version or updates to your device’s operating system.
The most useful next step is to experiment with the fade handles and volume controls directly in your project timeline. Try adjusting fade lengths and volume curves while previewing your video to find exactly the audio balance that suits your scene. Hands-on practice will help you become comfortable with iMovie’s tools and confident in shaping your audio to fit your storytelling.
See also: How to Split a Clip in iMovie: Step-by-Step Editing Guide · How to Use Picture in Picture in iMovie: A Step-by-Step Guide · How to Use Green Screen in iMovie: A Step-by-Step Guide



