How to Use Picture in Picture in iMovie: A Step-by-Step Guide
Discover how to add and adjust picture in picture overlays in iMovie to enhance your videos with clear, easy-to-follow steps.
You're editing a video in iMovie and want to add a small clip or photo over your main footage to highlight a detail or provide extra context. The picture in picture effect is perfect for this, but you might be unsure how to insert and adjust these overlays smoothly on your iPhone, iPad, or Mac.
This article covers how to picture in picture in iMovie with clear, step-by-step instructions. You'll learn how to prepare your media, insert photos and videos as picture in picture overlays, move and resize them easily, and export your finished project. Along the way, you'll find practical tips to help you manage your layers effectively and avoid common pitfalls that can disrupt your workflow.
Key takeaways
- Prepare your photos and videos before starting your iMovie project for smoother editing.
- Use the Picture in Picture option under video overlay settings to add overlays on iPhone, iPad, and Mac.
- Drag and pinch the overlay clip on the preview screen to move and resize it precisely.
- Export your project using the Share menu to save your video to Photos or Files.
- Check audio settings when using picture in picture to avoid unwanted sound overlaps.
Before you start: Prepare your media and iMovie setup
- Check that iMovie is installed and up to date. Open the App Store on your iPhone, iPad, or Mac, search for iMovie, and confirm you have the latest version installed. The latest iMovie supports picture in picture effects smoothly. When updated, you should see an "Open" button instead of "Update".
- Gather your photos and videos. Make sure the media you want to use is saved in your Photos app or accessible via the Files app. Supported formats include JPEG and PNG for photos, and MOV or MP4 for videos. When your media is readily available, you can easily import them into your project without delays.
- Understand basic iMovie navigation. Familiarize yourself with how to open existing projects or start new ones from the iMovie home screen. Know where the media browser is located so you can add clips and photos quickly. When you open a new or existing project, you should see the timeline and media library sections clearly.
- Check your device’s storage and performance. Picture in picture editing can use significant resources, especially with high-resolution videos. Ensure you have at least a few gigabytes of free storage to avoid slowdowns. If your device is low on space or running multiple apps, editing may lag or crash. When enough free space is available, your device will respond smoothly during editing.
How to make an iMovie with photos: Start your project
Begin by opening the iMovie app on your device. From the main screen, tap or click the + Create Project button to start a new project. Choose Movie mode, which allows you to combine multiple photos and videos into a single timeline for editing.
- After selecting Movie mode, the media browser will open. Tap or click Photos to access your Photos library.
- Browse your albums or moments and select the photos you want to include in your video. Once selected, tap or click Create Movie at the bottom of the screen. Your chosen photos will import directly into the timeline.
- In the timeline, arrange your photos by dragging them left or right. This customizes the sequence of your video and ensures your story flows as you want it.
- To smooth transitions between photos, tap the small transition icon between each clip. Choose from options like Cross Dissolve or Slide. Applying transitions can make your video feel more polished and professional.
- Optionally, you can add simple effects such as Ken Burns (a gentle zoom effect) by selecting a photo in the timeline and tapping the Crop icon. Enable or adjust Ken Burns to add dynamic motion to still images.
Once your photos are imported and arranged, and you’ve applied any transitions or effects, your project is ready for the next step: adding picture in picture elements.
How to insert a video in iMovie: Add your main video clip
To create a picture in picture effect, start by adding the main video clip that will serve as the background or base layer of your project. This clip anchors your entire timeline and sets the stage for any overlays you’ll add later. Importing and positioning this primary clip correctly is essential for smooth editing.
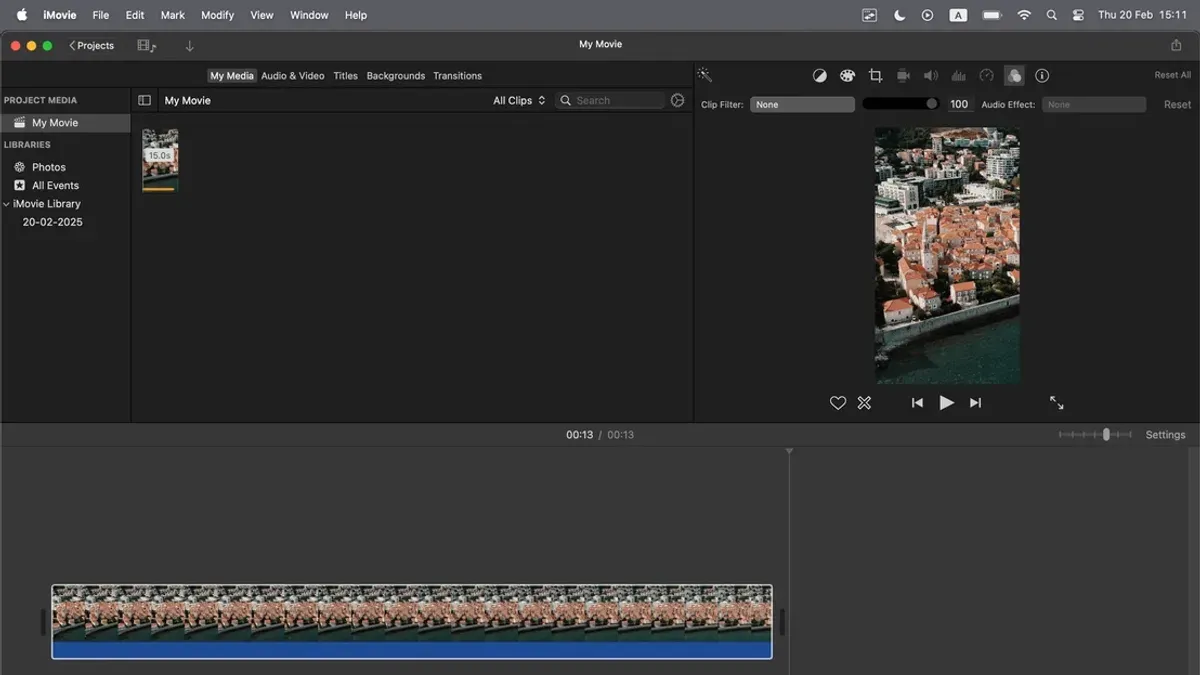
- Open your iMovie project and tap or click the Add Media button (a plus sign) located above the timeline. When the media browser opens, select Videos to locate your desired clip.
Once imported, you will see the clip in your media library within iMovie. - Drag the selected video clip from the media library down into the timeline. Place it at the very beginning or wherever you want it to start playing.
The clip will appear as the main layer stretching across the timeline and will be ready for trimming or adjustments. - To trim the clip, tap or click on its edges in the timeline and drag inward to shorten it. You can also split the clip by positioning the playhead and using the Split command.
The timeline updates immediately, showing only the trimmed portion of the clip. - Use playback controls to watch your clip and confirm it plays as intended. Adjust the clip’s position on the timeline if you want the picture in picture overlays to appear at specific moments.
Ensuring the clip is correctly placed and trimmed will help you layer picture in picture elements smoothly.
Following these steps allows you to set a strong foundation for your picture in picture effect by having the main video clip ready and edited before adding overlay images or videos.
How to add photos to iMovie and create picture in picture
To add a photo or video as a picture in picture overlay in iMovie, you first need to place the secondary media above your main timeline clip. This creates a layered effect where the overlay appears on top of your main video. You can use photos or video clips for the overlay, depending on your project needs.
- Drag the photo or video clip from the media browser and drop it directly above the main timeline clip where you want the picture in picture to start. When positioned correctly, a new secondary track appears above your main video track.
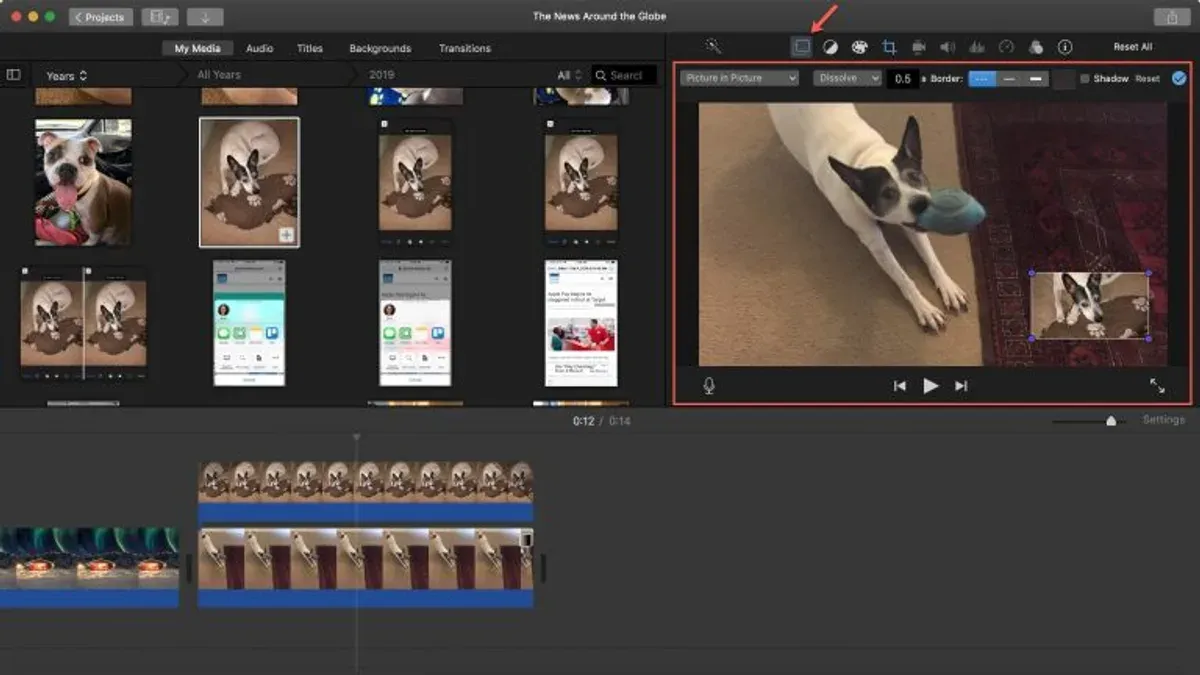
- Click to select the overlay clip in the timeline. Then, in the video overlay settings above the preview window, choose the Picture in Picture option. The preview screen will update to show the overlay inside a smaller window on top of the main video.
- Adjust the overlay window's size by dragging its corners in the preview screen. You can also click and drag the window to reposition it anywhere on the frame, such as a corner or center, depending on your desired look.
- Use the timeline to trim or extend the overlay clip so the picture in picture appears and disappears exactly when you want. Drag the edges of the overlay clip to control its duration relative to the main video.
For example, if you drag a photo of a product above the main video of a demonstration, select Picture in Picture, then resize and move it to the bottom right corner, you create a clear overlay. Adjusting the clip length in the timeline ensures the photo appears only during the relevant part of the video.
How to move picture in picture in iMovie on iPhone and iPad
To reposition or resize the picture in picture (PiP) window on your iPhone or iPad, start by selecting the overlay clip in your timeline. This action reveals editing controls directly on the preview screen, allowing you to manipulate the PiP frame visually. You can drag the PiP window to any corner or spot on the screen that best suits your composition, making it easy to avoid obstructing important content in your main video.
Next, use pinch gestures with two fingers on the picture in picture window to resize it. Pinching inward shrinks the frame, while pinching outward enlarges it. This resizing helps you balance visibility and screen space, especially when placing multiple visual elements. After adjusting position and size, it’s essential to preview your video to confirm that the PiP window complements your creative vision and does not interfere with other elements.
- Tap the overlay clip in the timeline; you should see the PiP window outlined with handles on the preview screen.
- Drag the PiP window to your desired location; it will move smoothly to any position on the screen.
- Pinch inward or outward on the PiP window to resize it; the frame adjusts accordingly, maintaining the aspect ratio.
- Tap the play button to preview your video and ensure the PiP placement fits well with your main content.
Before repositioning, the PiP window may cover key parts of your main video or be too large to fit naturally. After you move and resize it, the PiP element integrates seamlessly, enhancing your video without distraction. This hands-on control on iPhone and iPad offers precise customization for your picture in picture effects.
How to save iMovie to Photos: Export your final video
After completing your picture in picture edits, the next step is to export your project so it can be saved directly to your Photos app. This allows you to easily share or review your video outside of iMovie.
- Tap the Share button: In iMovie, locate and tap the Share icon, which looks like a square with an arrow pointing upward. This button is usually at the bottom of the screen on iPhone and iPad or in the upper-right corner on Mac. Once tapped, a menu with sharing options will appear.
- Select Save Video: From the share options, choose Save Video. This action initiates the export process to your Photos library, making your video accessible through the standard Photos app.
- Choose your export resolution: iMovie will present several resolution options such as 360p, 540p, 720p, 1080p, or 4K, depending on your original footage and device capability. Pick the resolution that best fits your needs—higher resolutions offer better quality but result in larger file sizes and longer export times.
- Wait for export to complete: Once you select a resolution, iMovie will begin rendering your video. You will see a progress indicator, and it’s important to stay within the app during this process to avoid interruptions. The time required varies based on video length and resolution.
- Verify the exported video in Photos: After export finishes, open your Photos app and navigate to the Recents or Videos album. Your newly exported video should appear here. Play the video to confirm the picture in picture effect and overall quality have been preserved as expected.
Following these steps ensures your edited video is saved securely and ready for sharing or backup directly from your device’s Photos app.
Troubleshoot common picture in picture issues in iMovie
When the Picture in Picture option is grayed out or missing, it usually means the clip you are trying to overlay is not compatible or not properly placed above the main timeline clip. Make sure you drag the second clip directly above the primary video clip in the timeline. If you see an error message like "Cannot use Picture in Picture with this clip," check that your media format is supported by iMovie (e.g., JPEG, PNG for photos; MP4, MOV for videos).
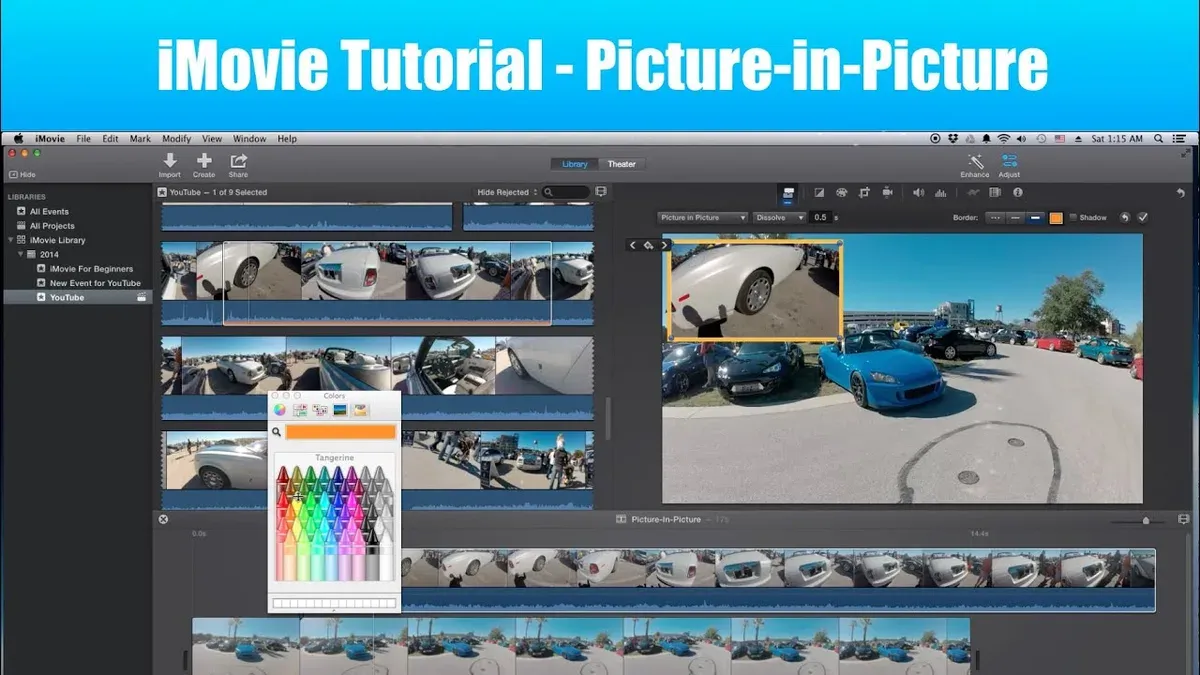
If your overlay clips do not appear or sync correctly, try these steps:
- Confirm the overlay clip is properly positioned exactly above the main clip in the timeline; it should be slightly offset to be visible.
- Play the timeline to check if the overlay clip timing matches your intention; adjust the clip length or position if it runs too early or late.
- If the overlay clip disappears during playback, close and reopen iMovie to reset the preview rendering.
Performance lag or crashes often occur when working with high-resolution media or multiple overlays. To reduce this, lower your preview quality by clicking the settings gear icon in the viewer and selecting "Better Performance." Also, close other apps to free up memory.
For import errors, such as "File not supported" or "Cannot import file," ensure your photos are saved in standard formats like JPEG or PNG and videos in compatible codecs. Large photo files can cause issues; resizing them to below 10 MB or converting to a different format using an image editor can help.
Following these steps should resolve most common Picture in Picture issues and improve your editing experience in iMovie.
Frequently asked questions
Can you insert photo in imovie video?
Yes, you can insert photos into an iMovie video. To do this, add your photo to the timeline above or alongside your main video clip, then use the Picture in Picture feature from the overlay settings. This allows the photo to appear as a smaller window on top of your video, creating a layered effect.
How to make a movie with imovie?
To make a movie with iMovie, start by creating a new project and importing your video clips and photos. Arrange your media in the timeline, trim and edit clips as needed, and add transitions or effects to enhance your story. Finally, preview your project and export it to save the finished movie.
How to make a video with imovie?
Making a video in iMovie involves importing your footage, placing it on the timeline, and editing it by cutting, trimming, or rearranging clips. You can enhance your video by adding titles, music, and effects. Once satisfied, export the video to your device or share it directly from iMovie.
How to do picture in picture in imovie on iphone?
On iPhone, open your iMovie project and add the main video to the timeline. Tap the plus icon to select a photo or video, then choose "More" and select "Picture in Picture." The inserted clip will appear as a small window you can move, resize, and adjust directly on the preview screen.
Can you insert photo in iMovie video?
Absolutely, inserting a photo in an iMovie video is straightforward. After adding your main video to the timeline, tap the plus button to add a photo, then choose the Picture in Picture option from the overlay menu. This lets you position and resize the photo over your video seamlessly.
What This Guide Does Not Cover
This guide focuses on basic picture in picture effects using iMovie on iPhone, iPad, and Mac. It does not cover advanced video compositing techniques such as keyframing, chroma key (green screen) adjustments beyond the standard tools, or complex multi-overlay setups. Users needing detailed control over animations, masking, or multiple simultaneous overlays may find professional editing software like Final Cut Pro or Adobe Premiere Pro more suitable for their projects.
For those looking to create highly intricate visual effects or precise motion tracking within picture in picture, exploring dedicated compositing software will provide greater flexibility, though at the cost of a steeper learning curve.
Next Step: Experiment with Picture in Picture Placement and Timing
Now that you know how to add and move picture in picture clips, try adjusting their size and position throughout your video to enhance storytelling. Use the timeline to trim or split picture in picture clips, placing them exactly where they complement your main footage. This hands-on experimentation will help you understand how subtle changes can make your video more engaging. Keep testing different placements and durations until your picture in picture elements feel natural and purposeful within your project.
See also: How to Split a Clip in iMovie: Step-by-Step Editing Guide · How to Add Background Music in iMovie: A Step-by-Step Guide · How to Add Text Titles in iMovie: A Step-by-Step Guide