How to Restore an Entire Mac Using Time Machine: Step-by-Step Guide
Step-by-step guide to restoring your entire Mac using Time Machine, ensuring a full system and data recovery with ease.
Imagine your Mac suddenly stops working after a system crash, or you’ve just unboxed a new Mac and want to bring over everything exactly as it was. You might also want to revert your Mac to an earlier state to fix issues or remove unwanted changes. Whatever your situation, knowing how to restore an entire Mac in Time Machine can save you from data loss and hours of frustration.
This article walks you through each step of the full system restore process using Time Machine. You’ll learn how to prepare your Mac and backup, start macOS Recovery, restore both system files and user data, handle restoring to a new Mac, and avoid common pitfalls along the way.
Key takeaways
- Make sure your Time Machine backup is complete and accessible before starting the restore.
- Use macOS Recovery by holding Command (⌘) + R at startup to access Time Machine restore options.
- Restoring includes system files and user data but not some settings or apps installed outside standard paths.
- When moving to a new Mac, ensure both devices use compatible macOS versions for a smooth restore.
- Common restore issues often involve disk formatting or connection problems—check these first.
Prepare your Mac and Time Machine backup
Before starting a full system restore, ensure you have a complete Time Machine backup stored on an external drive or a network location such as a Time Capsule or a NAS supporting Time Machine. Common external drives include USB-C or Thunderbolt hard drives with sufficient storage—typically equal to or larger than your Mac’s internal storage to hold all data. Check that your Mac is connected to a power source to avoid interruptions, and confirm a reliable internet connection is available, especially if macOS needs to be downloaded during the restore.
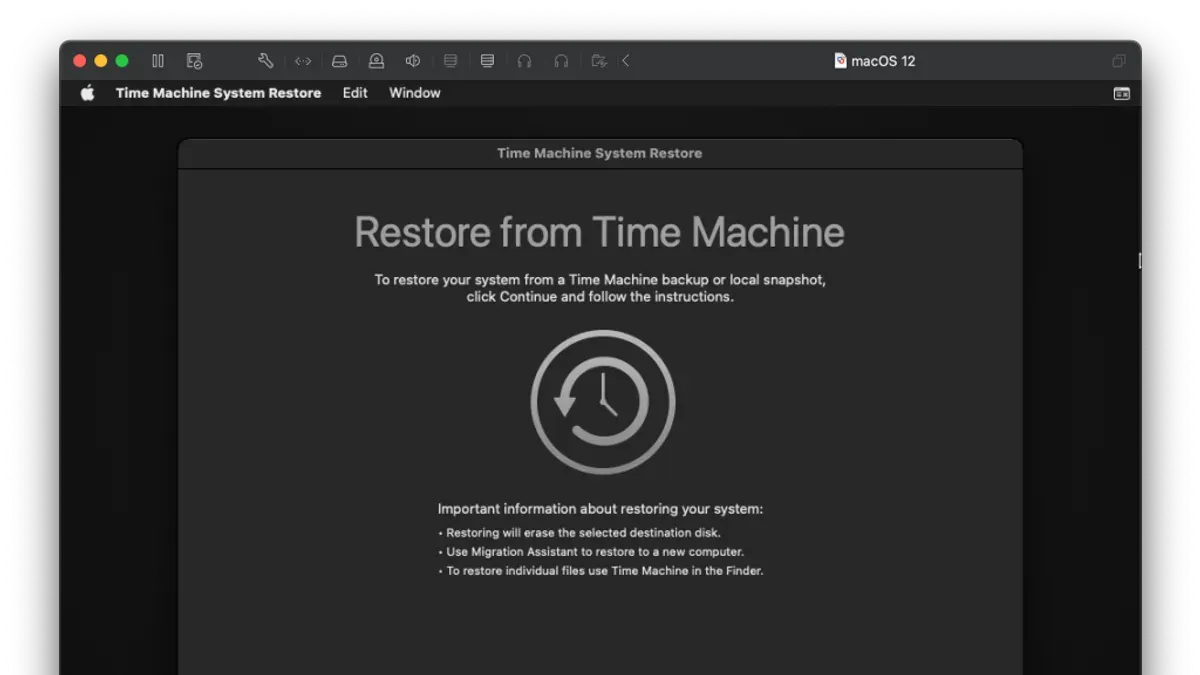
Determine whether the backup was made from the same Mac or a different one. Restoring to a new Mac may require additional setup, but Time Machine supports this scenario well. Verifying the backup's date and integrity is crucial; open Time Machine preferences to see the latest backup timestamp. Also, use Disk Utility to verify the external drive’s health if possible. Starting a restore with an outdated or corrupted backup can cause issues.
- Connect your external Time Machine drive or ensure access to your network backup. You should see the drive appear in Finder’s sidebar under Locations.
- Open System Preferences, then select Time Machine. Confirm that the latest backup date is recent and complete; you should see a green checkmark or a status reading “Latest backup: [date and time].”
- Make sure your Mac is plugged into power and connected to Wi-Fi or Ethernet. You can check this by clicking the Wi-Fi icon or the Network pane in System Preferences.
- If restoring to a new Mac, prepare your Apple ID and password to sign in after the restore completes.
- Optionally, run Disk Utility (in the Utilities folder) to check the external backup disk’s health by selecting it and clicking “First Aid.” You should see a confirmation that the disk appears healthy.
Start macOS Recovery to initiate the restore
To begin restoring your entire Mac from a Time Machine backup, you need to enter macOS Recovery mode. This special environment allows you to access system recovery tools independent of your installed macOS. The method to enter Recovery mode depends on whether your Mac has an Apple Silicon chip or an Intel processor.
- For Apple Silicon Macs: Shut down your Mac completely. Press and hold the power button until you see the startup options window with a gear icon labeled "Options." Release the button and click "Options," then click "Continue." This process usually takes 30 seconds to a minute.
- For Intel-based Macs: Shut down your Mac. Press the power button, then immediately hold down Command (⌘) + R keys simultaneously. Keep holding these keys until the Apple logo or a spinning globe appears. This screen loading can take up to a minute.
Once macOS Recovery loads, you will see a window titled "macOS Utilities" or "macOS Recovery." It presents several options, including "Restore From Time Machine Backup," "Reinstall macOS," "Disk Utility," and "Get Help Online." To restore your Mac fully, select "Restore From Time Machine Backup" and click "Continue."
Choosing this option directs you to the restoration workflow where you will select the backup drive and backup date to restore from. This environment is designed to provide a clean slate to recover your system without interference from your current macOS installation.
Restore your entire Mac from the Time Machine backup
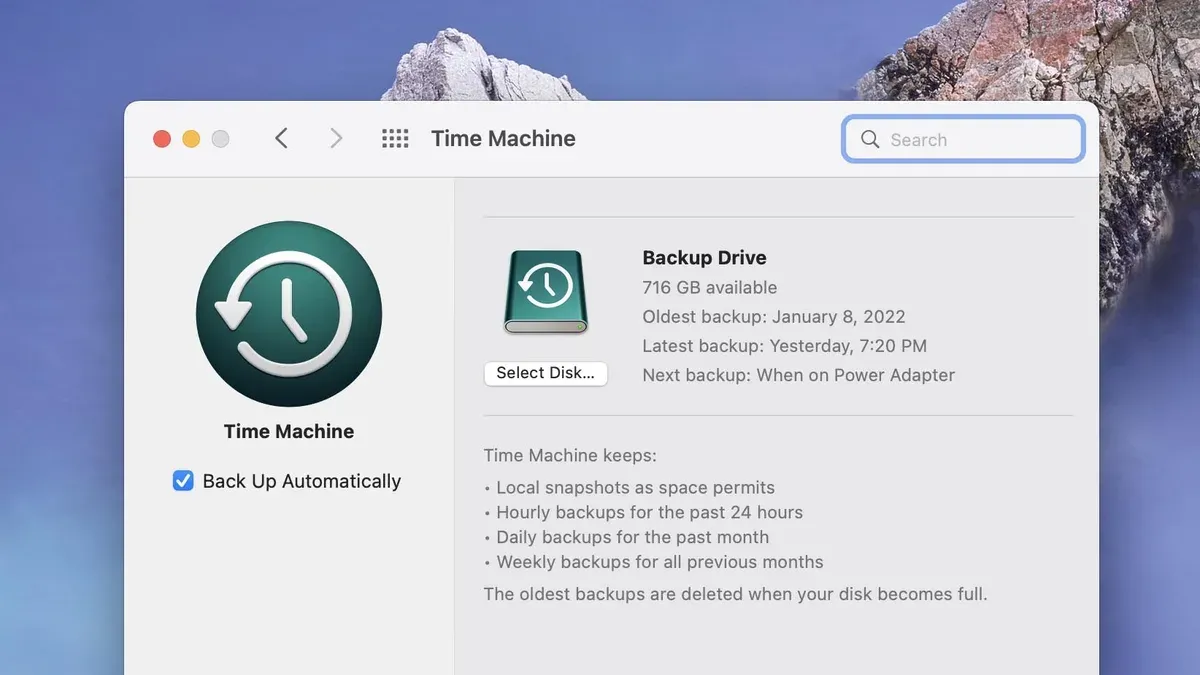
- Select your Time Machine backup disk when prompted. You will see a list of available backup drives; choose the one containing your backups. Once selected, a list of backup snapshots organized by date and time appears.
- Choose the specific backup snapshot you want to restore from. Typically, selecting the most recent backup ensures you recover the latest data and system state. Confirm your selection to proceed.
- Next, select the destination disk for the restoration. This is usually the internal drive of your Mac. Make sure to choose the correct disk, as the restoration process will erase its current contents.
- Begin the restoration process. The system will copy all files, system settings, and applications from your selected backup to the destination disk. Restoration time varies depending on the backup size and connection type; for example, restoring 500 GB over a USB 3.0 drive may take a few hours, while a network backup could take significantly longer.
- After restoration completes, your Mac restarts automatically. It then starts the initial setup process as if it were newly restored, allowing you to confirm settings and user accounts. At this point, your Mac should be fully restored to the chosen backup state.
Restore your Mac to an earlier time using Time Machine snapshots
Restoring your Mac to an earlier time using Time Machine snapshots can help undo recent system changes or resolve software issues that have developed since your last good backup. To do this, you need to carefully identify the correct backup date to revert to, ensuring it predates the problem you want to fix. Keep in mind that any data created or changes made after the chosen backup date will be lost, so back up important new files separately before proceeding.
Follow these steps to restore your Mac safely and verify success:
- Open the Time Machine application from the menu bar or System Preferences. You should see a timeline of your backups on the right side of the screen.
- Navigate through the timeline to select the backup date that represents the last known good configuration of your Mac. Confirm that the date predates the issue you want to fix; for example, if a software update on October 1 caused problems, select a backup from September 30 or earlier.
- Click "Restore" to begin the process. Your Mac will restart and restore the system to the chosen snapshot. When the restore completes, your Mac should boot normally with the system state from the selected backup.
- After restoration, check critical applications and settings to verify the issues are resolved. Also, confirm that your essential data is intact, keeping in mind that files created after the backup date will not be present.
For example, users have successfully fixed startup issues or resolved crashes by reverting to a snapshot before installing problematic software updates. However, be cautious: restoring to an earlier snapshot overwrites recent data, which can lead to permanent loss if you haven’t backed up new files. Always ensure you have copies of important documents before restoring.
Restore a Time Machine backup to a new Mac
When moving to a new Mac, restoring your data from a Time Machine backup ensures a seamless transition of your system settings, applications, and files. Before starting, confirm that your new Mac’s macOS version is compatible with the backup; typically, the new Mac should run the same or a newer macOS version than the one used to create the backup. Hardware differences can occasionally cause compatibility issues, but these are rare with recent Macs.
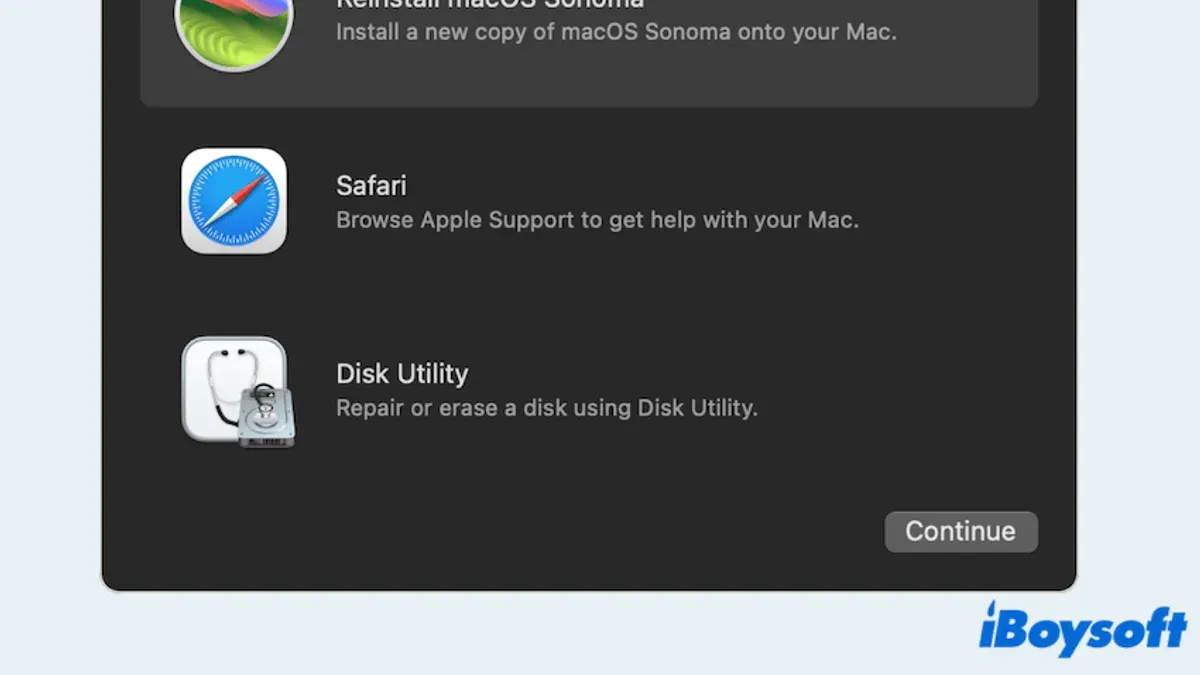
You have two main options: use Migration Assistant to transfer user data and settings, or perform a full system restore via macOS Recovery. Migration Assistant is ideal if your new Mac is already set up and lets you selectively transfer accounts, apps, and files without overwriting the entire system. In contrast, a full restore from Recovery mode reinstalls the entire system exactly as in the backup, which is useful if you want an identical setup on your new machine.
Migration Assistant generally has a high success rate but may occasionally miss system-level settings or third-party extensions. Full restores tend to replicate everything but require erasing the new Mac’s disk first. After completing either method, verify that all critical apps launch correctly, system preferences reflect your customizations, and your files are intact. A quick checklist includes opening key applications, checking network and security settings, and confirming email accounts and passwords.
- Connect your Time Machine backup drive to the new Mac and power it on.
- If using Migration Assistant, open Applications > Utilities > Migration Assistant, then follow the prompts to select your Time Machine backup as the source; you should see your user accounts and apps listed for transfer.
- If doing a full system restore, start your new Mac in macOS Recovery by holding the appropriate keys during startup, select Restore From Time Machine Backup, then choose the backup and target disk; the system will then reinstall macOS and your data.
- After restoration or migration completes, log in and check that your desktop, applications, and preferences appear as expected without errors.
- Test essential apps and verify network and security settings to ensure full functionality.
Troubleshoot common Time Machine restore issues
When restoring your Mac using Time Machine, you might encounter some common issues that can interrupt the process. One frequent problem is the Time Machine backup disk not appearing or being recognized. This usually happens if the disk is not properly connected, powered on, or formatted with a compatible file system like APFS or HFS+. Ensure the disk is connected via USB, Thunderbolt, or a stable network connection and check it appears in Disk Utility.
If you see error messages such as “incompatible backup” or “restore failed,” this often means the backup was made on a different macOS version or the backup data is corrupted. Verify that the macOS version you are restoring to matches or is newer than the backup’s, and try selecting a different backup snapshot if available.
Should the restore process be stuck or run unusually slowly, it may be due to a slow connection to the backup disk or disk errors. Pause and wait for a reasonable time, then consider restarting your Mac and retrying the restore. Also, run First Aid on the backup disk from Disk Utility to fix minor issues.
If macOS Recovery does not load properly, check your internet connection and try booting into Recovery mode again using the correct key combination for your Mac model. Resetting NVRAM or SMC can also help resolve startup issues preventing Recovery mode from launching.
- Confirm the backup disk is connected and visible in Disk Utility; you should see the disk listed without errors.
- If an error message appears, verify macOS version compatibility and select an alternative backup if possible; the restore window should proceed without error.
- If the restore stalls, run First Aid on the backup disk, then restart the Mac and retry; the restore progress bar should advance steadily.
- If macOS Recovery fails to load, reboot your Mac and use the correct Recovery key combination; the macOS Utilities window should appear.
Frequently asked questions
How to restore entire mac from time machine?
To restore your entire Mac, start by booting into macOS Recovery by restarting and holding Command-R. Then, choose "Restore From Time Machine Backup" from the utilities window. Select your Time Machine backup disk, pick the most recent backup or the desired point in time, and follow the onscreen instructions to restore your system, including macOS, apps, and user data.
How to restore mac to earlier time?
You can restore your Mac to an earlier time by using a Time Machine snapshot. Enter macOS Recovery, select "Restore From Time Machine Backup," and choose a backup dated before the changes you want to undo. This process reverts your Mac’s system and files to the selected snapshot, effectively taking it back to that earlier state.
How to restore from time machine?
Restoring from Time Machine involves entering macOS Recovery mode and selecting "Restore From Time Machine Backup." After connecting your backup disk, pick the backup you want and confirm the restore. For specific files, you can also enter Time Machine from Finder to browse and restore individual items without a full system restore.
How to restore files from time machine?
To restore individual files, open a Finder window and click the Time Machine icon in the menu bar, then choose "Enter Time Machine." Navigate through the timeline on the right to find the version of the file or folder you want, select it, and click "Restore." The file will be copied back to its original location.
How to backup mac with time machine?
Connect an external drive and open System Preferences, then click "Time Machine." Click "Select Backup Disk," choose your external drive, and enable Time Machine by sliding the switch to On. Time Machine will automatically start hourly backups and keep daily and weekly snapshots as long as the disk has space.
What This Guide Does Not Cover
This guide focuses on restoring your entire Mac system using Time Machine, which includes macOS, apps, settings, and user data. It does not cover selectively restoring individual files or recovering deleted files without performing a full system restore. If you only need to recover specific files or folders, consider using the Time Machine interface within Finder or look for specialized file recovery tools. Additionally, this process assumes you have a complete and recent Time Machine backup; if your backup is corrupted or incomplete, professional data recovery services might be necessary.
For users who want to recover data from a Time Machine backup without wiping their entire system, or who are troubleshooting minor issues, exploring file-level restoration or alternative backup methods is advisable.
The most useful next step is to verify the integrity and completeness of your Time Machine backup before starting any restore. Open Time Machine preferences, select your backup disk, and browse recent backups to ensure you have everything you need. This simple check can save you time and prevent restoration errors down the line.
See also: How to Restore a Single File Using Time Machine on Mac · How to Change Backup Frequency in Time Machine: Step-by-Step Guide · How to Exclude Folders from Backup in Time Machine: Step-by-Step Guide