How to Use Quick Note in Notes App: A Step-by-Step Guide
Discover how to create, find, and manage Quick Notes in the Notes app to capture ideas swiftly across your devices.
You’re browsing a website on your iPhone when a sudden idea strikes. You want to jot it down quickly without interrupting your flow or switching apps.
This article guides you through how to use Quick Note in Notes app, showing you practical ways to capture thoughts swiftly across your iPhone, Mac, or Windows laptop. You’ll learn each step of creating, finding, and managing Quick Notes, alongside comparisons with Microsoft OneNote to help you decide which workflow suits your productivity style best.
Whether you prefer Apple’s integrated Notes app for seamless cross-device syncing or want to explore OneNote’s features, this step-by-step guide will help you build an efficient note-taking routine.
Key takeaways
- Quick Note on iPhone can be started by swiping up from the bottom right corner or using Control Center shortcuts.
- On Mac, Quick Note appears as a corner hotspot or through keyboard shortcuts like Fn + Q or Globe + Q, depending on your setup.
- Notes app syncs Quick Notes across Apple devices via iCloud, but Windows users can access notes through the iCloud web or use OneNote for a richer cross-platform experience.
- Organize Quick Notes by tagging and categorizing to find them easily later.
- Regularly check app permissions and settings if Quick Note features don’t respond as expected.
Before you start: What you need to use Quick Note
Quick Note is a handy feature designed to let you capture ideas swiftly across your devices, but it requires certain device and software conditions to work properly. On Apple devices, Quick Note is available in the Notes app starting with iOS 15 on iPhone models from iPhone 6s and later, and on Macs running macOS Monterey or newer. This means if your iPhone runs an earlier iOS version or your Mac has an older macOS, Quick Note won’t be accessible.
Microsoft OneNote also offers a Quick Notes feature, but it functions differently and is available on Windows devices with OneNote for Windows 10 or OneNote as part of Microsoft 365 apps. To use Quick Notes in OneNote, ensure you’re running the latest version of the app, which supports quick note creation and syncing across devices.
It’s important to understand that Apple’s Quick Note is integrated deeply into the Notes app and system-wide gestures on Apple devices, while Microsoft’s Quick Notes are part of the OneNote app ecosystem and rely on Microsoft’s cloud syncing. This distinction affects how you capture and access notes depending on the platform you use.
Before you begin using Quick Note, make sure your Notes app is set up and ready:
- Open the Notes app on your iPhone or Mac. You should see your existing notes or a welcome screen prompting to create one.
- Check that you are signed in with your Apple ID on Apple devices for syncing to work. Go to Settings > [your name] on iPhone or System Preferences > Apple ID on Mac.
- For Windows, open OneNote and verify you are signed in with your Microsoft account. The Quick Notes section should be visible in the app sidebar.
- Update your device’s operating system and Notes or OneNote app to the latest version available to access all Quick Note features smoothly.
How to make a Quick Note on your iPhone
Creating a Quick Note on your iPhone is straightforward and offers several convenient options depending on how fast you want to capture your ideas. You can access Quick Note through gestures, the Control Center, a widget, or even the lock screen, making it easy to jot down thoughts wherever you are.
- Use the swipe gesture: Swipe diagonally from the bottom-right corner of your iPhone screen toward the center. This opens a Quick Note overlay where you can start typing immediately. When it works, the Quick Note window appears over your current app, ready to accept input.
- Access Quick Note via Control Center: Open Control Center by swiping down from the top-right corner of the screen. Tap the Quick Note icon (a square with a pencil). A new Quick Note window will pop up for immediate use.
- Use the Notes app widget: Add the Notes widget to your Home Screen or Today View by long-pressing the screen, tapping the plus (+) icon, then selecting Notes. Tap the Quick Note option within the widget to start a fresh note quickly.
- Open Quick Note from the lock screen: If enabled in Settings under Face ID & Passcode, swipe up from the bottom-right corner on the lock screen. This launches Quick Note without unlocking your phone fully, letting you capture ideas fast and securely.
- Add content to your Quick Note: Once open, you can type text, insert sketches by tapping the pen icon, or add photos via the photo icon at the bottom of the note. This lets you create rich notes in moments.
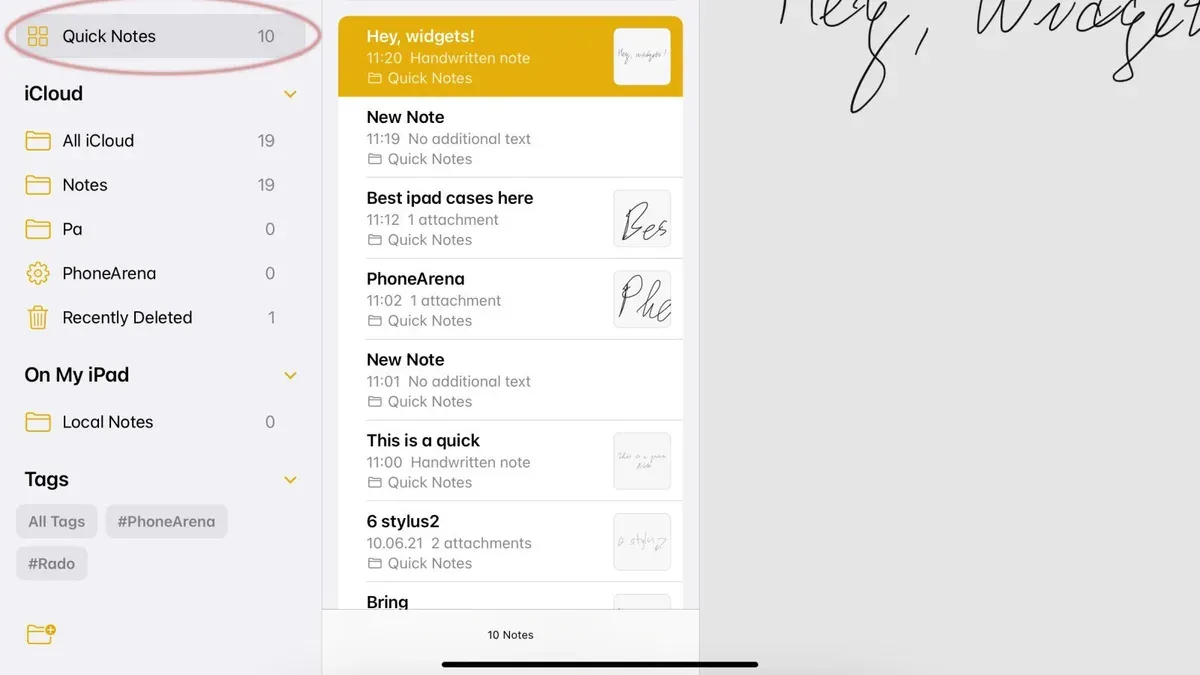
- Save and locate your Quick Notes: When you close the Quick Note overlay, your note automatically saves in the Notes app under the "Quick Notes" folder. Open the Notes app, tap Folders, then select "Quick Notes" to review or edit your saved notes anytime.
Visual cues for these steps include the swipe gesture arrow from the bottom-right corner, the Quick Note icon in Control Center, and the Notes widget on the Home Screen. Example notes might include a quick shopping list, a sketch idea, or a photo with annotations.
How to use Quick Notes on your laptop
Creating and managing Quick Notes on Mac
On your Mac, Quick Notes can be created swiftly using trackpad gestures or hot corners. To enable a hot corner for Quick Note, open System Settings, navigate to Desktop & Dock > Hot Corners, and assign a corner to "Quick Note." When you move your cursor to that corner, a Quick Note window will appear, ready for typing. Alternatively, if you have a trackpad, swipe up from the bottom right corner with two fingers to open a Quick Note. Once the note is created, it automatically saves in the Notes app under the Quick Notes folder.
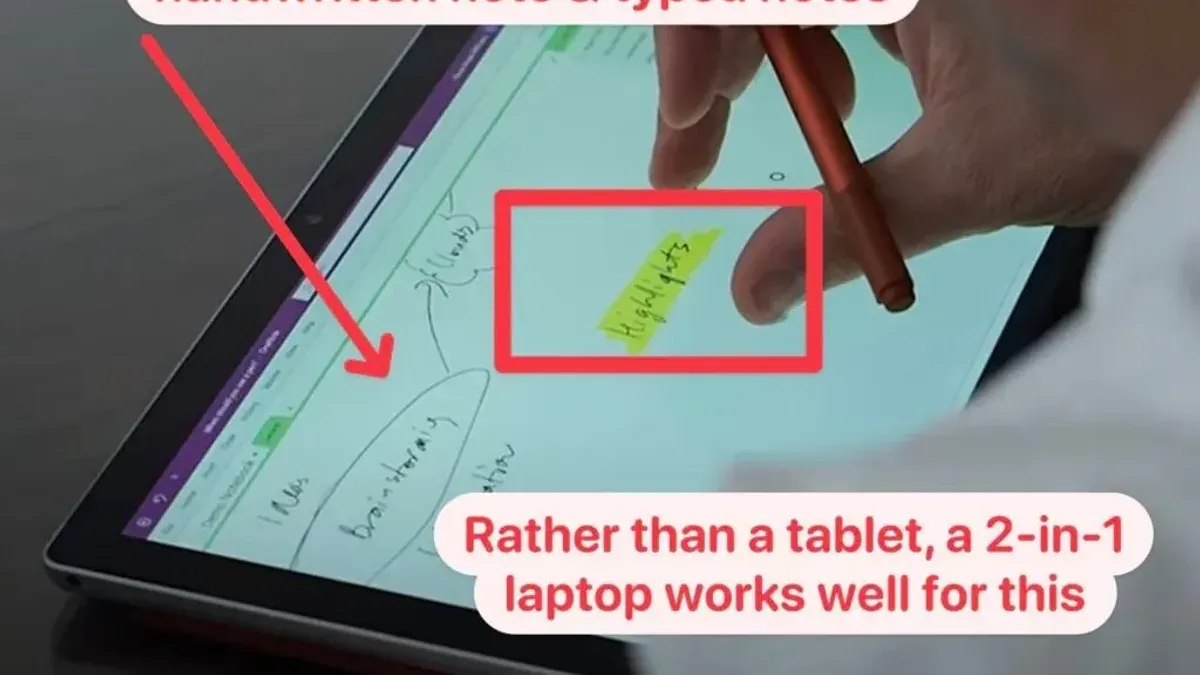
Within the Notes app on Mac, you can organize Quick Notes just like regular notes. Use folders, tags, or pin important Quick Notes for easy access. The interface allows you to search, edit, and link Quick Notes to other notes or documents, enhancing your workflow.
Using Quick Notes in Microsoft OneNote on Windows
Microsoft OneNote on Windows does not have a dedicated "Quick Note" feature exactly like Apple’s Notes app, but you can create Quick Notes using the "New Quick Note" option. To create one, open OneNote and click on the Home tab, then select "New Quick Note." This opens a small window where you can jot down ideas quickly. These notes are saved in the "Quick Notes" section within the default notebook.
OneNote’s Quick Notes sync across devices signed into the same Microsoft account, but syncing depends on internet connectivity and OneDrive status. Unlike Apple’s seamless system-wide gesture creation, OneNote requires manual opening, which can slow down capturing ideas quickly.
Comparing Quick Notes on Mac and Windows
| Feature | Apple Notes on Mac | Microsoft OneNote on Windows |
|---|---|---|
| Quick Note creation | Trackpad swipe or hot corner gestures | Manual launch via Home > New Quick Note |
| Saving location | Quick Notes folder in Notes app | Quick Notes section in default notebook |
| Syncing | iCloud sync across Apple devices | OneDrive sync across Microsoft devices |
| Accessibility | System-wide gesture from any app or desktop | Requires OneNote app open or quick launch |
| Organizing | Folders, tags, pinning | Sections and notebooks |
Overall, Quick Notes on Mac offer faster and more integrated note-taking with system gestures and native syncing, while OneNote provides a powerful but slightly less immediate Quick Note solution on Windows. Your choice depends on whether you prioritize instant access or advanced organizational features.
How to find Quick Notes in the Notes app
Locating your Quick Notes within the Notes app is straightforward once you know where to look. On both iOS and macOS, Quick Notes are organized in a dedicated folder or section, making it easier for you to access your recent thoughts quickly. Additionally, search and filtering options can help you find specific Quick Notes based on content or creation date.
Access the Quick Notes folder
- Open the Notes app on your iPhone or Mac. You should see a sidebar or a folders list.
- Look for the folder named Quick Notes in the sidebar. On iOS, if the sidebar is hidden, tap the back arrow or Folders button to reveal it.
- Tap or click on the Quick Notes folder. You will see a list of all your notes created using the Quick Note feature.
- Select any note to open and edit it. The list is typically sorted by the most recent first, helping you find recent notes quickly.
Use search and filtering options
- In the Notes app, tap or click the search bar at the top.
- Enter keywords or phrases you remember from your Quick Note’s content. For example, typing a unique phrase like "meeting ideas" can narrow down the results.
- Use date filters when available to limit results to notes created or modified within a specific timeframe. On macOS, click the filter icon to set date ranges.
- Review the search results for notes marked as Quick Notes; these often show a small icon or are listed within the Quick Notes folder.
Syncing considerations
To ensure your Quick Notes appear on all your devices, verify that iCloud syncing for Notes is enabled. On iOS, go to Settings > [your name] > iCloud and toggle on Notes. On macOS, open System Preferences > Apple ID > iCloud and confirm Notes syncing is active. This synchronization keeps your Quick Notes up to date and accessible, whether you’re on your iPhone or Mac.
By following these steps, you can quickly locate any Quick Note you've saved, making your note-taking workflow more efficient.
How to open Quick Notes and keep them handy
Accessing Quick Notes efficiently helps you stay productive by capturing thoughts instantly. On your Mac, you can use hot corners to open Quick Note quickly. To set this up, go to System Settings > Desktop & Dock > Hot Corners. Choose a corner and assign it to "Quick Note." When you move your cursor to that corner, a Quick Note window appears instantly.
Keyboard shortcuts also speed up access. Press Fn + Q on your Mac to open a new Quick Note anywhere. This shortcut works system-wide, so you don’t need to open the Notes app first. On iPhone, add the Quick Note button to your Control Center for one-tap access: go to Settings > Control Center and tap the green plus next to "Quick Note." Now, swipe down from the top-right corner and tap the Quick Note icon.
Pinning Quick Notes keeps them visible and easily reachable. In the Notes app on Mac or iPhone, swipe right on a note and tap the pin icon. Pinned notes appear at the top of your list for quick reference. Creating widgets on iPhone and iPad also helps: long-press your home screen, tap the plus icon, select Notes, then choose the Quick Note widget for immediate access without opening the app.
To manage reminders linked to your Quick Notes, use the Reminders app integration. Inside a Quick Note, tap the share icon and select "Remind Me." This sets notifications that prompt you to revisit or follow up on your note at a chosen time or location, ensuring important notes stay top of mind.
- Set up a hot corner on Mac: Open System Settings > Desktop & Dock > Hot Corners, select a corner, and assign "Quick Note." Moving your cursor there opens Quick Note.
- Use the Mac keyboard shortcut: Press Fn + Q to open a new Quick Note anywhere.
- Add Quick Note to iPhone Control Center: Go to Settings > Control Center, add "Quick Note," then swipe down from top-right and tap it.
- Pin important notes: In the Notes app, swipe right on a note and tap the pin to keep it at the top.
- Create a Quick Note widget on iPhone/iPad: Long-press the home screen, tap +, select Notes, and add the Quick Note widget.
- Set reminders for Quick Notes: Inside a note, tap the share icon, choose "Remind Me," and configure notifications.
How to take Quick Notes efficiently: tips and best practices
Using templates or default note formats can help maintain consistency and save time. For example, create a simple checklist template or a meeting notes format in the Notes app that you duplicate for each new Quick Note. This way, you avoid formatting from scratch and keep your notes organized.
Handwriting and voice dictation offer speed advantages depending on your context. On iPhone or iPad, using the Apple Pencil to jot down ideas can be faster for sketches or handwritten notes, while voice dictation allows hands-free input when typing is inconvenient. When you dictate, speak clearly to reduce errors, and review the note promptly to correct any misinterpretations.
Integrate Quick Notes into your daily workflow by setting specific triggers. For example, start a Quick Note at the beginning of meetings to capture action items or use Quick Notes to quickly jot down ideas when they arise during your day. You can also use tags or keywords in your notes to categorize them by project or priority, making retrieval easier later.
Exporting or sharing Quick Notes between apps is useful for collaboration or backup. In the Notes app, tap the Share icon in your Quick Note to send it via email, Messages, or save it to cloud storage. For cross-platform workflows, copy content to OneNote or other apps where you manage larger projects, ensuring all your ideas stay accessible regardless of device.
- Create a reusable note template in the Notes app, such as a checklist or meeting outline. When you start a Quick Note, duplicate this template. You should see your preformatted structure ready for input.
- Practice using voice dictation by tapping the microphone icon on your keyboard and speaking a short note. The text should appear in your Quick Note with minimal errors.
- Use the Apple Pencil or finger to handwrite or sketch in Quick Notes on compatible devices. Your handwriting or drawing should appear smoothly in the note.
- Start a Quick Note at the beginning of a meeting and add action items as they come up. Later, add tags or keywords like "#projectX" to organize these notes. These tags should be searchable within the Notes app.
- Share a Quick Note by tapping the Share button and selecting an app or contact. Confirm the note content is sent or saved successfully outside the Notes app.
Troubleshooting common Quick Note issues
Quick Note not syncing between iPhone and Mac
If your Quick Notes aren’t syncing as expected, first check that iCloud Drive is enabled for Notes on both devices. Go to Settings > [your name] > iCloud on your iPhone and ensure Notes is toggled on. On your Mac, open System Settings > Apple ID > iCloud and confirm that Notes is checked. Connectivity interruptions can also cause delays; a Wi-Fi or cellular connection is required.
If syncing still fails, try signing out of iCloud and back in on both devices, then restart them. Typically, this resolves most syncing problems within a few minutes.
Quick Note or Notes app not opening or freezing
When the Notes app or Quick Note feature freezes or won’t open, force quitting the app often helps. On iPhone, swipe up from the bottom and pause, then swipe the Notes app off the screen. On Mac, use Command + Option + Escape to open the Force Quit window and select Notes.
If the problem persists, ensure your device software is up to date, as outdated OS versions can cause app instability. Clearing some storage space can also improve performance since low storage can cause freezing.
Differences in Quick Note features on Windows using OneNote
OneNote on Windows lacks some Quick Note integrations available on Apple devices, such as system-wide swipe gestures or hot corners. You must manually open OneNote and create notes inside the app or via the taskbar icon. Syncing may also be slower because OneNote syncs through Microsoft’s cloud services, which operate differently from iCloud.
Understanding these differences helps set expectations and guides you to use OneNote’s built-in organizational tools like sections and pages to compensate.
How to recover accidentally deleted Quick Notes
If you delete a Quick Note by mistake, don’t panic. Open the Notes app and navigate to the Recently Deleted folder. Notes remain there for 30 days before permanent deletion. To recover:
- Open Recently Deleted in your Notes app.
- Select the note you want to restore.
- Tap or click Recover or move it back to your main Notes folder.
Recovery success is high if you act within this period. For Windows OneNote, check the Trash section within the notebook or use the Version History feature to restore previous note versions.
Frequently asked questions
How to use quick notes on iphone?
To use Quick Notes on your iPhone, swipe up from the bottom right corner of the screen if you have an iPhone with Face ID, or swipe up from the bottom edge on models with a Home button. This gesture opens a Quick Note overlay where you can jot down ideas instantly without leaving your current app. You can also add links or highlight text from other apps directly into the Quick Note for easy reference later.
How to use quick notes on laptop?
On your Mac laptop, open the Notes app and click or tap the Quick Note button in the lower right corner of the screen, or use the keyboard shortcut (usually Fn + Q). This opens a small Quick Note window where you can type your note. On Windows laptops, Quick Note as a feature is not built into Notes, but you can use Microsoft OneNote’s Quick Notes feature through the desktop app or the Windows shortcut Win + N to capture notes quickly.
How to use quick notes in onenote?
In OneNote, Quick Notes (formerly called Side Notes) are accessible by opening OneNote and selecting the “New Quick Note” option from the menu, or by pressing the shortcut Win + N on Windows. This opens a small window to capture your thought instantly without saving it to a specific notebook immediately. You can later organize these Quick Notes into your preferred notebooks and sections.
How to find quick notes in notes?
To find your Quick Notes in the Apple Notes app, open the app and look for the “Quick Notes” folder in the sidebar on Mac or in the Folders list on iPhone. All Quick Notes you’ve created are automatically saved there for easy access. If you don’t see this folder, make sure your Notes app is updated and that you are signed into iCloud to sync your notes.
How to use notes app?
The Notes app allows you to create, organize, and sync notes across devices. Start by tapping the compose button to create a new note, then add text, checklists, images, or sketches. Organize notes into folders and use search to find content quickly. Syncing with iCloud ensures your notes are available on your iPhone, Mac, and other Apple devices seamlessly.
What This Advice Does Not Cover and Who Should Look Elsewhere
This article focuses specifically on using Quick Note features within Apple’s Notes app and Microsoft OneNote for capturing ideas quickly across devices. It does not cover comprehensive note organization strategies such as tagging, folder hierarchies, or advanced search techniques that go beyond Quick Notes. Additionally, it excludes third-party note-taking apps other than OneNote, so if you use apps like Evernote, Notion, or Bear, you will need to consult resources dedicated to those platforms. For users seeking deep project management or collaboration features, dedicated productivity tools might better suit your needs.
The single most useful next step is to enable Quick Note on your devices and start creating a few test notes as you move between your iPhone, Mac, or Windows laptop. This hands-on approach will help you understand how Quick Note syncs and integrates with your workflow, allowing you to adjust settings such as iCloud syncing or OneNote’s notebook organization early on. By actively using Quick Note, you can quickly determine which app and workflow best fit your style and productivity needs.
See also: How to Add and Customize Tables in the Notes App: Step-by-Step · How to Create a Checklist in the Notes App: Step-by-Step Guide · How to Share a Note to Collaborate in the Notes App · How to Export All Notes from Your Notes App: A Clear Step-by-Step Guide