
How to Use Tags in Notes App: Organize Your Notes Efficiently
Discover how to use tags in Notes in Notes app to organize your notes efficiently and find them faster across your Apple devices.
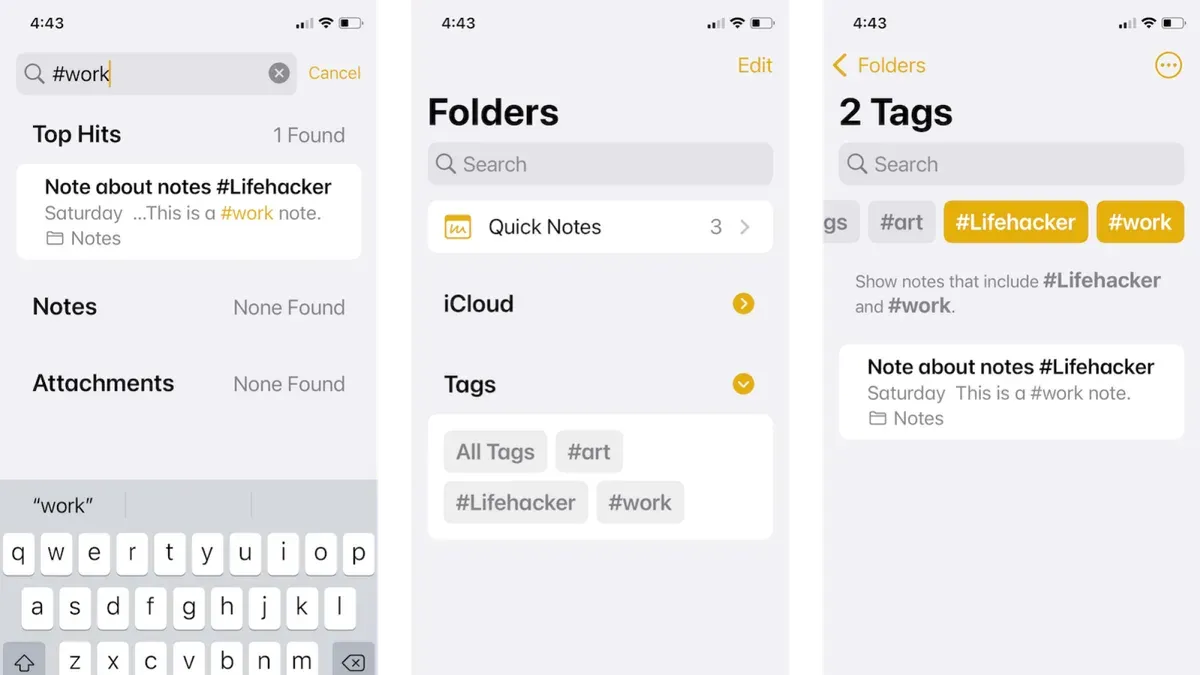
You have dozens of notes scattered across your iPhone or iPad, making it hard to find what you need quickly. Tagging your notes offers a straightforward way to organize and retrieve information without creating endless folders.
This article explains how to use tags in Notes in Notes app to keep your ideas, lists, and reminders neatly categorized. You will learn step-by-step how to add tags, browse notes by tags, and also get a comparison with tagging in Microsoft OneNote, helping you understand tagging across different note-taking platforms.
Key takeaways
- Tags in Apple Notes are simple keywords you insert within your note text to categorize content.
- You can add tags by typing a hashtag followed by a word, such as #recipe or #work, directly in a note.
- The Notes app automatically collects tagged notes under corresponding tag categories accessible from the main folders list.
- OneNote uses a different tagging system focusing on flags and labels rather than hashtags.
- Using tags reduces the need for excessive folders and speeds up note searches on iPhone and iPad.
Before you start: What you need to use tags in Notes
Tags in the Apple Notes app are a useful way to organize your content, but they require specific software versions to function. You need an iPhone or iPad running iOS 15 or iPadOS 15 or later. On Mac, tags are available starting with macOS Monterey. Without these versions or newer, the tagging features won’t appear in your Notes app interface.
Tags work seamlessly across all your devices signed into the same iCloud account. This means if you add a tag on your iPhone, you can find and use that tag on your iPad or Mac, making note management consistent. Make sure your devices are connected to iCloud with Notes syncing enabled to take full advantage of tags.
It’s important to understand that tags in Notes are for categorization and searching only. They do not offer any security features. Tags cannot replace password protection or locking of notes. If you want to keep sensitive notes secure, you still need to use the Notes app’s lock note feature separately.
When you open the Notes app after updating your device, you should see a new interface element where you can type # followed by your tag name inside a note. Additionally, the sidebar (on iPad and Mac) or the search interface (on iPhone) will show tag browsing options.
- Update your iPhone or iPad to iOS 15 or iPadOS 15 or later via Settings > General > Software Update. You should see the latest available version; install it if needed.
After update, your device will restart and the Notes app will support tags. - Sign in to iCloud with the same Apple ID on all your devices, and enable Notes syncing in Settings > [your name] > iCloud > Notes.
Once enabled, your notes and tags sync across devices. - Open the Notes app and create or open a note. Type a hashtag (#) followed by a word without spaces to create a tag.
The tag will turn blue, indicating it is recognized and clickable. - On iPad or Mac, check the sidebar for the new "Tags" section where your tags will be listed.
This confirms that tagging features are active.
What are tags in Notes and why use them?
Tags in the Notes app are keywords or labels that you add directly inside your notes to categorize and quickly locate them later. Unlike folders, which require you to move notes into specific locations, tags allow you to group related notes without changing their original placement. This flexibility means you can assign multiple tags to a single note, making it easier to find across various topics or projects.
Using tags complements the existing folder and search features in the Notes app. While folders create rigid categories and search finds notes based on text, tags provide a dynamic way to organize and browse your notes by themes or contexts. For example, you might tag work-related notes with #work, cooking ideas with #recipes, or brainstorming entries with #ideas. When you tap on a tag, the Notes app instantly shows all notes that include that tag, regardless of which folder they're in.
Here’s how tagged notes appear when browsing or searching:
- Open the Notes app and look at the Tag Browser under the Folders list or use the search bar.
- Select a tag like #work. You will see a collection of all notes tagged with #work, grouped together even if they are saved in different folders.
- Tap any note in the list to open and edit it, knowing it remains part of multiple organizational layers.
This approach helps you stay organized without duplicating content or strictly relying on folder hierarchy, making it easier to manage your notes efficiently.
How to add tags to Apple Notes on iPhone and iPad
Adding tags to your notes helps you organize and find them quickly. You create tags simply by typing the # symbol followed immediately by a keyword inside any note. For example, typing #travel creates a tag named “travel.” As you start typing after the #, the Notes app suggests existing tags based on what you’ve used before, making it easy to keep your tags consistent.
You can add multiple tags within a single note. Just type each tag with a # symbol as you write or edit your note. The app highlights these tags, and they become clickable links that help you browse related notes later.
If you want to edit a tag, simply tap the tag text within the note to place the cursor, then change the word after the # or delete the entire tag. Removing a tag is as easy as deleting its text from the note. The tag will no longer be associated with that note once you save your changes.
Here is how to add and edit tags step-by-step on your iPhone or iPad:
- Open the Notes app and select or create a new note. You should see a blank or existing note.
- Tap anywhere in the note to bring up the keyboard and start typing your content.
- When you want to add a tag, type the # symbol followed immediately by your tag keyword (e.g., #work). You will see the tag highlighted in yellow.
- If you want to use an existing tag, start typing after the # and tap the suggested tag from the list that appears above the keyboard.
- To add more tags, repeat the process anywhere in the note—there is no limit to how many tags you can add.
- To edit a tag, tap the tag text to position the cursor, then change or delete the tag keyword as needed.
- When done editing, tap outside the note or press the back button. The tag changes will save automatically.
By following these steps, you can efficiently tag and organize your notes for easy retrieval on iPhone and iPad.
How to find and browse notes by tags in the Notes app
To locate notes using tags, start by tapping any tag within a note. This action opens a list displaying all notes that include the same tag, helping you quickly gather related information without manually searching through folders. It’s a practical way to see all content linked by a specific theme or project.
The Notes app also features a Tags browser, accessible from the sidebar on iPad or Mac, or the bottom menu on iPhone. Here, you can view all your tags organized in one place. Tapping any tag in this browser shows all notes with that tag, making it easy to explore your tagged notes collection.
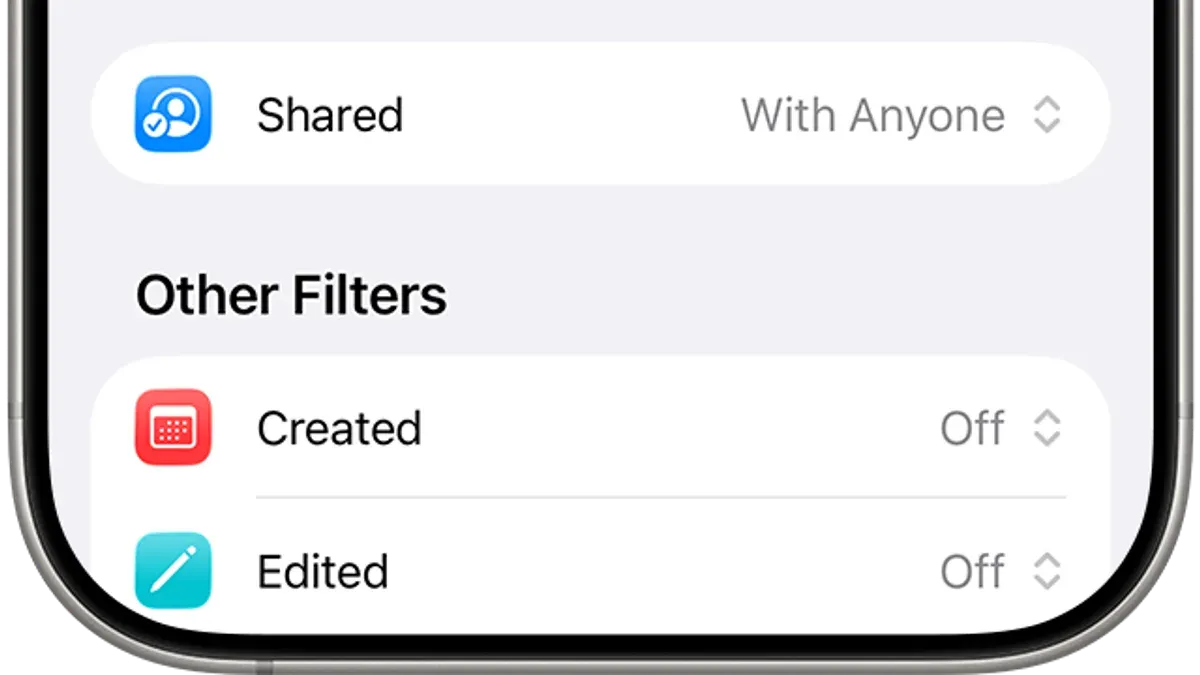
You can take organization further by creating smart folders based on tags. Smart folders automatically gather notes containing a chosen tag, saving you the effort of manual sorting. For example, create a smart folder for the tag "#work" to have all work-related notes appear there.
- Open the Notes app and tap the folders view.
- Tap "New Folder" or the plus icon, then choose "New Smart Folder."
- Name the folder, for example, "Work Notes."
- Select the tag filter option and enter or select the tag "#work."
- Save the smart folder. You will now see all notes tagged with "#work" automatically collected in this folder.
For more precise searching, combine tags by typing multiple tags in the search bar separated by spaces. This filters notes that include all the entered tags, refining your results. For instance, searching "#work #urgent" shows notes tagged with both "#work" and "#urgent."
Using these methods, you can efficiently find and browse notes by tags, keeping your information well-organized and easy to access.
How to use notes app on iPad and iPhone beyond tagging
Tags are a powerful way to organize your notes, but the Notes app offers additional features to help you manage and access your content more efficiently. Pinning notes allows you to keep important or frequently accessed notes at the top of your list. Unlike tags, which group notes by keywords across the app, pins prioritize individual notes for quick retrieval without changing their location.
Folders and subfolders provide a hierarchical structure to your notes. You can create folders to categorize notes broadly and use subfolders for more detailed organization. This contrasts with tags, which cross-cut folders and let you find notes across different categories by shared keywords.
The Notes app also integrates with iOS features like Siri and Spotlight search. You can ask Siri to find or create notes, enhancing hands-free access. Spotlight search indexes your notes, including their content and tags, enabling you to find information quickly from the device’s main search interface.
Notes sync across your Apple devices through iCloud, so any tags, pins, or folder arrangements you make appear everywhere you use Notes. Sharing notes with others preserves these organizational elements, keeping collaboration clear and consistent.
| Feature | Purpose | How It Organizes Notes | Example |
|---|---|---|---|
| Tags | Group notes by keywords | Cross-folder grouping via keywords | All notes tagged #project appear together |
| Pinning | Prioritize individual notes | Moves note to the top of the list | Pin a shopping list for quick access |
| Folders & Subfolders | Hierarchical categorization | Organizes notes by topic or category | Work folder with subfolder for meetings |
How to tag notes in OneNote and how it compares to Apple Notes tags
Microsoft OneNote uses a tagging system quite different from Apple Notes. In OneNote, tags are predefined or customizable labels that you can apply to text, paragraphs, or entire notes. You can find tags like "To Do," "Important," "Question," and many others ready to use. Additionally, OneNote allows creating new custom tags which can have unique icons and names, helping you tailor your organization to specific workflows.
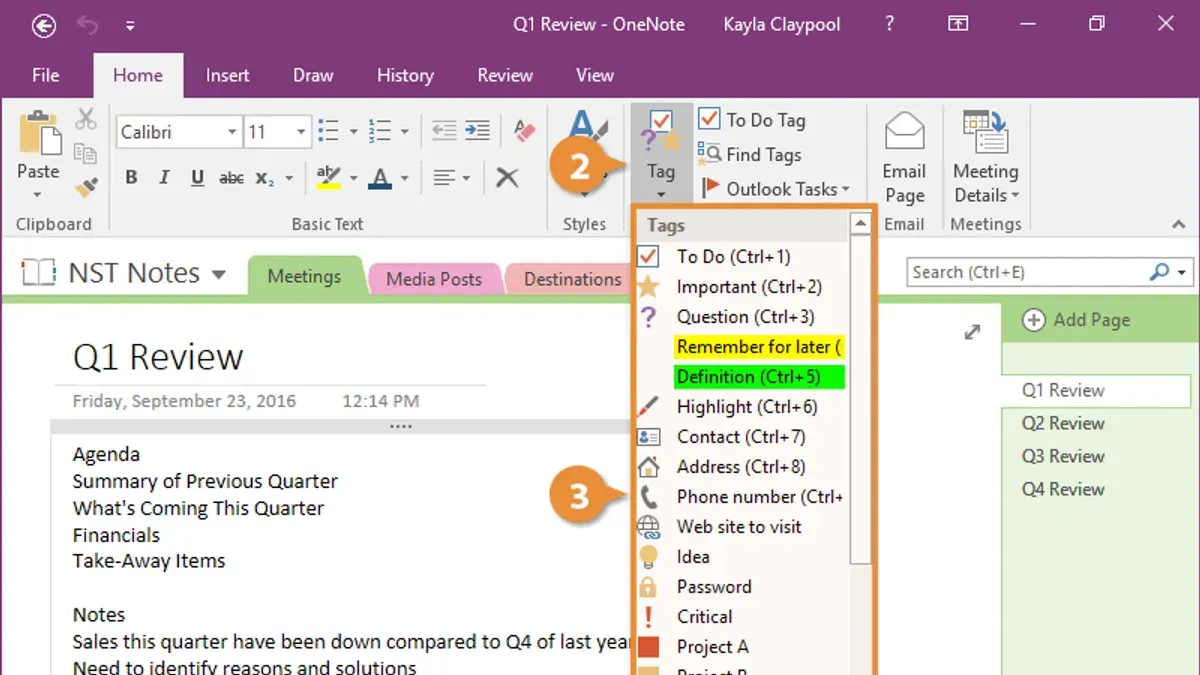
Tagging in OneNote is especially useful for task management. You can mark action items with tags like "To Do," then later use the search or Tag Summary pane to locate and track these tasks. This makes OneNote effective for managing projects and keeping track of tasks directly within your notes.
Compared to Apple Notes, OneNote’s tagging is more structured. Apple Notes tags are simple keywords inserted anywhere within the note using a # prefix, which makes them flexible and quick to add but less formalized. OneNote tags, by contrast, are applied via a menu and carry specific visual markers, which can make scanning and filtering easier but might feel less spontaneous.
Here is a comparison to help you choose:
| Feature | Apple Notes Tags | OneNote Tags |
|---|---|---|
| Tag Creation | Freeform keywords using # inside note text | Predefined and fully customizable tags with icons |
| Tag Application | Typing in note body | Applying via Tag menu to text or paragraphs |
| Tag Management | Simple search and smart folders based on tags | Tag Summary pane to view and manage tagged items |
| Task Management | Indirect, via tags as keywords | Integrated task tags like To Do with checkbox functionality |
| Visual Tag Indicators | Tag appears as #keyword text | Icon and label visibly attached to tagged content |
If you need quick, lightweight tagging with easy keyword entry, Apple Notes is a solid choice. If you want formalized tags that support task tracking and detailed note categorization, OneNote offers a more robust system. Understanding these differences can help you optimize note organization based on your workflow and whether you use multiple platforms.
Troubleshooting common issues with tags in Notes app
If you notice tags not appearing or syncing across your iPhone and iPad, ensure both devices are signed into the same Apple ID and have iCloud Notes syncing enabled. Sometimes, tags fail to sync due to network issues or temporary server delays. Restarting your device or toggling iCloud Notes off and back on can often resolve this.
One common limitation is that notes containing tags cannot be locked. This is because locking encrypts the note, preventing the system from indexing tags inside it. If privacy is a concern, consider that locking a tagged note will disable tag-based searches within that note.
If tags are not recognized or searchable, check that your device is running a current version of iOS or iPadOS. Outdated software can cause features to malfunction. Also, make sure you have typed tags correctly, with no spaces between the # symbol and the keyword. Misspelled or malformed tags won’t be detected by the app’s search or tag browser.
Steps to update software and reset Notes app settings
- Open the Settings app and go to General > Software Update. If an update is available, tap Download and Install. After updating, open Notes to check if tags work correctly.
- If problems persist, go to Settings > Notes, then toggle off “On My iPhone/iPad” account if enabled, then toggle it back on. This resets local Notes settings without deleting your iCloud notes.
- Restart your device by holding the power button and sliding to power off, then turn it on again. Open Notes and test tag functionality. You should see your tags listed in the tag browser and be able to search them.
- If you receive error messages like “Tags not found” or “Unable to sync tags,” ensure your network connection is stable and retry syncing by opening Notes and pulling down to refresh the list.
For further assistance, Apple’s official support site provides detailed guidance on Notes syncing and troubleshooting common issues. Remember, proper iCloud configuration and keeping your device updated are essential to smooth tag operation.
Frequently asked questions
How to use the notes app?
To use the Notes app, open it and tap the compose button to create a new note. You can type text, add checklists, images, or sketches within each note. Organize your notes into folders and use tags to categorize them for easier searching and browsing later.
How to use notes app on iphone?
On your iPhone, launch the Notes app from the Home screen. Tap the new note icon to start writing. Use the toolbar above the keyboard to add formatting, checklists, or attachments. To organize, add tags directly in the note text by typing a hashtag followed by your tag name, like #work.
What is a tag in iphone notes?
A tag in iPhone Notes is a keyword prefixed with a # symbol that you add within your note to categorize it. Tags help you group related notes and find them quickly using the Notes app's Tag Browser or search feature. For example, #recipes can gather all your cooking notes together.
How to use tags in onenote?
In OneNote, tags are used to mark important text or items like to-dos and questions. You can apply tags by selecting text and choosing from the Tags menu on the Home ribbon. Unlike Apple Notes, OneNote tags don’t create categories but help visually highlight and prioritize content within notes.
How to use notes on ipad?
Using Notes on iPad is similar to the iPhone experience but benefits from the larger screen. Open Notes, tap the new note icon, and use the on-screen keyboard or Apple Pencil for input. Add tags by typing # followed by your tag name anywhere in the note to organize and locate notes efficiently.
What This Guide Does Not Cover
This guide does not cover advanced automation with the iPhone Notes app API or third-party apps that integrate tags beyond the native Notes app. If you require complex workflows or integrations across multiple platforms, exploring dedicated task managers or note-taking apps with extensive plugin support may be more suitable. Additionally, this article does not address collaboration features in shared notes, which involve different management strategies beyond tags.
To get the most out of tagging in the Notes app, start by consistently adding clear, descriptive tags as you create or review your notes. Then, regularly use the Tags Browser to keep your notes organized and easy to find. This simple habit builds a personalized system that grows more effective over time, helping you stay organized without extra tools or apps.
See also: How to Pin a Note in the Notes App: Step-by-Step Guide · How to Recover Deleted Notes in the Notes App: Step-by-Step Guide



