
How to Trim a Video in QuickTime Player: Step-by-Step Guide
This guide shows you how to trim a video in QuickTime Player using easy steps to remove unwanted sections and export your edited video.
You have a video clip that’s just a bit too long or includes unwanted parts at the beginning or end. Whether you recorded it yourself or received it from someone else, trimming it quickly can make the content clearer and more focused. If you’re wondering how to trim a video in QuickTime Player, this guide walks you through every step with simple instructions suited for beginners.
This article covers trimming videos using QuickTime Player’s built-in tools, basic editing beyond trimming, tips to reduce file size, how to safely stop recordings, playing QuickTime videos on Windows, and common troubleshooting advice. Each section explains actions clearly so you can follow along without confusion.
Key takeaways
- Use QuickTime Player’s Edit > Trim feature to select and cut unwanted video sections precisely.
- Adjust playback handles carefully to avoid cutting off important parts of your video.
- Export trimmed videos with different quality settings to reduce file size effectively.
- Quit recordings through the Stop button or menu to save files properly and avoid corruption.
- Use compatible media players or codecs to play QuickTime videos on Windows without issues.
Before you start: What you need to trim a video in QuickTime Player
Before trimming a video, ensure you have QuickTime Player installed and updated on your Mac. QuickTime Player is included with macOS, but checking for updates via the App Store or Software Update ensures you have the latest features and compatibility fixes. If you use Windows, QuickTime Player is no longer officially supported, but you may use alternative software or older versions with limited functionality.
Have your video file accessible on your computer. QuickTime Player supports common video formats such as MOV, MP4 (H.264 or HEVC), M4V, and some AVI files. If your video uses an unsupported format, you might need to convert it before trimming. Familiarity with your file system—Finder on Mac or Windows Explorer on PC—helps you locate and open the video quickly.
Note that QuickTime Player offers straightforward trimming tools for cutting the start or end of your video, but it does not provide advanced editing features like multi-clip joining or detailed timeline editing. For basic trimming needs, it is user-friendly and efficient.
- Open the Applications folder on your Mac and locate QuickTime Player. When opened, you should see the QuickTime Player menu bar at the top of your screen.
- Verify that your video file is saved in an accessible folder, such as Documents or Desktop. You should see the file icon with a familiar video extension like.mov or.mp4.
- Double-click the video file to open it in QuickTime Player. The video playback window appears, ready for trimming.
- Check your Mac’s system meets minimum requirements: macOS version 10.13 (High Sierra) or later is recommended for best QuickTime performance and format support.
How to trim a QuickTime video with the built-in trim tool
- Open your video file by launching QuickTime Player and selecting File > Open File... from the menu bar. Once loaded, your video appears in the QuickTime window ready for editing.
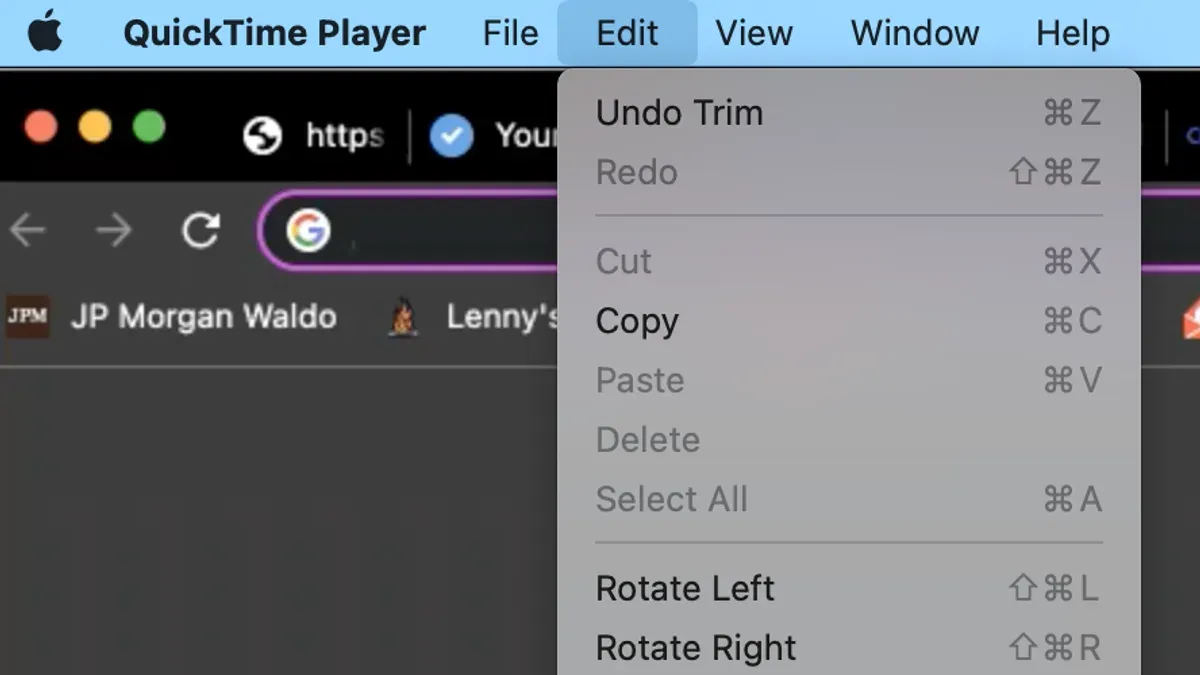
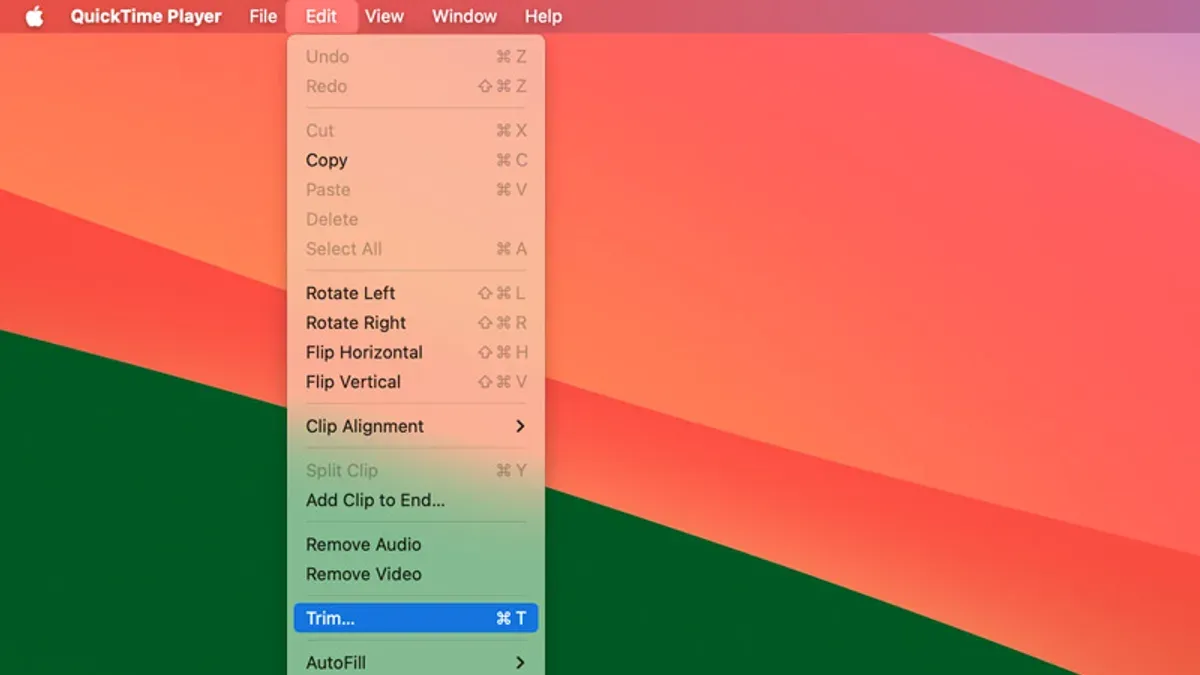
- Access the trim function by clicking Edit > Trim in the menu bar or pressing Command + T on your keyboard. This reveals a yellow trimming bar beneath the video timeline with handles on either side.
- Drag the yellow handles inward to select the portion of the video you want to keep. The left handle sets the new start point, and the right handle sets the new end point. As you adjust these, the video preview updates to reflect the trimmed segment.
- Use the play button within the trim interface to preview your selected segment and ensure it starts and ends exactly where you want. If needed, adjust the handles again for a more precise selection.
- Once satisfied, click Trim to finalize the cut. This will immediately shorten the video in the player window to your chosen segment.
- To save your trimmed video, go to File > Save to overwrite the original file, or choose File > Save As... (or Export As on newer versions) to create a new file with your edits intact. Naming the new file differently helps preserve the original if you want to keep a backup.
The trim interface is straightforward: the yellow handles visually mark your chosen clip boundaries, and the preview ensures you don’t accidentally lose important footage. Remember, trimming removes the parts outside the selected segment, so take care with your selection before saving.
How to edit a QuickTime video beyond trimming
QuickTime Player offers several simple editing features to help you refine your video beyond just trimming. One useful option is splitting clips, which lets you isolate specific sections of your video for further editing or removal. You can split a clip by positioning the playhead where you want to divide the video, then selecting Edit > Split Clip. This creates two separate clips within the timeline, allowing you to delete or rearrange parts as needed.
To rearrange clips, drag them left or right in the timeline to change their order. Deleting a segment can be done by selecting the clip and pressing the delete key or choosing Edit > Delete. These actions give you control over the sequence and content of your video without complex software.
QuickTime also includes basic video rotation and flipping tools. To rotate or flip your video, open the Edit menu, then choose Rotate Left, Rotate Right, or Flip Horizontal. Each action immediately updates the video display, helping you correct orientation issues with ease.
When you finish editing, exporting your video with different resolution or quality settings can help balance file size and visual clarity. Use File > Export As and choose options like 4K, 1080p, 720p, or 480p. Higher resolutions keep more detail but increase file size, while lower settings reduce size but may sacrifice sharpness. For example, exporting a 1080p video instead of 4K can decrease the file size by roughly half while maintaining good quality for most uses.
These features make QuickTime Player a handy tool for basic video editing tasks without needing specialized software.
How to reduce size of QuickTime video files effectively
QuickTime Player allows you to compress video files by exporting them at lower resolutions and quality settings. This is especially useful when you want to save storage space or share videos more easily without significantly sacrificing visual clarity. Using the Export As menu, you can select from predefined resolutions like 4K, 1080p, 720p, or 480p, each reducing the file size progressively.

- Open your video in QuickTime Player and click File in the menu bar.
- Select Export As and choose a resolution lower than your original video’s (for example, choose 720p if your video is 1080p). After selecting, a save dialog appears.
- Choose a destination and filename, then click Save. QuickTime will create a new compressed file.
- Check the new file’s size by right-clicking it and selecting Get Info (Mac) or Properties (Windows). You should see a noticeable reduction compared to the original file, often 30-60% smaller depending on resolution.
- If the quality is too low or the size reduction insufficient, try exporting again with a different resolution to balance size and clarity.
QuickTime Player’s compression is straightforward but limited to resolution changes and basic quality adjustments. If you need more control—like adjusting bitrate or advanced codecs—you may require third-party tools such as HandBrake or Adobe Media Encoder. These allow precise file size targets and better optimization for different devices.
Remember, reducing resolution will decrease file size but also the video’s sharpness, so choose the export settings that best fit your needs for quality and file size.
How to quit QuickTime Player recording safely
When you finish recording your screen or video in QuickTime Player, it's crucial to stop and save your recording properly to avoid losing any data. If you close QuickTime or shut down your computer without stopping the recording first, the file may become corrupted or incomplete. Follow these steps carefully to ensure your recording is saved correctly.
- Stop the recording by clicking the Stop button. This button looks like a square icon and is located in the menu bar at the top of your screen during the recording session. Once you click it, the recording will end, and QuickTime will automatically open the video in a new window for preview.
- Review your recording in the QuickTime Player window. You should see the full video of your session playing back smoothly. If it looks correct, you can proceed to save it; if not, you may decide to re-record.
- Save your recording by choosing File > Save. In the save dialog, enter a descriptive file name and select a location on your drive where you can easily find it later. Click Save to store the file. This step finalizes the recording and prevents data loss.
- Avoid quitting QuickTime Player before saving. Closing the app or your computer without saving after stopping the recording can cause the file to be lost or damaged. Always follow the Save step immediately after stopping.
- Common mistakes to avoid: Not clicking the Stop button first, closing QuickTime during recording, or force quitting the app can all cause your recording to fail to save properly.
Example: Suppose you start a screen recording to demonstrate software usage. After finishing your demo, click the Stop button in the menu bar. QuickTime opens the recorded video for preview. You watch it to confirm everything recorded correctly, then go to File > Save, name the file "Software Demo.mov," choose your Documents folder, and hit Save. This completes the session safely without risking file corruption.
How to play QuickTime videos on Windows
QuickTime videos typically use the.mov format, which can sometimes cause compatibility issues on Windows due to limited native support. While Apple once provided QuickTime Player for Windows, it is no longer officially supported or updated, making it less reliable and potentially insecure for playback on modern systems.
To play QuickTime videos on Windows, you have two main options: installing QuickTime Player for Windows or using alternative media players that support QuickTime formats.
Installing QuickTime Player for Windows
- Download QuickTime Player for Windows from a trusted archive or Apple's official site if still available. When installation completes, open your.mov file with QuickTime Player.
- If playback starts successfully with both video and audio, the installation worked. However, many users experience missing audio or video tracks or playback errors due to outdated codecs.
- Keep in mind QuickTime Player for Windows may not support newer codecs or formats embedded in recent videos, limiting its effectiveness.
Using Alternative Media Players
Many users find better success with third-party media players that support QuickTime video formats and codecs more reliably on Windows.
- Download and install VLC Media Player (from videolan.org), which supports a wide array of video and audio codecs including those used in QuickTime files.
- Open your.mov file in VLC by right-clicking the file, selecting "Open with," then choosing VLC Media Player. VLC usually plays QuickTime videos smoothly, including those with advanced codecs.
- If VLC fails to play audio or video, try updating VLC to the latest version or installing codec packs such as K-Lite Codec Pack for additional format support.
Among common Windows players, VLC Media Player is generally the most reliable for QuickTime video playback, offering higher success rates with fewer issues than the legacy QuickTime Player for Windows. Windows Media Player often lacks support for QuickTime codecs, leading to missing audio or video.
Troubleshooting Common Playback Issues
- If your video shows no picture but plays sound, or vice versa, check if the file uses uncommon codecs by inspecting it with media info tools.
- Ensure your media player is updated to the latest version to include recent codec improvements.
- Consider converting the QuickTime video to a more Windows-friendly format like MP4 using free converters if playback problems persist despite using VLC or other players.
Troubleshooting when QuickTime movie not showing video or audio
If your QuickTime movie fails to show video or audio, start by checking the file format and codec compatibility. QuickTime supports MOV, MP4, and M4V formats with standard codecs like H.264 and AAC. If you see an error such as "The movie could not be opened" or "Unsupported format," the file may use a codec QuickTime cannot decode. Converting the file to a compatible format using a tool like HandBrake often resolves this.
Next, ensure your video drivers and QuickTime Player software are up to date. Outdated drivers or software versions can cause playback problems and crashes. On a Mac, update macOS and QuickTime via the App Store. On Windows, check for graphics driver updates through Device Manager or the manufacturer’s website. After updating, relaunch QuickTime Player and reopen your video.
If QuickTime Player crashes or freezes during editing, try these steps:
- Close all other running applications to free system resources. You should notice smoother performance.
- Restart your computer to clear temporary glitches. Opening QuickTime Player again should be stable.
- Open the video file in QuickTime Player without making edits to confirm it plays correctly.
- If problems persist, delete QuickTime preference files located in ~/Library/Preferences/com.apple.QuickTimePlayerX.plist (Mac) or reinstall QuickTime on Windows. This resets settings that might cause instability.
When QuickTime refuses to trim or save properly, common error messages include "Unable to save the trimmed movie" or "Operation could not be completed." To fix this:
- Check that the video file is not locked or set to read-only in Finder or File Explorer. Uncheck "Locked" or change permissions to allow editing.
- Try saving the trimmed video to a different folder with full write access, such as your Desktop. A successful save confirms folder permission issues.
- Export the trimmed clip using File > Export As instead of saving directly. This often bypasses file corruption or compatibility problems.
- If the issue remains, duplicate the original file and trim the duplicate. This avoids corrupt source file problems.
Following these checks and fixes should resolve most common playback and editing issues when QuickTime movies do not show video or audio correctly.
Frequently asked questions
How to edit video in quicktime player?
You can edit videos in QuickTime Player by using its simple tools like trimming, splitting, and rearranging clips. To start, open your video and access the Edit menu to find options such as Split Clip or Rotate. For basic enhancements, you can also use the View menu to show the Inspector for adjusting some properties. QuickTime Player doesn’t support advanced editing like adding transitions or effects, so it’s best for straightforward edits.
How to trim video in quicktime player?
Open your video in QuickTime Player and select Edit > Trim from the menu bar. A yellow trimming bar will appear at the bottom of the window. Drag the handles to select the portion you want to keep, then click Trim to remove the unwanted parts. Remember to save your trimmed video afterward to keep the changes.
How to play quicktime video on windows?
Windows doesn’t natively support QuickTime’s.mov format in all cases. To play QuickTime videos on Windows, you can install a media player like VLC that supports.mov files. Alternatively, you can convert the QuickTime video to a more common format like MP4 using free software before playing it on Windows media players.
How to play a quicktime movie?
Double-click the QuickTime movie file to open it in QuickTime Player by default on Mac. Use the playback controls at the bottom to play, pause, rewind, or fast forward. If the movie doesn’t play, check that your QuickTime Player is updated and the file isn’t corrupted.
How to trim on quicktime player?
To trim a video, open it and choose Edit > Trim. Move the yellow handles in the trimming bar to cover the section you want to keep. When ready, click Trim to finalize the cut. This method is quick and preserves only the selected footage.
Honest Limits of QuickTime Player
QuickTime Player provides straightforward trimming and basic editing tools, which are great for quick fixes but do not include advanced features like multi-track editing, color correction, or special effects. If you need more complex editing, consider dedicated video editing software such as iMovie, Final Cut Pro, or Adobe Premiere Pro. Additionally, QuickTime support on Windows is limited and outdated, so playback or editing may not work smoothly; alternative media players like VLC or specialized converters may be necessary for full compatibility.
When reducing file size with QuickTime's export options, keep in mind that compression can noticeably lower video quality. For professional-quality compression and optimization, using specialized software like HandBrake or Adobe Media Encoder is recommended to balance file size and clarity more effectively.
Your Next Step
To get started trimming your video confidently, open your file in QuickTime Player and select Edit > Trim. Use the yellow handles to precisely mark the start and end points, then click Trim to finalize. Take your time adjusting the selection, as this step is often overlooked but crucial for accurate trimming. Once done, export your video with the desired resolution to manage file size better before sharing or storing it.
See also: How to Screen Record with Internal Audio in QuickTime Player · How to Remove Flicker in Final Cut Pro: A Clear Step-by-Step Guide



