How to Use VoiceOver on Mac: A Complete Step-by-Step Guide
Discover how to enable, customize, and use VoiceOver on Mac with clear instructions to improve your screen navigation experience.
You might find yourself needing spoken descriptions of the screen while working on your MacBook, MacBook Air, or MacBook Pro. Whether you're navigating complex documents or simply want auditory feedback, VoiceOver can be an essential tool.
This article covers how to use VoiceOver on Mac with clear, step-by-step instructions tailored to various Mac models. You'll also learn how to enable, customize, and troubleshoot VoiceOver, plus how it compares to similar features on other Apple devices, helping you decide if and how to integrate it into your workflow.
Key takeaways
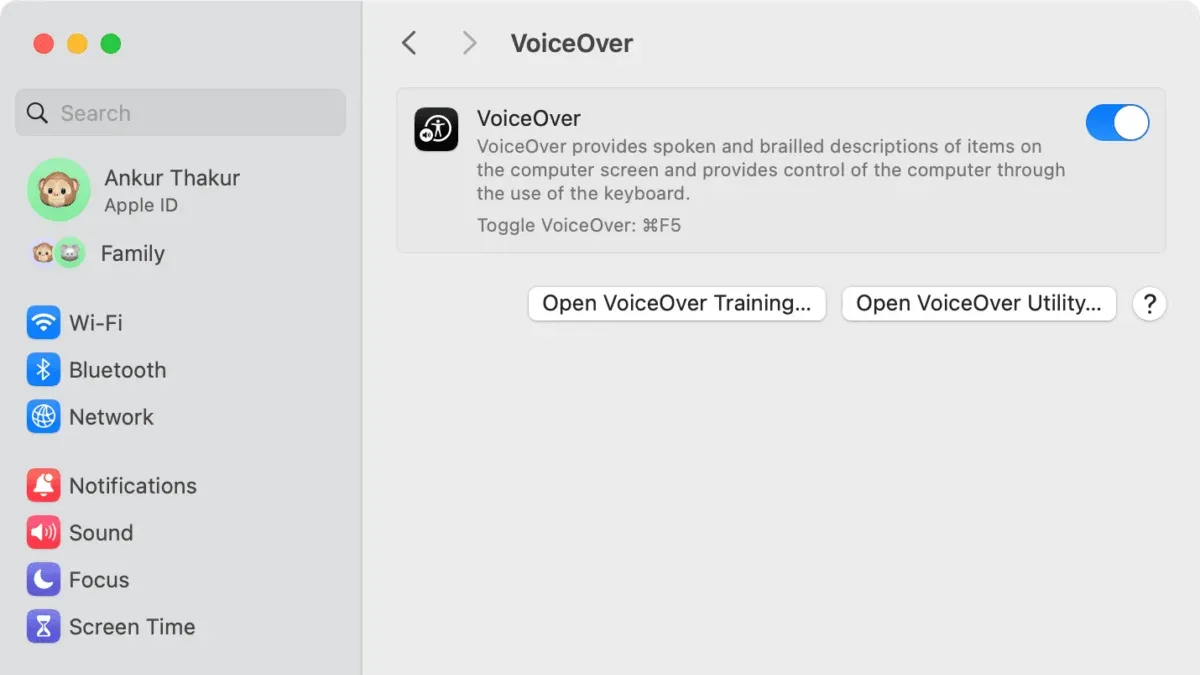
- Turn on VoiceOver quickly using Command + F5 or through System Settings > Accessibility > VoiceOver.
- Use VoiceOver commands specific to MacBook models for efficient navigation.
- Customize VoiceOver settings such as verbosity, speech rate, and braille support in System Settings.
- Trusting a computer while VoiceOver is enabled requires specific gestures and steps.
- VoiceOver on Mac offers different capabilities compared to iPhone and iPad, with unique keyboard shortcuts and navigation methods.
Before you start: What you need to use VoiceOver on Mac
VoiceOver is a built-in screen reader on Mac that provides spoken descriptions of what appears on your screen, helping users navigate and interact using audio feedback. It supports a wide range of tasks, from reading text to announcing interface elements and controlling your Mac through keyboard shortcuts.
To use VoiceOver, your Mac must be running macOS versions starting from Mac OS X 10.4 Tiger onward, with the feature continually improved in subsequent releases. Most modern Mac models support VoiceOver, including MacBook, MacBook Air, MacBook Pro, iMac, Mac mini, and Mac Pro.
Hardware-wise, VoiceOver works best when you have access to a keyboard and either the built-in trackpad or an external pointing device. The keyboard is essential for navigating VoiceOver commands, which rely heavily on key combinations. External devices such as USB or Bluetooth keyboards, trackpads, and braille displays are also supported.
For context, VoiceOver is not exclusive to Mac; it is also available on iPhone, iPad, and Apple Watch, with similar functionality adapted to those devices’ interfaces. Understanding these similarities can help if you use multiple Apple products and want a consistent accessibility experience.
- Check your Mac model and ensure it is from the last decade or so, as all recent MacBooks, MacBook Airs, and MacBook Pros support VoiceOver. You can verify your model by clicking the Apple menu > About This Mac.
- Confirm your macOS version is Mac OS X 10.4 Tiger or later by opening System Preferences > Software Update or About This Mac. VoiceOver is included by default in all supported versions.
- Ensure you have a functioning keyboard connected, either built-in or external, as VoiceOver commands rely on keyboard shortcuts. You can test your keyboard in System Preferences > Keyboard.
- Make sure you have access to a trackpad or mouse, which helps with navigation and pointer control when VoiceOver is active.
How to turn on VoiceOver on Mac
Activating VoiceOver on your Mac can be done quickly using different methods depending on your preference and device. Here are the most common ways:
- Press Command + F5 on your keyboard. On some Mac models, especially those with Touch Bar or newer function key setups, press Fn + Command + F5 instead. When VoiceOver activates, you will hear a spoken confirmation stating "VoiceOver on".
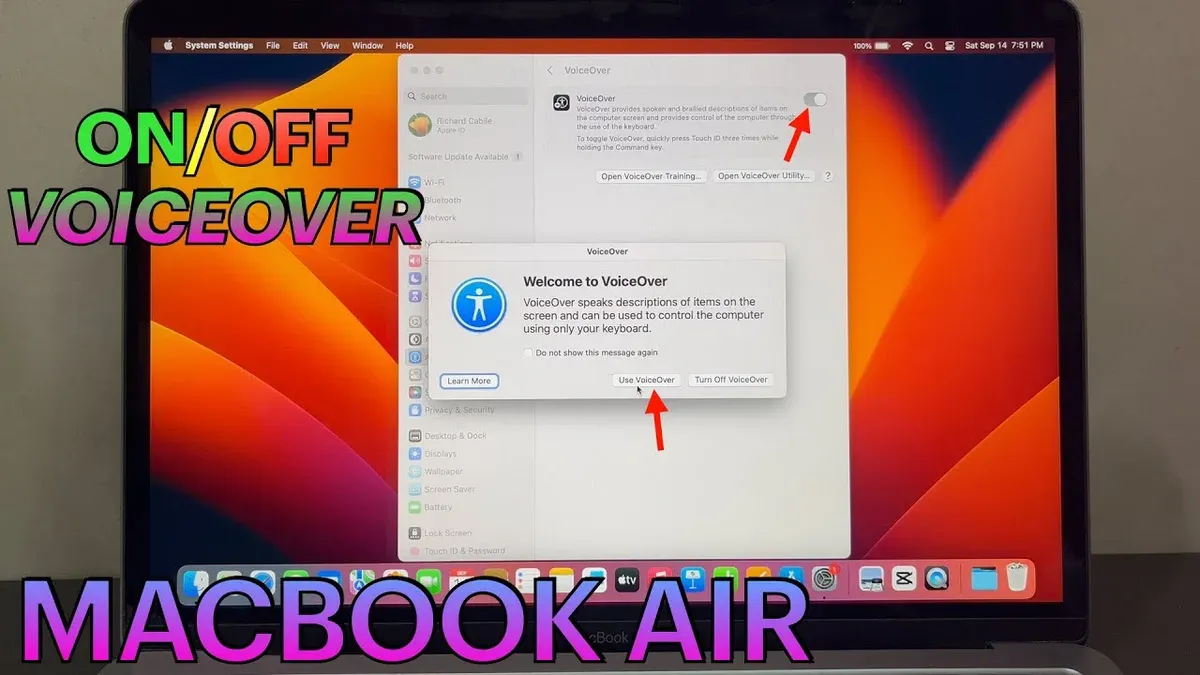
- Open System Preferences from the Apple menu and select Accessibility. In the sidebar, click VoiceOver, then check the box labeled Enable VoiceOver. You will immediately hear the VoiceOver introduction.
- Use Siri by clicking its icon or pressing the dedicated key (if available) and say, "Turn on VoiceOver." Siri will confirm by enabling the feature.
To turn off VoiceOver, use the same methods: press Command + F5 (or Fn + Command + F5), uncheck the box in Accessibility preferences, or ask Siri to "Turn off VoiceOver." You will hear a confirmation such as "VoiceOver off."
Note that the keyboard shortcut behavior may vary depending on your Mac’s model and keyboard settings. If the shortcut does not work, verify your function key settings under System Preferences > Keyboard and ensure the function keys are set to act as standard function keys or try other activation methods.
How to use VoiceOver on MacBook, MacBook Air, and MacBook Pro
Using VoiceOver on MacBook models involves mastering both keyboard navigation and trackpad gestures tailored to each device's hardware. The VoiceOver cursor lets you move through items on screen, while the rotor helps you quickly access controls, navigation options, and speech settings.
- Place three fingers on the trackpad and rotate them clockwise or counterclockwise to activate the VoiceOver rotor; you should hear the rotor options announced, allowing you to select navigation types like headings, links, or form controls.
- Use the VoiceOver cursor to move between elements by pressing Control + Option + Right or Left Arrow; as you navigate, VoiceOver will read aloud the item under the cursor.
- On MacBook Air and MacBook Pro with Force Touch trackpads, press down with three fingers to perform a VoiceOver click, which simulates a mouse click; you will hear the VoiceOver confirmation sound indicating the action succeeded.
- Customize VoiceOver commands to fit your MacBook keyboard by opening the VoiceOver Utility (Control + Option + F8), selecting the Commanders category, and remapping keys to preferred shortcuts, improving efficiency.
- Note that MacBook Pro models with Touch Bar offer additional VoiceOver controls through the Touch Bar interface, allowing quick access to common commands and rotor settings without keyboard input.
- Practice combining trackpad gestures and keyboard navigation to adapt to the slightly different hardware layouts and gesture sets between MacBook Air and MacBook Pro for seamless VoiceOver use.
How to use VoiceOver to trust a computer on Mac
The "Trust This Computer" prompt appears when you connect your Mac to an external device, such as an iPhone or iPad, for the first time. This prompt requests permission to allow data exchange between the Mac and the connected device. Using VoiceOver to interact with this dialog ensures accessibility for users relying on screen reading.
Follow these steps to navigate and activate the trust option using VoiceOver:
- When the "Trust This Computer" dialog appears, VoiceOver will announce the message and highlight the buttons available, typically "Trust" and "Don't Trust."
- Use the VoiceOver navigation command Control + Option + Right Arrow to move the VoiceOver cursor to the "Trust" button. You should hear VoiceOver read "Trust button."
- Press Control + Option + Spacebar to activate the "Trust" button. This confirms your choice and dismisses the dialog.
- After activation, VoiceOver will announce that the dialog has closed, and the Mac will begin syncing with the trusted device if applicable.
Tips for relying solely on VoiceOver: If the dialog does not appear immediately, try disconnecting and reconnecting the device. Use the VoiceOver rotor (Control + Option + U) to navigate through different UI elements if the default navigation commands do not highlight the dialog buttons. Patience is key, as these prompts can sometimes take a moment to become active.
Using VoiceOver commands deliberately on the trust dialog ensures you can securely and confidently allow your Mac to communicate with other devices without needing visual confirmation.
How to customize VoiceOver settings on Mac for better usability
Customizing VoiceOver on your Mac can greatly enhance your experience by aligning the tool with your preferences. Begin by opening VoiceOver Utility: press Command + F5 to activate VoiceOver, then press Control + Option + F8 to open the Utility window.
- Adjust speech settings: In VoiceOver Utility, select the Speech category on the left panel. Here, you can change the Voice from the drop-down list, choosing options like Alex or Samantha, and adjust the Speech Rate slider to slow down or speed up the spoken text. You will hear a preview of the voice at the selected speed.
- Set verbosity preferences: Click the Verbosity category. You can toggle options such as announcing punctuation, hints, or hints for text editing. For example, enabling "Speak punctuation" allows VoiceOver to read symbols like commas and periods, which can be helpful for detailed proofreading.
- Configure Braille and audio: Under the Braille category, connect and set up supported Braille displays. For audio output, visit the Audio section to select your preferred output device and adjust audio ducking, which lowers other sounds when VoiceOver is speaking.
- Customize navigation and rotor settings: Choose the Navigation category to modify how VoiceOver moves through content, including options for keyboard navigation and quick navigation keys. Under Rotor, you can add or remove items like links, headings, or form controls to tailor the rotor menu to your workflow.
- Save and manage profiles: Use the Profiles tab to create, save, and switch between different VoiceOver configurations. This is useful if you use your Mac for various tasks requiring different settings, such as coding versus reading documents.
Each step provides immediate feedback through VoiceOver's speech or Braille output, confirming the changes. You can close VoiceOver Utility when you finish customizing, and the settings will apply system-wide for your VoiceOver use.
How VoiceOver on Mac compares to VoiceOver on iPhone and iPad
VoiceOver on Mac and iOS devices share core accessibility features, including spoken descriptions of screen elements, navigation by rotor, and support for Braille displays. Both platforms use a VoiceOver cursor to indicate focus and provide auditory feedback, maintaining consistency across devices.
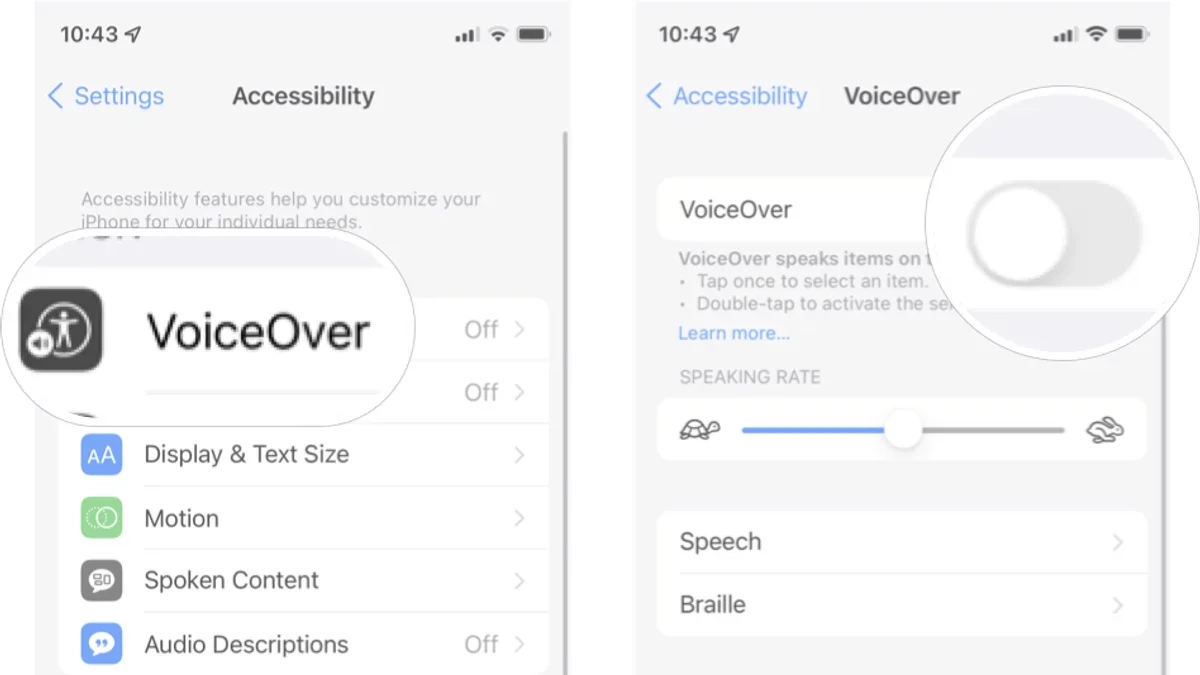
However, hardware differences lead to distinct gesture and navigation methods. On iPhone and iPad, VoiceOver relies heavily on touch gestures like three-finger swipe for scrolling and single-finger exploration. Mac VoiceOver, conversely, uses keyboard commands and trackpad gestures, such as Control-Option arrow keys for navigation and three-finger flicks on the trackpad.
| Feature | VoiceOver on Mac | VoiceOver on iPhone/iPad |
|---|---|---|
| Primary Input | Keyboard + Trackpad/Mouse | Touchscreen Gestures |
| Navigation | Control-Option keys, trackpad gestures | Touch gestures (single-finger explore, swipe) |
| Rotor | Control-Option-U to open rotor menu | Rotate two fingers on screen |
| Speech Customization | System Preferences > Accessibility > VoiceOver | Settings > Accessibility > VoiceOver |
To adapt your iOS VoiceOver skills to Mac, focus on learning keyboard shortcuts and trackpad gestures. For example, the Control-Option keys (called the VoiceOver modifier keys) on Mac replace many touch gestures from iOS. Practice navigating menus and lists with these keys combined with arrow keys.
For users familiar with VoiceOver on iPhone or iPad, Apple offers a detailed guide specifically for iOS VoiceOver usage. Exploring that resource alongside this Mac guide can smooth the transition and help you leverage the strengths of each platform effectively.
Troubleshooting common VoiceOver issues on Mac
If VoiceOver does not turn on or off as expected, try resetting the feature by pressing Command (⌘) + F5 twice. You should hear the VoiceOver welcome message when it activates successfully. If there is no response, check System Preferences > Accessibility > VoiceOver to ensure it is enabled.
When VoiceOver voice does not speak or the wrong voice is selected, open System Preferences > Accessibility > VoiceOver > Speech. Confirm the selected voice is appropriate and that the volume is not muted. Changing the voice and testing speech output immediately should resolve the issue.
If trackpad gestures stop working with VoiceOver, ensure that VoiceOver trackpad commander is enabled. Go to System Preferences > Accessibility > VoiceOver > Trackpad Commander and verify the checkbox is selected. If gestures remain unresponsive, restarting your Mac often restores proper function.
VoiceOver freezing or lagging during use can stem from resource-heavy apps or system overload. Closing unnecessary applications and restarting VoiceOver can help. If problems persist, reboot your Mac. Occasionally, running macOS software updates resolves performance bugs affecting VoiceOver.
- Attempt to toggle VoiceOver with Command + F5 twice; listen for the welcome message indicating activation.
- Check VoiceOver speech voice in System Preferences > Accessibility > VoiceOver > Speech; select a different voice and test speech output.
- Enable Trackpad Commander in System Preferences > Accessibility > VoiceOver > Trackpad Commander if trackpad gestures fail.
- Close unused applications and restart VoiceOver to reduce lag or freezing.
- Restart your Mac if issues persist, and check for macOS updates under System Preferences > Software Update for potential fixes.
- How to Turn On Zoom Accessibility on Mac: Step-by-Step Guide
- How to Increase Cursor Size on Mac: Clear Step-by-Step Guide
- How to Enable and Use Type to Siri on Your Mac
- How to Change Siri Voice on Mac: A Step-by-Step Guide
Frequently asked questions
How to use voice on mac?
You can use voice on Mac by enabling VoiceOver or the Speech feature. To turn on VoiceOver, press Command + F5 or go to System Settings > Accessibility > VoiceOver and toggle it on. For text-to-speech, go to System Settings > Accessibility > Spoken Content, and enable "Speak selection" or use the keyboard shortcut Option + Esc to read selected text aloud.
How to use voiceover on ipad?
On iPad, enable VoiceOver by going to Settings > Accessibility > VoiceOver and turning it on. Once active, you use gestures like swiping and tapping to navigate the screen, and VoiceOver will read aloud the items you select. Familiarizing yourself with VoiceOver gestures is key for effective use.
What is mac voiceover?
Mac VoiceOver is a built-in screen reader that provides spoken descriptions of what’s on your screen. It helps users with visual impairments by reading text, interface elements, and controls aloud. VoiceOver also supports braille displays and keyboard navigation for a more accessible Mac experience.
How to use voiceover on iphone?
To use VoiceOver on iPhone, open Settings > Accessibility > VoiceOver and switch it on. VoiceOver changes touch interactions so that tapping an item reads it aloud, and gestures like swipe and double-tap control navigation and activation. Learning these gestures improves your ability to navigate apps and content.
How to use voice on Mac
To use voice features on Mac, you can enable VoiceOver for full screen reading or use spoken content options to have selected text read aloud. Access these settings in System Settings under Accessibility. Using keyboard shortcuts like Command + F5 for VoiceOver or Option + Esc for speaking selection helps you quickly access voice functions.
What this guide does not cover
This guide does not cover advanced scripting or development with VoiceOver APIs, which require specialized knowledge and tools beyond basic user settings. If you need to integrate VoiceOver into custom applications or create tailored accessibility scripts, consider consulting developer resources or accessibility experts. Additionally, this article does not address third-party screen readers or alternative assistive technologies that may offer different features or compatibility.
The most useful next step is to explore the VoiceOver Utility by pressing Command + F5 to enable VoiceOver, then opening System Preferences > Accessibility > VoiceOver and clicking the Utility button. This allows you to fine-tune navigation, verbosity, and speech settings tailored to your workflow, enhancing both efficiency and comfort when using your Mac’s screen reading capabilities.