
Fix ‘This Apple ID Has Not Yet Been Used in the iTunes Store’ on Mac
Learn how to fix the ‘This Apple ID Has Not Yet Been Used in the iTunes Store’ error on your Mac with simple setup and troubleshooting steps.
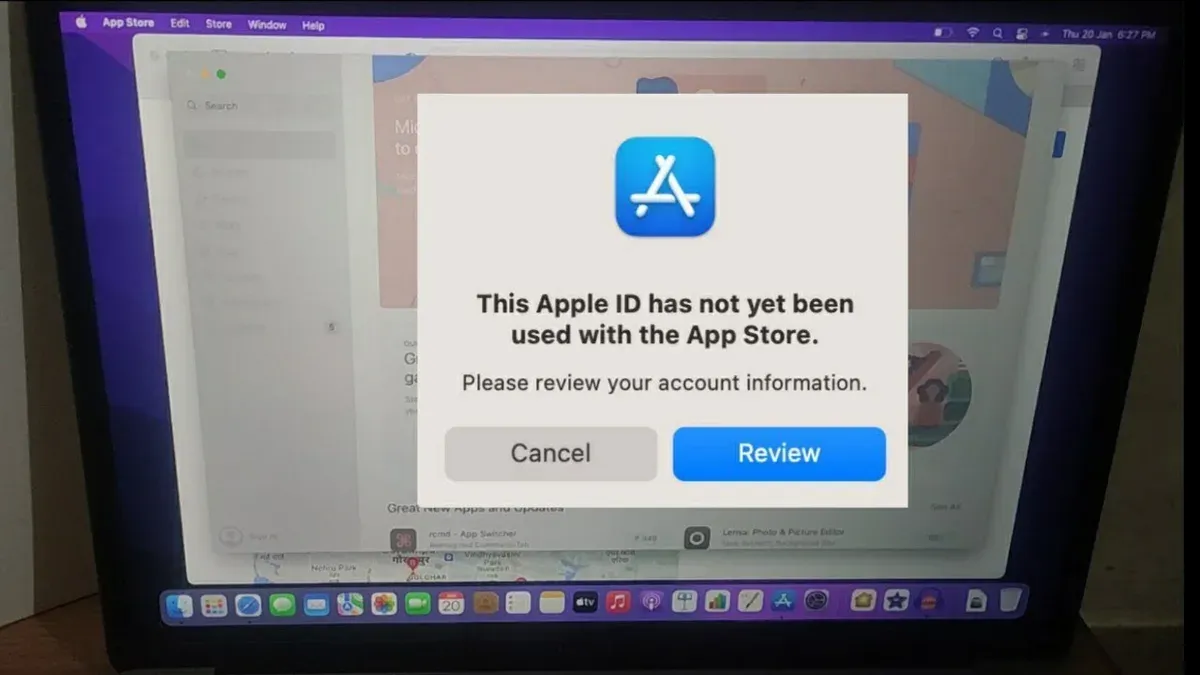
You open the App Store on your Mac, ready to download an app or music, but a message pops up saying, “This Apple ID has not yet been used in the iTunes Store.” This can be confusing if you’ve already signed in with your Apple ID elsewhere. Resolving this requires completing a few setup steps to activate your Apple ID for the iTunes Store specifically on your Mac.
This article walks you through a clear, patient, step-by-step process for the this Apple ID has not yet been used in the iTunes Store on Mac fix. You will learn how to sign in correctly, complete your Apple ID setup for store use, verify your email, and troubleshoot common issues that might block your access.
Key takeaways
- Sign in to both the App Store and iTunes with the same Apple ID to avoid conflicts.
- Complete all required Apple ID setup screens, including payment and billing details, within the iTunes Store interface.
- Verify your Apple ID email address to confirm your account is ready for purchases and downloads.
- Keep your macOS and Apple Music or iTunes apps updated to prevent compatibility issues.
- Reset Apple ID store settings on your Mac if you encounter persistent errors.
Before You Start: What You Need to Prepare
Before you begin fixing the “This Apple ID Has Not Yet Been Used in the iTunes Store” error on your Mac, it’s important to gather all the necessary information and ensure your setup is ready. You need a valid Apple ID and its password at hand since you will sign in and possibly verify your account. Make sure your Mac has a stable internet connection; an interrupted or weak connection can cause setup processes to fail or stall.
Next, have your payment method details ready along with your billing address. These details are often required to complete your Apple ID activation for the iTunes Store. Typical billing address fields include your full name, street address, city, state or region, postal code, and a phone number. The presence of these details confirms your account can be fully registered for store use.
Lastly, understand that seeing this error does not mean your Apple ID is locked or invalid. Instead, it means your Apple ID has not been fully activated for making purchases or downloads from the iTunes Store. Being clear on this helps you approach the steps calmly and avoid unnecessary concerns.
- Confirm you know your Apple ID email and password. Successful sign-in means you reach your Apple ID account page.
- Check your Mac’s Wi-Fi or Ethernet connection by opening a webpage. The page should load without delay.
- Gather your payment method (credit/debit card, PayPal, or other accepted forms) and billing address details. You should be able to provide full info when prompted during setup.
- Recognize that this error indicates incomplete setup, so proceed with the activation steps calmly.
Sign In to the App Store and iTunes on Your Mac
- Open the App Store app from your Mac’s Dock or by searching for it with Spotlight. You should see the App Store homepage load.
- Click Sign In in the lower-left corner or select Store > Sign In from the menu bar. Enter your Apple ID email address and click Next.
- When prompted, enter your Apple ID password. If you have two-factor authentication enabled, check your trusted device or phone for the verification code, then enter it to complete signing in.
- Once signed in, your Apple ID email should appear in the same lower-left corner or under the Store menu, confirming you are logged in.
- Next, open the Music app on your Mac. If your macOS version uses the standalone iTunes app, open that instead.
- In the Music app, click on iTunes Store in the sidebar. If the sidebar is hidden, enable it from View > Show Sidebar.
- Look for the Sign In button at the top right of the iTunes Store window and click it. Sign in again using your Apple ID credentials. This step triggers the activation process for your Apple ID in the iTunes Store.
- After signing in successfully, the iTunes Store should display your account name or email address instead of the Sign In button, confirming activation has started.
Following these steps ensures your Apple ID is recognized both in the App Store and iTunes Store on your Mac, which is essential for accessing purchases and media content.
Complete Your Apple ID Setup for the iTunes Store
After signing in to the iTunes Store on your Mac, you might see a prompt to review and complete your Apple ID setup. This process ensures your account is ready for purchases, downloads, and other store activities.
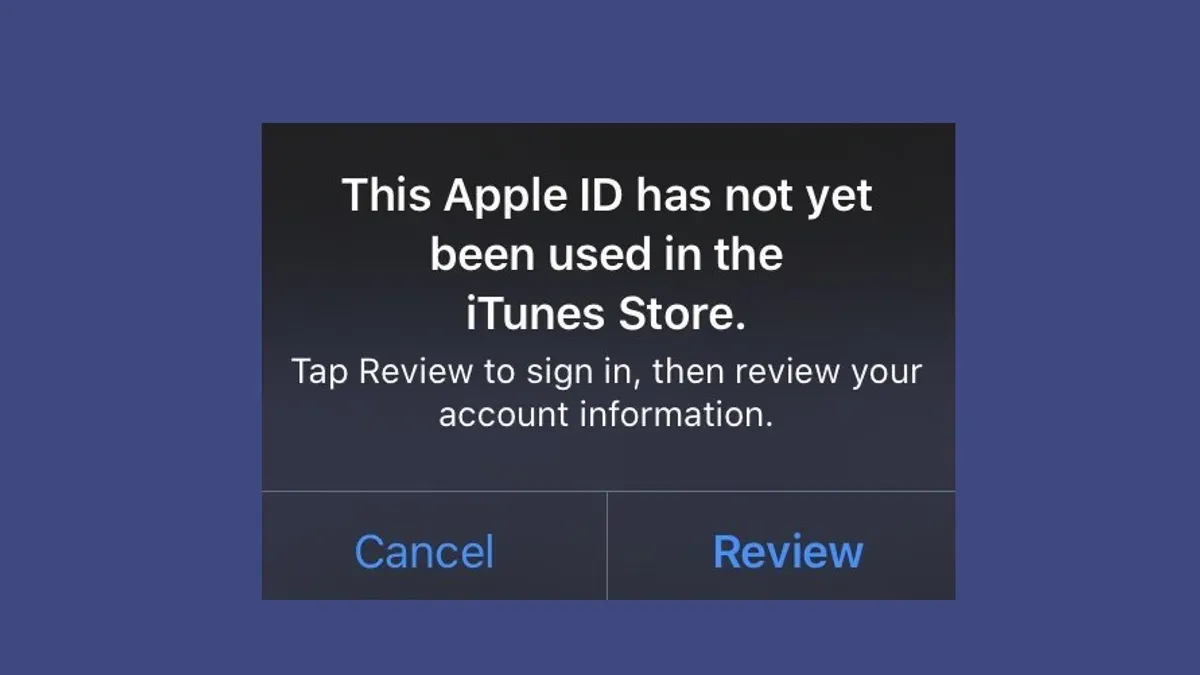
- Review your Apple ID information: The setup screen will display fields such as your name, date of birth, and contact email. Confirm these details are correct and update them if necessary. When done correctly, you will be able to proceed to the next step.
- Provide or confirm a payment method: You can choose from credit card, PayPal, or select "None" if the option is available. If you add a payment method, enter the card number, expiration date, and security code accurately. Selecting "None" allows access without storing payment details but may limit some purchase types. After entering this information, the button to continue will become active.
- Enter your billing address: Accurately fill in the billing address fields, including street address, city, state or province, postal code, and country. This information must match your payment method's billing details to comply with store policies. Once entered, the system will accept the data and allow you to move forward.
- Agree to the terms and conditions: Read through the Apple Media Services terms, then check the agreement box to confirm your acceptance. This step is mandatory to finalize your Apple ID setup for using the iTunes Store. When accepted, you can click "Done" to complete the process.
Typical setup screens feature labeled input fields for each required item and buttons like "Continue" or "Done" that activate once all necessary information is entered. If you skip adding a payment method, you will see options limited to free downloads and some account features, but your Apple ID will still be fully activated for use.
Verify Your Apple ID Email Address
Verifying your Apple ID email address is a crucial step in fully activating your account for use in the iTunes Store. An unverified email can block the activation process, causing the "This Apple ID has not yet been used in the iTunes Store" error to persist. To confirm your email status, visit appleid.apple.com and sign in. Look for a notification or status indicating whether your email is verified.
If your email is not verified, you need to resend the verification email and confirm it promptly. Sometimes, these emails may be directed to your spam or junk folder, so be sure to check there if you don’t see it in your inbox. Failing to verify your email is one of the more common reasons for activation issues, as Apple requires this confirmation to link your Apple ID fully to the iTunes Store.
- Go to appleid.apple.com and sign in with your Apple ID and password. You should see your account details.
- Look for a message or label near your email address stating "Verified" or "Unverified." If it says "Unverified," click the option to resend the verification email.
- Open your email inbox and locate the verification email from Apple. If you don’t find it within a few minutes, check your spam or junk folder.
- Click the verification link in the email. A webpage should open confirming your email address is now verified.
- Return to your Mac and attempt to use the iTunes Store again. The activation error should no longer appear once verification is complete.
By following these steps, you ensure your Apple ID is recognized as fully activated by Apple's systems, enabling smooth access to iTunes Store services on your Mac.
Update macOS and Apple Music or iTunes Apps
Outdated system software and store-related apps can cause conflicts that prevent your Apple ID from authenticating properly in the iTunes Store. To avoid this, you need to ensure both macOS and your Music or iTunes app are up to date. Updates often include bug fixes and security improvements that maintain smooth Apple ID functionality.
- Open System Preferences from the Apple menu and click Software Update. If an update is available, click Update Now. Once the update completes, your Mac might restart automatically. Successfully installing an update means you have the latest macOS version compatible with your device.
- Launch the App Store app on your Mac and select the Updates tab. Look for any available updates for the Music or iTunes app. Click Update next to the app if shown. After the update finishes, the app will be on its newest version, which helps prevent authentication errors.
- Restart your Mac after completing all updates. This step ensures all changes take effect fully and any temporary issues caused by outdated software are cleared. Once your Mac is back on, try signing in to the iTunes Store again to check if the problem is resolved.
Common issues from outdated software include failed Apple ID sign-in attempts, error messages related to store access, and unexpected app crashes. Keeping your system and apps current helps maintain compatibility with Apple’s servers and services.
Reset Apple ID Settings for the Store on Your Mac
If you continue to see the “This Apple ID has not yet been used in the iTunes Store” error after completing the usual steps, resetting your Apple ID settings related to the store on your Mac can help clear corrupted data and trigger a fresh activation. This process signs you out entirely, clears cache and preference files, and allows the system to rebuild store-related data from scratch. Keep in mind that resetting these settings may temporarily remove saved preferences, but it often resolves stubborn account activation issues.
- Open the App Store app on your Mac and click Store in the menu bar, then choose Sign Out. Repeat this in the Music or iTunes app if it is separate on your Mac. After signing out, your Apple ID will no longer be active on these apps.
- In Finder, press Shift + Command + G to open the "Go to Folder" window. Enter
~/Library/Caches/com.apple.appstoreand delete all contents of this folder. This clears the App Store cache. - Next, use the "Go to Folder" window again to navigate to
~/Library/Preferences/. Find and delete files namedcom.apple.appstore.plistandcom.apple.iTunes.plistif present. These preference files hold Apple ID settings related to the store. - Restart your Mac to ensure all changes take effect and residual caches clear.
- After rebooting, open the App Store and Music or iTunes apps and sign back in with your Apple ID. You should be prompted to review and complete any necessary account setup steps anew, triggering a fresh activation.
Before resetting, note that this process removes local cache and preferences related to Apple ID store access. While it does not delete your Apple ID or purchases, you might need to re-enter some settings or accept terms again. This trade-off usually leads to a clean slate that helps resolve persistent activation errors.
Troubleshoot Common Failure Points
If you still encounter activation issues after completing the setup steps, several common causes may be blocking your Apple ID use in the iTunes Store. First, check for any restrictions or parental controls on your Mac that could limit access to the store. Navigate to System Settings > Screen Time > Content & Privacy Restrictions and ensure that the iTunes Store and App Store are allowed.
Next, verify that your payment method is valid and accepted in your region. An expired credit card or unsupported payment option often triggers errors like “Your payment method was declined.” You can review and update your payment information under System Settings > Apple ID > Payment & Shipping.
Also, confirm that your Apple ID is not locked or disabled by visiting Apple’s official support site at iforgot.apple.com. Common error messages such as “This Apple ID has been disabled for security reasons” indicate account restrictions that must be resolved through Apple.
If you have verified these points and activation still fails, contacting Apple Support is appropriate. Account-specific issues, including billing problems or unresolved security holds, require assistance from Apple directly to restore full store access.
- Open System Settings > Screen Time > Content & Privacy Restrictions and disable any restrictions on iTunes Store access. You should be able to open the store without restriction errors.
- Go to System Settings > Apple ID > Payment & Shipping and confirm your payment method is current and accepted. Successful validation prevents payment-related errors during activation.
- Visit iforgot.apple.com and enter your Apple ID to check for account locks or security holds. If unlocked, you will see confirmation allowing store use.
- If activation issues persist after these checks, use Apple Support to report your problem and receive account-specific guidance or resolution.
Frequently asked questions
Why does my Mac say ‘This Apple ID has not yet been used in the iTunes Store’?
This message appears when your Apple ID has not completed the initial setup required for iTunes Store use. Before you can make purchases or download free content, you need to review and accept the store terms and conditions, and provide necessary account details like billing information. Until you finish this setup, the system treats your Apple ID as inactive for the iTunes Store.
Can I use an Apple ID without adding a payment method to the iTunes Store?
Yes, you can use an Apple ID without a payment method if you only download free content. When setting up your account, simply choose the “None” option under payment methods. However, if you want to buy apps, music, or subscriptions, you must add valid billing information to complete the setup.
What happens if I enter incorrect billing information during Apple ID setup?
Entering incorrect billing details can prevent your Apple ID from activating fully for store purchases. The system may reject the information, causing errors or repeated prompts to update your payment method. To resolve this, double-check your billing address, card number, expiration date, and security code to make sure they match your bank’s records exactly.
How do I know if my Apple ID is fully activated for all Apple services?
You can verify activation by signing in to the iTunes Store or App Store and attempting to download free content or make a purchase. If you are not prompted to complete account setup, and your downloads proceed without error, your Apple ID is fully active. Additionally, checking your Apple ID account page for payment and billing details confirms completion.
What This Advice Does Not Cover
This article does not cover issues related to Apple ID security breaches or account recovery processes, which require separate support channels provided by Apple Support. If your Apple ID is managed by an organization, such as a workplace or school, or has special restrictions, some steps in this guide may not apply or might be blocked. This guide also assumes you have a basic familiarity with macOS System Preferences and app navigation, including signing in and managing your Apple ID.
The single most useful next step after following these instructions is to ensure your Apple ID email address is verified. Without verification, the iTunes Store will not allow full activation of your account, which is often the key reason for encountering the “This Apple ID has not yet been used in the iTunes Store” message. Check your inbox for the verification email, follow the link inside, and then revisit the App Store or iTunes to complete your setup.
See also: How to Fix Apple ID Verification Failed on Mac: Step-by-Step Guide



