How to Auto Rename Files Using Automator on Mac
Discover easy steps to auto rename files in Automator on Mac and streamline your batch file management with effective automation.
Handling a large batch of files can be time-consuming, especially when you need to rename each one systematically. If you use a Mac, Automator offers tools that let you automate this task, saving you considerable effort.
This article guides you step-by-step on how to auto rename files in Automator, showing practical workflows and common pitfalls to avoid. You'll also get an overview of Power Automate's renaming options to help you choose the best tool for your batch file management needs.
Key takeaways
- Automator’s "Rename Finder Items" action provides several renaming options like adding text, changing case, or numbering files.
- Power Automate offers cloud-based and cross-platform batch renaming but requires additional setup for Mac users.
- Preparing a backup before batch renaming prevents accidental data loss.
- Choosing the right renaming sequence minimizes errors, such as numbering before or after renaming.
- Automator workflows can be saved and reused for consistent batch processing.
Before you start: What you need to prepare
To get started with automating file renaming on your Mac, ensure you have a Mac computer running macOS. Automator is preinstalled on macOS, so you don't need to download anything extra, but you should be comfortable navigating its interface. Basic knowledge of file management, such as selecting files and understanding folder structures, will help you follow along smoothly.
Prepare a sample folder containing files you want to rename. This practice set allows you to test your automation without risking important data. Before building your workflow, decide on the naming pattern or scheme you want to apply, such as adding sequential numbers, dates, or custom text, so you have a clear goal.
If you want to compare Automator with alternatives or plan to use Microsoft Power Automate, ensure you have a Power Automate account set up and access to its desktop or web app. Having these prerequisites ready will prevent interruptions and make the process more efficient.
- Check that your Mac is running macOS and locate Automator in the Applications folder. When opened, you should see the Automator interface with options to create new workflows.
- Create or select a folder of files to practice renaming. Confirm you can view and select these files in Finder.
- Note your intended naming scheme clearly, for example, "ProjectName_001" format or "Date_Filename" pattern.
- If considering Power Automate, log in to your Microsoft account and verify you can access the Power Automate platform.
How to automatically rename files with Automator
Automator lets you batch rename files efficiently by creating a simple workflow. Start by launching Automator from your Applications folder and choosing to create a new Workflow or Application. Workflows run within Automator, while applications can be run independently by double-clicking.
- Select Get Specified Finder Items or Ask for Finder Items from the Actions library and add it to your workflow. The first lets you pre-select files, while the second prompts you to choose files each time you run the workflow.
- Add the Rename Finder Items action next. Automator will offer to add a Copy Finder Items action for safety; choose based on whether you want to keep originals.
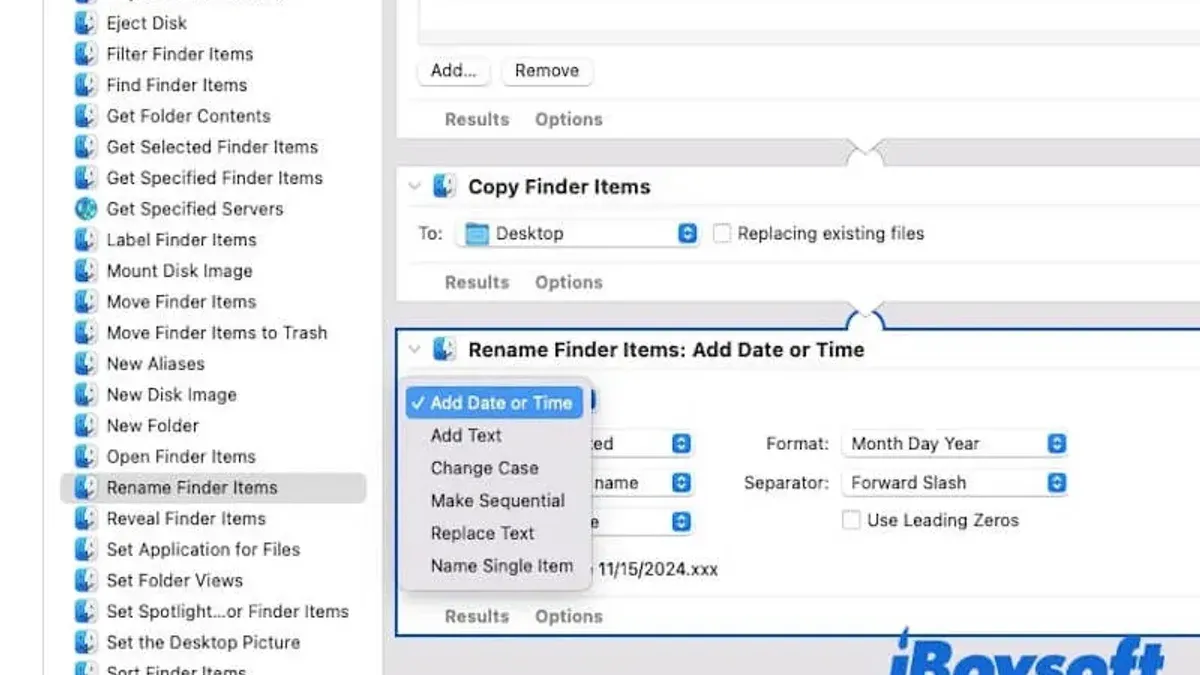
- In the Rename Finder Items action, pick a renaming option such as Add Date or Time, Replace Text, or Make Sequential. For example, select Make Sequential to add numbers like "IMG_001.jpg", "IMG_002.jpg".
- Configure the parameters carefully. For sequential numbers, set the starting number, number of digits, and where the number appears. Double-check to avoid overwriting files by previewing the changes.
- Save the workflow or application with a clear name so you can reuse it anytime batch renaming is needed.
- Run the workflow. After completion, verify the files in Finder to confirm the renaming applied correctly, matching your settings.
For example, files named "Vacation1.jpg", "Vacation2.jpg", "Vacation3.jpg" can be renamed to "Holiday_001.jpg", "Holiday_002.jpg", "Holiday_003.jpg" using the Replace Text and Make Sequential actions combined. This step-by-step approach reduces errors and saves time on repetitive renaming tasks.
How to rename something in files using Automator
To rename specific parts of file names, you use Automator’s Rename Finder Items action with the Replace Text option. This lets you target exact text within file names and substitute it with new text, which is useful for correcting or updating batches of files efficiently.
- Open your Automator workflow and add the Rename Finder Items action.
- In the action’s dropdown menu, select Replace Text.
- Enter the text you want to find in the Find field. For example, type “Draft”.
- Enter the replacement text in the Replace field, such as “Final”.
- Choose whether the search is case sensitive by checking or unchecking Ignore Case. Leaving it unchecked will match exact case only.
- To preview changes, select Show this action when the workflow runs to confirm replacements before applying.
- Click Run to see the updated file names where “Draft” is replaced by “Final”.
You can also add prefixes or suffixes by switching the dropdown to Add Text. Specify your prefix or suffix and whether it appears before or after the filename. For example, adding the prefix “2026_” helps organize files chronologically. Preview these changes too before confirming.
Using these options carefully avoids accidental renaming and ensures your batch process updates files exactly as intended.
How to rename files with Power Automate: An overview
Power Automate is a versatile automation tool primarily designed for Windows users but also supports cross-platform workflows through cloud services. It integrates seamlessly with OneDrive, SharePoint, and local file systems, enabling automated file management tasks including renaming files as part of larger workflows. This flexibility makes it an option for users who work across Windows and Mac environments and want a centralized automation solution.
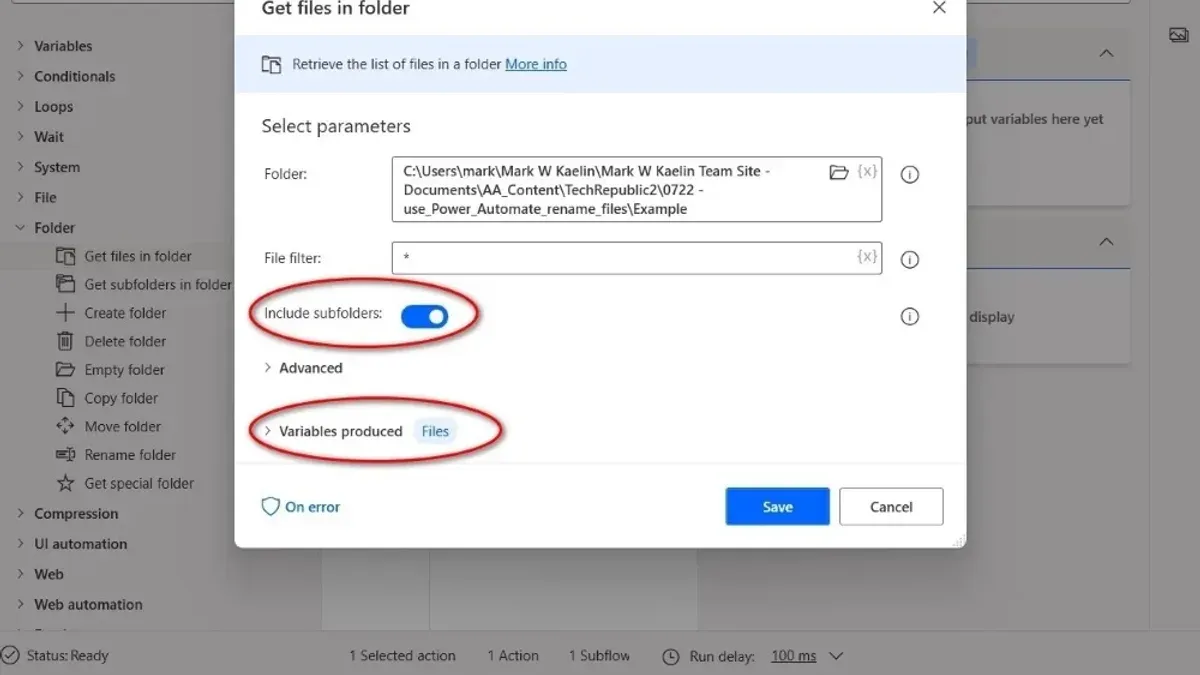
To create a flow that renames files, you start by selecting a trigger such as "When a file is created or modified" in OneDrive or SharePoint. Then, you add actions like "Get file metadata" and "Update file properties," or use the "Move file" action where you can specify a new name. For example, you can copy files to a new folder and rename them by appending dates or custom text during the process.
However, Power Automate’s file renaming capabilities are more limited on Mac, as it relies heavily on cloud-based connectors. Unlike Automator, it lacks direct macOS Finder integration and local file system access without additional setup. Power Automate is a better choice if you need to automate file renaming across cloud storage or mixed OS environments, especially when working with Microsoft 365 services.
| Feature | Automator | Power Automate |
|---|---|---|
| Platform Integration | macOS Finder and local files | OneDrive, SharePoint, Windows local files |
| Batch Renaming | Strong, with detailed options | Available mainly via cloud services |
| Cloud Service Support | Limited | Extensive |
| Cross-Platform Use | macOS only | Windows, cloud, some Mac capabilities |
| Custom Naming Options | Rich text and pattern editing | Relies on flow design and expressions |
- Open Power Automate and choose a trigger like "When a file is created" in OneDrive. You should see the trigger added to your flow.
- Add the "Get file metadata" action to retrieve current file details. Confirm that metadata is successfully fetched.
- Add the "Move file" action, specifying the destination folder and entering the new file name in the "Destination File Path" field. The new name can include dynamic content such as dates or custom text.
- Save and test your flow by uploading or modifying a file in the monitored folder. You should see the file renamed or moved automatically.
How to rename a lot of files efficiently
When renaming a large batch of files, using Automator's batch processing features carefully can save you significant time and reduce errors. Before applying your workflow to hundreds of files, test it on a small set—like 10 or 20 files—to ensure the renaming behaves as expected. This helps avoid mistakes that could require manual corrections later.
Backing up your original files before starting is crucial to prevent irreversible changes. Consider naming conventions that scale well, such as adding sequential numbering or timestamps, which keep your files organized and easy to identify. For example, renaming 100+ photos with sequential numbers like “Vacation_001.jpg,” “Vacation_002.jpg,” and so on can be completed in minutes, instead of hours manually.
Automator also lets you combine renaming with other actions like moving files to specific folders or sorting them by date. This lets you build efficient workflows that not only rename but also organize your files in one automated process.
- Create a new Automator workflow and add the “Get Specified Finder Items” action, selecting a small batch of files. When run, you should see those files queued up in Automator.
- Add “Rename Finder Items” with the desired settings like sequential numbering. Running this should rename just the test files correctly.
- Make a backup copy of your full file set outside the working folder to secure originals.
- Replace the test files in the “Get Specified Finder Items” action with your full batch, then run the workflow. The files should rename sequentially without errors.
- Add additional actions such as “Move Finder Items” to sort renamed files into folders automatically. Running this will both rename and organize your files efficiently.
Troubleshooting common issues when auto renaming files in Automator
If your files are not renaming or the workflow fails to run, first check if you have the necessary permissions. Right-click a file, select Get Info, and ensure Read & Write access is enabled for your user. Also, verify that files are not locked by unchecking the Locked box in the same Info window. Without proper permissions or if files are locked, Automator cannot modify them.
When duplicate names occur, Automator typically appends a number to the filename to avoid overwriting. However, if you see errors like "The operation can’t be completed because an item with the same name already exists," review your naming parameters to ensure uniqueness. Adjust your naming scheme by adding incremental numbers or unique text to prevent conflicts.
Unexpected naming results usually stem from incorrect parameters in actions like Rename Finder Items. Double-check options such as Add Date or Time format, or Replace Text patterns. Using the Show This Action When the Workflow Runs checkbox helps preview changes before finalizing.
If Automator freezes or crashes during batch operations, break the task into smaller batches and test on a few files first. System resource limits or problematic files can cause instability. Save your workflow and quit other apps to free memory.
Before applying your workflow to important files, test it on a sample folder. Watch for error dialogs like "Automator was unable to complete the action" and review your workflow steps. Screenshots of your configured Rename Finder Items action with correct settings can serve as a reference to avoid errors.
Frequently asked questions
Can power automate rename files?
Yes, Power Automate can rename files as part of its workflow automation capabilities. You can create flows that trigger on file creation or modification and then apply a rename action using connectors like OneDrive, SharePoint, or local file systems with gateway support.
How to rename file using power automate?
To rename a file using Power Automate, start by creating a flow triggered by an event such as file creation. Then, add an action like "Update file properties" or use the connector's specific rename action by setting the new file name in the appropriate field. Make sure the new name follows your desired convention and avoid invalid characters.
Can Power Automate rename files automatically?
Yes, Power Automate can automatically rename files based on triggers and conditions you define. For example, you can set it to rename files when they are uploaded to a folder, adding timestamps or prefixes without manual intervention.
How to rename file using Power Automate?
Renaming a file with Power Automate involves selecting the correct trigger and then inserting the rename step. Use actions like "Move file" or "Update file properties" depending on the file storage service, and specify the new file name using dynamic content or expressions to customize the name.
How to auto rename files when copying?
To auto rename files when copying, set up an automation that triggers on the copy event or when files are added to the destination folder. In Automator, you can use the "Rename Finder Items" action after the copy step. In Power Automate, include a rename action after copying the file, using dynamic naming patterns to avoid overwriting existing files.
What This Advice Does Not Cover
This article focuses on using Automator for macOS and Power Automate as alternatives for batch file renaming but does not cover advanced scripting techniques such as AppleScript or shell scripting. If your renaming needs involve highly customized patterns, conditional logic, or integration with other systems beyond what Automator or Power Automate offer, exploring dedicated third-party renaming software or writing custom scripts may be necessary. Additionally, this guide does not address file renaming on non-Mac platforms or complex workflows requiring database connections or cloud service automation beyond basic Power Automate flows.
To get the most from what you have learned here, try setting up a simple Automator workflow to rename a small batch of files first. This hands-on step helps you understand the interface and common options like adding dates, sequences, or replacing text. Once comfortable, you can expand your workflows or explore Power Automate’s cloud-based features for cross-device automation. Starting small and gradually increasing complexity ensures you avoid common pitfalls and build reliable, repeatable renaming processes.
See also: How to Create a Quick Action in Automator: A Step-by-Step Guide · How to Batch Convert Images Using Automator on Mac