How to Browse and Access Old Backups in Time Machine Easily
Discover how to access and explore old backups in Time Machine to restore files and manage your backups efficiently.
You’ve been using Time Machine to back up your Mac, but now you need to find a file or folder from a backup you made weeks or months ago. Navigating through the layers of backups can feel confusing if you’re unsure how to browse old backups in Time Machine effectively.
This article guides you step-by-step on how to access and explore your Time Machine backups so you can confidently find what you need. You'll learn not just how to open backups but also how to understand their contents and manage them safely. Whether restoring a single document or reviewing your backup history, this guide will help you avoid common pitfalls and handle your backups with ease.
Key takeaways
- Access old backups by entering Time Machine from the menu bar or System Preferences.
- Use the timeline on the right edge of the screen to navigate to specific backup dates.
- Preview files in backups before restoring to avoid unnecessary data replacement.
- Understand that Time Machine organizes backups by date and by file system structure.
- Ensure your backup disk is connected and mounted before browsing backups.
Before you start: What you need for Time Machine backups
To use Time Machine for backing up your Mac, you first need a suitable storage device. This can be an external hard drive or SSD connected via USB, Thunderbolt, or FireWire. Time Machine also supports network volumes such as a Time Capsule or a macOS Server shared drive. The storage device must be formatted as APFS or Mac OS Extended (Journaled) to be compatible with Time Machine.
Make sure your Mac is running macOS and that Time Machine is enabled in System Settings. Time Machine is built into macOS, but you must turn it on and select your backup disk before it starts working. It’s helpful to verify that the backup disk has sufficient free space, as backups can grow large depending on your data.
Time Machine backs up your entire system, including system files, applications, user accounts, documents, photos, and more. It handles multiple user accounts by backing up data for each user separately but within the same backup structure. This ensures all your personal data and system configurations are saved.
Backups are organized as hourly, daily, and weekly snapshots, each marked by date and time. This makes it easier to browse through various points in time and restore specific files or entire systems from those snapshots. Because Time Machine stores incremental changes, backup sizes vary depending on how much your data changes between backups.
How to set up Time Machine backup on your Mac
Setting up Time Machine for the first time involves selecting a backup disk and configuring your preferences to ensure your data is protected. Follow these steps carefully to get started and confirm that backups are running smoothly.
- Connect your external drive or network storage to your Mac. Once connected, open System Preferences from the Apple menu and click on Time Machine. You should see the Time Machine preference pane open, ready for configuration.
- Click Select Backup Disk. A list of available disks will appear; choose the external or network drive you want to use. After selection, the disk name will appear in the Time Machine pane, indicating it is set as your backup destination.
- Turn on automatic backups by toggling the switch next to Back Up Automatically. This ensures your Mac regularly saves snapshots without manual intervention. When enabled, you will see a status message confirming that automatic backups are active.
- If you want to exclude specific folders or files from backups, click Options. In the new window, use the + button to add items you do not want backed up. After adding exclusions, click Save to apply changes. This helps manage backup size and focus on important data.
- To start your first backup immediately, click the Time Machine icon in the menu bar and select Back Up Now. A progress bar will appear, showing the time remaining and data being backed up. This initial backup may take some time depending on the amount of data.
After these steps, your Mac will regularly create backups on the selected disk, allowing you to access and restore files from different points in time.
How to start and run a Time Machine backup manually
If you want to control exactly when your Mac backs up or need an immediate backup before making significant changes, you can start a manual Time Machine backup. This is useful when automatic backups haven't run recently or when you want to ensure your latest files are saved right away.
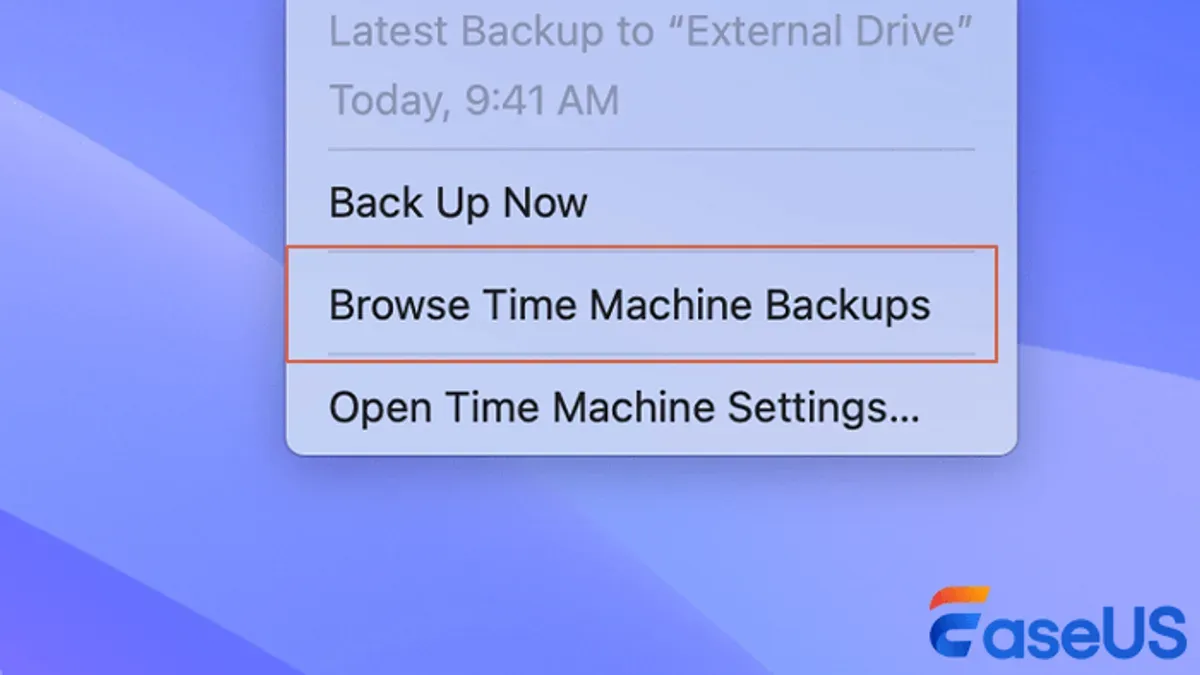
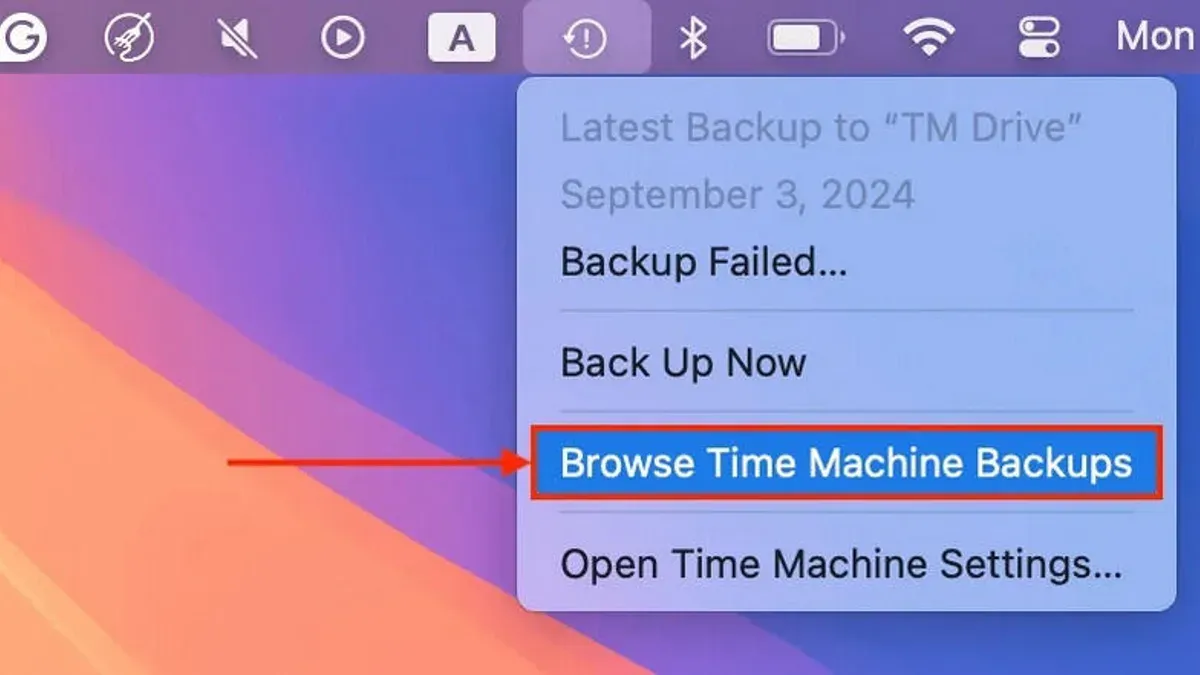
- Locate the Time Machine icon in the menu bar at the top-right of your screen. It looks like a clock with a circular arrow around it. If you don’t see it, go to System Settings > General > Control Center, then enable Time Machine in the menu bar.
- Click the Time Machine icon to open its menu. Select Back Up Now. Your Mac will begin a backup immediately.
- While the backup runs, click the Time Machine icon again to view progress. You will see a status message such as Backing up: x MB of y MB along with an estimated time remaining.
- Wait for the backup to complete. You can continue using your Mac during this process, but it's best to keep it connected to power to avoid interruptions.
- Manual backups work alongside automatic scheduled backups. Time Machine regularly backs up your system hourly, daily, and weekly, so manual backups provide extra control without interfering with the automatic schedule.
Using the menu bar icon for manual backups lets you instantly save your data whenever you choose, giving you peace of mind before important updates or changes.
How to access Time Machine backup and browse old backups
Accessing your Time Machine backups to browse and find older files is straightforward once you know where to look. You can enter the Time Machine interface directly from the menu bar if the icon is enabled, or through the Applications folder if not. This interface allows you to visually navigate through snapshots of your system taken at different points in time.
- Click the Time Machine icon in the menu bar and select "Enter Time Machine." If the icon isn’t visible, open the Applications folder, find Time Machine, and launch it. You should see a Finder window surrounded by a starry background indicating you are in the Time Machine interface.
- Use the timeline that appears along the right side of the screen to select a backup from a specific date. Alternatively, you can click the up and down arrows next to the Finder window to move through backups sequentially. Each step moves you closer to or further from the current state.
- Navigate through the folders inside the Finder window as you normally would to locate the file or folder you want to restore or examine. You can preview files by selecting them and pressing the space bar to ensure it’s the correct version.
- For example, to restore a document last edited two months ago, browse the timeline to that date, find the document, preview it to confirm, then click the “Restore” button at the bottom right. Your Mac will copy the file back to its original location.
- If you don’t see backups from several weeks or months ago, ensure the backup drive is connected and mounted. Time Machine stores hourly, daily, and weekly snapshots depending on storage, so older backups may be further down the timeline but remain accessible.
This visual and date-driven method helps you confidently browse through your backups, understanding the progression of your files over time and selecting exactly the version you need.
How to restore from Time Machine backup
Once you have located the files or folders you want to recover within Time Machine, restoring them is straightforward. You select the items and use the Restore button to bring them back to your Mac. The restored files will reappear in their original locations, making it easy to continue working with them as before.
- Navigate to the desired backup snapshot by using the timeline or arrows on the right side of the Time Machine window. You should see the Finder window showing the contents of that backup.
- Browse or search to find the specific file or folder you want to recover. Click to select it; you can select multiple items by holding the Command key.
- Click the Restore button at the bottom right of the window. You should see a progress bar indicating that the restore is in progress.
- After the restore completes, the selected items will appear in their original locations on your Mac. For example, a restored document in Documents will reappear in the Documents folder.
- If a file with the same name exists at that location, macOS will prompt you with options to either Keep Both, Replace, or Cancel. Choosing Keep Both will rename the restored file to avoid overwriting.
- For deleted files, restoring them will simply place them back in their previous folders, recovering them as if they were never deleted.
- For overwritten files, restoring will revert the version to the one from the selected backup date, allowing you to recover earlier edits or data.
By following these steps, you can confidently recover individual files or entire folders from your Time Machine backups without confusion or risk of permanent data loss.
How to clear or delete old backups in Time Machine safely
Over time, your Time Machine backup disk can fill up, especially if you have limited storage space. While Time Machine automatically manages storage by deleting the oldest backups when needed, you might want to manually remove specific backups to free up space or remove unnecessary data. Doing this correctly ensures you do not corrupt the backup set or lose important files.
You can delete old backups either through the Time Machine interface or directly in Finder. Using Time Machine to delete backups is safer because it handles the backup structure and metadata properly. Manual deletion in Finder requires extra caution and is recommended only for advanced users.
Deleting backups via Time Machine interface
- Open Time Machine by clicking its icon from the menu bar or launching it from the Applications folder. You should see the timeline on the right side of the screen.
- Navigate to the date of the backup you want to delete using the timeline or the arrows. The Finder window will show the contents of that backup.
- Click the gear icon in the Finder toolbar and select "Delete Backup". A confirmation dialog will appear.
- Confirm the deletion by entering your administrator password if prompted. Time Machine will safely remove that backup snapshot and reclaim disk space.
- After completion, check your backup disk free space in Finder to confirm the recovery of storage.
Deleting backups using Finder (advanced users only)
Manually deleting backups from the backup disk in Finder is not recommended because it can break Time Machine's backup integrity. If you must, you need to disable Time Machine first and then carefully delete entire dated backup folders located inside the "Backups.backupdb" folder. Afterward, re-enable Time Machine. However, this method risks data loss or corrupted backups and should be a last resort.
Understanding automatic vs. manual deletion
Time Machine automatically deletes the oldest hourly backups when your backup disk is nearly full, then daily, and finally weekly backups, preserving as much history as possible. Manual deletion lets you target specific backups to remove, such as those with large files you no longer need. For example, deleting a few old backups could recover several gigabytes of disk space instantly.
Always make sure you do not delete backups that contain files you might need later. Regularly review your backups and delete only those that are genuinely unnecessary to maintain a healthy backup history without wasting space.
Troubleshooting common Time Machine backup issues
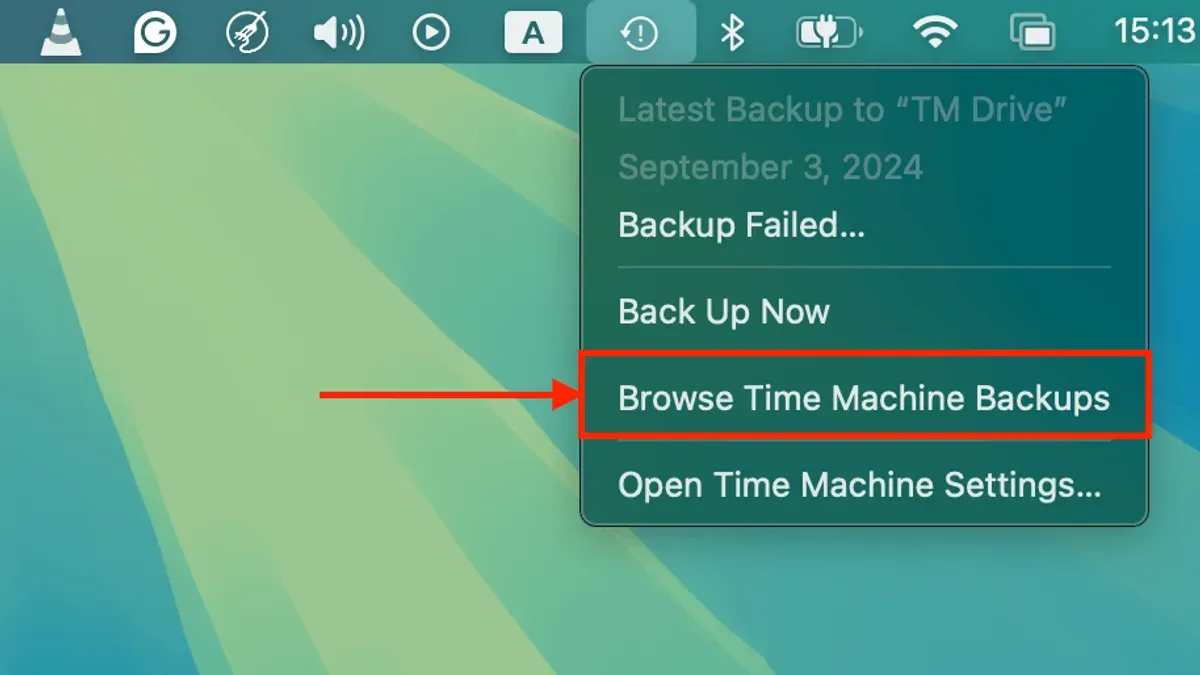
Sometimes Time Machine may not start a backup, fail mid-way, or prevent you from accessing old backups. These issues often stem from disk formatting problems, permission errors, or system glitches. Identifying the error messages and following precise steps can help resolve most problems.
If Time Machine backup is not starting
- Open System Preferences and select Time Machine. Ensure the backup disk is connected and shows as selected. You should see the name of the disk under "Backup Disk." If not, reconnect or select the correct disk.
- Check for error messages such as "Backup disk not available" or "Time Machine couldn’t complete the backup." If these appear, open Disk Utility, select your backup disk, and run "First Aid" to repair disk errors. Successful repair shows a confirmation message.
- Verify the backup disk format is compatible (APFS or Mac OS Extended Journaled). If incorrectly formatted, you may need to reformat the disk, which erases its contents, so back up important data first.
Fixing permission errors and slow backups
- Open Finder, right-click the backup disk, and select "Get Info." Check the Sharing & Permissions section to ensure you have Read & Write access. If not, click the lock icon, authenticate, and adjust permissions.
- If backups are unusually slow, close other heavy applications and check your network connection if using a network drive. Slow speeds often improve when the Mac is idle and connected via Ethernet rather than Wi-Fi.
- Delete any incomplete or corrupt backup snapshots via Time Machine’s interface by entering Time Machine, right-clicking the problematic backup, and choosing "Delete Backup." This frees space and can solve repeated failure issues.
When to seek professional help or alternatives
If backups consistently fail despite troubleshooting, or if the backup disk shows frequent errors in Disk Utility, consider consulting Apple Support or a professional. Additionally, keep an alternative backup strategy, such as cloud storage or a secondary external drive, to prevent data loss.
Frequently asked questions
How to backup with time machine?
To back up with Time Machine, first connect an external drive or use a network backup disk. Open System Settings and select Time Machine, then choose your backup disk. Time Machine will automatically start hourly backups once set up, keeping hourly, daily, and weekly snapshots.
How to start a time machine backup?
To start a Time Machine backup, open System Settings, click on Time Machine, and toggle the switch to turn it on if it isn’t already. Time Machine usually begins backups automatically, but you can initiate one manually by clicking “Back Up Now” from the Time Machine menu in the menu bar.
How to run time machine backup now?
If you want to run a backup immediately, click the Time Machine icon in the menu bar and select “Back Up Now.” This triggers an immediate backup without waiting for the next scheduled hourly backup.
How to start time machine backup manually?
Starting a manual backup is simple: click the Time Machine icon in the menu bar and choose “Back Up Now.” If the icon isn’t visible, enable “Show Time Machine in menu bar” in System Settings under Time Machine.
Does time machine backup all users?
Yes, Time Machine backs up all user accounts and system files on your Mac. It creates a complete snapshot of your entire startup disk, so all users’ data is included in the backup.
What This Advice Does Not Cover
This article does not cover migrating backups to new drives or restoring entire systems, which require specialized guides. If you need to move your Time Machine backups to a different external drive or perform a full macOS system restore, consult dedicated resources designed for those tasks. Additionally, Time Machine is designed specifically for macOS environments and is not natively compatible with Windows PCs. If you use a Windows computer, consider alternative backup solutions tailored for that platform.
Now that you understand how to browse and access your old backups confidently, the single most useful next step is to regularly verify your backup disk’s connection and health. Open System Preferences > Time Machine and check that your backup disk is listed and accessible. Running periodic manual backups and occasionally entering Time Machine to preview your backup contents ensures your data is safely archived and easily recoverable when needed.
See also: How to Restore an Entire Mac Using Time Machine: Step-by-Step Guide · How to Restore a Single File Using Time Machine on Mac