
How to Delete Render Files in Final Cut Pro: Step-by-Step Guide
Step-by-step guide to safely delete render files in Final Cut Pro and free up disk space without affecting your project.
You’ve been working on a complex video project in Final Cut Pro, and suddenly your storage space is running low. You know that render files can take up a significant amount of disk space, but you’re unsure about the safest way to remove them without disrupting your workflow.
This guide explains how to delete render files in Final Cut Pro step-by-step, helping you free up space while maintaining your project’s integrity. You’ll learn not just the actions to take but also the effects these deletions have, so you can manage your storage wisely and avoid common pitfalls.
Key takeaways
- Render files accumulate during editing and can consume large amounts of disk space.
- Use Final Cut Pro’s built-in options to delete all or only unused render files safely.
- Deleting render files does not delete your original media or project files.
- External tools can assist in identifying and removing render files beyond Final Cut Pro’s interface.
- Regularly managing render files helps optimize storage and maintain smooth editing performance.
Before you start: What you need to know about render files
Render files are the processed versions of your clips and effects in Final Cut Pro. When you apply effects, transitions, or color corrections, Final Cut Pro creates these files to play back your timeline smoothly without requiring real-time processing. They act like temporary, pre-rendered snapshots of your edits that improve performance during playback and exporting.
While render files boost editing efficiency, they can also consume significant disk space over time. For example, a typical 10-minute 4K project may generate several gigabytes of render data. Without managing these files, your storage can fill up quickly, potentially slowing down your system or limiting space for new projects.
Understanding which render files are safe to delete is key. Deleting render files tied to active timeline sections will cause Final Cut Pro to re-render those areas when you play back or export, which may lengthen processing time temporarily but does not harm your project. Conversely, unused or outdated render files can be safely removed to reclaim disk space without affecting your workflow.
As a reference, a 10-minute 4K project might occupy around 5 to 10 GB of render files, which can reduce to a fraction of that after deleting unused or unnecessary files. Knowing how to identify and remove these files effectively ensures you maintain optimal storage and performance.
How to delete render files in Final Cut Pro safely
Deleting render files directly within Final Cut Pro is the safest way to free up disk space without disrupting your projects. Follow these numbered steps to ensure a smooth process and avoid unintentional data loss.
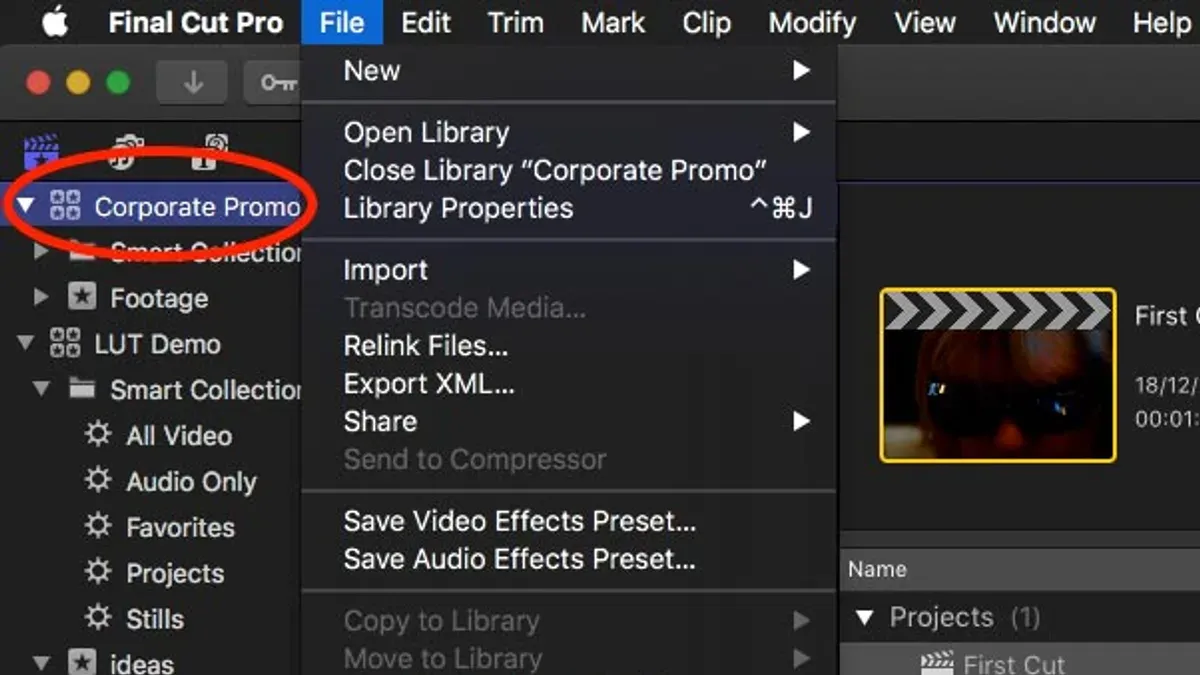
- Open your Final Cut Pro project and make sure the library you want to manage is active. Then, click on the File menu in the top menu bar. You should see a list of options related to your current library and project.
- From the File menu, select Delete Generated Library Files. This option controls render files, optimized media, and proxy media associated with the library. A dialog box will appear allowing you to choose what to delete.
- In the dialog, check the box for Delete Render Files. You will then see two options: Unused Only or All. Choose Unused Only if you want to remove render files not currently linked to any project clips, which minimizes risk. Select All if you want to remove every render file; keep in mind this will require re-rendering to restore smooth playback.
- After making your selection, click OK to confirm. Final Cut Pro will begin deleting the chosen render files. Depending on your library size, this may take a few moments. Once complete, you will notice recovered disk space reflected in your system storage or within Final Cut Pro’s library size indicators.
For example, deleting unused render files in a medium-sized library might free several gigabytes of space without affecting current project playback. This method ensures you only remove files that are safe to delete, preserving your workflow efficiency.
Remember, if you delete all render files, your next playback may require re-rendering, which can temporarily slow down your editing process until renders are rebuilt.
How to delete unused render files in Final Cut Pro
Unused render files are those generated during editing but no longer linked to any active clips or effects in your project. Deleting only these files helps you free up disk space without affecting the smooth playback of your current timeline, making it the safest choice when you want to clean up without risking your work.
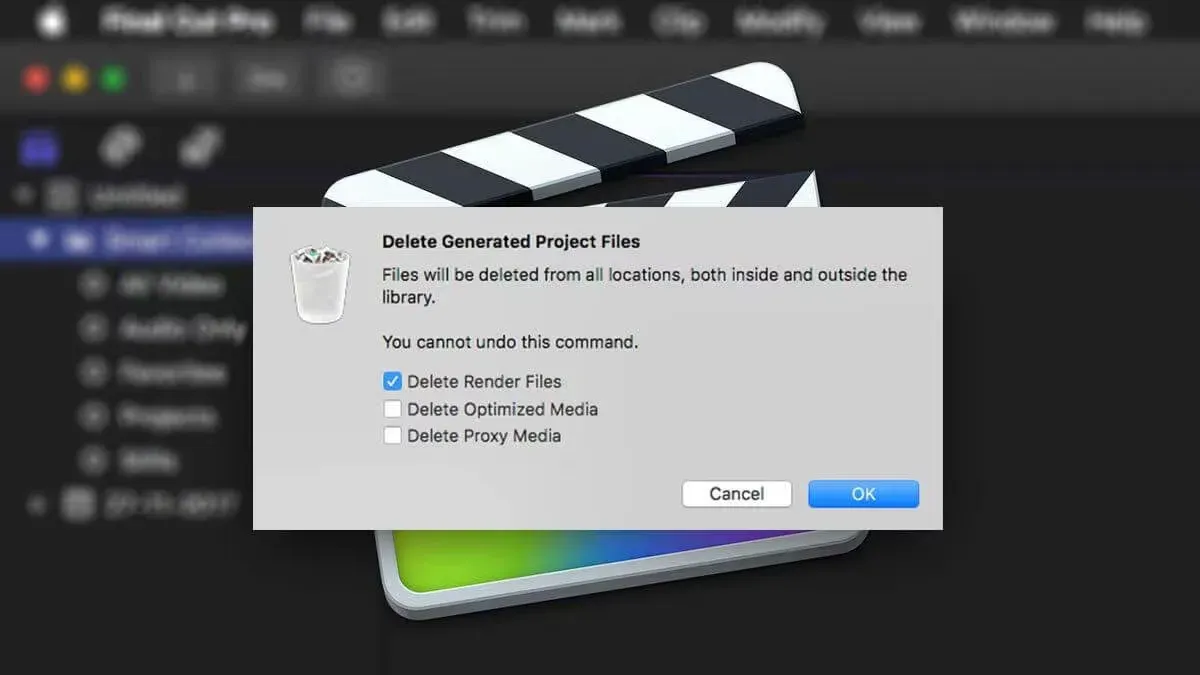
To delete unused render files, follow these steps carefully:
- Open your Final Cut Pro library in the Libraries sidebar and select the library you want to clean up.
- Go to the File menu and choose Delete Generated Library Files. A dialog box will appear.
- In the dialog, check the option labeled Delete Render Files and then select Unused Only. This ensures only render files not currently needed are targeted.
- Click OK to confirm. Final Cut Pro will remove unused render files and display progress.
- Once completed, you should notice recovered disk space, typically less than deleting all render files but safer for ongoing projects.
Choosing to delete only unused render files is preferable when you want to maintain uninterrupted editing and playback performance. For example, on a moderately complex project, removing unused render files might free tens of gigabytes, while deleting all render files could reclaim significantly more but requires re-rendering later. This approach balances efficient storage management with workflow stability.
Is it safe to delete render files in Final Cut Pro?
Yes, deleting render files in Final Cut Pro is generally safe and will not affect your source clips or project timelines. Render files are generated files that store pre-rendered effects and transitions to allow for smooth playback during editing. Removing them does not delete any original media or timeline data.
When you delete render files, Final Cut Pro will regenerate the necessary ones as you continue editing or export your project. This means you may experience temporary slowdowns or longer export times as the software reprocesses effects and transitions. However, this process ensures your project remains intact and fully editable.
To minimize risk, it is advisable to back up your project or library before performing mass deletions of render files. This precaution helps prevent accidental loss in case of unexpected issues, although such problems are uncommon. Official Final Cut Pro documentation and user experiences consistently confirm that deleting render files does not compromise project integrity.
What happens if I delete render files in Final Cut Pro?
When you delete render files in Final Cut Pro, you immediately free up disk space previously occupied by those files. For example, a typical project with several hours of footage might reclaim several gigabytes of storage, depending on the complexity and format of your media. This space recovery is instant and visible in your system’s storage overview.
However, there is a trade-off in terms of project load and playback. Without render files, Final Cut Pro needs to re-render clips when you play back or export your project. This re-rendering can cause temporary slowdowns, especially if your project includes many effects or high-resolution footage. Render times vary but expect longer initial playback delays compared to when render files are present.
Deleting render files can also increase project load time, as Final Cut Pro rebuilds its render cache. Despite this, it can be a useful maintenance step for large or older projects that have accumulated unnecessary render data over time. Regularly clearing render files helps keep your storage efficient and your editing environment responsive.
For instance, a project that initially used 15 GB for render files might drop to under 2 GB immediately after deletion. Subsequent rendering during playback may take a few seconds per clip, but this balances out by freeing valuable disk space and reducing clutter.
How to remove render files in Final Cut Pro using external tools
Final Cut Pro stores render files within your Library package on your disk, typically inside the .fcpbundle file. These files are usually located in subfolders such as Render Files within the Library. You can access them manually through Finder by revealing the package contents, but this method carries some risks.
To manually delete render files, follow these steps carefully:
- Locate your Final Cut Pro Library file in Finder, which might be named something like MyProject.fcpbundle. You should see a single file, but it is actually a package.
- Right-click (or Control-click) the Library file and select Show Package Contents. A new Finder window opens revealing internal folders such as Render Files, Media, and Analysis Files.
- Open the Render Files folder. Inside, you will find subfolders named by codec or type (e.g., High Quality, Proxy).
- Select the render files or folders you want to delete and move them to Trash. Once trashed, empty the Trash to free disk space.
- Close the package contents window and reopen your Library in Final Cut Pro. The program will detect missing render files and re-render as needed.
While this method can free space quickly, it risks corrupting your Library if files outside the render folders are deleted or if the package structure is altered. You might also encounter error messages like "Library cannot be opened" or "Media Offline" if critical files are removed inadvertently.
Manual deletion is best reserved for advanced users who need immediate disk space recovery and understand the Library structure. For most users, using Final Cut Pro’s built-in Delete Generated Library Files dialog remains safer and prevents accidental data loss.
How to update Final Cut Pro to improve render file management
Keeping Final Cut Pro up to date is essential for optimal render file handling and efficient storage use. Apple regularly releases updates that include improvements to render file management, storage optimization, and overall performance enhancements. These updates can also address bugs that cause render files to accumulate unnecessarily, helping you maintain better control over disk space.
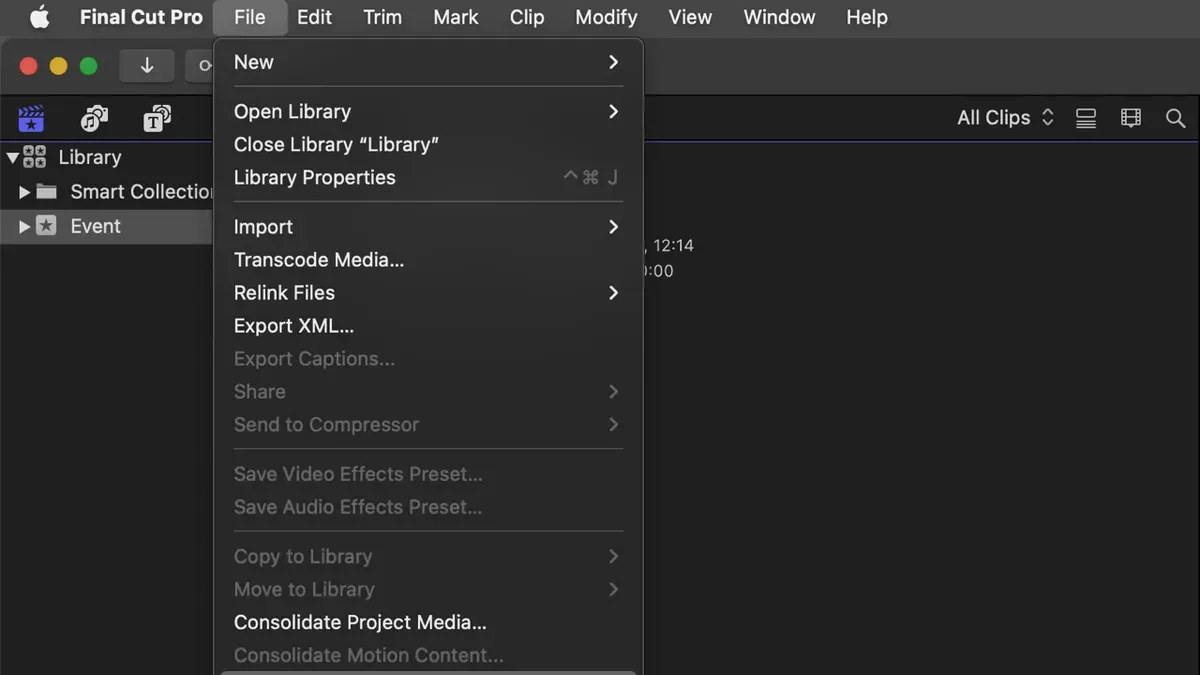
To check for and install updates, follow these steps:
- Open the App Store on your Mac. You should see the App Store icon in your Dock or in the Applications folder.
- Click on the Updates tab on the left side of the App Store window. This will display all available updates for your installed apps.
- If an update for Final Cut Pro is listed, click the Update button next to it. You will see a progress bar indicating the download and installation status.
- Once the update is installed, launch Final Cut Pro. You may notice improved responsiveness and smoother render file management based on the update’s release notes.
For example, a recent update described in the release notes included "enhanced render file cleanup processes and reduced background storage usage". Such updates help keep your project libraries lean and reduce the risk of storage bloat caused by render files.
Regularly updating Final Cut Pro ensures you benefit from these improvements and maintain effective control over your editing workflow and disk space.
Troubleshooting: What to do if render files won’t delete or disk space doesn’t free up
If you find that render files won’t delete or disk space doesn’t increase after deletion, several common issues could be the cause. First, ensure Final Cut Pro is completely closed. Sometimes background processes keep files locked, preventing deletion.
- Close Final Cut Pro and check via the Dock or Activity Monitor that no Final Cut Pro processes are running. When successful, you should see no active Final Cut Pro icon or process.
- Restart your Mac to refresh disk indexing and release locked files. After reboot, check disk space in Finder or Disk Utility; you should see an increase if deletion was successful.
- Verify your user account has Read & Write permissions for the library folder containing the render files. Right-click the folder, choose Get Info, and check permissions at the bottom. Adjust if needed, so your user has full access.
- Open Disk Utility from Applications > Utilities, select your startup disk, and run First Aid. This repairs disk permissions and volume errors that can block file deletion. A successful run will report "Operation successful".
- If issues persist, clear Final Cut Pro’s cache and preferences. Hold the Option and Command keys while launching Final Cut Pro, then confirm the reset dialog. This can resolve corrupted settings affecting file management.
Common error messages like "File is in use" indicate the app or a process still accesses the files. "Permission denied" points to insufficient access rights. Following these steps addresses these scenarios systematically.
Frequently asked questions
How to clear render files in final cut pro?
To clear render files, open your project in Final Cut Pro, then go to the menu bar and select File > Delete Generated Library Files. In the dialog, choose to delete Render Files, then select either All or Only Unused Render Files, and click OK. This process frees up disk space without affecting your source media or project timeline.
Can you delete render files in final cut pro?
Yes, you can delete render files safely inside Final Cut Pro. The software allows you to remove either all render files or only those not currently used in your project. Deleting these files helps free up storage and Final Cut Pro will regenerate necessary renders when you play or export your project again.
How to download final cut pro?
Final Cut Pro can be downloaded from the Mac App Store. Simply open the App Store on your Mac, search for Final Cut Pro, and click the purchase or download button. Ensure your macOS version meets the minimum requirements listed on the app page before downloading.
How to use final cut pro?
To use Final Cut Pro, start by importing your media into a library, then organize clips on the timeline to build your sequence. Use editing tools to trim, cut, and arrange clips, add transitions, effects, and color corrections. Export your finished project by selecting File > Share and choosing your desired output format.
How to remove render files final cut pro?
Removing render files involves choosing File > Delete Generated Library Files, then selecting Render Files in the popup window. You can opt to delete all render files or just those unused by your project. This method ensures only unnecessary files are removed, preserving your project's integrity.
What This Guide Does Not Cover
This article focuses specifically on deleting render files within Final Cut Pro’s native library and does not address render files created by third-party plugins or effects that may store data externally. If you are working with collaborative or shared libraries, it is crucial to coordinate with your team before deleting render files to prevent project conflicts or data loss. Additionally, while deleting render files frees up disk space, it will require Final Cut Pro to re-render affected clips or sequences when you return to editing, which can temporarily slow down your workflow. This guide does not cover strategies for optimizing render settings or hardware upgrades that might improve performance and reduce render file sizes.
The most useful next step is to regularly manage your render files through Final Cut Pro’s built-in options, such as using the “Delete Unused Render Files” command found under the File > Delete Generated Library Files menu. This helps you reclaim disk space without deleting essential files tied to your active projects, maintaining a balance between storage management and workflow efficiency.
See also: How to Create Compound Clips in Final Cut Pro: A Step-by-Step Guide · How to Export ProRes in Final Cut Pro: A Clear Step-by-Step Guide · How to Use Keyframes in Final Cut Pro: Step-by-Step Guide · How to Auto Duck Audio in Final Cut Pro: Step-by-Step Guide



