How to Export ProRes in Final Cut Pro: A Clear Step-by-Step Guide
This guide explains how to export ProRes in Final Cut Pro with clear steps, tips for settings, and advice to ensure the best quality and efficient workflow.
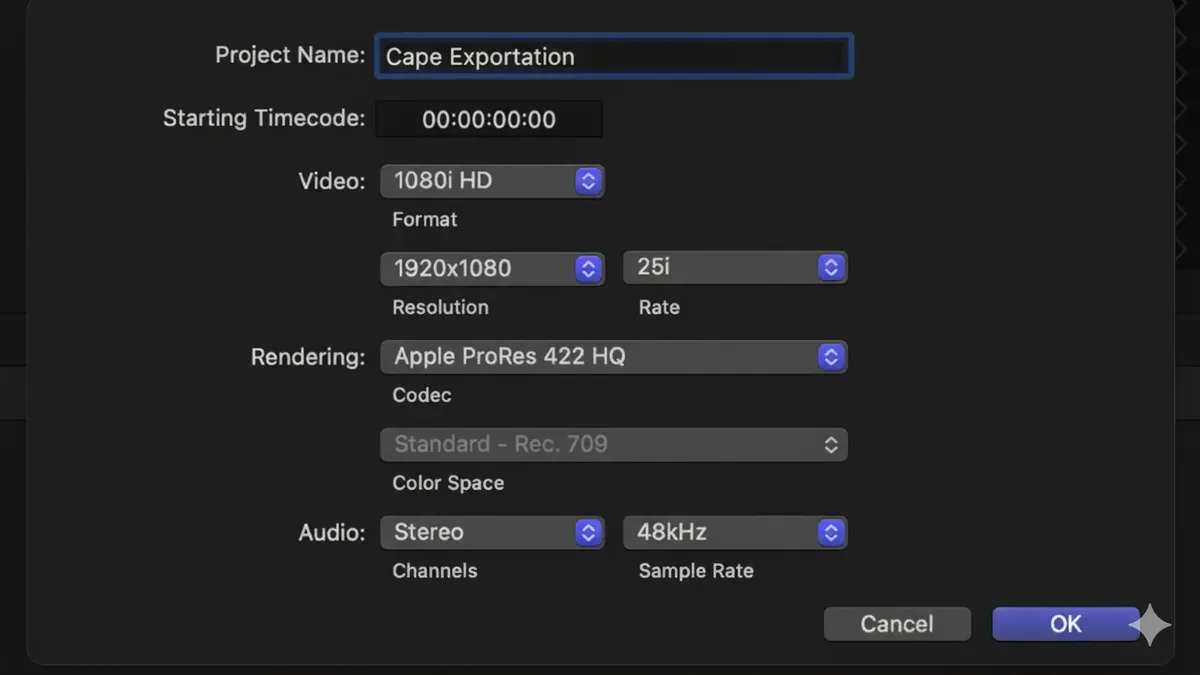
You’ve finished your edit in Final Cut Pro and want to deliver the highest quality version of your video. Exporting in ProRes format is a common choice for video editors who need excellent image fidelity and smooth playback during post-production or delivery.
This article explains how to export ProRes in Final Cut Pro with clear, step-by-step instructions. You’ll learn how to prepare your project timeline, select the right export settings, and avoid common pitfalls that can cause errors or unnecessarily large files. Additionally, you’ll find tips for exporting smaller files in MP4 format when needed and advice for optimizing your ProRes exports for better quality and workflow efficiency.
Key takeaways
- Use the Share menu and choose Apple ProRes 422 or ProRes 4444 for high-quality exports.
- Set your project’s timeline resolution and frame rate to match your source footage for best results.
- When exporting, check the Video Codec setting under Settings in the Share panel to select the correct ProRes variant.
- Export to MP4 using H.264 if you need a smaller file size without ProRes quality requirements.
- Resolve common export errors by checking disk space, project codec compatibility, and updating Final Cut Pro.
Before you start: What you need to export ProRes in Final Cut Pro
To export your project in ProRes format, first verify that Final Cut Pro is installed and updated to a version that supports ProRes export. You can check this by opening Final Cut Pro, clicking on the menu bar's Final Cut Pro > About Final Cut Pro, and confirming your version matches the latest compatible release. Next, understand the ProRes variants available since each serves different needs. Choosing the right variant depends on your balance of quality and file size.
| ProRes Variant | Typical File Size | Use Case |
|---|---|---|
| ProRes 422 Proxy | Lowest (small files) | Offline editing, rough cuts |
| ProRes 422 LT | Small | Draft exports, less storage |
| ProRes 422 | Medium | General delivery, broadcast |
| ProRes 422 HQ | Large | High-quality master files |
| ProRes 4444 | Very Large | Visual effects, alpha channel support |
Make sure your Mac has adequate storage—ProRes files can be several times larger than standard H.264 exports—and sufficient processing power to handle these large files smoothly. This means having a recent Mac with a multicore CPU and enough free disk space that comfortably exceeds your project size. Finally, prepare your timeline by setting the correct frame rate, resolution, and color profile to match your delivery requirements. These settings help avoid unexpected quality loss or format mismatches during export.
- Open Final Cut Pro and check the version under Final Cut Pro > About Final Cut Pro. You should see a version that supports ProRes export.
- Review your project’s timeline settings by selecting your project in the browser, then opening the inspector. Confirm the frame rate, resolution, and color profile match your intended output.
- Evaluate your storage space by clicking on the Apple menu > About This Mac > Storage. Ensure you have at least double the size of your expected export free.
- Choose the ProRes variant by considering your quality needs and storage limits. Refer to the comparison table above to decide which codec fits your project.
Set up your project timeline and export settings for ProRes
Before exporting, review your timeline’s resolution and frame rate to ensure they match your intended output. For example, if your final delivery is 1920x1080 at 30 fps, confirm these settings in the timeline properties. This step helps avoid unnecessary scaling or frame rate conversion during export.
Check for any effects or plugins applied in your project. Some third-party plugins might not be fully compatible with ProRes export, potentially causing errors or unexpected results. Disable or render these effects beforehand to ensure smooth export.
To begin exporting, go to the menu and select File > Share > Master File (default). This opens the export settings window where you choose your export destination and format. You can also create a custom export setting if you want to specify a different save location or filename.
Within the export settings, click the Settings tab, then set the Format to Video and Audio. Under Video Codec, select one of the ProRes options available: ProRes 422 Proxy, ProRes 422 LT, ProRes 422, ProRes 422 HQ, or ProRes 4444. Each variant balances quality and file size differently—Proxy and LT produce smaller files with lower quality, while HQ and 4444 offer the highest quality but larger files. Choose the one that fits your project’s delivery needs.
Once your settings are confirmed, you’re ready to export your project with the chosen ProRes codec.
- Open your Final Cut Pro project and confirm timeline resolution and frame rate via Modify > Project Properties. You should see your desired resolution and frame rate reflected.
- Review your timeline for any effects or plugins that may interfere with export; disable or render these if necessary. Your timeline should play smoothly without rendering errors.
- Go to File > Share > Master File. The export window appears, showing export destinations and formats.
- Click the Settings tab in the export window. Under Format, select Video and Audio. Under Video Codec, pick the appropriate ProRes variant. You should see a description of each codec’s quality and file size implications.
- Confirm the destination folder or choose a new location. Verify the filename is correct. Your export setup is now ready for the next step.
Export your project to ProRes step-by-step
- Open your Final Cut Pro project and click the Share button in the upper-right corner of the interface. From the dropdown menu, select Master File (default). You should see a new window open with export options.
- Navigate to the Settings tab in the Master File window. Under Video Codec, click the dropdown and choose the specific Apple ProRes variant you want to export, such as ProRes 422 or ProRes 4444. Selecting the correct variant balances quality and file size according to your needs.
- Review the Audio settings below the codec selection. Configure your audio output format, such as stereo or surround sound, depending on your project requirements. This ensures your audio exports correctly alongside your video.
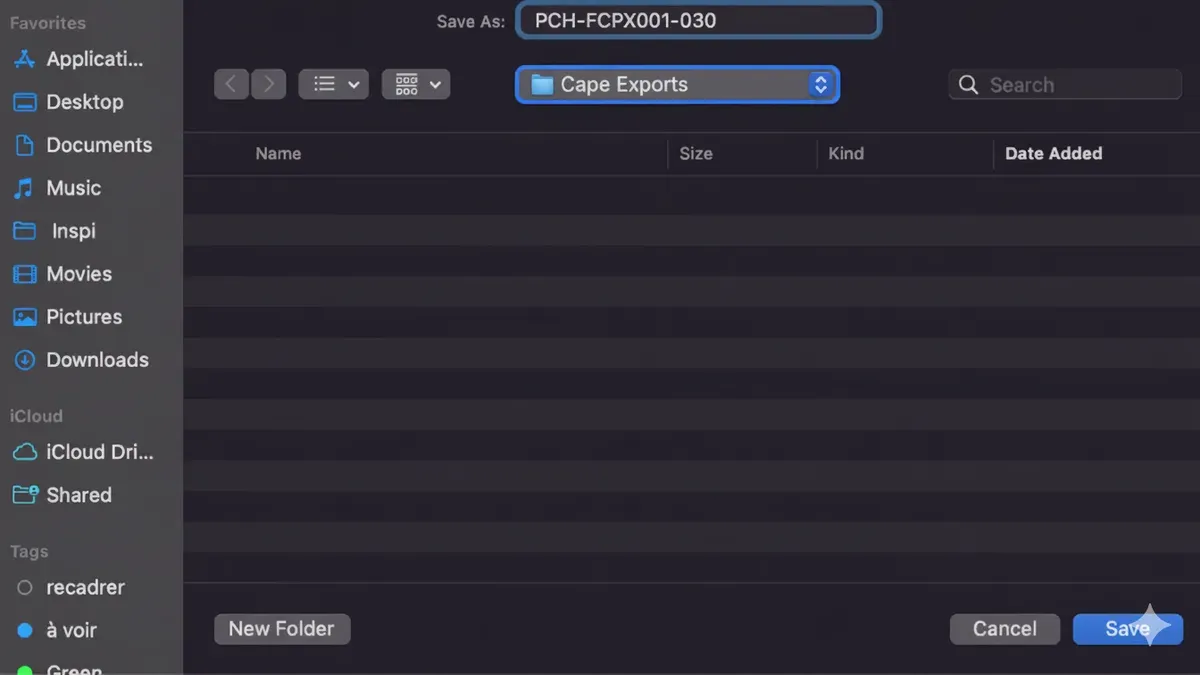
- Click the Info tab to name your file and select the destination folder where you want to save the exported ProRes file. Confirm your file name is clear and the save location has enough disk space.
- Press the Save button to start the export. A progress bar appears in the background tasks window. For a typical 10-minute 1080p project, expect the export to take several minutes and produce a file size ranging from several gigabytes, depending on the ProRes variant.
Monitoring the progress allows you to anticipate when your file will be ready. If you need to pause or cancel, use the background tasks window. Once complete, verify your ProRes export by playing the file to ensure video and audio quality meet expectations.

How to export final cut pro to mp4 when you want a smaller file
ProRes files are known for their high quality but come with very large file sizes, making them less suitable for web streaming, quick sharing, or devices with limited storage. When you need a smaller, more manageable file, exporting your project as an MP4 using the H.264 codec is a practical alternative that balances quality and compression.
The following steps guide you through exporting an MP4 in Final Cut Pro:
- Open your project in Final Cut Pro and go to File > Share > Master File (default). You should see the Share window open.
- Click on the Settings tab within the Share window. Here, change the Format dropdown to Computer. This selects a compressed format suitable for MP4.
- Under the Video Codec dropdown, select H.264 Better Quality or H.264 Faster Encode depending on your balance preference between speed and quality. You should see the estimated file size update accordingly.
- Confirm audio settings are set to 48kHz AAC for compatibility and quality.
- Click Next, name your file, choose the destination folder, and click Save. The export progress will appear, and once finished, you will have a much smaller MP4 file ready for web or sharing.
Compared to ProRes exports, MP4 files can be several times smaller—often reducing file size by 80% or more—while maintaining good visual quality for streaming and playback on most devices. However, MP4 is a delivery format rather than an editing codec, so it’s best used for final distribution rather than further post-production.
Typical use cases for MP4 exports include uploading to YouTube, Vimeo, social media, or sending drafts and previews via email. ProRes remains ideal for professional deliveries, archival, or when maximum quality is required.
Fix export error in Final Cut Pro: Common ProRes export issues and how to solve them
When exporting ProRes files in Final Cut Pro, you might encounter error messages such as "Codec not supported," "Export failed," or warnings about insufficient disk space. These issues often stem from timeline corruptions, disk management, or software glitches. Identifying the exact error message helps direct the right troubleshooting steps to get your export back on track.
- Check the error message displayed during export. If the message says "Codec not supported," verify your project settings match a ProRes-compatible format. When resolved, Final Cut Pro will proceed without codec errors.
- Inspect your timeline for corrupt clips or effects. Remove or replace any problematic media or complex effects that might cause export failures. Successful export should proceed past the previous failure point.
- Clear Final Cut Pro's render and cache files. Go to File > Delete Generated Library Files, select all options (render files, optimized media, and cache), then restart Final Cut Pro. This often clears stuck export processes.
- Free up sufficient disk space on your export destination drive. ProRes files require large free space; ensure at least double the project size is available. Also, confirm your drive uses a compatible filesystem like APFS or HFS+ to avoid write errors.
- Update Final Cut Pro and macOS to the latest versions. Codec-related bugs and compatibility issues are often resolved through software updates. After updating, retry the export to confirm the fix.
Following these steps addresses the most frequent export errors encountered with ProRes in Final Cut Pro, helping you complete your high-quality export smoothly.
Optimize your ProRes exports with Final Cut Pro tips for better quality and workflow
- Enable Background Rendering: Go to Final Cut Pro > Preferences > Playback and check "Background Render." This allows your timeline to render while you continue editing, reducing wait times when you export.
- Use Proxy Media for Smoother Editing: Generate proxy files by selecting your clips, then choose File > Transcode Media > Create Proxy Media. Editing with proxies speeds up your workflow, especially with high-resolution footage, and the final export will use the original media for full quality.
- Adjust Color Space and HDR Settings: Before exporting, open the Inspector and verify your project’s color space matches your delivery needs (e.g., Rec. 709 for SDR or Rec. 2020 PQ for HDR). Proper settings ensure accurate color grading and optimal output quality.
- Batch Export Multiple Projects or Clips: Use the Share menu’s "Add to Batch Export" feature to queue several projects or clips. Then go to Window > Background Tasks to monitor and export all at once, saving time on repetitive steps.
- Use External Storage for Large ProRes Files: Due to ProRes’s large file size, store your exports on fast external SSDs connected via Thunderbolt or USB-C. This prevents disk space issues and speeds up read/write during export.
- Purchase and Download Final Cut Pro from the Mac App Store if New: If you haven’t installed Final Cut Pro yet, buying it from the Mac App Store ensures you get the latest version with all export features, including ProRes support and ongoing updates.
Frequently asked questions
How to export from final cut pro?
To export from Final Cut Pro, first select your project in the timeline. Then, go to the top menu and click File > Share > Master File (default). In the Share window, choose the Settings tab and set the format to Video and Audio and the codec to Apple ProRes 422 or your preferred ProRes variant. Finally, click Next, choose the save location, and click Save to begin the export.
How to buy final cut pro?
You can buy Final Cut Pro directly from the Mac App Store. Search for “Final Cut Pro,” and purchase it using your Apple ID. Once purchased, the app will download and install automatically on your Mac. There are no physical copies or alternative official stores for the software.
How to use final cut pro?
Using Final Cut Pro starts with importing your media into a new or existing library. Organize clips in events, then create a project timeline to arrange and edit your footage. Use the toolbar for cutting, trimming, adding effects, and adjusting audio. Familiarize yourself with the inspector panel to fine-tune clip properties and export your final work through the Share menu.
How to download final cut pro?
Download Final Cut Pro by opening the Mac App Store on your Mac. Search for “Final Cut Pro” and click the download or purchase button. The app will download and install automatically once the process completes. A stable internet connection and sufficient storage space are necessary for a smooth download.
Is final cut pro worth it?
Final Cut Pro offers professional-grade editing features with optimized performance on Mac hardware, which makes it valuable for serious video editors. Its intuitive interface and powerful tools can justify the cost if you need high-quality exports like ProRes and efficient workflows. However, casual users or those on tight budgets may consider free or cheaper alternatives before investing.
Understanding the Limits of This Guide
This guide focuses on exporting using Final Cut Pro’s built-in ProRes codecs and does not cover third-party plugins or external encoding software, which may offer additional customization for specialized workflows. If your workflow requires advanced compression options, hardware-accelerated encoding, or integration with broadcast automation systems, exploring dedicated encoding tools might be necessary. Additionally, this article does not address color grading or mastering, which can affect your final export quality and should be handled before the export steps described here.
Getting the best results from ProRes exports depends on careful project setup and export settings, but if you encounter persistent issues with file compatibility or delivery standards, consulting Apple’s official Final Cut Pro support or professional post-production resources is recommended.
The single most useful next step is to familiarize yourself with the Export settings panel under File > Share > Master File (default), then click Settings and choose the appropriate ProRes codec variant for your project. Pay special attention to the Video Codec dropdown, selecting options like ProRes 422 HQ for highest quality or ProRes 422 LT for smaller file sizes while maintaining good quality. This precise selection often makes the biggest difference in balancing quality and storage needs.
See also: How to Generate Auto Captions in Final Cut Pro: A Step-by-Step Guide · Master Object Tracking in Final Cut Pro: Step-by-Step Guide · How to Use Keyframes in Final Cut Pro: Step-by-Step Guide · How to Do Multicam Editing in Final Cut Pro: A Step-by-Step Guide