Master Object Tracking in Final Cut Pro: Step-by-Step Guide
Discover practical steps to use object tracker in Final Cut Pro for smooth motion tracking and attaching dynamic graphics without manual keyframes.
You're editing a video where a moving skateboarder needs a graphic label that follows their motion seamlessly. You wonder how to use object tracker in Final Cut Pro effectively to achieve this without spending hours on keyframes.
This article guides you through practical steps to track objects and attach dynamic text or graphics within Final Cut Pro. You will learn how to prepare your project, use the built-in tracking tools, troubleshoot common issues, and understand when external plugins might be necessary. By focusing on straightforward tracking workflows and avoiding keyframe complications, you'll gain confidence in adding polished, moving elements to your videos.
Key takeaways
- Set up your project with clear footage and stabilized clips for best tracking results.
- Use the built-in Shape or Point Tracker in Final Cut Pro to follow objects accurately.
- Attach text or graphics to tracked points using the Motion tab without relying on manual keyframes.
- Address common problems like tracker drift or occlusion with specific adjustments.
- Consider external plugins only when advanced tracking or 3D motion is required beyond native tools.
Before you start: Prepare your Final Cut Pro project for tracking
To achieve accurate object tracking in Final Cut Pro, start with high-quality footage that has minimal motion blur and stable camera work. Footage shot with consistent lighting and distinct contrast between the object and its background significantly improves tracking success. For example, tracking an object in a well-lit scene with clear edges yields smoother results than footage with low light or similar colors blending the object and background.
Ensure your clip is properly imported and placed on the timeline before beginning tracking. You should see the clip fully loaded and scrub smoothly without dropped frames, indicating it’s ready for editing.
Verify that your Final Cut Pro version supports native tracking features by checking the "Modify" menu for tracking options or the Inspector panel for tracking controls. Older versions may lack built-in trackers, requiring third-party plugins.
- Import your clip into Final Cut Pro and drag it onto the timeline. Look for a fully loaded clip with smooth playback.
- Review the footage for lighting consistency and object-background contrast. Confirm that the object you want to track is clearly visible and distinguishable.
- Check your Final Cut Pro version by clicking "Final Cut Pro" > "About Final Cut Pro." Confirm the presence of tracking tools under the "Modify" menu or in the Inspector when a clip is selected.
How to track an object in Final Cut Pro using the built-in tracker
- Select the clip in your timeline where you want to track an object. You should see the clip's properties appear in the Inspector panel.
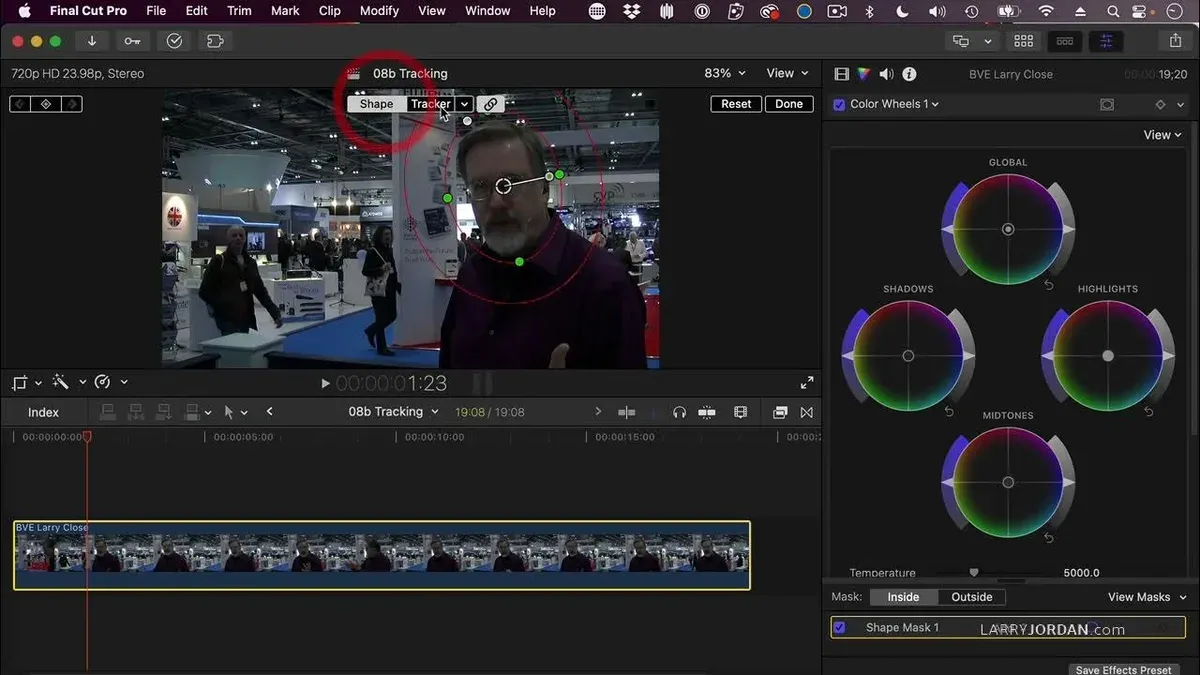
- Open the Effects Browser by clicking the Effects button or pressing Command+5, then locate the Motion Tracking category. Drag the "Track Motion" effect onto your clip. When applied, a bounding box with tracking handles appears on the viewer.
- Choose the tracking mode in the Inspector under the Track Motion section. You can select between Point Tracker, which tracks a specific point, or Shape Tracker, which tracks a defined region. Point Tracker is good for small, distinct features, while Shape Tracker works well for larger or more complex objects.
- Define your tracking region by adjusting the bounding box around the object or area you want to track. Use the corner handles to resize and position it precisely. A well-defined region improves tracking accuracy.
- Click the Analyze button (usually a play icon) to run tracking analysis. The bounding box will follow the object frame-by-frame. Watch for smooth movement; if the box drifts or loses the object, stop and refine the bounding box or switch tracking modes.
- Once tracking completes successfully, apply the tracking data to an effect, text, or graphic by linking your element to the track in the Inspector. The tracked item will now follow the object's motion automatically throughout the clip.
After applying the tracker, you should see the bounding box consistently follow the chosen object without jumping or lagging. If you notice tracking errors, adjusting the tracking region or switching between point and shape trackers usually helps resolve them.
How to track text in Final Cut Pro and attach it to moving objects
- Create a text layer by selecting the Titles and Generators sidebar, choosing a style like Basic Title, and dragging it onto your timeline above the clip with the moving object. You should see the text appear on the viewer, ready to be positioned.
- Position the text near the target object by dragging it in the viewer or adjusting the transform controls in the Inspector. The text should visually align with the object you want it to follow.
- Apply the tracking data from your previously tracked clip by selecting the text layer, opening the Video Inspector, and under the Transform section, click on the small arrow icon next to Position to reveal the popup menu. Choose “Paste Attributes,” then select only the Motion Tracking data from your tracked clip. The text will now inherit the movement of the tracked object.
- Fine-tune the text’s position and scale by adjusting the X and Y Position and Scale values in the Inspector to keep it properly aligned throughout the clip. Watch the playback to confirm the text follows smoothly without lag or drift.
- For occlusions or fast-moving objects, consider keyframing minor position tweaks where tracking data falters. Adding a slight drop shadow or outline to the text can help maintain legibility during quick movements or partial cover.
For example, attaching a player’s name to a moving sports athlete involves creating the text near the player, pasting the player’s motion tracking data onto the text, and then adjusting the text’s position so it appears naturally connected as the athlete moves across the frame.
How to use Final Cut Pro for precise motion tracking without keyframes
Manual keyframing requires you to set position, scale, and rotation points frame by frame, which can be time-consuming and prone to small errors. Final Cut Pro’s native object tracker automates this process by analyzing the footage and generating smooth, accurate tracking data automatically. This significantly reduces the manual workload and improves consistency, especially when tracking complex or fast-moving objects.
Using the native tracker is particularly efficient for attaching text or graphics to moving subjects in scenes with steady lighting and clear contrast. However, keyframes are still useful for fine tuning in situations where the tracker loses the target due to rapid motion or occlusion. You can easily add or adjust keyframes alongside the tracking data for precise control.
The tracking data integrates seamlessly with other effects like color correction masks or distortions, allowing you to create dynamic visuals that follow motion naturally without extra manual adjustments.
| Workflow | Time & Effort | Accuracy |
|---|---|---|
| Manual keyframing | High – frame-by-frame adjustments required | Variable – depends on user precision |
| Native object tracker | Low – automated tracking with minimal tweaks | High – consistent and smooth motion data |
- Select the clip in your timeline and open the Tracker inspector.
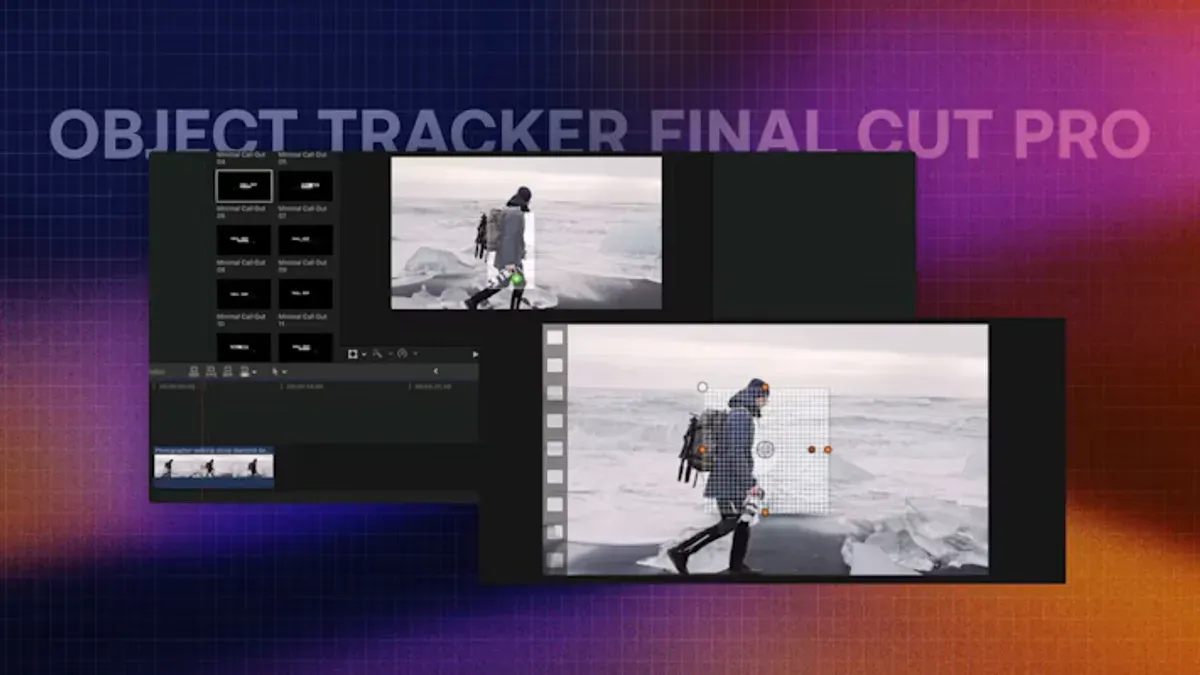
- Choose the object to track by drawing a tracking region around it; press "Analyze Forward" to let Final Cut Pro calculate motion data automatically.
- Apply the tracking data to your text or graphic element; you should see it follow the object smoothly throughout the clip without needing to adjust keyframes.
- If the tracking drifts, use the keyframe controls in the inspector to manually correct position or scale at specific frames; this fine-tuning ensures precision.
- Combine the tracking data with other effects like masks or distortions by selecting the tracked clip and applying the desired effect; the effect will follow the tracked motion.
Troubleshoot common object tracking issues in Final Cut Pro
If the tracker loses the object or the tracked motion jitters, start by refining the tracking region. Narrow the tracking area to focus tightly on high-contrast features of the object. When done correctly, the tracker should follow smoothly without sudden jumps.
Improving footage quality can also help. Ensure the clip has consistent lighting and minimal motion blur. For example, a clip with sudden shadows caused the tracker to lose the object, but increasing brightness and contrast stabilized the track.
Partial occlusions or rapid lighting changes often confuse the tracker. In these cases, manually adjust the tracking points frame-by-frame for a few seconds to guide the tracker back on target. This small intervention helps maintain a steady follow-through.
When tracking complex or fast-moving objects with frequent occlusions, Final Cut Pro’s native tracker might struggle. Consider external plugins like CoreMelt or Mocha for enhanced tracking capabilities. These tools offer advanced algorithms to handle difficult scenarios where native tracking fails.
- Select the clip and open the Tracker panel. Adjust the tracking area smaller to focus on a stable part of the object. You should see smoother tracking paths without jitter.
- Improve footage by applying a Color Board adjustment: increase exposure slightly and boost contrast. The tracker will lock onto clearer features.
- Manually move tracking points for 5-10 frames during occlusion or lighting shifts. The track path will realign correctly after this manual input.
- If tracking errors persist despite adjustments, export the clip and test it in a plugin like Mocha. Confirm whether advanced tracking yields better results before integrating external software.
Compare Final Cut Pro object tracking to Adobe alternatives
Final Cut Pro offers built-in object tracking that integrates smoothly within its streamlined interface. Its tracker is user-friendly for those already in the Apple ecosystem, with automated tracking and the ability to attach text or graphics efficiently. However, compared to Adobe After Effects, Final Cut Pro's tracking tools are less advanced in terms of precision and detailed control.
Adobe After Effects excels in complex tracking scenarios, including planar and 3D camera tracking, which Final Cut Pro lacks natively. Premiere Pro provides tracking features similar to Final Cut Pro but benefits from Adobe's broader ecosystem and plugin support. The trade-off is that Adobe's tools generally have a steeper learning curve and require more setup.
Cost-wise, Final Cut Pro is a one-time purchase, making it attractive for editors focused on straightforward tracking tasks. Adobe’s subscription model may be more expensive but includes access to powerful, specialized tracking features and integration with Photoshop and Illustrator.
For editors prioritizing ease of use and quick results within Apple hardware, Final Cut Pro’s native tracker suffices. Those needing precision tracking or advanced effects often lean toward After Effects, accepting the complexity and cost in exchange for greater control.
Frequently asked questions
How to track in final cut pro?
To track in Final Cut Pro, select the clip you want to track and open the Inspector. Use the built-in object tracker by adding a tracking behavior or effect, then define the tracking area around your moving object. Start the analysis, and Final Cut Pro will follow the object's movement frame by frame, allowing you to attach text or graphics that move precisely with it.
How to object track in final cut pro?
Object tracking in Final Cut Pro involves using the Tracker tool found in the Inspector under the Effects panel. You draw a tracking box around the object and initiate tracking forward or backward in the timeline. The software then calculates the object's position changes so you can link titles or effects to the moving subject without manual keyframing.
How to motion track in final cut pro?
Motion tracking in Final Cut Pro is done by selecting the clip and applying the built-in motion tracking feature. After setting your tracking region, run the tracking analysis to capture the object's movement. This data can then be applied to text, images, or effects, ensuring they follow the motion smoothly throughout the clip.
How to do object tracking in final cut pro?
To do object tracking in Final Cut Pro, open your project and select the clip. Use the Tracker effect from the Effects Browser by placing a tracking shape over the object, then press the Analyze button to track movement. Attach your desired text or graphics to this tracking data for seamless movement without manually adjusting keyframes.
How to track in Final Cut Pro?
Tracking in Final Cut Pro starts by selecting the clip and accessing the Tracker from the Inspector or Effects Browser. Define the tracking area around your chosen object, then run the tracking process. Once the track completes successfully, link your graphic or text element to the tracker to keep it aligned with the object throughout the video.
Understand the limits of Final Cut Pro’s native tracking tools
This guide focuses on using Final Cut Pro’s built-in object tracking features, which work well for basic motion tracking tasks like attaching text or graphics to moving objects in your footage. However, it does not cover advanced 3D tracking or planar tracking workflows, which require specialized third-party plugins such as Mocha Pro or TrackX. If your project demands complex camera solves, multi-plane tracking, or intricate masking, you will likely need to explore those external tools for greater control and accuracy.
Additionally, while Final Cut Pro’s tracker provides an effective alternative to manual keyframing for many situations, it may struggle with fast, erratic motion or low-contrast subjects. In those cases, combining native tracking with manual adjustments or plugin assistance can yield the best results.
To build confidence with Final Cut Pro’s object tracker, the single most useful next step is to practice on a variety of clips with different motion characteristics. This hands-on exploration helps you understand when the built-in tracker excels and when to consider external options, ensuring you choose the right approach for your specific editing needs.
See also: How to Do Multicam Editing in Final Cut Pro: A Step-by-Step Guide · How to Apply LUTs in Final Cut Pro: A Step-by-Step Guide