
How to Export All Notes from Your Notes App: A Clear Step-by-Step Guide
This guide provides clear steps to export all notes in Notes app across devices, ensuring safe backups and easy transfers without losing data.
You have accumulated a wealth of notes across multiple devices and apps, but now you want to consolidate or back them up securely. Whether you're switching devices, creating backups, or simply organizing, knowing how to export all notes in Notes app and other platforms is essential.
This guide walks you through clear, step-by-step instructions for exporting notes from Apple Notes on iPhone, iPad, and Mac; Microsoft OneNote and Outlook; Samsung Notes; and Evernote. You'll learn how to move your notes safely without losing formatting or attachments, and how to choose the best method based on your device ecosystem and goals.
Key takeaways
- Prepare your devices by updating apps and ensuring sufficient storage before exporting.
- Use the built-in export or share options on iPhone, iPad, and Mac to export Apple Notes as PDFs or text files.
- Export OneNote notebooks via OneNote’s export feature to get backups in.onepkg or PDF formats.
- Transfer Samsung Notes to Apple Notes using Samsung’s export tools and compatible file formats.
- Check for attachment compatibility and format preservation when migrating notes between different apps.
Prepare Your Devices and Apps Before Exporting
Before exporting your notes, make sure all your devices and apps are properly prepared to avoid data loss and technical issues. First, confirm that your notes are fully synced. For Apple Notes, check the sync status in Settings > [your name] > iCloud > Notes — you should see that Notes is turned on and the last sync time matches your recent activity. In Microsoft OneNote, look for the sync status icon next to each notebook; a green checkmark means syncing is complete.
Next, verify you have enough free storage space on your destination device or cloud service. Exporting large note libraries, especially those with attachments, often requires several hundred megabytes or more. For example, exporting a OneNote notebook with images can easily exceed 500 MB. Check storage under Settings > General > iPhone Storage on iOS or System Settings > Storage on your device.
Update your Notes app and any related apps like OneNote or Evernote to the latest version. App updates often fix bugs and improve export functionality. Finally, ensure a stable internet connection, especially when exporting via cloud services or email. A disrupted connection can cause incomplete exports or corrupted files. Use Wi-Fi or a reliable cellular network for best results.
- Open your device’s settings and confirm Notes syncing is enabled and up to date. You should see recent sync timestamps or green sync icons.
- Check available storage space; ensure you have at least double the size of your notes library free for safe exporting.
- Go to the App Store or relevant app store, find your notes apps, and update them if updates are available.
- Connect to a stable Wi-Fi or cellular network and verify connectivity by loading a webpage or streaming a short video.
Export All Notes from iPhone or iPad Notes App
The iOS and iPadOS Notes app does not offer a built-in “export all” button, so exporting all your notes requires manual selection or using online and third-party tools. You can export notes individually or in groups using the Share Sheet to email, save as PDFs, or save directly to the Files app.
- Open the Notes app and go to the folder containing the notes you want to export. You should see a list of your notes.
- Tap Edit at the top right. This allows you to select multiple notes at once.
- Tap on each note you want to export. You will see checkmarks appear next to selected notes. For about 10 notes, exporting is quick; for 100 notes, expect the process to take noticeably longer.
- Tap the Share icon at the bottom left of the screen. A Share Sheet will appear with various options.
- Choose to Save to Files to store notes as PDFs or text files locally or in iCloud Drive. Alternatively, select Mail to email notes as attachments, or Print to save as PDFs.
If you prefer bulk exporting without manual selection, you can log in to iCloud.com on a computer, select multiple notes, and download them as PDFs or text files. This method is faster for large numbers of notes.
Third-party apps and custom Shortcuts can automate batch exporting, but they require setup and may not support all note formats perfectly. Always review exported files to ensure no data was lost.
Export All Notes from Mac Notes App
Exporting all your notes from the Mac Notes app can be done in several ways depending on the format you want and the number of notes involved. For single notes, use the built-in Export as PDF feature by selecting a note, then going to File > Export as PDF. This creates a standalone PDF file you can save anywhere. If you want to export multiple notes at once, you can select them individually or in batches and use the Print dialog. Choose File > Print, then select Save as PDF from the PDF dropdown in the lower-left corner, which generates a PDF document containing all selected notes.
To export notes as editable text files, drag and drop individual notes from the Notes app into a Finder folder. This saves them as rich text files (.rtf) or plain text (.txt) depending on your system settings. This method works regardless of whether your notes are stored in iCloud, on your Mac locally, or synced from Exchange accounts.
If you need to export a large number of notes—say 50 or more—doing it manually can be time-consuming. Automated batch exporting using AppleScript or Automator workflows can speed up the process significantly, saving you from repetitive manual steps. For instance, exporting 50 notes manually as PDFs might take around 10 minutes, while an automated script can complete the task in a fraction of that time. Setting up these workflows requires some initial effort but pays off for bulk exports.
Export Microsoft OneNote Notes
OneNote offers several ways to export your notes depending on your device. On Windows, you can export entire notebooks or individual sections as PDF, OneNote Package (.onepkg), or Word documents. The.onepkg format bundles your notes for easy backup or transfer but works only within OneNote. Exported PDFs or Word files are useful for sharing or importing into other apps.
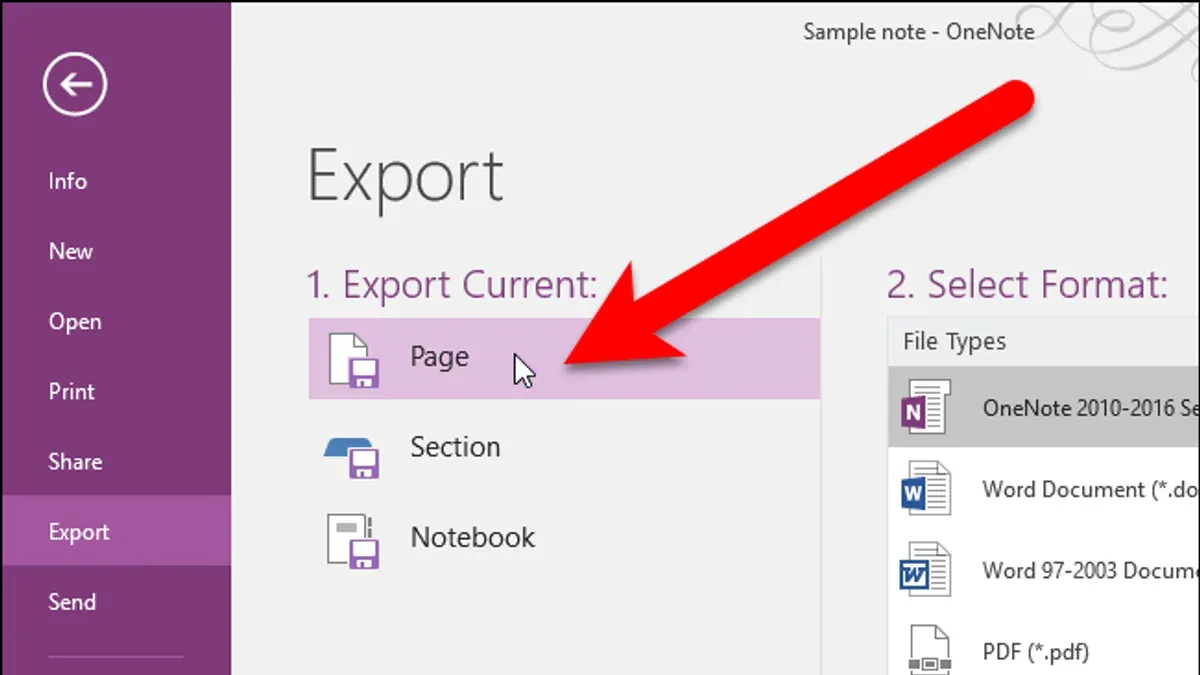
On macOS, OneNote supports exporting pages or sections as PDF files but does not allow exporting entire notebooks directly. This limitation means you may need to export notebooks section by section. OneNote’s cloud sync ensures your notes are updated across devices, so exporting the latest version is straightforward once your notebook is fully synced.
For iOS and the web version, export options are more limited. You can share individual pages as PDFs via the Share menu, but there is no bulk export. To move notes into Apple Notes or other apps, exporting as PDF or Word on Windows or macOS first is recommended, then importing or copying into your target app.
- Open OneNote on your Windows PC and select the notebook or section you want to export. You should see the content displayed.
- Go to File > Export and choose the export format: PDF, Word Document, or OneNote Package. After choosing, click Export.
- Pick the save location and name your file, then click Save. You will see the file saved with the chosen format.
- On macOS, open OneNote and select the page or section to export. Go to the menu bar, click File > Save as PDF. Confirm the save location and save.
- For iOS or web, open the note page, tap the Share icon, then select Send a Copy > PDF. Choose your destination app or save location.
Note that a medium-sized notebook with several sections and dozens of pages typically results in a PDF file ranging from a few megabytes to tens of megabytes, depending on embedded images. Using OneNote’s cloud sync ensures your exported files reflect the latest updates. Remember, exporting as OneNote Package is best for backup or transferring to another OneNote user, while PDF or Word exports are more versatile for use in other applications.
Export Notes from Outlook and Microsoft Notes
If you store notes in Outlook or the Microsoft Notes app, exporting them requires understanding the available file formats and syncing options. Outlook notes can be exported by dragging them to a folder or saving them as text files, but direct export options are limited compared to other apps. Syncing notes between Outlook and OneNote or Apple Notes offers a smoother way to manage and access your notes across devices.
Exporting Outlook Notes
- Open Outlook and navigate to the Notes section. You should see a list of your saved notes.
- Click and drag a note from the list to a desktop folder or any other folder in File Explorer. This action exports the note as a.msg file, which preserves the note’s formatting and content.
- Alternatively, right-click a note and choose Copy, then paste it into a text editor like Notepad. Save the file as a.txt document for a plain text export.
- Check the exported file:.msg files open in Outlook retaining all formatting, while.txt files contain only plain text, losing images or attachments.
Syncing Notes with OneNote and Apple Notes
Outlook notes can sync with OneNote if both are connected to the same Microsoft 365 account, allowing easy access and export from OneNote’s more versatile interface. To sync, ensure your Outlook and OneNote apps are signed in with the same account and that the notes folder is enabled for syncing.
For Apple users, syncing Outlook notes to Apple Notes requires third-party tools or manual export-import steps, as direct syncing is not supported. Exporting notes to OneNote first and then exporting from OneNote can be a practical workaround.
Overall, exporting directly from Outlook is straightforward for individual notes but limited in bulk export features. Using syncing with OneNote enhances export success and file format options.
Transfer Samsung Notes to iPhone Notes App
Moving your notes from Samsung Notes to the Apple Notes app on your iPhone or iPad requires exporting your notes first and then importing them into the Apple environment. Samsung Notes allows exporting individual notes as PDF or text files, which is key for transferring content. While Samsung Smart Switch can transfer certain data types between devices, it does not directly support Samsung Notes to Apple Notes transfer, so manual methods are often necessary.
- Open Samsung Notes on your Samsung device and select the notes you want to export. For example, if you have 20 notes, select them one by one or in small batches.
- Export each note by tapping the three-dot menu, choosing "Save as file," then selecting PDF or Text format. You should see the file saved in your device's storage or cloud folder.
- Transfer the exported files to your iPhone or iPad. You can do this by emailing the files to yourself, uploading them to a cloud service like Google Drive or Dropbox, or using file-sharing apps.
- On your iPhone or iPad, open the Mail or Files app depending on your transfer method, then tap on each note file.
- Use the share icon to select "Copy to Notes" or "Open in Notes" to import the content into the Apple Notes app. You should see the note appear with the content from Samsung Notes.
Keep in mind that formatting and embedded media such as drawings or audio may not transfer perfectly; text and images typically come through, but complex layouts can change. For instance, transferring 20 Samsung notes may result in some notes losing their original formatting or media attachments. Reviewing each imported note in Apple Notes helps ensure the content is intact and readable.
Export Notes from Evernote to Apple Notes
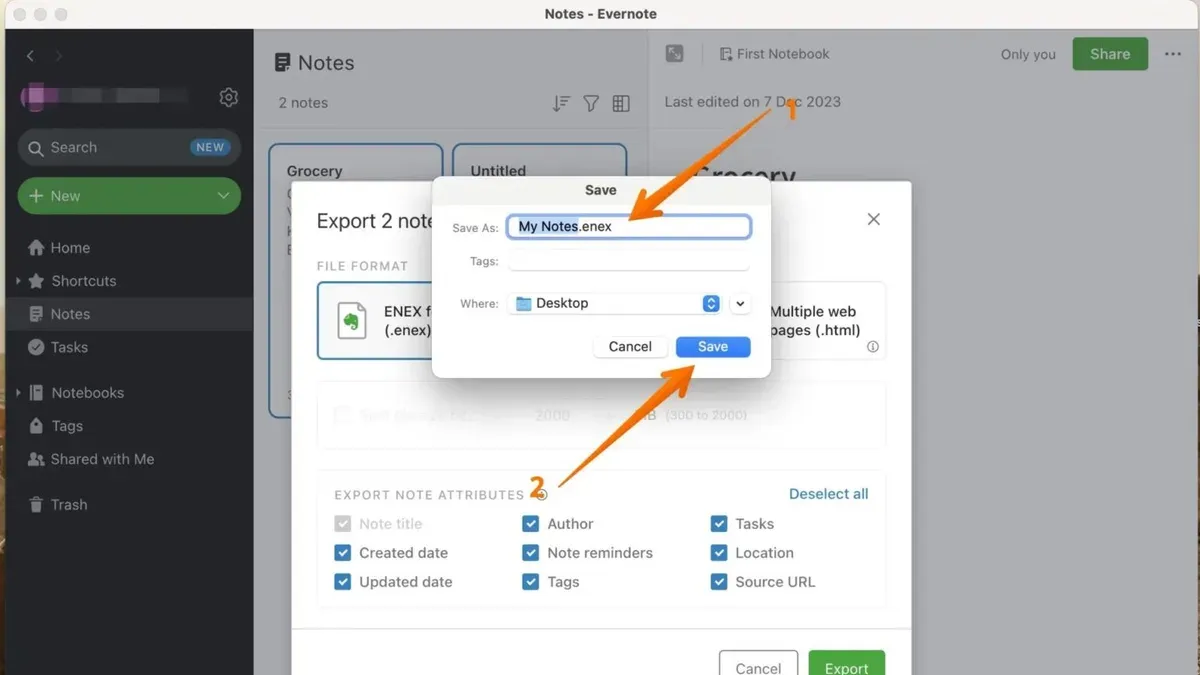
To move your notes from Evernote to Apple Notes, start by exporting your Evernote notes as ENEX files, which preserve most content including attachments and formatting. Alternatively, you can export notes as HTML files, but this method may lose some formatting details. Once exported, use Apple’s built-in import tool available on Mac, found under File > Import to Notes, to bring your ENEX files into Apple Notes. This method usually retains a large portion of the original formatting and attachments, though complex layouts or embedded media might not transfer perfectly.
If you prefer, third-party apps can help streamline the import process, especially when dealing with large note collections, offering faster batch imports compared to Apple’s native tool. For individual notes or selective content, manual copy-pasting remains an option, but it is slower and less suitable for bulk transfers.
- Open Evernote on your computer and select the notes or notebooks you want to export. Right-click and choose Export Notes.... You should see a prompt to save an ENEX file.
- Save the ENEX file to a location you can easily access. This file contains your chosen notes with most formatting and attachments preserved.
- On your Mac, open the Notes app. Navigate to File > Import to Notes... and select the ENEX file you just saved. Click Import.
- Once the import completes, check the new folder created in Apple Notes. You should see your Evernote notes with formatting and attachments mostly intact.
- If some notes appear without proper formatting or missing media, consider manually copying and pasting content for those specific notes.
Export Apple Notes to PC or Other Apps
To export Apple Notes for use on a Windows PC or in other note-taking apps like OneNote, you’ll primarily work with PDF or text file formats. Using your Mac or iCloud.com, you can save notes individually or in small batches, then transfer them via email or cloud services such as OneDrive or Google Drive. This approach helps ensure your notes are accessible on non-Apple platforms.
Here’s a practical workflow for exporting about 30 notes from Apple Notes on a Mac:
- Open the Notes app on your Mac and select the notes you want to export (use Command-click to select multiple notes). You should see the selected notes highlighted.
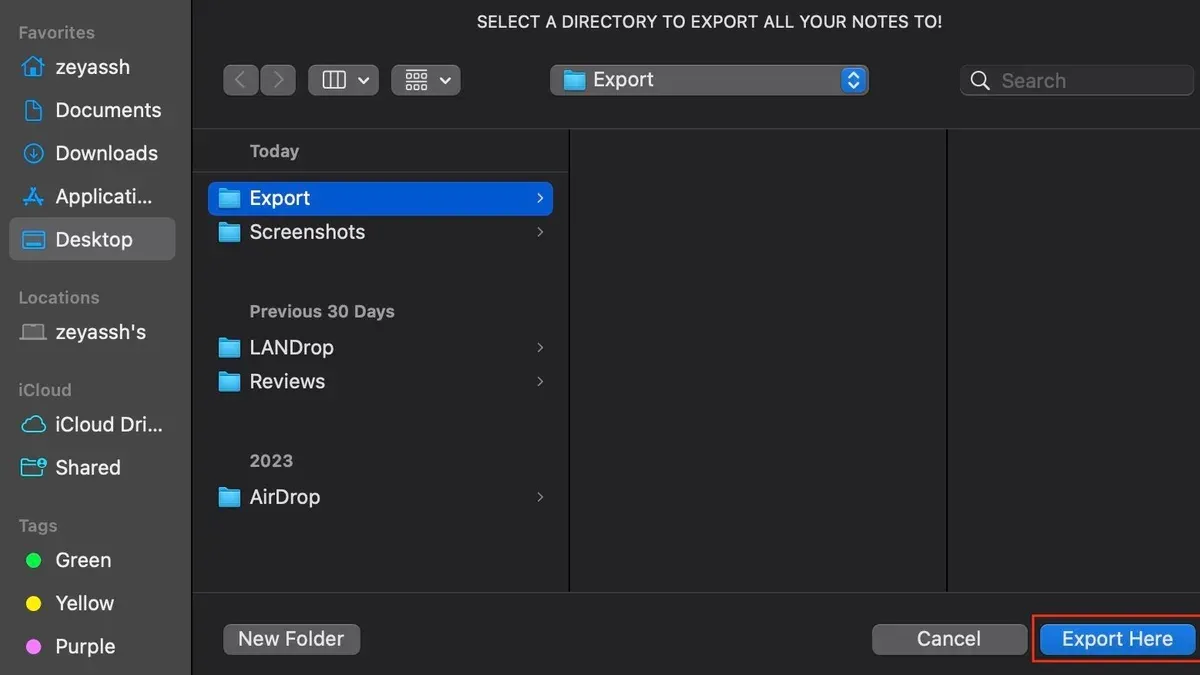
- Click File > Export as PDF to save these notes as separate PDF files, or choose File > Export Notes to save them as plain text files. Confirm the export location on your Mac.
- Use an email client or upload the exported files to a cloud service like OneDrive or Google Drive. You should see the files uploaded or ready to send in your email draft.
- On your Windows PC, download the files from your email or cloud storage. Confirm the files appear in your Downloads or chosen folder.
- To import into OneNote, open OneNote, select Insert > File Printout or Insert > File Attachment, and choose the exported PDFs or text files. The notes will appear in your OneNote notebook, though formatting and media like images may not transfer perfectly.
Keep in mind that exporting notes as PDFs preserves layout but limits editing, while text files are more editable but lose formatting and images. Large exports can take time and space, so exporting in batches of 20-30 notes is often more manageable. This method provides flexibility but expect some trade-offs in media fidelity and formatting when moving notes between Apple Notes and other platforms.
Troubleshoot Common Issues When Exporting Notes
Exporting notes can sometimes lead to issues such as missing content, corrupted files, or app crashes. These problems often stem from sync errors, insufficient storage, or incompatible formats. For example, some users encounter error messages like "Export failed due to network error" or "File cannot be opened". Addressing these issues promptly ensures your notes transfer safely and completely.
- Verify Sync Status: Check that your notes have fully synced across devices before export. In Apple Notes, look for the spinning sync icon; in OneNote, confirm the sync status in the notebook settings. Successful sync means your latest changes are saved and ready for export.
- Check Available Storage: Ensure your device or cloud account has enough free space. Exports often fail or result in corrupted files when storage is low. After freeing space, retry the export; a successful export creates complete files without error messages.
- Use Compatible Export Formats: Export notes in widely supported formats like PDF or plain text. If formatting or media elements are lost, try exporting as PDF or using dedicated import tools, which better preserve content integrity.
- Update or Restart Apps: If the app crashes or freezes during export, close and reopen it, then ensure it’s updated to the latest version. This often resolves bugs causing instability. After restart, the app should run smoothly and complete the export.
- Test with a Single Note: Export one note first to confirm the process works correctly before bulk exporting. A successful single-note export verifies your method and settings are correct.
Following these steps helps resolve common export failures and protects your data during transfer.
Frequently asked questions
How to export all notes from iphone?
To export all notes from your iPhone, open the Notes app and go to the folder containing the notes you want to export. Tap Select in the upper right corner, then tap Select All if available, or manually select your notes. Tap the Share icon and choose your export method, such as Mail, Save to Files, or AirDrop. Using iCloud sync also lets you access your notes on other Apple devices or via iCloud.com.
How to export microsoft notes?
Microsoft Notes might refer to OneNote or the Notes section in Outlook. For OneNote, open the notebook, select File > Export, and choose the format such as OneNote Package or PDF. In Outlook, open your notes, select all, and copy-paste them into another app or save using the Save As option. Export options vary by app version, so check for Export or Save commands in menus.
How to export notes?
Exporting notes depends on your app and device. Generally, you open the notes app, select the notes or notebooks you want, then use a Share or Export feature. Common export formats include text files, PDFs, or app-specific packages. Decide if you want to export individually or in bulk, and pick a destination like email, cloud storage, or another notes app.
How to export all notes from mac?
On Mac, open the Notes app and select the folder with your notes. Use Edit > Select All to highlight all notes. Then go to File > Export as PDF to save them as a single or multiple PDF files, or use File > Export Notes if available. For Apple Notes, syncing via iCloud provides easy access on other devices without manual export.
How to export apple notes?
Apple Notes can be exported by selecting notes or folders within the Notes app, tapping the Share button, and choosing the export method such as Mail, Save to Files, or AirDrop. On Mac, you can also export notes as PDFs via the File > Export as PDF option. Syncing with iCloud is another way to access your notes across devices without manual exporting.
What This Guide Does Not Cover
This article does not cover enterprise or managed device restrictions that may limit note exporting capabilities. If your device or app is controlled by an organization with specific security policies, some export features might be disabled or require administrator approval. Additionally, this guide focuses on personal note export methods and does not address bulk export automation through third-party tools or scripting solutions that may be used by advanced users or IT professionals.
For users needing to export notes from highly customized or restricted environments, consulting your IT department or using specialized software designed for enterprise data management would be the safest approach.
Next Step: Choose the Export Method That Matches Your Device Ecosystem
Now that you understand the options, the most useful next step is to pick the export method that fits your primary device and note app ecosystem. For example, if you mainly use Apple Notes on iPhone and Mac, start with exporting directly from those devices using built-in share or export features. If you use Microsoft OneNote or Samsung Notes, follow their dedicated export instructions to preserve formatting and attachments. Taking this targeted approach helps ensure you keep your notes intact and accessible where you want them.
Remember to back up your notes before starting any export process and verify the exported files are complete and readable. This careful preparation prevents data loss and makes your note export experience smooth and secure.
See also: How to Recover Deleted Notes in the Notes App: Step-by-Step Guide · How to Use Tags in Notes App: Organize Your Notes Efficiently · How to Change the Default Font and Font Size in Notes App



