How to Find Where a Photo Was Taken in the Photos App
Discover how to check, add, or edit location info in the Photos app to find where a photo was taken and manage your photo library better.
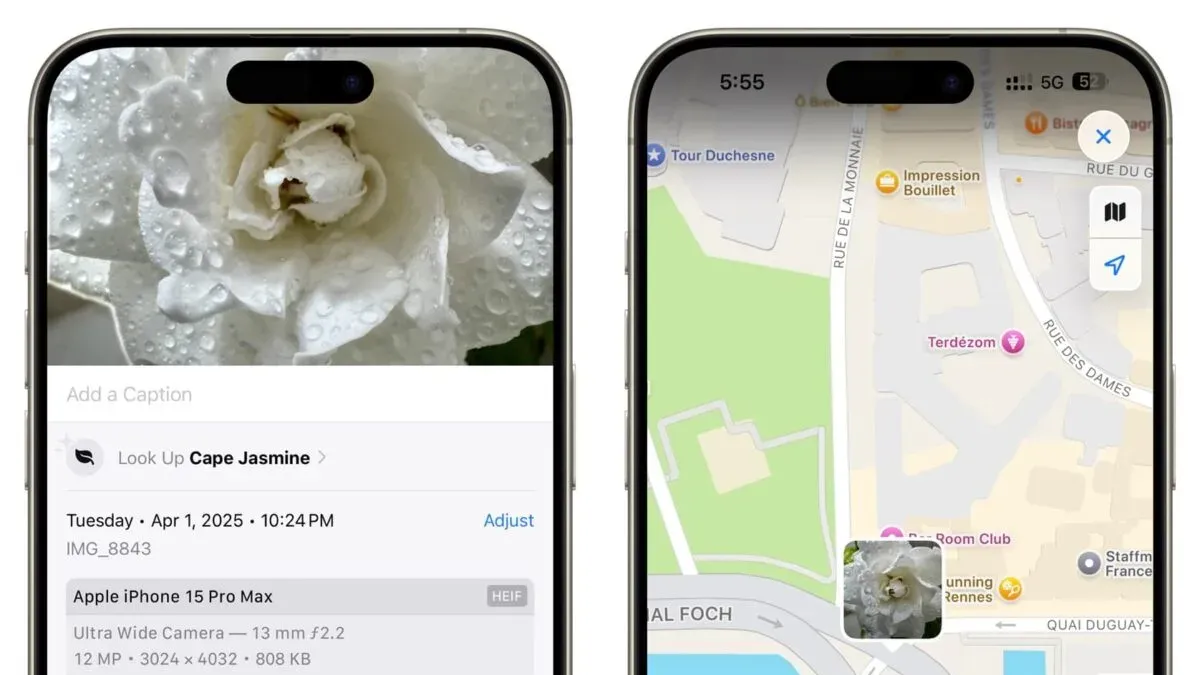
You have a photo on your iPhone or Mac, but you can’t quite remember where it was taken. Maybe you want to share the location with friends or organize your library better. Knowing how to find where a photo was taken in Photos app can help you reconnect with those moments.
This guide walks you through checking location information embedded in your photos, searching your library by place, adding or correcting location details, and understanding why location data might sometimes be missing or inaccurate. You’ll also learn how privacy settings affect this information and how to troubleshoot common problems.
Key takeaways
- View photo location by opening the photo and tapping the info (i) button or clicking the info icon on Mac.
- Search your Photos library by location using the search bar with place names or map views.
- Add or edit photo locations manually via the info panel if the data is missing or incorrect.
- Location data can be missing due to privacy settings, disabled location services, or edited metadata.
- Check your device’s Settings > Privacy & Security > Location Services to manage permissions affecting location tagging.
Before You Start: What You Need to Know About Photo Location Data
Location information in photos is stored within the photo’s metadata, specifically in a section called EXIF (Exchangeable Image File Format). When you take a picture with location services enabled on your device, the GPS coordinates are embedded in this metadata. For example, a photo’s EXIF data might include latitude and longitude values like 37.7749° N, 122.4194° W, pinpointing where the photo was captured.
However, location data is only present if you used a GPS-enabled device, such as an iPhone or certain cameras, or if you imported the photo with location tags already attached. If you took the photo with location services turned off or if the photo was edited to remove location info, the data won’t be available.
Privacy settings can also affect whether you see location data in the Photos app. On your iPhone or Mac, check that the Photos app is allowed to access location information by going to Settings > Privacy > Location Services and confirming that location access is enabled for Photos. If location access is denied, the app won’t show where photos were taken even if the data exists.
View the Location of a Photo in the Photos App
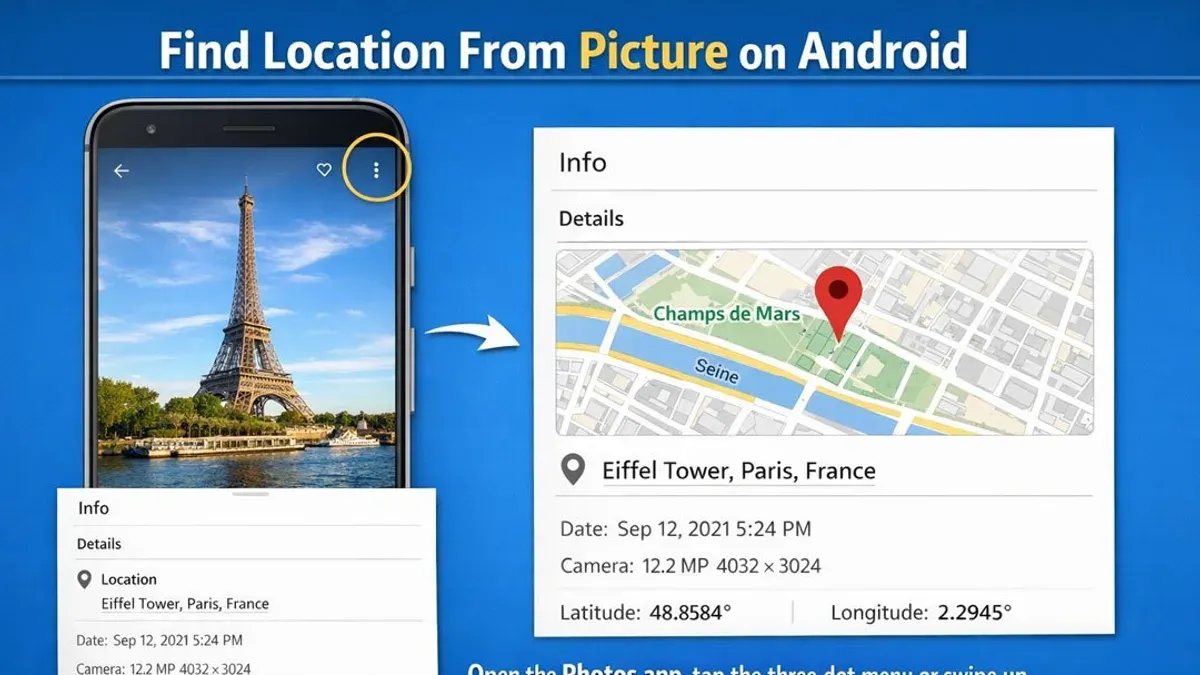
To see where a photo was taken, start by opening the Photos app and selecting the photo you want to inspect. Once the photo is open, look for the info panel by tapping the ‘i’ button, usually located at the bottom of the screen on iPhone or in the toolbar on Mac. This opens detailed photo information, including location data if available.
- Open the Photos app and select a photo.
- Tap the ‘i’ (info) button to open the details panel.
- Look for a map preview and a location name beneath it. This map shows the exact or approximate spot where the photo was taken, based on embedded GPS data.
The map preview helps you visualize the location directly within the app. You can tap or click the map to open it in a larger view or in Apple Maps for more context. If the location is shown as ‘Unknown Location’ or is missing, it means the photo does not have embedded location data. This can happen if location services were off during capture or if the data was removed. In that case, the app cannot display a map or location name.
If you encounter a missing location, you can manually add or correct it later, but viewing the info panel is the first step to understanding the current data your photo holds.
Search Photos by Location Using the Photos App
You can find photos taken in a specific place by using the Photos app’s search bar or exploring the 'Places' album. Start by typing the location name directly into the search bar at the top of the app. For example, entering "Central Park" will display photos tagged with location data matching that area. If your photos have embedded location metadata, the results will include a map preview and clusters of images taken there.
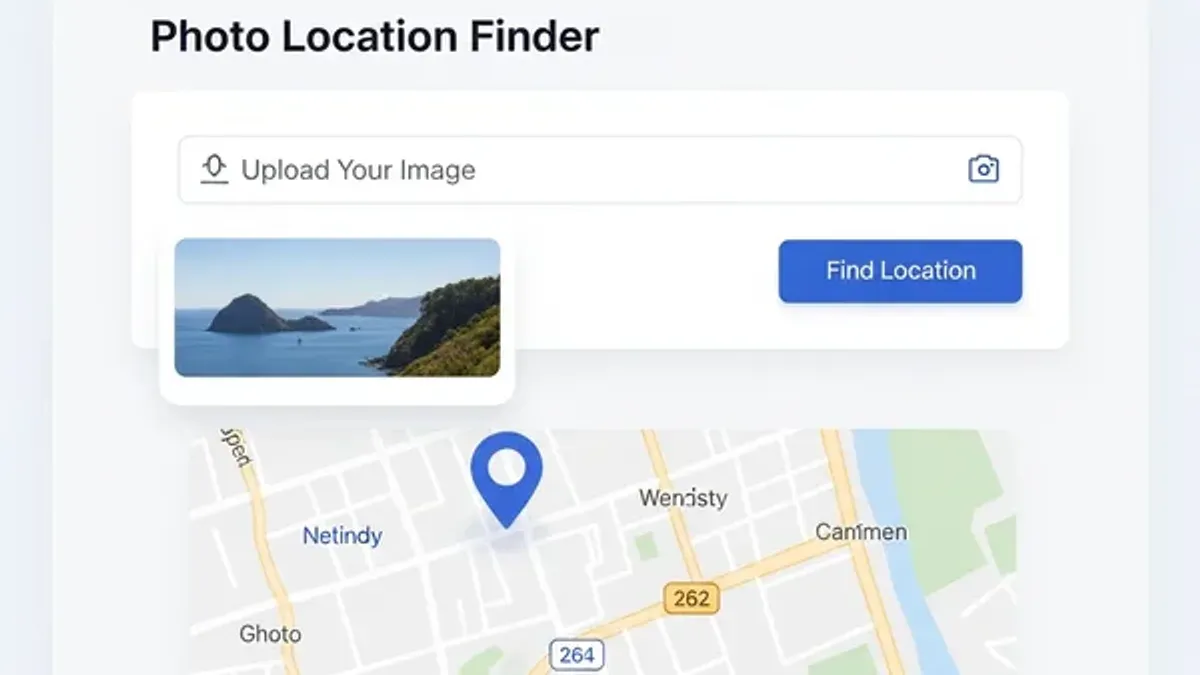
Another way to browse by location is through the 'Places' album found under the Albums tab. This album groups photos on an interactive map, allowing you to zoom in and tap clusters to view photos from particular spots. This visual approach helps you identify photos even if you don’t remember exact place names.
To improve search accuracy, use specific place names or landmarks, and consider alternative spellings. Keep in mind that photos without location data won’t appear in these searches. In such cases, manual location tagging may be necessary to organize your library effectively.
- Open the Photos app and tap the search bar at the top.
When you type a location like "Central Park," relevant photos with matching location info appear. - Tap the Albums tab and select the "Places" album.
You see a map with photo clusters representing different locations. - Zoom in or out on the map and tap a cluster to view photos taken there.
The photos displayed correspond to that geographic area. - If you notice missing photos in location searches, check if those images have location data embedded.
Photos without location tags won’t show up in these searches.
Add or Correct Location Information for Photos
If a photo’s location is missing or incorrect, you can easily add or update it manually within the Photos app. This helps keep your photo library organized and searchable by location. Here’s how to add or correct location details for individual photos or groups of photos.
- Select the photo you want to update. On an iPhone or iPad, tap the photo to open it, then tap the info (i) button. On a Mac, open the photo and click the info (i) button in the toolbar. You should see the current location or a blank field if no location is set.
- Tap or click "Add a Location" or "Assign a Location." Start typing the place name or address, and choose the best match from the suggestions that appear. Once selected, the location will appear on the map preview below.
- To confirm the change, close the info panel. The new location is now saved with the photo. You can verify this by reopening the info panel and seeing the updated location displayed.
- For multiple photos, select them all first (tap "Select" and choose photos on iPhone/iPad, or hold Command and click photos on Mac). Then open the info panel and add or change the location. The location you assign will apply to all selected photos, which is helpful for grouping photos taken at the same place.
Manually adding or correcting locations is useful when GPS data was missing or inaccurate due to device settings or indoor shoots. However, avoid adding locations if you’re unsure, as incorrect data can make searches and organization confusing. When possible, rely on embedded location data or verified information.
Before: The info panel shows "No Location" on a photo taken indoors without GPS data.
After: After adding "Central Park, New York," the info panel displays the location name and map, making it easier to find later.
Understand Why Location Data Might Be Missing or Inaccurate
Location data may not appear in your Photos app for several common reasons. First, if a photo was taken with Location Services turned off on your iPhone or Mac, the image won’t have embedded GPS coordinates. This often happens when users disable location tracking to protect privacy or save battery.
Second, some devices without GPS capabilities, such as older iPads or Macs, cannot record precise location information when capturing photos. In these cases, the photo lacks location metadata by default.
Third, imported photos sometimes lose location data due to privacy settings or app limitations. For example, when photos are downloaded from messaging apps or certain social media platforms, metadata—including location—may be stripped automatically to protect users’ privacy.
Fourth, editing or exporting photos using some apps can remove location tags, especially if you export images in formats that do not support EXIF metadata or use options that exclude location info.
Lastly, your iPhone or Mac privacy settings may prevent location data from appearing. Check Settings > Privacy > Location Services > Photos to confirm the Photos app has permission to access location information. Without this, even photos taken with location services on might not show location details in the app.
Troubleshoot Common Issues When Finding Photo Locations
Sometimes, the Photos app may not display location maps even though the photo's metadata contains location data. This often happens if app permissions are restricted. To fix this, check your device’s Settings under Privacy > Location Services > Photos and ensure the app is allowed to access location data. Once enabled, reopen the Photos app and tap the info button on a photo; the map preview should appear.
If location information appears incorrect or outdated, it could be due to manual edits or changes in the metadata. You can update the location manually from the info panel to ensure accuracy. Also, remember that some older photos might have imprecise data if they were taken with devices lacking GPS.
For deeper metadata analysis or when the Photos app doesn’t meet your needs, third-party apps like Metapho or Exif Viewer provide detailed EXIF data, including GPS coordinates. These tools can confirm if location data exists or has been stripped during editing. Compared to the Photos app, they offer more granular control but require extra installation.
- Open the Settings app and navigate to Privacy > Location Services > Photos.
You should see options for location access—select "While Using the App" or "Always". - Return to the Photos app and select a photo with expected location data.
Tap the info button; the map preview should now display. - If still missing, use a third-party metadata viewer app to check the photo’s EXIF data.
The app will show whether GPS coordinates are embedded in the photo. - If location data is missing in the third-party app, consider whether location services were off when the photo was taken or if metadata was removed during transfer.
Frequently asked questions
Can I find the location of a photo if it was taken before location services existed?
If a photo was taken before location services or GPS tagging were available, it will not have embedded location data. In such cases, the Photos app cannot automatically identify where the photo was taken. You can manually add location information to these older photos within the app to keep your library organized.
How do I prevent my location from being saved in photos?
To stop your iPhone or iPad from saving location information in photos, go to Settings > Privacy > Location Services > Camera, and select "Never" or "Ask Next Time". On a Mac, location data is typically added by devices, so controlling it usually involves adjusting settings on your iPhone or iPad before syncing photos. This prevents new photos from embedding location details.
Is it possible to find location info on photos shared from other apps?
Photos shared from other apps may or may not include location data, depending on the app's sharing settings and whether the photo has embedded metadata. Some apps strip location information for privacy, so the Photos app might not display location for those images. Always check the photo’s info in the Photos app to see if location appears.
Can I remove location data from photos before sharing them?
Yes, you can remove location data before sharing. On iPhone or iPad, tap the share button in the Photos app, then tap "Options" at the top of the share sheet and toggle off "Location". This ensures the shared photo does not include any embedded location information. On Mac, use the Info pane in Photos to remove or edit location before sharing.
What This Guide Does Not Cover
This guide does not cover forensic or advanced geolocation methods beyond what the Photos app provides. If you need precise location verification for legal, investigative, or professional purposes, specialized software and expertise are required. Additionally, some photos may never have location data if they were taken with GPS turned off, on devices without GPS, or if the location metadata was removed during editing or sharing. In those cases, the Photos app cannot retrieve or infer location information.
For the most reliable location data, ensure your device’s Location Services are enabled for the Camera app before taking photos. If you want to explore more advanced geotagging or reverse image search techniques, other dedicated tools and apps will better suit those needs.
The single most useful next step is to open the Photos app, select a photo, and tap the info (i) button to check for embedded location details. This simple action helps you immediately see what location data is available and whether you need to add or correct it manually.
See also: How to Import Photos from Your Camera into the Photos App · How to Export All Notes from Your Notes App: A Clear Step-by-Step Guide · How to Name Faces in People Album in Photos App: Step-by-Step Guide · How to Create a Shared Album in Photos App: Step-by-Step Guide