How to Install and Use Fonts in Font Book on Your Mac
Discover how to install and manage fonts in Font Book on your Mac to use them seamlessly across your favorite apps.
You’ve downloaded a new font and want to use it in your favorite Mac apps, but you're not sure how to add it properly. Knowing how to install a font in Font Book is the first step to safely adding new fonts and avoiding issues later on.
This article walks you through the entire process: from preparing your font files to installing them in Font Book, using them across applications like Pages or Keynote, managing your font collections, and troubleshooting common problems. You’ll also learn practical tips on organizing fonts and ensuring smooth font use on your Mac.
Key takeaways
- Use Font Book’s File > Add Fonts menu to install fonts safely.
- Organize fonts into collections within Font Book for easy access.
- Validate fonts before installation to prevent conflicts.
- Restart apps after installing fonts to see them available.
- Font Book lets you disable or remove fonts without deleting files.
Before you start: What you need to install fonts in Font Book
To add fonts successfully to Font Book on your Mac, you first need to ensure you have the correct font files and system permissions. Font Book supports several common font file formats, including .ttf (TrueType Font), .otf (OpenType Font), and .dfont (Mac OS X Data Fork TrueType). Each format has its advantages: .otf files often contain advanced typographic features, while .ttf files are widely compatible across many systems. The .dfont format is specific to older Mac environments but is still supported for compatibility.
Make sure you download fonts from trusted sources to avoid corrupted files or security risks. Reliable places include Google Fonts for free and open-source options, Adobe Fonts if you have a subscription, or well-known font foundries like Font Squirrel. Avoid downloading fonts from unverified websites to prevent malware or unusable fonts.
Before installation, verify that your Mac user account has the necessary permissions to add system fonts. Typically, standard user accounts can install fonts for their own use, but administrative rights may be required to install fonts system-wide. Also, ensure your macOS version supports Font Book and font management features; most modern versions do by default.
- Locate the font file you want to install on your Mac. After downloading, you should see a file ending in .ttf, .otf, or .dfont.
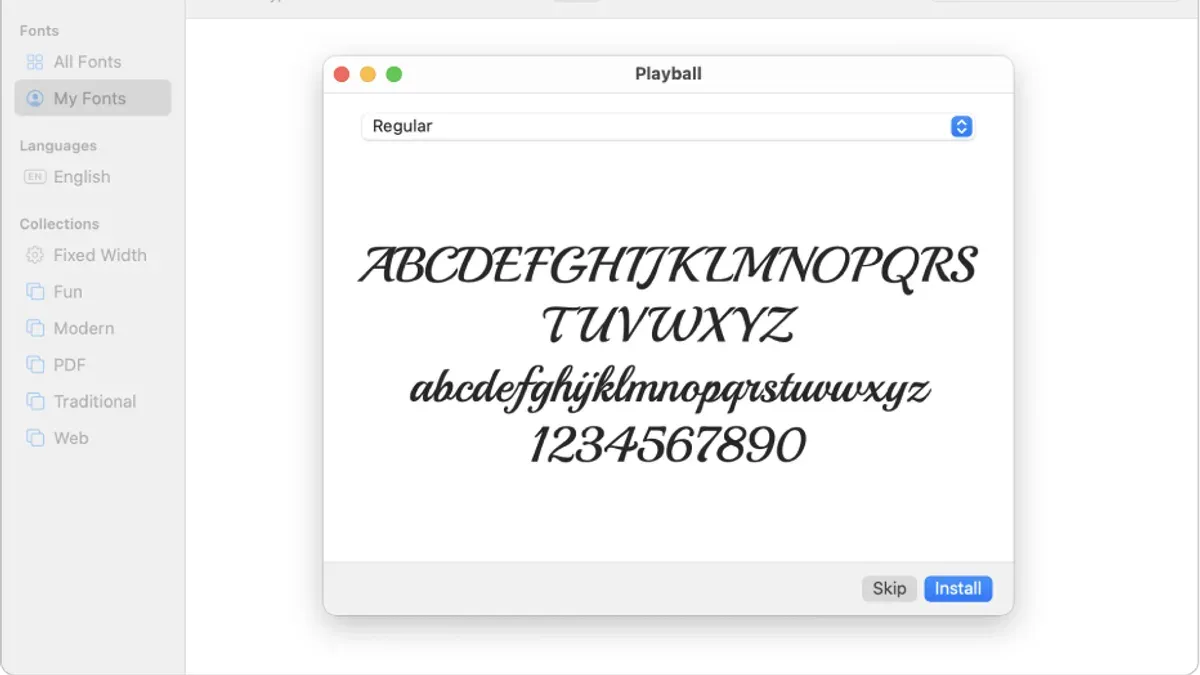
- Double-click the font file; this should open a preview window showing the font style and glyphs.
- Check that the preview displays correctly without errors or missing characters, indicating the file is intact.
- From the preview window, you are ready to add the font to Font Book, which you will learn in the next section.
How to add fonts to Font Book step-by-step
Installing fonts into Font Book on your Mac can be done quickly using a few simple methods. First, open the Font Book application by going to your Applications folder or searching for "Font Book" with Spotlight. Once open, you can add fonts either by dragging font files directly into the app or by using the menu commands.
- Drag and drop font files: Locate the font files on your Mac, usually with extensions like.ttf or.otf. Drag these files into the Font Book window. When successful, the fonts will appear in the list with a preview, indicating they are installed.
- Use the File menu to add fonts: In Font Book, click File in the menu bar and select Add Fonts.... Navigate to where your font files are stored, select them, and click Open. The fonts will then be imported into Font Book and listed with previews.
- Choose installation scope: After adding a font, you can install it for your user account only or system-wide. Installing for your user means only you can access the font, which requires no admin rights. System-wide installation makes the font available to all users but will prompt for administrator authentication.
Installing fonts system-wide is useful when multiple users on the same Mac need access to the font, but it requires extra permissions. Installing fonts for just your user is quicker and safer if you do not need other accounts to use the font. Always verify the font appears in Font Book with a proper preview to confirm successful installation.
How to use an installed font in your applications
Once you have installed a font in Font Book, it becomes available for use in your applications, but you need to ensure the apps recognize the new font. Most apps like Pages, Microsoft Word, and design software load their font lists when they start, so restarting these applications is essential after installing fonts.
- Close the application where you want to use the new font, for example, Pages or Word. When you reopen it, the app will refresh its font list to include your newly installed font.
- Open or create a document, then go to the font selection menu, usually found in the toolbar or under the Format menu. Look for your font’s name in the list; fonts are typically listed alphabetically.
- Select the font and start typing or apply it to existing text. You should see the text change to the new font style immediately if it is properly activated.
- If the font does not appear in the font menu, quit the application and reopen it once more. Sometimes font caching causes delays in the font appearing.
- To verify the font’s appearance across apps, repeat these steps in another program like Pages or a design app. Font Book manages font activation globally, so once activated, the font should be available to all compatible applications on your Mac.
Font Book automatically activates fonts when installed, but if you notice missing fonts, restarting your computer can clear font caches and resolve recognition issues. This ensures all apps access the latest font information.
How to install a font file correctly to avoid common issues
Installing fonts incorrectly can lead to errors like corrupted fonts, missing characters, or fonts not appearing in Font Book. To avoid these problems, start by ensuring your font files are complete and not corrupted. A corrupted font file might trigger error messages such as "The font could not be installed" or cause the font to display improperly in applications. Always download fonts from trusted sources to reduce the risk of corrupted or incomplete files.
Before installing, verify the font license to confirm you have permission to use and install the font. Some fonts are limited to personal use or prohibit installation on multiple devices. Installing fonts without proper licensing might cause restrictions or remove functionality in some font management tools.
If a font fails to install or does not show up in Font Book after installation, first try restarting Font Book or your Mac. If the issue persists, check for duplicate fonts by opening Font Book and selecting "All Fonts". Duplicate fonts often cause conflicts that prevent proper activation. Resolve duplicates by selecting the duplicates and choosing "Resolve Duplicates" from the File menu, which merges or disables conflicting copies.
- Obtain the font file from a reliable source and inspect its integrity. When successful, the file will open without errors in a font previewer.
- Confirm the font license permits installation and use. When compliant, you retain full access to font features without restrictions.
- Open Font Book, then use File > Add Fonts or drag the font file into the app. A successful install shows the font listed without errors.
- Restart Font Book or your Mac if the font does not appear. The font should become visible and selectable in your collections.
- Check for and resolve duplicates by selecting "All Fonts", highlighting duplicates, and choosing "Resolve Duplicates". After this, only one active copy remains, ensuring consistent usage.
How to manage and organize fonts in Font Book
Keeping your fonts organized in Font Book helps you quickly find the right style for any project and prevents system slowdowns caused by too many active fonts. A practical way to manage fonts is by creating collections tailored to specific tasks, such as a book-writing project. For example, you might create a collection named "Book Writing" containing serif fonts like Times New Roman, Georgia, and Garamond to maintain consistent typography throughout your manuscript.
- Open Font Book and select File > New Collection. A new collection appears in the sidebar ready to be named.
- Name the collection, for instance, "Book Writing". It now shows as a separate group under Collections.
- Drag fonts you want for this project from the All Fonts list into the new collection. The fonts remain installed but are now grouped, making selection easier.
- To remove clutter, select fonts you no longer use and choose Edit > Disable. Disabled fonts stay in Font Book but do not load in your apps, improving performance without deleting files.
- If you are certain you won’t need a font again, select it and choose Edit > Remove to delete the font file from your system.
- Before making major changes, back up your font library by copying the contents of ~/Library/Fonts and /Library/Fonts to an external drive or cloud storage.
- Use Font Book’s validation tool by selecting a font and choosing File > Validate Font. This checks for errors that can cause issues in applications.
Before organizing, your font list might be a long, undifferentiated set of dozens or hundreds of fonts. After creating collections and disabling unused fonts, you’ll see a cleaner sidebar with clearly labeled groups and fewer active fonts, which simplifies selecting the right font for your writing or design projects.
How to troubleshoot if fonts don’t appear after installation
If a font you installed does not show up in your applications, there are several steps you can take to diagnose and fix the problem. Often, the issue is related to cached font data or conflicts between fonts.
- Restart your Mac and applications. Close all apps that use fonts, then restart your Mac. After rebooting, open your apps again and check if the font appears in the font list. A restart often refreshes the system font cache and resolves simple loading issues.
- Clear the font cache manually or with an app. Font caches can become corrupted and prevent new fonts from being recognized. You can clear caches manually by opening Terminal and running the command sudo atsutil databases -remove, then restarting your Mac. Alternatively, use a trusted font cache cleaning app. After clearing caches, the font should become visible in applications.
- Reinstall the problematic font. Delete the font from Font Book, then reinstall it. Sometimes the font file may be corrupted or improperly installed. After reinstalling, restart your apps to check if the font now appears.
- Check for conflicting or duplicate fonts. In Font Book, use the “Resolve Duplicates” feature or look for fonts with warning symbols. Conflicts or corrupt font files can stop fonts from loading. Disable or remove duplicates and validate fonts to ensure integrity.
If you follow these steps, you should be able to identify why a font is missing and correct the issue so your fonts display properly in your applications.
How to install fonts on other devices and Windows alternatives
Font Book is a Mac-only application designed for managing fonts on macOS. If you use a Windows laptop or other platforms, font installation works differently. Windows relies on a dedicated Fonts folder and system settings to add and manage fonts.
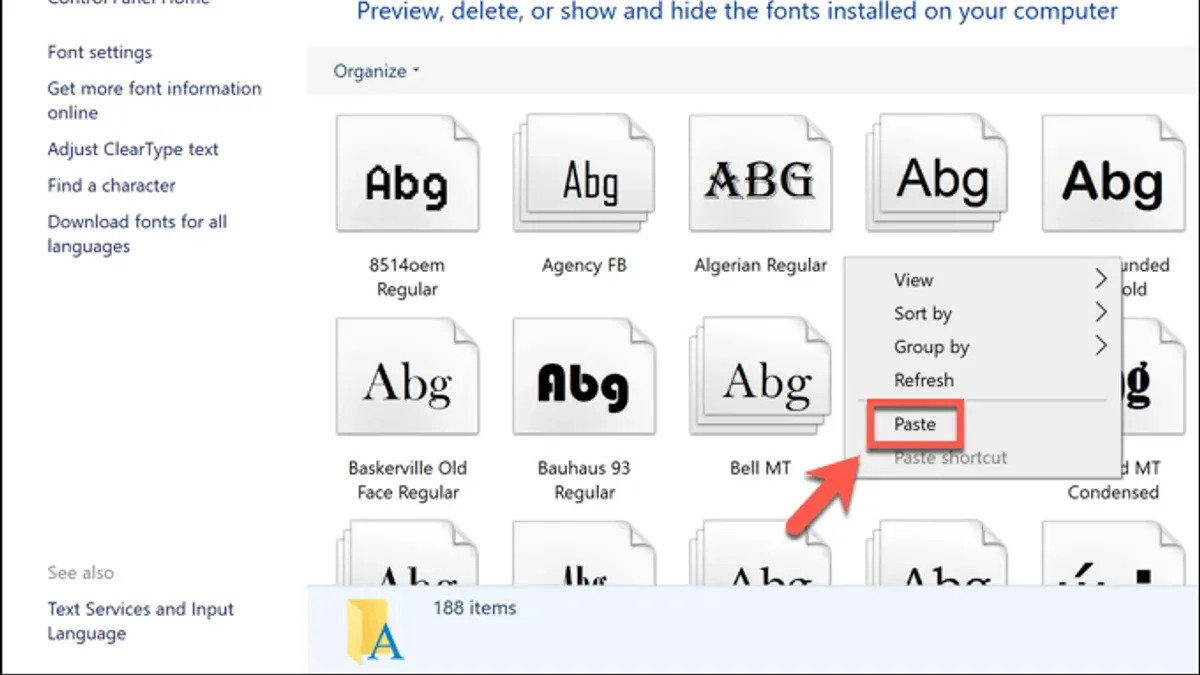
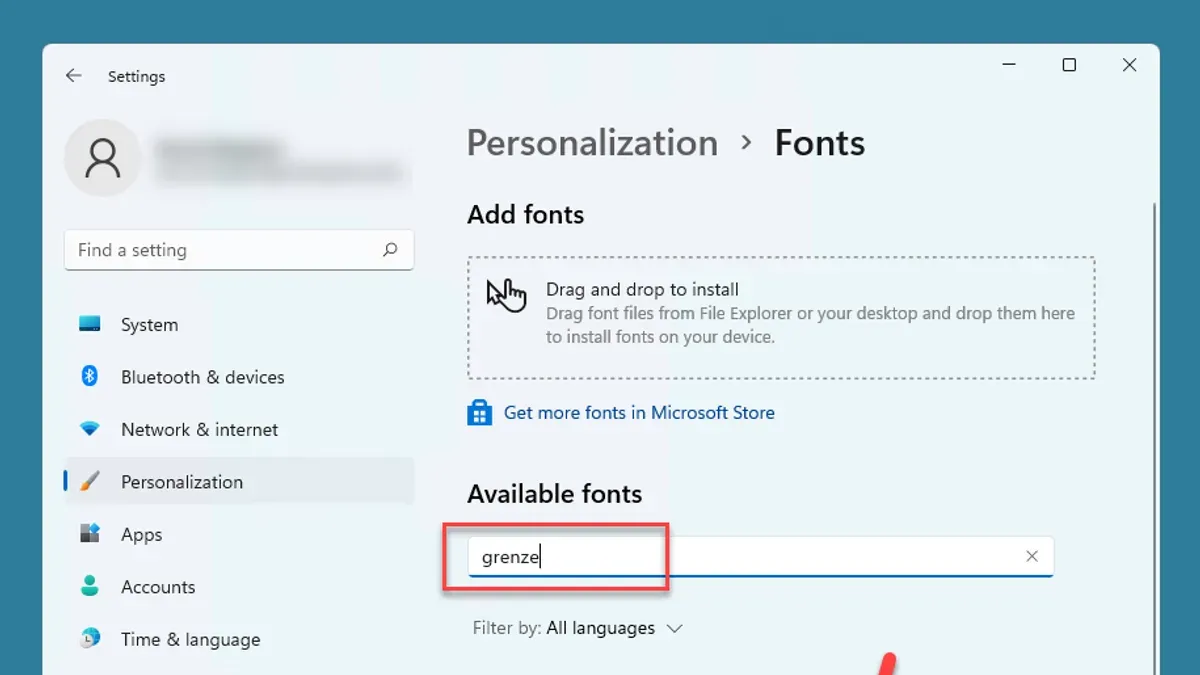
On Windows, you typically install fonts by copying font files into the Fonts folder located at C:\Windows\Fonts or by right-clicking the font file and choosing Install. This makes the font available system-wide. Microsoft also provides tools like the Fonts section in Settings under Personalization for viewing and managing installed fonts.
Font files such as TrueType (.ttf) and OpenType (.otf) are compatible across both macOS and Windows. This means you can use the same font files on multiple platforms, but you must install them separately using each system’s native tools.
| Feature | Mac (Font Book) | Windows (Fonts Folder) |
|---|---|---|
| Installation Method | Drag font files into Font Book or use File > Add Fonts | Right-click font file > Install or copy to C:\Windows\Fonts |
| Font Management | Create collections, disable fonts, validate fonts within Font Book | View and uninstall fonts via Settings > Personalization > Fonts; limited grouping options |
| Scope of Installation | User-only or system-wide installation options | Generally system-wide; user-only installs need manual configuration |
| Font Validation | Built-in validation to identify issues | No built-in validation; third-party tools required |
- Locate the font file you want to install on your Windows device. When done correctly, the font file should be accessible and compatible (usually.ttf or.otf).
- Right-click the font file and select Install. If you want the font available for all users, choose Install for all users if that option appears.
- Open an application such as Microsoft Word or Adobe Photoshop. The newly installed font should appear in the font selection menu.
- If the font doesn’t appear immediately, restart the application or your computer to refresh the font cache.
These steps and tools differ from Font Book but achieve the same goal: making fonts available for use in your applications. Understanding these differences helps when you switch between Mac and Windows or share fonts across devices.
How to find and choose fonts ideal for writing books or professional documents
Choosing the right font for long-form writing or professional documents hinges on readability, formality, and style. Good book fonts typically have clear letterforms, moderate spacing, and balanced contrast, which reduce eye strain over extended reading. Serif fonts like Garamond, Times New Roman, and Georgia are popular for printed books because their serifs guide the reader's eye across lines. For digital reading, fonts like Helvetica and Avenir, which are sans-serif, often offer clean and modern readability.
On a Mac, you can find these fonts preinstalled or available for easy download. For example, Garamond and Georgia come with macOS and are widely supported in writing apps such as Microsoft Word and Pages. Testing fonts before committing helps ensure they suit your document’s tone and length.
To experiment without cluttering your Font Book, create a dedicated collection for potential book fonts. This helps keep your library organized and avoids overwhelming your system. When testing, compare fonts side-by-side in your writing app by applying each font to the same text section and observing differences in spacing, readability, and overall feel.
User studies and readability assessments often highlight that fonts with balanced x-height and moderate stroke contrast improve reading speed and comfort. When using Word, you can view fonts in the font dropdown menu and apply them instantly, making it easy to preview and decide.
- Open your writing application, such as Microsoft Word or Pages. You should see your document ready for editing.
- Select a paragraph or section of text to test different fonts. The selected text will be highlighted.
- Open the font menu and choose a font like Garamond or Georgia. The text updates immediately to reflect your choice.
- Repeat with other fonts you want to compare, noting readability and tone differences.
- Create a Font Book collection named “Book Fonts” and add candidate fonts to it for easier management. Open Font Book, click the “+” button, name the collection, then drag fonts into it. You should see the fonts grouped under this collection.
Frequently asked questions
How to use a font i installed?
After installing a font in Font Book, open the application where you want to use it, such as Pages or Microsoft Word. The new font will appear in the font menu, typically under its name. If you don’t see it immediately, try restarting the application to refresh the font list.
How to install a font on laptop?
To install a font on your Mac laptop, double-click the font file (usually.ttf or.otf). This opens Font Book with a preview. Click the “Install Font” button at the bottom right to add it to your system fonts.
How to add a font in font book?
Open Font Book and go to the File menu, then select “Add Fonts.” Navigate to your font file’s location, select it, and click “Open.” The font will then be validated and added to your collection.
How to install a font on computer?
On a Mac computer, installing a font involves opening the font file to launch Font Book, then clicking “Install Font.” Ensure the font file is compatible and not corrupted for smooth installation.
How to add fonts to font folder?
Fonts installed through Font Book are automatically placed in the correct system folders. Manually adding fonts by copying files to the ~/Library/Fonts or /Library/Fonts folders is possible but not recommended, as it can cause conflicts. Use Font Book’s interface to manage fonts safely.
What This Guide Does Not Cover
This guide focuses on installing fonts using Font Book on macOS and managing them for everyday use. It does not cover advanced font editing, such as modifying font outlines or creating custom fonts. Additionally, it does not address embedding fonts in commercial products to meet licensing requirements, which often involves specialized software and legal considerations. If you need to work with font licensing for professional publishing or create custom font designs, consulting a font licensing expert or using dedicated font editing tools is recommended.
To move forward confidently, the most useful step is to practice installing a new font yourself. Download a free font from a trusted website, then follow the step-by-step instructions in Font Book to add and activate it. After installation, open an application like Pages or TextEdit to verify the font appears in the font menu and type some sample text. This hands-on approach will help you become comfortable with the process and reduce common installation mistakes.
See also: How to Set Downtime for Kids in Screen Time on Mac: A Step-by-Step Guide · How to Set App Limits in Screen Time on Mac: A Step-by-Step Guide · How to Sort by Due Date in Reminders on Mac: A Clear Step-by-Step Guide