
How to Make a Movie Trailer in iMovie: Step-by-Step Guide
Discover how to create a captivating movie trailer in iMovie with step-by-step instructions for Mac and iPad users.
You have a collection of video clips and photos ready, but you're unsure how to turn them into a captivating preview that grabs attention. Making a movie trailer can seem daunting, especially if you want it to look polished and professional.
This article explains how to make a movie trailer in iMovie, guiding you step-by-step through the process on both Mac and iPad. You'll learn how to start a trailer project, add and arrange clips, customize titles and music, and export your final video for sharing. The focus is on practical storytelling and pacing tips that help your trailer stand out, beyond just the technical steps.
Key takeaways
- Start by gathering your best video clips and photos before opening iMovie.
- Use iMovie’s built-in trailer templates to create a structured timeline quickly.
- Customize titles and replace default music to match your trailer's mood.
- On iPad, use touch gestures and device features for precise clip trimming.
- Export your trailer in 1080p for high-quality playback on YouTube or other platforms.
Before you start: Prepare your materials and setup
Before you dive into making your movie trailer, ensure your device and software are ready. iMovie is available on both Mac and iPad, but note that the Mac version offers more advanced editing features such as detailed timeline controls and greater audio customization. The iPad version is streamlined for touch interaction and may have some limitations, but it’s excellent for quick editing on the go. Confirm your device runs the latest iMovie update to access the newest features and templates.
Gather all the video clips, photos, and audio files you plan to use. This includes any recorded footage, background music, sound effects, and images that support your trailer’s theme. Organize these materials in a folder or album for easy access during editing. Planning the story or theme of your trailer ahead of time helps guide what shots to include; consider whether your trailer is dramatic, comedic, or informative to select clips that fit the mood.
Make sure you have enough free storage space on your device to handle video editing, which can quickly consume several gigabytes, especially with high-resolution footage. Also, work in a stable environment where your device won’t run out of power or be interrupted, as iMovie projects can take time to complete without crashes or data loss.
- Check your device’s compatibility by opening the App Store and verifying that iMovie is installed and updated; successful update means you see the latest version number and can launch iMovie without errors.
- Collect your media files and place them in a dedicated folder or album on your device; when you open the Photos or Files app, you should see all your clips, photos, and audio ready for import.
- Write a brief outline of your trailer’s story or theme on paper or a notes app; you should have clear ideas for the sequence of clips and the tone you want to convey.
- Verify available storage by going to Settings > General > iPhone Storage (or About on Mac); ensure you have at least a few gigabytes free to avoid editing interruptions.
- Charge your device fully or keep it connected to power to maintain a stable editing session without unexpected shutdowns.
Create a new movie trailer project in iMovie
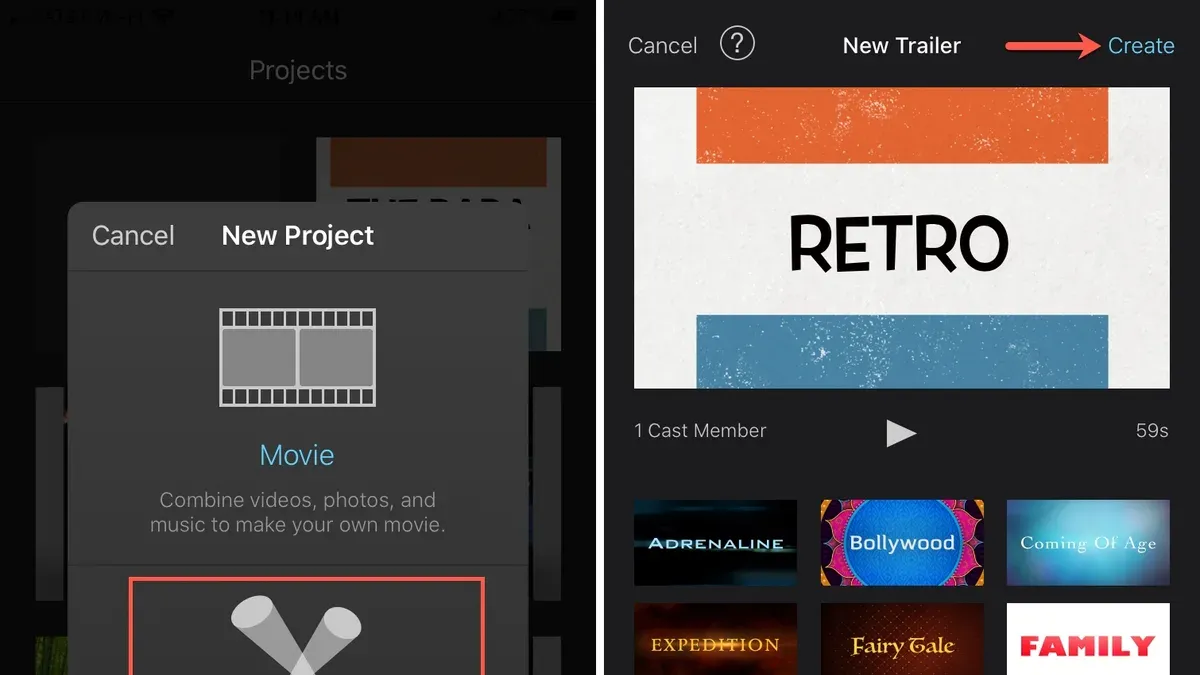
To start making your movie trailer, first open the iMovie app on your Mac or iPad. Once iMovie launches, look for the Create New button, typically found at the top of the screen on Mac, or the plus icon on iPad. Tap or click it, then select Trailer from the options that appear. This opens the trailer template browser, where you can choose a style that fits your video’s mood and genre.
- After selecting Trailer, a grid of trailer templates will appear. Each template has a unique combination of pacing, shot types, and music style. Browse through the thumbnails and click or tap any trailer to preview its style and pacing in a short demo video.
- Choose a template that matches the tone you want for your trailer—whether it’s action-packed, dramatic, or fun. Selecting the right template helps your trailer maintain a professional rhythm and look.
- Once you select the template, iMovie creates a new project with a structured storyboard. This storyboard includes placeholders for your video clips and photos, title cards that you can customize with your own text, and a soundtrack synced to the trailer’s pace.
- Familiarize yourself with the template elements: the placeholders marked for specific shot durations, the title fields for your trailer’s headline and credits, and the automatic music track that adjusts as you edit clips.
- With the template loaded, you’re ready to start adding your media into these placeholders to build your trailer.
Screenshot note: The template selection screen displays thumbnails with the template name below each. The storyboard view shows clip placeholders as blue rectangles with icons indicating the type of shot required, while title cards are shown as editable text boxes.
Add and arrange video clips and photos in the trailer timeline
Once you have your media files imported into iMovie’s project media library, you can start replacing the template’s placeholder clips and photos with your own footage. Each placeholder is designed for a specific shot type or duration, so matching your clips to these helps keep the trailer’s pacing and narrative flow intact.
- Open the project media library: Click the Import Media button or drag your clips and photos from Finder into the media library pane. You should see thumbnails of all imported files available for use.
- Drag clips to placeholders: Click and hold a clip or photo, then drag it onto a placeholder in the trailer timeline storyboard. When the placeholder highlights, release to replace it. The clip automatically adjusts to the template’s set length.
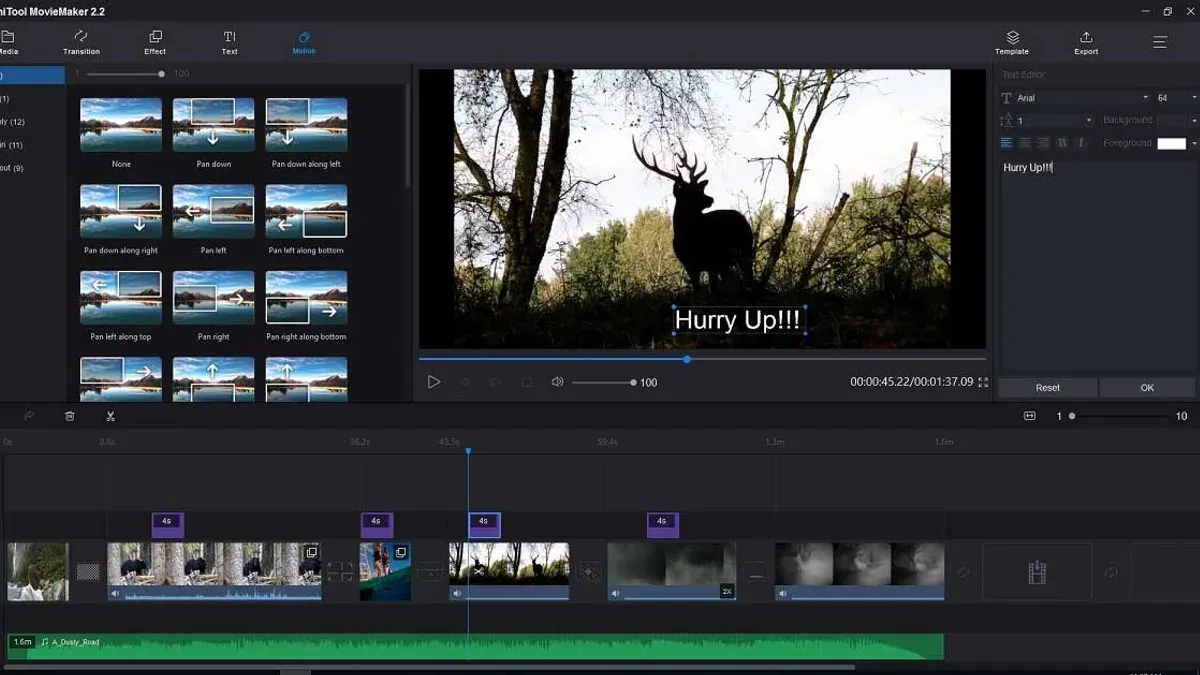
- Trim clips if needed: Select the clip within the timeline, then drag the yellow handles on either side to trim its length while keeping within the placeholder’s duration. This fine-tuning helps maintain the trailer’s rhythm without cutting important action.
- Match shot types to storyboard guidance: The storyboard provides descriptions like “Close-up” or “Wide shot” for each placeholder. Choose clips that visually fit these directions to build a coherent story and create excitement.
- Review and reorder clips: If a clip doesn’t fit well, drag it out and try another from your media library. You can also drag clips to reorder them within the timeline, but keep the storyboard’s suggested sequence in mind to preserve narrative flow.
For example, replacing a “Medium shot of character” placeholder, you drag your clip showing a character mid-frame and trim it to fit the set duration. The template automatically adjusts transitions and timing to match. Screenshots show the import step, dragging clips onto placeholders, and trimming handles in action, illustrating the process clearly.
Customize titles, text, and music to enhance your trailer
Personalizing your trailer's text and soundtrack is key to making it stand out. Start by editing the title cards and text overlays in iMovie’s trailer storyboard. Select each placeholder text to type your movie's name, credits, or taglines. Keep your text concise and impactful—trailers work best with brief phrases that quickly convey the mood or theme. Explore different title styles by clicking the “Titles” tab; some styles are bold and cinematic, while others are subtle and elegant. Compare how the font, size, and animation affect the trailer's tone.
- Click a title placeholder in the storyboard, then double-click the text to edit it. You should see your new text appear in the preview window.
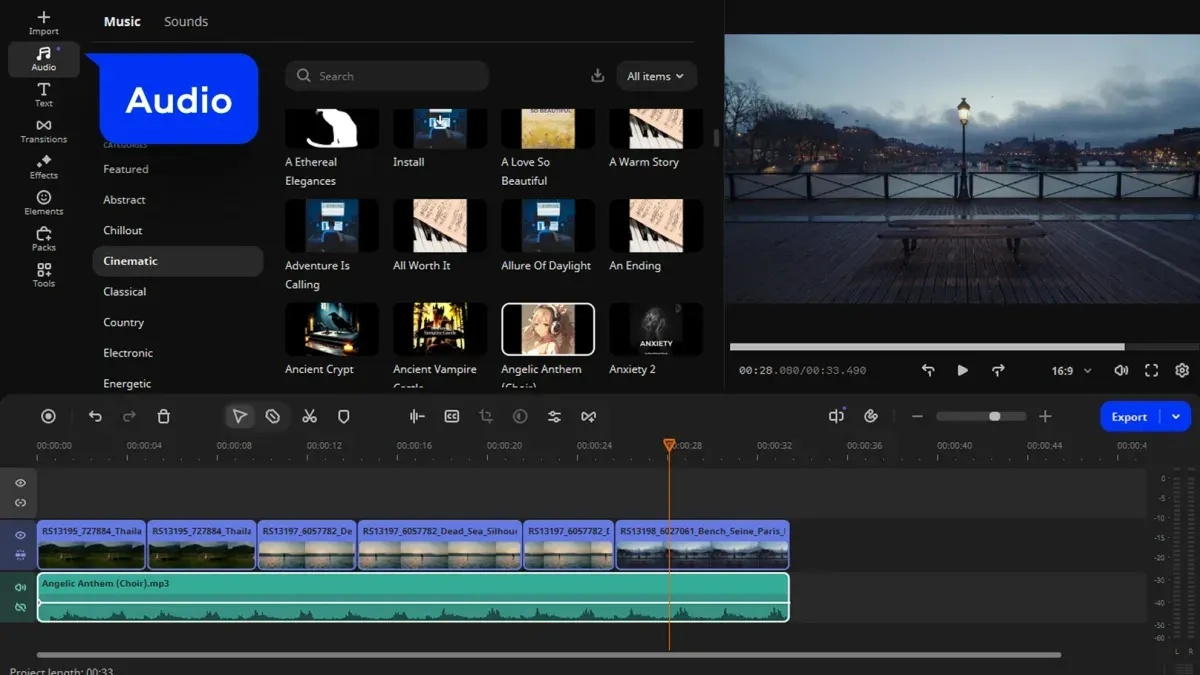
- Navigate to the “Audio” tab, and browse the built-in music options categorized by genre and tempo. Select a track to preview it in your trailer context.
- To import your own audio, click the “Import Media” button and choose a file from your device or external storage. The audio clip will appear in your media library.
- Drag the chosen music to the background music track below the timeline. The track's waveform should appear, indicating it is active.
- Adjust the volume by selecting the audio clip and using the volume slider in the inspector pane; reduce volume to avoid overpowering your dialogue or sound effects.
- Trim or extend the music clip by dragging its edges to sync with the trailer’s length and pacing. The timeline will update visually as you adjust.
Using built-in music offers quick, royalty-free options that match trailer moods, while importing allows you to customize further with unique soundtracks. Balancing text style and music volume enhances storytelling—too much text or loud music can distract, so aim for clarity and emotional impact.
Make a movie trailer on iMovie iPad: device-specific tips
Starting a trailer project on iMovie for iPad differs from the Mac experience primarily in interface layout and touch-based controls. On iPad, you begin by tapping the plus icon (+) and selecting "Trailer" from the project options. Unlike the Mac’s sidebar and menu-driven workflow, the iPad presents a more streamlined, touch-optimized storyboard view where placeholders respond directly to taps and drags.
Trimming and arranging clips on iPad rely heavily on intuitive gestures. To trim a clip, tap it to reveal yellow trim handles, then drag these handles with your finger to adjust the clip’s duration. Rearranging clips is done by pressing and holding a clip until it lifts slightly, then dragging it to a new position in the timeline. These gestures differ from the Mac’s drag-and-drop with mouse precision but offer quick, tactile control suited to touchscreens.
Importing photos and videos on iPad is integrated tightly with the Photos app. Tap the placeholder clip, choose "Import Media," then select from your Photos library. This direct access means you can quickly add content without switching apps or navigating complex dialog boxes as on Mac.
Exporting your finished trailer on iPad is straightforward. Tap the share icon, select "Save Video" or "YouTube," and follow prompts to upload directly. This contrasts with the Mac workflow where you export to a file first, then upload separately. The iPad’s direct share options speed up publishing your trailer to YouTube or other platforms.
| Feature | iPad | Mac |
|---|---|---|
| Starting a trailer | Plus (+) icon & touch storyboard | Menu bar, sidebar, mouse-driven |
| Clip trimming | Tap + drag yellow handles | Drag edges with mouse |
| Clip rearranging | Tap, hold, drag with finger | Click, drag with mouse |
| Import media | Direct from Photos app | File browser dialog |
| Export & share | Direct share to YouTube & save | Export file then upload |
Export your finished trailer and upload it to YouTube
Once your movie trailer is complete, exporting it with the right settings ensures high quality while balancing file size. In iMovie, click the Share button (a square with an arrow pointing upward) in the upper right corner. Select File to open export options. Set the Resolution to 1080p for Full HD quality, which is ideal for YouTube uploads. Choose Quality as High to maintain clarity without creating excessively large files. Keep Compress set to Better Quality if available; this may increase export time but preserves detail.
After adjusting these settings, click Next. Choose a destination folder on your device or select iCloud Drive to save your trailer in the cloud. Naming your file clearly helps with later uploads. When the export finishes, you’ll see a confirmation window with a preview option.
To upload directly from iMovie, click the Share button again and select YouTube & Facebook. Sign in to your YouTube account if prompted. Fill in your video’s Title, Description, and Tags. Use keywords relevant to your trailer content for better discovery, such as "movie trailer," "short film," or your video’s genre. Select the appropriate Privacy setting: Public, Unlisted, or Private. Then click Next, and iMovie will upload the trailer directly to YouTube.
If you prefer uploading through the YouTube app or website, open the app, tap the + icon, and select Upload a video. Locate your exported trailer file, then add title, description, and tags as above. Review all details before confirming the upload.
Troubleshoot common issues when making trailers in iMovie
When creating your movie trailer in iMovie, you may encounter some typical problems related to clip placement, audio, exporting, or uploading. Understanding how to resolve these issues ensures a smoother editing experience and a polished final product.
Fix clips that won’t fit template placeholders
If your clips don’t fit the trailer template placeholders properly, it’s usually because of incompatible aspect ratios or clip lengths. To fix this, select the clip in the timeline, then use the Crop to Fill option found in the preview toolbar. Adjust the frame to focus on the desired part of the clip, ensuring it fills the placeholder without black bars. If the clip is too short, replace it with a longer one or duplicate clips if the template allows.
Resolve audio syncing or volume issues
Audio problems like out-of-sync sound or uneven volume levels are common. Check your clip’s audio waveform for irregularities by selecting the clip and enabling the audio waveform view. To fix syncing, detach the audio from the video (right-click the clip and choose Detach Audio), then manually drag the audio track to line it up with the video. Adjust volume by selecting the clip and dragging the volume slider in the audio inspector. Using the Auto Enhance audio feature can also help balance sound levels.
Handle export errors or slow rendering
If iMovie gives an export error or is slow rendering, first verify sufficient storage space on your device. Close other apps to free up memory. For persistent errors like “Export Failed” or “Unable to Complete Export,” try restarting iMovie and your device. Also, check the export format and resolution settings under File > Share > File... to ensure compatibility. Exporting in a lower resolution can speed up rendering if time is an issue.
What to do if YouTube upload fails from iMovie
Uploading directly to YouTube from iMovie can fail due to network issues, incorrect account permissions, or app glitches. Confirm you are signed into the correct YouTube account in iMovie’s preferences. If upload fails, export the trailer to your device first, then use the YouTube app or website to upload manually. Common error messages include “Upload Failed” or “Authentication Error.” Rechecking your internet connection and YouTube account status typically resolves these.
- Check clip aspect ratios and lengths: Use Crop to Fill or replace clips to fit placeholders correctly.
- Fix audio sync: Detach audio and manually align; adjust volume in audio inspector.
- Clear storage and close apps: Free memory if export is slow or fails.
- Restart iMovie and device: Resolve persistent export errors.
- Verify export settings: Choose compatible file format and resolution.
- Confirm YouTube sign-in in iMovie: Ensure correct account access.
- If upload fails: Export locally and upload via YouTube app or website.
Frequently asked questions
How to make a movie with imovie?
Start by opening iMovie and selecting "Create New" > "Movie". Import your video clips and drag them onto the timeline in the order you want. Trim clips by clicking and dragging the edges, then add transitions, titles, and music from the libraries to create a cohesive story. Finally, review your movie and make any adjustments before exporting.
How to make a video with imovie?
Making a video in iMovie involves importing your footage or photos, arranging them on the timeline, and enhancing with effects like filters and soundtracks. Use the toolbar to add titles or voiceovers and adjust clip length for pacing. Once satisfied, export the video by clicking the share button and choosing your desired format.
How to make an imovie?
An iMovie is a project created within the iMovie app. To make one, open iMovie and tap "Create New". Choose either "Movie" or "Trailer" based on your goal, then add your media files. Customize your project with editing tools like crop, split, and audio adjustments before saving or sharing.
How to put an imovie on youtube?
After finishing your iMovie project, click the share button (a square with an arrow) and select "YouTube". Sign in to your YouTube account if prompted, fill in the video title, description, and privacy settings, then upload directly. Alternatively, export the video to your device and upload it manually through the YouTube app or website.
How to make an imovie with photos?
Import your photos into iMovie by selecting them from your library or albums. Drag the photos onto the timeline and adjust their duration to control how long each appears. Add zoom or pan effects using the Ken Burns feature to create movement, then complement your slideshow with music or voiceover before exporting.
What This Guide Does Not Cover
This guide focuses on using iMovie’s built-in trailer templates and basic editing tools to help you create engaging movie trailers quickly and easily. It does not cover advanced video effects, color grading, motion graphics, or audio engineering techniques that professional filmmakers might require for more complex productions. If your project demands high-level customization or you want to explore specialized software like Final Cut Pro or Adobe Premiere Pro, those tools offer a broader range of options beyond what iMovie provides.
The single most useful next step is to open iMovie and start a new trailer project using one of the available templates. Experiment with adding your own clips and photos, paying close attention to the preset storyboard prompts and timing cues. This hands-on approach will help you understand how to tell a compelling story within the structured format iMovie offers, making your trailer feel polished and professional from the start.
See also: How to Record a Voiceover in iMovie: Step-by-Step Guide · How to Add Subtitles in iMovie: A Complete Step-by-Step Guide · How to Export Your iMovie Project in 4K: A Step-by-Step Guide



