How to Compress a PDF in Preview: Step-by-Step Guide
This guide shows how to compress a PDF in Preview to reduce file size without losing important details or clarity.
Imagine you need to email a PDF but the file size is too large to send quickly or easily. You want to reduce the size without making the document blurry or losing important details. This is a common situation for Mac users who rely on Preview for viewing PDFs.
This article explains how to compress a PDF in Preview effectively. You will learn step-by-step how to use Preview’s built-in Quartz Filter to reduce file size, create custom filters for better control over compression, and check your document’s quality after compression. We’ll also cover troubleshooting tips and alternatives if Preview’s tools don’t meet your needs.
Key takeaways
- Open your PDF in Preview and access the Quartz Filter through the Export menu to start compression.
- Use the "Reduce File Size" filter for quick compression but expect some quality loss.
- Create a custom Quartz Filter in ColorSync Utility for more precise control over image quality and file size.
- Always compare the original and compressed PDFs to ensure readability is maintained.
- If Preview's compression isn’t sufficient, consider third-party apps or online tools as alternatives.
Before you start: What you need to compress a PDF in Preview
To compress a PDF using Preview, you first need a Mac computer, as Preview is a built-in application included with macOS. Make sure your system is running normally and that Preview opens without issues. The PDF file you want to compress should be accessible on your device, preferably saved in a location you can easily find, like the Desktop or Documents folder.
Before starting compression, back up the original PDF file. Compression can reduce file size by lowering image quality or altering data, which may result in some loss of detail or clarity. Keeping a copy of the original ensures you can return to it if the compressed version is unsatisfactory or if you need the full-quality document later.
Preview compresses PDFs using Quartz filters, which apply preset adjustments to images and text within the file. Compression effectiveness depends heavily on the PDF’s content. For example, PDF files primarily consisting of scanned images or photos can often be reduced by a significant percentage, sometimes halving the file size or more. In contrast, PDFs mostly made up of text and vector graphics might see only slight size reductions, as their data is already quite compact.
Understanding these factors helps set realistic expectations. Compression can be quick and convenient with Preview’s tools, but the results vary. Having your backup ready and knowing the nature of your PDF’s content will prepare you for the next steps.
- Locate the PDF file you want to compress on your Mac. You should be able to see it in Finder or on your Desktop.
- Make a duplicate of the PDF by right-clicking the file and selecting Duplicate. This copy serves as your backup.
- Open the duplicate file with Preview by double-clicking it. Preview should launch and display the document.
- Confirm the PDF opens fully and pages load correctly in Preview. This means you’re ready to proceed with compression.
Open your PDF in Preview and prepare for compression
Start by locating your PDF file in Finder. You can open it directly by double-clicking if Preview is your default PDF viewer. Alternatively, right-click the file, hover over "Open With," and select "Preview." This ensures your PDF opens in the correct app for compression.
Once your PDF is open in Preview, check its current file size to have a baseline for comparison after compression. To do this, close Preview temporarily, select the PDF in Finder, and press Command + I to open the Info window. Look for "Size" under the General section to note the file size. This step helps you measure how much compression reduces the file size.
If your PDF contains unnecessary pages or large images that you don’t need, remove them before compressing. In Preview, open the sidebar using the View menu and choose "Thumbnails." Select unwanted pages by clicking on them (use Command-click to select multiple), then press the Delete key. Removing redundant content can significantly reduce the file size before compression.
Preparing your PDF carefully by opening it correctly, checking the original size, and trimming unneeded parts gives you better control over the final compressed file and its quality.
Use the Quartz Filter to compress your PDF manually
Preview includes built-in Quartz Filters that let you compress PDFs quickly by reducing file size, primarily through image downsampling and quality reduction. To use these filters, you export a new version of your PDF with the compression applied. It’s crucial to save the compressed file under a new name to keep your original intact for comparison or backup.
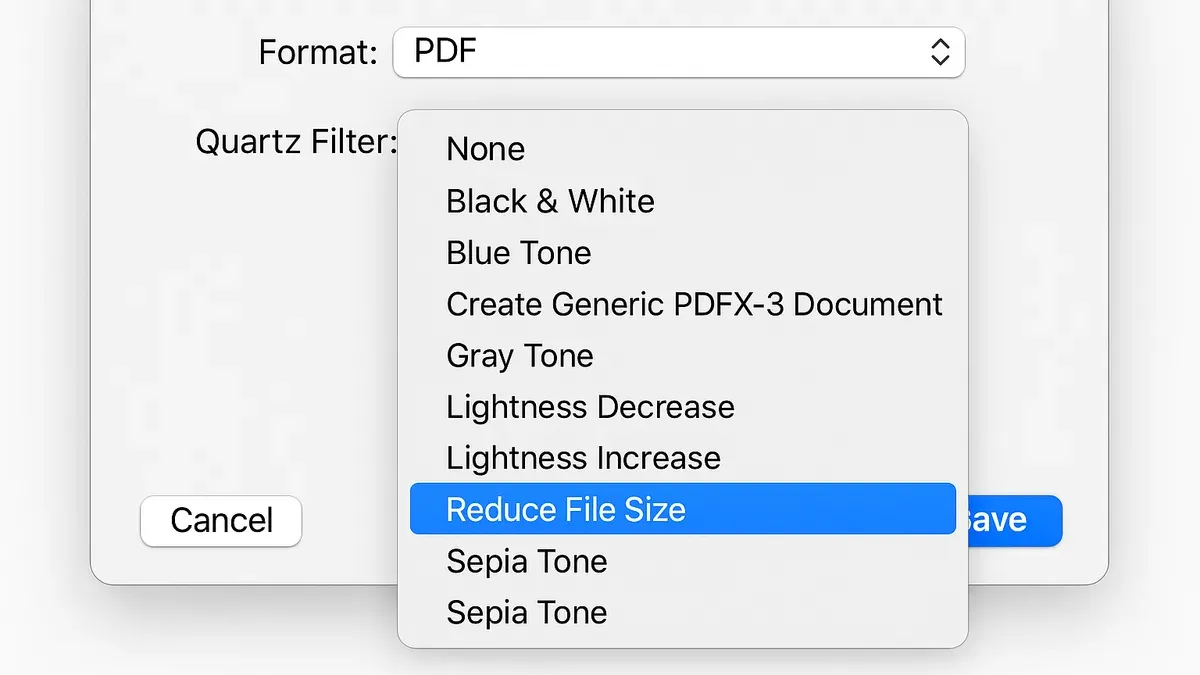
- Click File in the menu bar, then select Export. You will see an export dialog box.
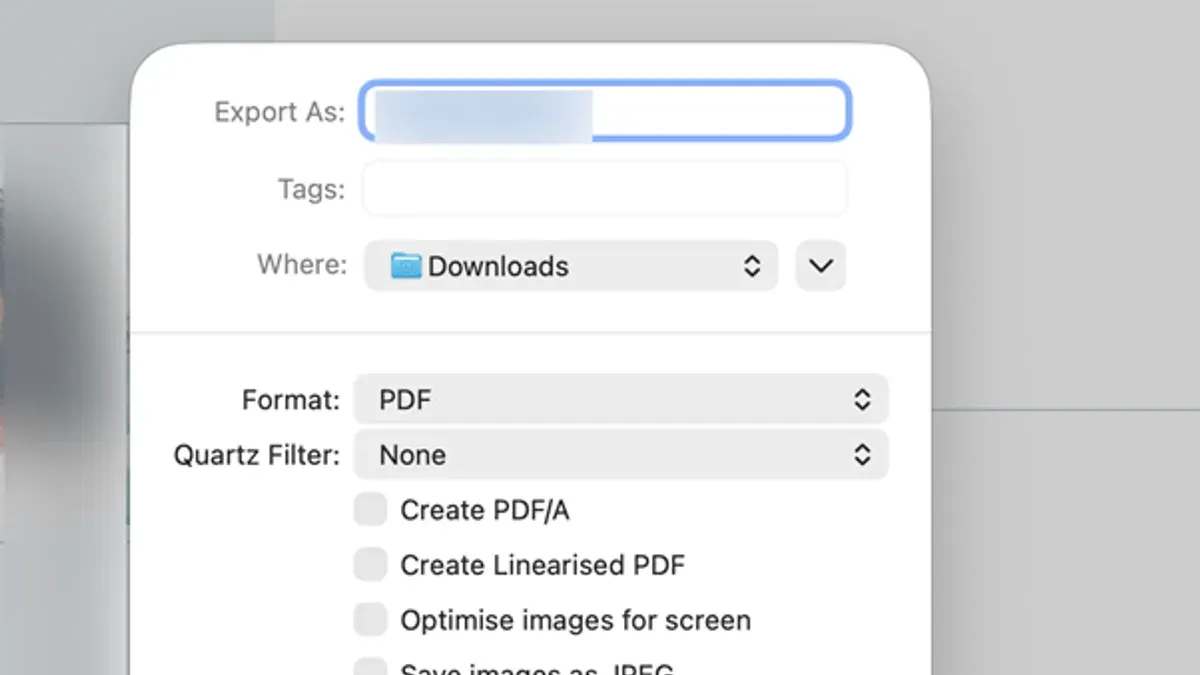
- In this dialog, locate the Quartz Filter dropdown menu near the bottom.
- Click the dropdown and select Reduce File Size. This filter compresses images by downsampling and lowering their quality, which reduces the overall PDF size.
- Choose a new file name and location to save the compressed PDF. Click Save.
- Once saved, open the new file in Preview and compare its size and image quality to the original. You’ll notice a smaller file size but potentially lower image detail, especially in photos or scanned documents.
This basic compression works well for many documents but may reduce image clarity noticeably in some cases. Always review the output to ensure the quality remains acceptable for your needs.
Create a custom Quartz Filter for better control over compression
To achieve a better balance between file size reduction and quality preservation, you can create a custom Quartz Filter using the ColorSync Utility on your Mac. This allows you to fine-tune image sampling, compression quality, and resolution settings beyond the default options provided by Preview’s built-in filters.
- Open the ColorSync Utility from your Applications > Utilities folder. You should see a sidebar with a “Filters” section.
- Click the + button at the bottom of the Filters list to create a new Quartz Filter. Name it something descriptive like “Custom PDF Compression.”
- Select your new filter, then click + under the filter’s details pane to add a new image sampling action. Choose Image Sampling from the dropdown menu.
- Adjust the settings as follows: set Downsample to 150 pixels per inch (ppi) for images above 200 ppi, choose Bicubic resampling for better quality, and set compression to JPEG with a quality of about 0.6. These settings reduce file size while keeping images clear enough for reading and printing.
- Optionally, add a ColorSync Profile action to maintain color accuracy if your PDF contains color images or graphics.
- Save your filter and close ColorSync Utility.
- Back in Preview, open your PDF, go to File > Export, and select your custom filter from the Quartz Filter dropdown menu before saving.
Using this custom filter typically results in smaller files than the default “Reduce File Size” filter, with noticeably better image quality and readability. For example, a 10MB PDF compressed with the default filter might reduce to 3MB but appear blurry, whereas the custom filter might produce a 4MB file with sharper images and clearer text. This manual adjustment gives you control over how aggressively images are compressed, letting you prioritize quality or size according to your needs.
Check the compressed PDF and compare quality
After compressing your PDF using Preview’s Quartz Filter or a custom filter, it’s essential to carefully review the results. Open the compressed PDF and examine the clarity of images and text. Look for any noticeable blurring, pixelation, or loss of detail, especially in graphics, photographs, and small fonts. This close inspection helps you verify that the compression did not degrade the readability or important visual elements.
Next, compare the compressed file side-by-side with the original PDF. You can open both files in separate Preview windows or tabs to view them simultaneously. Pay attention to differences in image sharpness, text crispness, and overall layout. Also, check the file sizes by selecting each file and pressing Command + I to open the Info window. This comparison lets you see how much space was saved and whether the quality trade-off meets your needs.
If the compressed PDF looks too degraded or the file size reduction is minimal, consider adjusting your compression approach. You might choose to create a new custom Quartz Filter with less aggressive settings or select a different built-in filter. Repeat the export and review steps until you find a balance between file size and visual quality that suits your purpose.
- Open the compressed PDF in Preview. You should see the document load fully with images and text displayed.
- Inspect several pages closely, especially those with images or detailed graphics. Text should remain sharp and readable.
- Open the original PDF in a separate Preview window or tab for direct comparison.
- View the same pages side-by-side in both documents, noting any visible quality differences.
- Select each PDF file in Finder, press Command + I, and compare the file sizes shown in the Info windows.
- Decide if the quality and size reduction meet your requirements. If not, return to compression settings and adjust accordingly.
Troubleshoot common issues when compressing PDFs in Preview
If you find that compressing your PDF in Preview does not significantly reduce the file size, first check the content type of your document. PDFs that are mostly text with few images naturally compress less because text is already efficiently stored. Conversely, image-heavy PDFs respond better to compression filters.
When working with scanned PDFs, avoid aggressive compression as it can severely degrade legibility. Over-compressing scanned documents often results in blurred or pixelated text, making the file harder to read rather than smaller in a useful way.
Ensure you have selected the correct Quartz Filter during export. The default “Reduce File Size” filter lowers image quality to shrink the file. If you accidentally choose a filter that does not apply compression, the file size will remain unchanged. Double-check the filter selection under File > Export > Quartz Filter.
If Preview crashes or the export fails, restarting Preview or your Mac can resolve temporary glitches that interfere with the compression process. Sometimes system resources or temporary bugs cause these errors.
As an example, a PDF mainly consisting of vector graphics or text with minimal images may not compress well using Preview’s filters. For such cases, consider alternative methods like using dedicated PDF compression software or online tools that offer more advanced algorithms tailored for text and vector content.
Alternative methods to compress PDFs when Preview isn’t enough
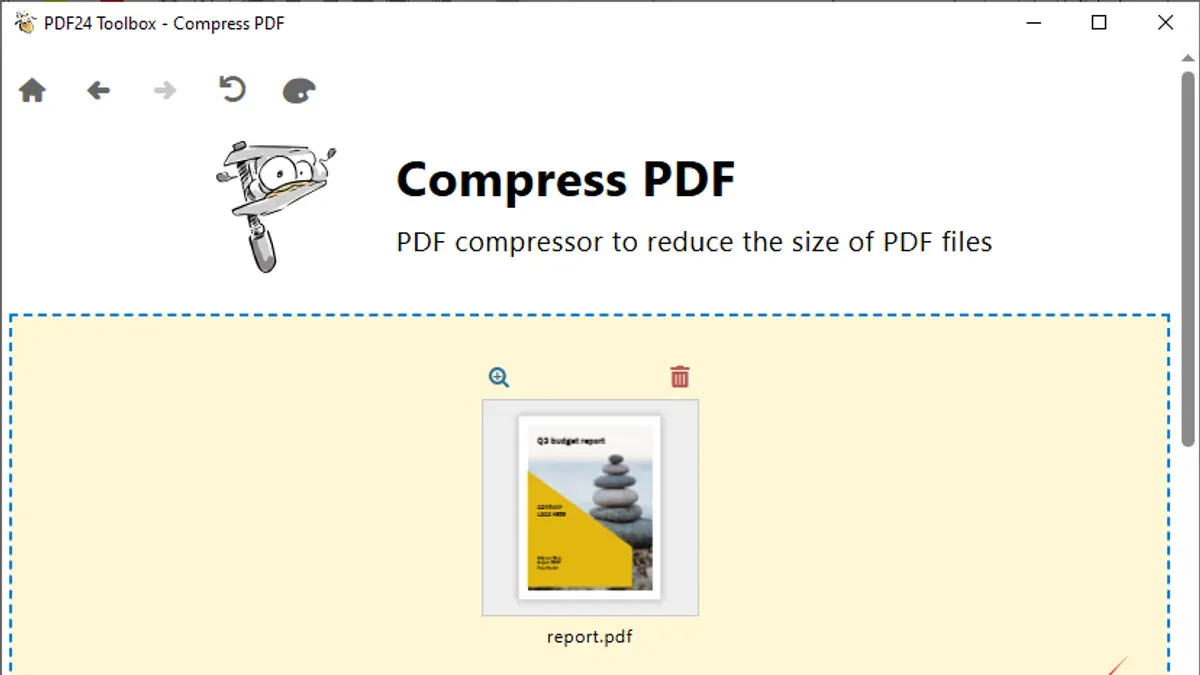
If Preview’s built-in compression does not reduce your PDF file size sufficiently or compromises quality too much, you can explore other tools and workflows. Dedicated PDF compression apps and online services often offer more advanced optimization algorithms, allowing for better control over image quality, font embedding, and removal of unnecessary data.
One practical approach is combining Preview’s compression with manual image editing before creating the PDF. For example, reducing image resolution or cropping images in an image editor can lower the overall PDF size before compression, resulting in better quality retention after applying compression filters.
However, be cautious when using online PDF compressors. Uploading sensitive documents to web-based services poses privacy risks, as your files may be stored or accessed by third parties. Always review the service’s privacy policy and consider offline tools when handling confidential information.
| Method | Compression Effectiveness | Quality Control | Privacy Considerations |
|---|---|---|---|
| Preview Quartz Filter | Moderate | Limited, predefined filters | Local, safe |
| Dedicated PDF Compression Apps (e.g., PDF Squeezer, PDF Expert) | High | Advanced options like image quality, font embedding | Local, safe |
| Online Compressors (e.g., Smallpdf, iLovePDF) | Varies, often high | Some offer quality sliders | Potential privacy risk |
By leveraging these alternatives, you can achieve a better balance between file size and quality when Preview alone doesn’t meet your needs. Always verify the output by comparing file sizes and visual quality to ensure your PDFs remain readable and effective.
Frequently asked questions
How to compress a pdf file preview on mac?
Open your PDF file in Preview, then go to the File menu and select Export. In the export dialog, choose Quartz Filter and select Reduce File Size. Finally, save the new compressed file. This method uses Preview’s built-in tools for quick compression.
How to properly compress a pdf?
Proper compression balances smaller file size with readable quality. Use Preview’s Quartz Filter cautiously, as the default Reduce File Size filter may overly degrade images. For better results, create a custom Quartz Filter in ColorSync Utility to adjust image quality and resolution settings.
How to compress file in pdf?
To compress a PDF file, open it with Preview, then export it using a Quartz Filter designed for compression. You can pick the preset Reduce File Size or create a custom filter for more control. This reduces image resolution and quality to shrink file size.
How to compress pdf file manually?
Manual compression involves creating a custom Quartz Filter via the ColorSync Utility app. Adjust parameters such as image sampling resolution and compression quality to suit your needs. Then apply this filter when exporting the PDF from Preview to control how much detail is lost.
How to compress a pdf?
Compress a PDF by opening it in Preview and exporting it with a Quartz Filter like Reduce File Size. If the quality drops too much, create a custom filter for finer control over image compression and resolution. Always compare the compressed file to the original to ensure readability is maintained.
Understanding Preview’s Compression Limits
Preview’s compression uses Quartz filters that primarily focus on downsampling images within your PDF. This method does not optimize embedded fonts or remove metadata, which means the resulting file size may not be as small as specialized tools can achieve. If your PDF contains mostly text or vector graphics, the reduction in file size might be minimal since those elements aren’t significantly compressed.
For users who require professional-grade PDF optimization—such as removing hidden data, optimizing fonts, or applying more advanced compression techniques—dedicated PDF software like Adobe Acrobat Pro or third-party utilities will offer better results. Preview’s built-in tools provide a solid, accessible option for basic compression but are not designed for deep file size optimization.
To continue refining your PDFs with Preview, the most useful next step is to experiment with creating and applying custom Quartz Filters tailored to your specific needs. Adjusting image resolution and compression settings can help you find the best balance between file size and readability for your documents.
See also: How to Annotate a PDF in Preview: A Clear Step-by-Step Guide · How to Sign a PDF in Preview: Step-by-Step Guide for Mac Users · How to Combine PDFs in Preview: A Clear Step-by-Step Guide