How to Batch Resize Images in the Shortcuts App: A Step-by-Step Guide
Easily batch resize multiple photos on your iPhone or iPad using the Shortcuts app with this step-by-step guide.
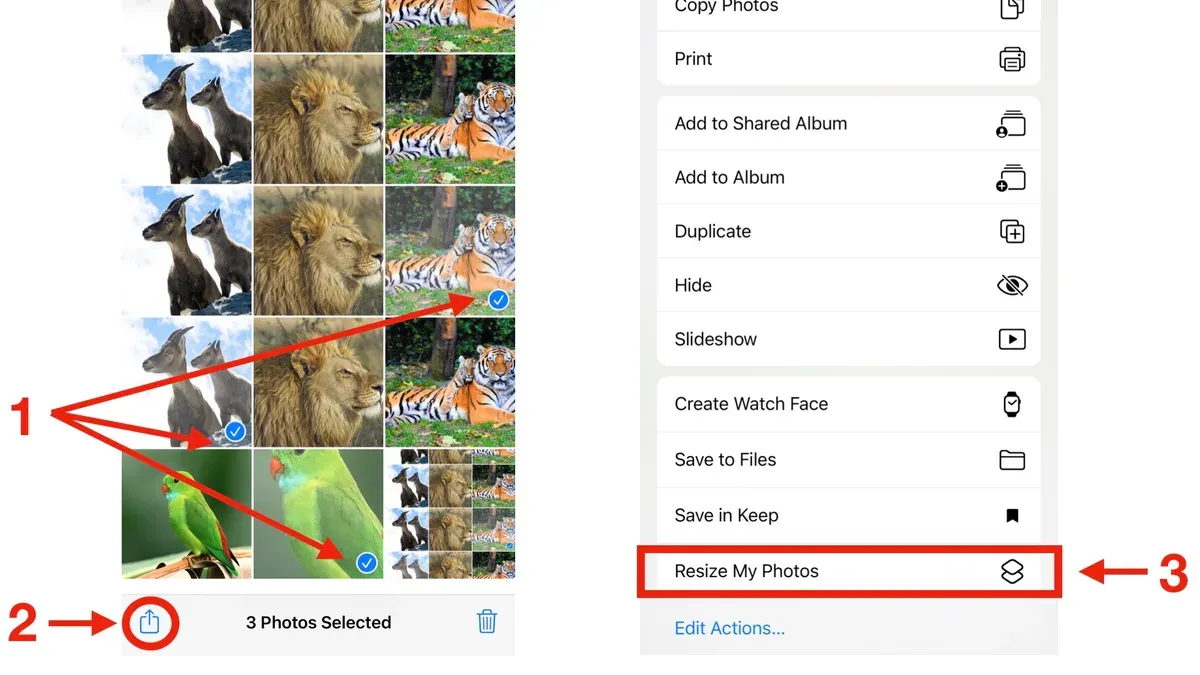
Imagine you have taken dozens of photos on your iPhone or iPad and need to quickly resize them all to share or upload. Doing each one individually can be time-consuming and frustrating. Fortunately, the Shortcuts app on your Apple device allows you to automate this process efficiently.
This article explains how to batch resize images in Shortcuts app, guiding you through creating a custom shortcut to resize multiple photos at once. You'll learn step-by-step how to set up and run this shortcut, making it easier to handle large photo batches without relying on complex software or third-party tools.
Key takeaways
- You can create a shortcut in the Shortcuts app to resize multiple images simultaneously.
- Setting specific pixel dimensions helps maintain consistent image sizes across your batch.
- Using the "Select Photos" action lets you choose multiple images quickly for resizing.
- The shortcut can save resized photos automatically to your photo library or a chosen folder.
- Batch resizing in Shortcuts is a simple alternative to more complex apps like Photoshop.
Before you start: What you need to batch resize images in Shortcuts
To batch resize images using the Shortcuts app, you first need an iPhone or iPad running iOS or iPadOS with the Shortcuts app installed. This app comes preinstalled on modern Apple devices, so you should find it ready to use. Make sure your device’s software is up to date to avoid any compatibility issues.
You should have a basic understanding of how to create and run shortcuts. This involves opening the Shortcuts app, finding actions, and combining them into a workflow. If you’re new, spend a few minutes exploring simple shortcuts to get comfortable with the interface, which typically shows a list of your shortcuts and buttons to add or edit them.
Access to your Photos app is essential since you’ll select the images you want to resize from there. The resizing process involves changing the pixel dimensions of your photos, which affects file size and image quality. Maintaining the aspect ratio is important to prevent distortion, so your shortcut should include steps that keep width and height proportional.
Keep in mind that the Shortcuts app’s image processing capabilities are basic. It can resize images but does not offer advanced editing like batch sharpening or color correction. This makes it a lightweight, straightforward tool ideal for resizing but not for complex photo edits.
- Open the Shortcuts app and confirm you see your existing shortcuts or an empty gallery screen. This means the app is ready.
- Verify you have photos in the Photos app that you want to resize. Open Photos and check your albums for suitable images.
- Understand that resizing means adjusting pixel dimensions (e.g., reducing from 4000×3000 to 1200×900) while keeping the aspect ratio the same to avoid stretching.
How to batch resize images in Shortcuts app: Create your resizing shortcut
- Open the Shortcuts app and tap the '+' icon to create a new shortcut. You will see a blank canvas where you can add actions to build your resizing workflow.
- Add the 'Select Photos' action by tapping 'Add Action', then searching for and choosing 'Select Photos'. Make sure to enable the 'Select Multiple' option so you can choose more than one image at a time. When this runs, you'll be able to pick all the photos you want to resize.
- Add the 'Resize Image' action by searching for it and adding it to your shortcut. Configure the width and height parameters here. For fixed dimensions, enter exact pixel values (e.g., 800 by 600); for proportional resizing, leave one dimension blank or calculate it dynamically to maintain aspect ratio.
- Insert a 'Repeat with Each' action to loop through every photo selected. Place the 'Resize Image' action inside this loop so it processes each image individually.
- Add the 'Save to Photo Album' or 'Save File' action after resizing. This lets you save or share the resized images to a specific album or folder. You can also add a 'Quick Look' action before saving to preview the resized images.
When you run the shortcut, you will be prompted to select photos. The shortcut will then resize each image based on your settings and save the results. For a clear comparison, you might test with a few photos and note their original versus new dimensions.
Remember, using fixed dimensions can crop or distort images if their aspect ratios differ from your set size. To avoid this, keep one dimension blank or use calculations to preserve proportions.
How to resize a batch of photos: Using your shortcut effectively
To quickly select photos for batch resizing, open the Photos app and use the "Select" option to tap multiple images, or use the Albums tab to pick entire collections. When you run your resizing shortcut, it will prompt you to choose these photos, streamlining the process without needing to select images one by one each time.
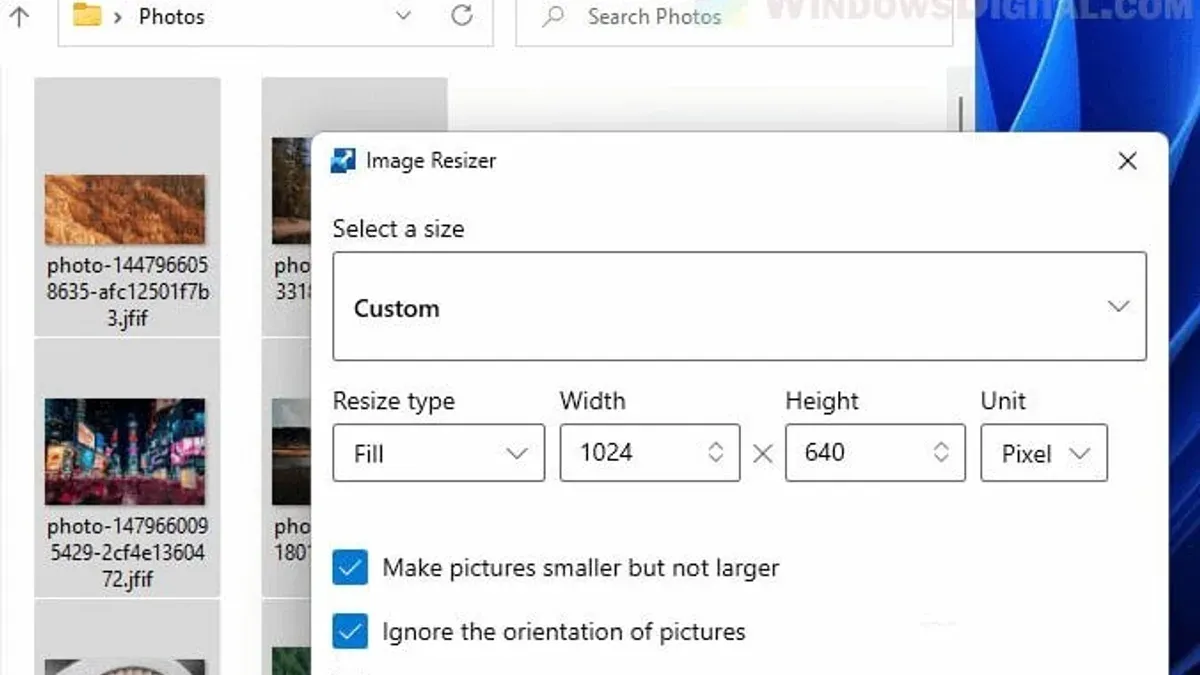
Adjust your shortcut's settings to balance image quality and file size by specifying dimensions and compression levels. Keeping resolution around 1080 pixels on the longest side often retains good visual quality while significantly reducing file size, sometimes by half or more compared to originals. This balance helps when sharing or uploading images without noticeable quality loss.
The shortcut works seamlessly with both iCloud Photos and local albums. For iCloud Photos, ensure your device is connected to the internet to avoid delays. When resizing large batches—typically more than 50 images—break them into smaller groups to prevent performance slowdowns or shortcut crashes. Running the shortcut on batches of 20-30 photos usually completes within a minute, offering a smooth workflow.
Save resized images into organized folders by adding a "Save File" action in your shortcut. You can create folders by date or project name in the Files app, making it easier to locate resized images later. This structure prevents clutter and helps maintain an efficient photo management system.
- Open Photos and select your batch of images (e.g., 20-30) for resizing; you should see them highlighted.
- Run your custom resizing shortcut from the Shortcuts app or Share Sheet; the shortcut will start processing.
- Choose the destination folder when prompted; the folder should appear in the Files app with your resized images inside.
- Review image quality and file size in the destination folder; files should be smaller but visually clear.
- If resizing large batches, split into smaller groups to avoid delays or errors; the shortcut should process each group smoothly.
How to batch resize images in Photoshop: A brief comparison
Photoshop offers a robust batch resizing feature primarily through Actions and the Image Processor script. You create an Action to resize one image, then apply it to a batch via File > Scripts > Image Processor, allowing consistent resizing with additional options like file format conversion. This method provides precise control over resizing parameters and supports advanced adjustments alongside resizing.
Compared to the Shortcuts app, Photoshop’s batch process is more complex and requires a desktop environment. It demands familiarity with Actions and scripts, whereas Shortcuts provides a simpler, mobile-friendly interface with less setup. Photoshop excels in professional workflows needing advanced edits, color profiles, or format conversions, but it comes with a cost and steeper learning curve.
Shortcuts, on the other hand, is free on iPhones and iPads, lightweight, and integrates smoothly with your photo library, making it ideal for quick tasks without complex software. For a batch of about 20 photos, Photoshop might take a few minutes to prepare and run the batch, while Shortcuts completes resizing almost instantly on mobile.
| Feature | Photoshop | Shortcuts App |
|---|---|---|
| Platform | Desktop (Mac/Windows) | iPhone/iPad |
| Complexity | Moderate to high (Actions, scripts) | Low (drag-and-drop shortcut) |
| Cost | Paid (subscription) | Free |
| Advanced edits | Yes (color profiles, layers) | No |
| Speed for 20 photos | Few minutes setup + processing | Under a minute |
Use Photoshop when you require advanced editing or batch processes beyond simple resizing. For straightforward, quick batch resizing on the go, Shortcuts offers a convenient and free alternative.
Troubleshooting common issues when batch resizing images in Shortcuts
If your shortcut freezes or won’t run with a large batch of photos, it’s often due to memory overload. Try resizing smaller groups, such as 10 to 20 images at once. If you see error messages like "Shortcut exceeded memory limit," reduce the batch size or close other apps to free up RAM.
When images don’t resize to the expected dimensions, double-check your "Resize Image" action settings. Ensure the "Width" and "Height" fields have correct values and that the "Scale Proportionally" toggle is enabled to maintain aspect ratio. Forgetting this toggle can cause unexpected stretching or cropping.
Quality loss or pixelation often happens if the resized dimensions are too small or if the shortcut compresses the image excessively. To avoid this, set dimensions that are large enough for your needs and use the "Set Image Quality" action with a value around 80% or higher. This balances file size and image clarity.
Issues saving or sharing resized images can stem from permission restrictions or file format mismatches. Confirm the shortcut has access to Photos by checking Settings > Privacy > Photos > Shortcuts. Also, use the "Save to Photo Album" action with a supported format like JPEG or PNG to prevent errors.
To debug and optimize your shortcut:
- Run the shortcut step-by-step using the "Show While Running" option to identify where it stops or errors appear. You should see each action’s result as it completes.
- Use "Quick Look" after resizing to preview images immediately, confirming correct size and quality.
- If the shortcut runs slowly, add "Wait" actions with a short delay (e.g., 0.5 seconds) between processing batches to reduce system strain.
- Regularly update your device’s iOS or iPadOS to benefit from performance improvements in the Shortcuts app.
Frequently asked questions
How to batch resize photos?
You can batch resize photos by selecting multiple images and applying a resizing tool or app that supports batch processing. On Apple devices, using the Shortcuts app allows you to automate resizing multiple photos at once by creating a shortcut that adjusts image dimensions. On other platforms, similar batch resizing tools or software can be used to specify new size parameters and process photos in bulk, saving time compared to resizing each photo individually.
How to batch resize images in Photoshop?
In Photoshop, batch resizing is done using the Image Processor or Actions. Go to File > Scripts > Image Processor, then select the folder of images, the output location, and set the desired resize dimensions. Alternatively, you can record an Action that resizes one image, then use File > Automate > Batch to apply that Action to a folder of images automatically.
How to batch resize photos on Windows 10?
Windows 10 users can batch resize photos using built-in apps like Microsoft Paint or the Photos app, but these don’t support batch resizing directly. Instead, third-party tools such as IrfanView or FastStone Photo Resizer are popular free options that allow batch resizing by selecting multiple files and specifying new dimensions or percentage scaling.
Is there free batch image resizing software I can use?
Yes, there are several free batch image resizing programs available, including IrfanView, FastStone Photo Resizer, and XnConvert. These tools let you resize many images at once, often with options for maintaining aspect ratio and choosing output formats, making them suitable alternatives to paid software.
How can I batch resize images online without losing quality?
Online services like BulkResizePhotos.com or ResizeImage.net offer batch resizing with options to preserve image quality by adjusting compression settings. To avoid quality loss, choose formats like PNG or set JPEG quality to high when resizing, and avoid enlarging images since that increases pixelation.
What This Guide Does Not Cover
This guide focuses on batch resizing within the Shortcuts app on Apple devices and does not cover advanced editing features or professional-grade resizing available in desktop software like Photoshop. If you require precise control over image quality, color profiles, or need to apply complex edits during resizing, a dedicated photo editing program may better serve your needs. Additionally, this method assumes basic familiarity with the Shortcuts app and Apple Photos; users looking for automated resizing across different platforms or cloud services might need alternative solutions.
For your next step, try running your newly created shortcut on a small batch of images to confirm it works as expected. Pay attention to the output folder and image dimensions to ensure they meet your requirements. Adjust the size parameters in your shortcut if needed, and once satisfied, you can confidently process larger batches with minimal effort.
See also: How to Auto Change Wallpaper Daily Using the Shortcuts App · How to Adjust Image Colors in Preview: A Clear Step-by-Step Guide · How to Resize an Image in Preview on Mac: Step-by-Step Guide · How to Add Text to an Image in Preview: A Clear Step-by-Step Guide