How to Schedule a Message in Messages on Mac: Step-by-Step Guide 2026
Discover how to schedule a message in Messages on Mac with native features and workarounds for seamless messaging in 2026.
You want to send an important message later but you're not sure if the Messages app on your Mac supports scheduling. Maybe you've noticed scheduling options on your iPhone and wonder if the same is possible on Mac. If you have asked yourself how to schedule a message in Messages on Mac, this guide will clarify what you can and cannot do in 2026.
This article walks you through the current state of message scheduling on Mac’s Messages app, including native capabilities and practical workarounds using Apple Shortcuts. You'll also learn how to handle basic messaging actions like replying and deleting messages, troubleshoot common issues, and explore third-party alternatives for scheduling. By the end, you will be confident in managing your messages effectively on your Mac.
Key takeaways
- As of 2026, the Messages app on Mac does not natively support scheduling messages to send later.
- You can schedule messages on your iPhone and have them sync to your Mac’s Messages app if both devices use the same Apple ID.
- Apple Shortcuts on Mac provides a workaround to schedule messages with some setup required.
- Replies and message deletion remain straightforward on Mac with Messages’ standard interface.
- Third-party apps offer additional scheduling features if native options don’t meet your needs.
Before you start: What you need to schedule messages on Mac
In 2026, the Messages app on Mac does not support native message scheduling as a built-in feature. This limitation applies across all macOS versions up to and including macOS Sonoma (14) and the latest macOS Ventura updates. Official Apple documentation confirms that scheduling messages directly within Messages on Mac is not yet available, unlike on iPhone where this feature is integrated in iOS 17 and later.
To schedule messages on your Mac, you will need to rely on third-party apps or create automated workflows using Apple Shortcuts. These workarounds require macOS Ventura (13) or later for the Shortcuts app to run properly on Mac, as earlier versions lack full Shortcuts integration.
Before proceeding, make sure your Mac is running macOS Ventura (13) or newer. Check this by clicking the Apple menu > About This Mac, where you will see your macOS version. Additionally, ensure you are signed into iCloud with the same Apple ID on both your Mac and iPhone to enable seamless syncing of messages and shortcuts.
- Verify your macOS version: Go to Apple menu > About This Mac; you should see macOS Ventura (13) or later. If not, update your system via System Preferences > Software Update.
- Confirm you have the Shortcuts app installed on your Mac, available by default from macOS Ventura onwards.
- Sign in to iCloud with your Apple ID: Open System Preferences > Apple ID; ensure Messages syncing is enabled under iCloud settings.
Meeting these requirements prepares your Mac for scheduling messages using the available workarounds, since native scheduling is not yet supported in the Messages app itself as of 2026.
How to schedule a message in Messages on Mac using Apple Shortcuts
Since the Messages app on Mac does not support native message scheduling in 2026, you can use the Shortcuts app to create an automation that sends a message at a specific time. This method requires macOS Ventura or later and that your Mac remains awake and connected to the internet at the scheduled time.
- Open the Shortcuts app on your Mac. You should see the main Shortcuts window with existing shortcuts and an option to create a new one.
- Click the Automation tab at the top, then select Create Personal Automation. This opens the automation setup interface.
- Scroll down and choose Time of Day as the trigger. Set the desired time and select whether this should repeat daily, weekly, or monthly. Click Next.
- Click Add Action and search for Send Message. Select it to add the action to your automation.
- In the Send Message action, enter the text you want to send in the message field and click the plus icon to add the recipient from your contacts or enter their phone number/email.
- Click Next to review your automation. Make sure Ask Before Running is turned off if you want the message to send automatically without manual approval.
- Click Done to activate the automation.
- To test, you can temporarily set the time trigger to a minute or two ahead and observe if the message sends correctly. If it works, reset the trigger to your intended schedule.
Limitations: For this automation to work, your Mac must be awake and connected to the internet at the scheduled time. If your Mac is asleep or offline, the message won’t send until you manually run the shortcut or the Mac wakes up.
Example: A shortcut set to send "Happy Birthday!" to your friend at 9:00 AM on their birthday every year. User reports indicate this method works reliably when conditions are met but requires some manual oversight.
How to schedule a message on iPhone and sync with Messages on Mac
Scheduling a message directly in the iPhone’s Messages app is straightforward in 2026, and understanding how this interacts with your Mac can help you manage your conversations across devices. When you schedule a message on your iPhone, it will automatically sync with your Mac via iCloud, allowing you to see the scheduled message in the Messages app on your Mac, though the actual sending happens on the iPhone.
- Open the Messages app on your iPhone and select the contact you want to message. You should see the conversation window open.
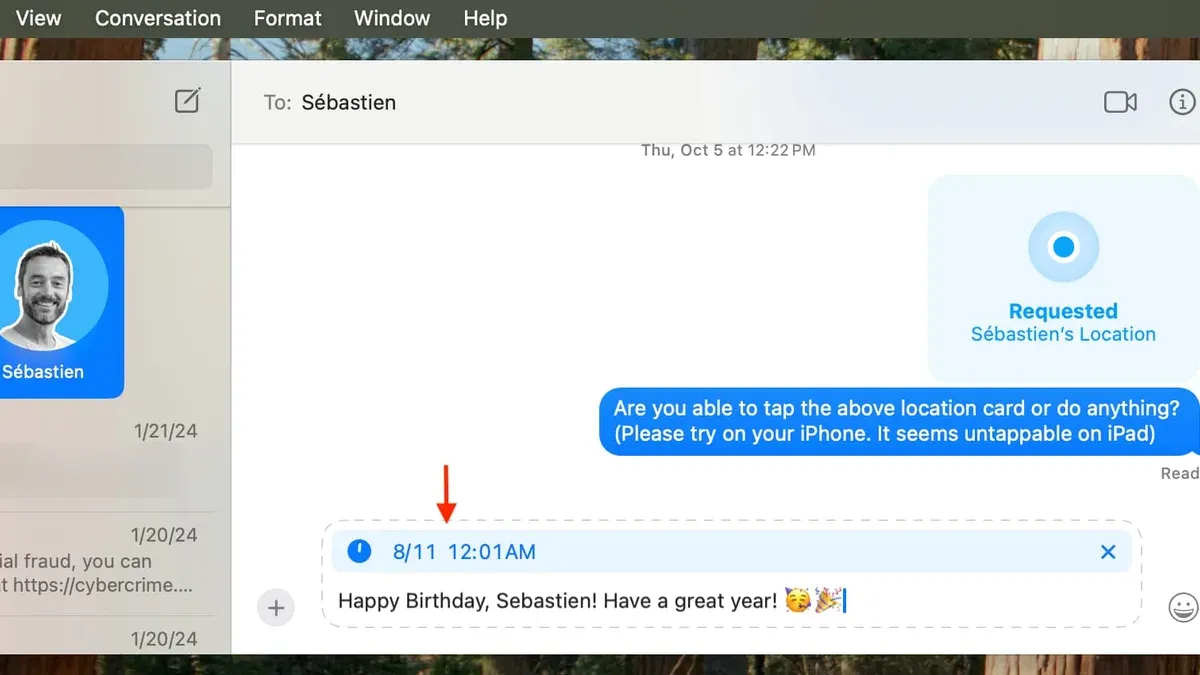
- Type your message as usual. Then, tap and hold the blue send button until the scheduling options appear. This menu lets you pick a date and time for sending your message.
- Choose your desired date and time, then tap Schedule Send. You will see a small clock icon next to the scheduled message in the conversation, indicating it is queued.
- On your Mac, open the Messages app and navigate to the same conversation. The scheduled message will appear with a clock icon, but note that your Mac will not send the message; the iPhone handles delivery at the scheduled time.
- Ensure both devices are signed in to the same Apple ID with iCloud Messages enabled for syncing. Sync delays are usually under a minute but can vary based on network conditions.
The key difference is that iPhone scheduling is native and handles the sending itself, while on Mac, you only see the scheduled message synced but cannot create or send scheduled messages natively. Use iPhone scheduling when you want reliable, native message scheduling that automatically syncs to your Mac for visibility.
| Feature | iPhone Messages App (2026) | Mac Messages App (2026) |
|---|---|---|
| Native schedule creation | Yes, via long-press on send button | No native scheduling, view-only |
| Message sending | Automatic at scheduled time from iPhone | Not supported |
| Syncing scheduled messages | Scheduled messages sync to Mac via iCloud | Can view synced scheduled messages |
| Sync delay | Immediate on iPhone | Typically under a minute, varies by network |
How to send a message on your Mac: Basic sending and replying
To start messaging on your Mac, open the Messages app from your Dock or Applications folder. Once open, select a contact or group from the sidebar; if the person is not listed, use the search bar at the top left to find them by name, email, or phone number. After selecting the contact, the conversation opens on the right side where you can compose your message.
To send a new message, click the text field at the bottom of the conversation window and type your message. When ready, press the Return key or click the blue Send button (an upward arrow). You should see your message appear in the conversation with a timestamp, confirming it was sent.
Replying to a message is just as straightforward. Click on the message you want to reply to, then type your response in the text field. Press Return or click Send to deliver your reply. You can also right-click a message and choose Reply to quote it directly, which is helpful in group chats for clarity.
For faster messaging, use keyboard shortcuts: Command+N to start a new message, Command+F to search messages, and Command+Shift+D to do a read receipt toggle. These shortcuts speed up your workflow and make messaging more efficient.
Mac experts recommend keeping the Messages window visible and using keyboard shortcuts to quickly jump between conversations. This practice supports a smooth messaging experience, especially when managing scheduled messages or ongoing chats.
How to delete a message in Messages on Mac
Managing your messages effectively includes knowing how to delete unwanted texts or entire conversations. On your Mac, you can delete individual messages within a conversation or remove whole conversations to keep your Messages app organized. Remember, deleting messages or conversations on your Mac will sync these changes across all devices signed in with the same Apple ID via iCloud.
- Open the Messages app on your Mac and select the conversation containing the message you want to delete. You should see the full chat history displayed.
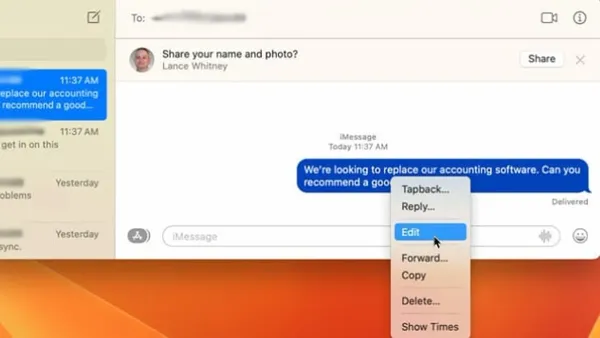
- To delete an individual message, right-click (or Control-click) the specific message bubble you want to remove. A contextual menu will appear.
- Choose "Delete" from the menu. A confirmation prompt will appear asking if you want to delete the message.
- Click "Delete" to confirm. The message will be removed from the conversation and this deletion will sync to your other devices.
- To delete an entire conversation, in the sidebar, right-click (or Control-click) the conversation name or contact and select "Delete Conversation."
- Confirm by clicking "Delete" in the prompt. This permanently removes the conversation and all messages within it across your synced devices.
- If you delete a message or conversation by mistake, immediately use the Undo option by pressing Command + Z or selecting Edit > Undo from the menu bar to restore it.
Following these steps ensures efficient cleanup of your messages while maintaining synchronization across your Apple devices. For visual guidance, Apple’s support website provides screenshots illustrating these deletion steps clearly.
Troubleshoot scheduling messages on Mac: Common issues and fixes
If your scheduled messages are not sending as expected on your Mac, several common issues might be the cause. The most frequent problems include shortcut automations not running on time, the Messages app failing to send scheduled texts, your Mac sleeping or being offline during the scheduled time, and permissions or notification settings blocking the process.
- Check that your Mac is awake and connected: Scheduled messages via Shortcuts require your Mac to be awake and have an active internet connection at the scheduled time. To test this, prevent your Mac from sleeping by going to System Settings > Battery > Battery and setting Turn display off after to Never temporarily. If your message sends successfully, sleeping was the issue.
- Verify Shortcut automation settings: Open the Shortcuts app and select your message-sending automation. Ensure that the automation is enabled and that the trigger is set correctly (e.g., time of day). You should see a green toggle next to Enable this automation. If it’s off, the automation will not run.
- Confirm Messages app permissions: Go to System Settings > Privacy & Security > Automation and make sure Shortcuts has permission to control the Messages app. Without this, the automation cannot send messages.
- Review Notifications settings: Scheduled messages might fail silently if notifications are disabled. Check System Settings > Notifications > Messages and ensure notifications are allowed. This helps confirm message delivery status.
- Restart your Mac: Sometimes a simple restart clears temporary glitches with Shortcuts or Messages. After restarting, test your automation again.
On forums and support channels, the most commonly reported cause for scheduled messages not sending is the Mac entering sleep mode before the automation runs. Ensuring your Mac is awake and permissions are correctly set resolves the majority of issues.
Alternatives to native scheduling: Third-party apps and services for Mac
If native scheduling in Messages or Apple Shortcuts doesn’t fully meet your needs, third-party apps offer useful alternatives for scheduling messages on your Mac. Popular options compatible with macOS include apps like Scheduled App, Delayd, and Pulse SMS. These tools often provide more flexible scheduling options, recurring messages, and integrations beyond Apple’s ecosystem.
Comparison of top third-party scheduling apps for Mac:
| App | Scheduling Features | Price | User Rating | Integration Notes |
|---|---|---|---|---|
| Scheduled App | One-time and recurring message scheduling, SMS and iMessage support | Free with in-app purchases | 4.2/5 | Requires iPhone companion app for sending; syncs via cloud |
| Delayd | Time-based message scheduling, group messaging | Subscription-based (monthly fee) | 4.0/5 | Integrates with Contacts and Messages on Mac |
| Pulse SMS | Cross-platform scheduling, customizable reminders | Free with premium plans | 4.1/5 | Works over web and macOS app, supports SMS gateways |
Compared to Apple Shortcuts, third-party apps usually offer a more straightforward scheduling interface and additional features like message templates and recurring sends. However, they often require additional setup steps, such as linking your phone or creating an account. Consider the security and privacy implications: these apps handle your messages or contacts, so verify their data policies and use apps with end-to-end encryption if privacy is a priority.
Example workflow: Using Scheduled App, you set up a message on your Mac’s app interface, select a recipient from your contacts, pick a date and time, and save the scheduled message. The companion iPhone app then sends the message at the scheduled time, and the status updates sync back to your Mac.
Best practices when scheduling messages on Mac
Scheduling messages can greatly improve your communication efficiency, but using this feature responsibly ensures your messages are well received. First, choose appropriate times to send messages. Aim to schedule messages during typical waking hours, usually between 8 a.m. and 8 p.m. local time for your recipient. Sending messages too early or late may disrupt others and reduce the chance of a timely response.
Next, avoid overloading recipients with too many scheduled messages. Spacing out communications helps prevent your messages from being perceived as spam. Use scheduling primarily for important reminders, professional communications, or time-sensitive updates rather than frequent casual chats.
Many users find scheduling helpful for managing work-related messages, such as sending meeting reminders or follow-ups at planned times. Scheduling can also serve as a personal reminder system when you set messages to yourself or close contacts.
Backing up your scheduled messages and automation workflows is recommended to avoid losing essential setups. Regularly export your shortcuts or save copies in iCloud Drive or another secure location. This safeguard ensures your scheduled tasks remain intact, even after system updates or device changes.
Frequently asked questions
How do i send a message on my mac?
To send a message on your Mac, open the Messages app and select a conversation or start a new one by clicking the new message icon. Type your text in the message field at the bottom, then press the Return key or click the send button (a blue upward arrow). Make sure your Mac is signed in with your Apple ID connected to iMessage for smooth sending.
How to schedule a message in iphone?
On iPhone in 2026, you can schedule messages using the Shortcuts app by creating an automation to send a message at a specific time. Alternatively, some carriers or third-party apps offer scheduling features. Native Messages app on iPhone does not have a built-in schedule feature, so using Shortcuts or apps is the practical approach.
How to schedule a message in imessage?
Scheduling a message directly in the iMessage app on Mac or iPhone is not available natively in 2026. You can use the Shortcuts app on iPhone to automate sending messages at a set time, which then syncs with iMessage. This method acts as the closest native workaround for scheduling iMessages.
How to send schedule message in iphone?
To send a scheduled message on iPhone, open the Shortcuts app, create a new personal automation, select the time of day trigger, then add the 'Send Message' action with your desired recipient and text. When the automation runs at the set time, the message will be sent automatically via iMessage.
How to schedule a text message iphone?
Scheduling a text message on iPhone requires using the Shortcuts app to set up an automation since the Messages app lacks a native scheduler. Alternatively, you can use third-party messaging apps that offer scheduling features. Remember, scheduled messages sent through Shortcuts will use iMessage or SMS depending on your recipient.
What This Advice Does Not Cover
Currently, the Messages app on Mac does not support native message scheduling in 2026. All scheduling methods rely on workarounds such as Apple Shortcuts or third-party apps, which require your Mac to be awake and connected to the internet at the scheduled send time. This means if your Mac is asleep, shut down, or offline, the scheduled message will not send. Additionally, this guide does not cover group message scheduling limitations or messaging on non-Apple platforms.
If you need guaranteed delivery of scheduled messages regardless of your Mac’s state, or require advanced scheduling options like recurring messages, consider using dedicated third-party messaging services or apps designed for those features.
Next Step: Create and Test a Shortcut
To start scheduling messages on your Mac, set up a simple Apple Shortcut that automates sending a message at a specific time. Test it with a non-critical message to ensure your Mac stays awake and the shortcut triggers correctly. This practical trial will help you understand the limitations and capabilities before relying on scheduled messaging for important communications.
See also: How to Edit a Sent Message in Messages on Mac: A Step-by-Step Guide · How to Turn Off iMessage on Mac in Messages App