Fix Error Code -43 on Mac: Clear Step-by-Step Solutions
Learn clear, step-by-step solutions to fix error code -43 on Mac caused by file conflicts and permission issues.
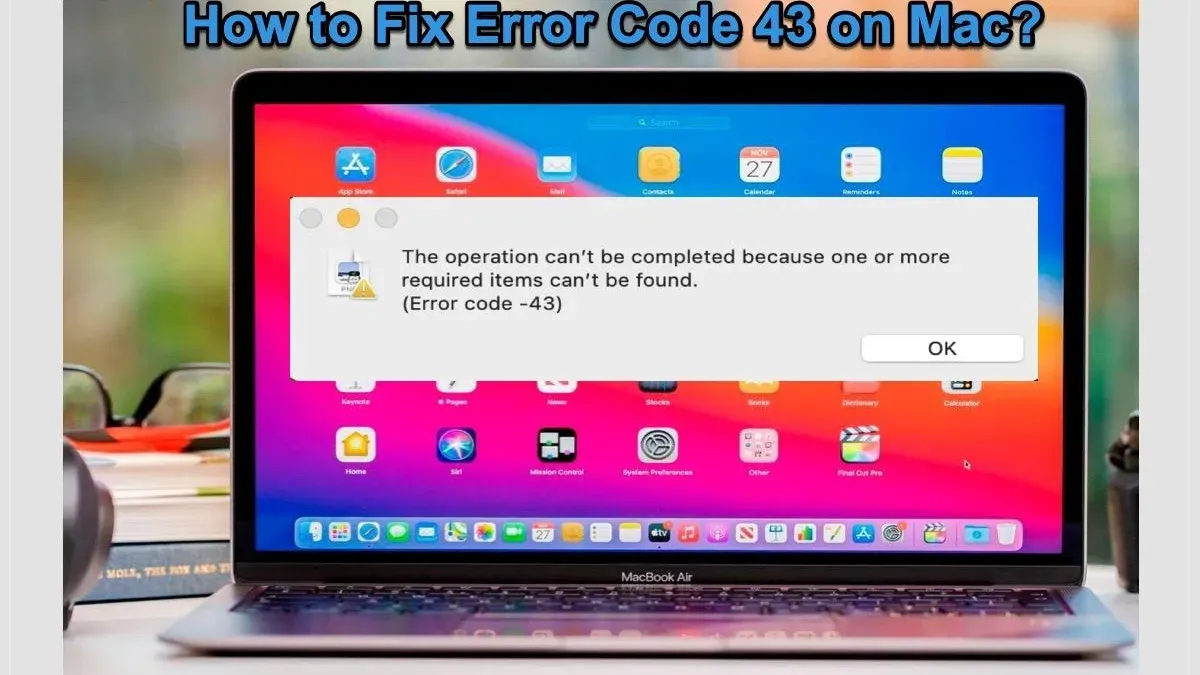
You’re trying to move or delete a file on your Mac, but suddenly an error message pops up: "The operation can’t be completed because one or more required items can’t be found (error code -43)." This unexpected interruption can be frustrating, especially when you’re unsure what triggered it or how to fix it.
This article covers clear, step-by-step solutions for the error code -43 on Mac fix. You’ll learn about the common root causes related to file system conflicts and permissions, how to check for issues before applying fixes, and when it might be best to get professional help.
Key takeaways
- Verify the file path and filename for invalid characters or length issues first.
- Check disk format compatibility and ensure the drive is properly mounted.
- Use Disk Utility to repair disk permissions and run First Aid on your drive.
- Clear Finder and system caches to resolve temporary conflicts.
- Use Terminal commands cautiously to move or delete stubborn files.
Before You Start: What You’ll Need
Before diving into fixes for error code -43 on your Mac, it’s essential to prepare both your system and your mindset. You’ll need administrator access on your Mac since some solutions require changing system settings or running commands that standard users can’t perform. Without this access, you might encounter permission errors during troubleshooting.
Backing up important files is a crucial safety step. Whether you use Time Machine or manually copy essential documents to an external drive, a backup ensures that no data is lost if something unexpected happens during the repair process. Consider this your safety net.
Familiarity with Finder basics—such as locating files, understanding file paths, and using the context menu—will help you follow instructions smoothly. Some steps involve Terminal commands; basic knowledge like opening Terminal, typing commands, and pressing return will be sufficient. The article will explain Terminal commands clearly as you proceed.
Lastly, identify the type of drives involved: internal (built into your Mac), external (USB, Thunderbolt, or other connected drives), or network drives accessed over Wi-Fi or Ethernet. Different drive types might require distinct approaches, so knowing what you’re working with is key.
Here’s a quick checklist to confirm you’re ready:
- Ensure you can log in as an administrator. You should be able to access System Preferences > Users & Groups and see your account labeled as “Admin.”
- Verify that important data is backed up, either via Time Machine or by copying files to another safe location.
- Open Finder and practice navigating to files, right-clicking for options, and checking file paths by pressing Command+Option+C to reveal the path bar.
- Open Terminal from Applications > Utilities, type ls, and press return to see a list of files, confirming you can run basic commands.
- Identify if the problem files are on your Mac’s internal drive, an external USB or Thunderbolt drive, or a network share.
Completing these steps will help prevent interruptions and confusion, making the troubleshooting process smoother and more effective.
Check the File Path and Filename for Issues
Error code -43 often occurs when the file path or filename contains invalid characters or is too long. macOS restricts certain characters like ":", "/", "?", "*", and others from being used in filenames. Additionally, a file path that exceeds the system limit can cause this error when you try to move, delete, or copy files.
To inspect and rename files safely in Finder, follow these steps:
- Open Finder and navigate to the folder containing the problematic file. You should see the file listed if it’s visible.
- Click the file once to select it, then press Enter to rename. If the filename contains special characters, remove them and replace with simple letters or numbers. For example, change "Report:2026?.doc" to "Report2026.doc".
- After renaming, try the original file operation again. If it works, the error was caused by invalid characters.
If the file is hidden or the name contains invisible characters, use Terminal to find it:
- Open Terminal (Applications > Utilities > Terminal).
- Type ls -b followed by the folder path to list files, showing special characters as escape sequences.
- Identify any suspicious or unusual filenames with backslashes or symbols. Rename them in Finder or use
mvin Terminal to correct the name.
For example, a file named "data\file?.txt" causes error -43. Renaming it to "datafile.txt" resolved the issue and allowed file operations to complete successfully.
Verify Disk Format Compatibility and Mount Status
Understanding your disk's format and whether it is properly mounted is key to resolving error code -43. macOS commonly uses the APFS and HFS+ formats, which fully support macOS file operations, including moving and deleting files. External drives often use FAT32 or exFAT formats for cross-platform compatibility, but these can have quirks such as filename length limits or lack of support for certain macOS file attributes, potentially triggering error -43.
| Disk Format | Compatibility | Common Issues |
|---|---|---|
| APFS | Fully compatible with macOS | None for native use |
| HFS+ | Fully compatible with macOS | Older, slower on SSDs |
| FAT32 | Compatible with macOS and Windows | Max file size 4GB; no macOS permissions |
| exFAT | Compatible with macOS and Windows | No journaling; potential corruption on improper ejection |
Next, confirm the disk is mounted correctly. An unmounted or improperly mounted disk can cause file operation errors.
- Open Disk Utility from Applications > Utilities.
- Select the disk in the sidebar. If it appears grayed out or the volume is not listed, it is likely unmounted.
- If unmounted, click Mount in the toolbar. The disk name should become fully visible and accessible in Finder.
- For external drives, safely eject them by clicking the Eject icon next to their name in Finder or Disk Utility, then physically disconnect and reconnect. The drive should remount automatically.
If the disk fails to mount or remount, or if the format is incompatible with required file operations, error -43 is likely to occur. Addressing these mounting and format issues before other fixes ensures a stable starting point.
Repair Disk Permissions and Run First Aid
File operations on your Mac rely heavily on correct permissions. If permissions are misconfigured, macOS may prevent you from moving, deleting, or copying files, triggering error code -43. This happens because macOS restricts access to files and folders based on ownership and permission settings to protect system integrity and user data.
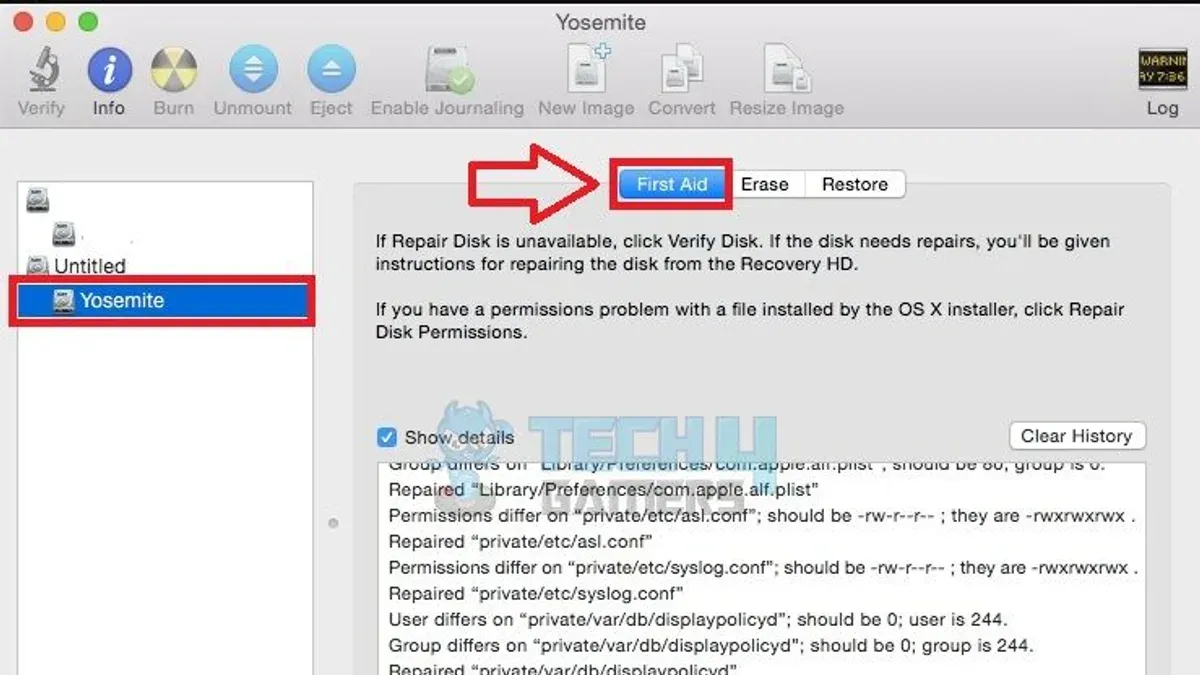
To resolve this, start by running First Aid in Disk Utility. First Aid scans your disk for errors and repairs issues related to the file system and permissions. Fixing these underlying problems often clears error -43 when caused by disk inconsistencies.
- Open Disk Utility from Applications > Utilities.
- Select your startup disk or the relevant volume from the sidebar.
- Click the First Aid button in the toolbar, then click Run to start scanning and repairing the disk.
- When First Aid completes, look for a confirmation message indicating repairs were successful or no issues found.
If permissions remain problematic, you can cautiously adjust them using Terminal commands like chmod to change file permissions and chown to change ownership. Use these only if you understand the implications, as incorrect changes can cause further access issues.
Before running First Aid, you may see error messages related to permissions; after a successful run, these typically disappear, allowing file operations to proceed without error -43.
Clear Finder and System Caches
Caches are temporary files your Mac creates to speed up operations and improve system responsiveness. However, corrupted Finder or system caches can interfere with file handling, leading to persistent error -43 even after other fixes. Clearing these caches refreshes your Mac’s file management components and often resolves issues that standard troubleshooting misses.
- Open Finder, then press Command + Shift + G to open the "Go to Folder" dialog; type
~/Library/Cachesand press Enter. You should see a list of cache folders related to apps and system processes. - Locate the folder named
com.apple.finderand move it to the Trash. This removes Finder’s cached preferences and temporary data. - Return to the Go to Folder dialog (Command + Shift + G) and enter
/Library/Caches(without the tilde) to access system-level caches. - Safely delete contents of folders related to system processes, such as
com.apple.systempreferencesandcom.apple.desktopservices. Avoid deleting entire folders to prevent unintended issues; focus on the contents. - Restart Finder by holding Option, right-clicking the Finder icon in the Dock, and selecting Relaunch. You should see Finder windows close and reopen, indicating the cache reset.
- Finally, restart your Mac to fully apply the cache clearing. After reboot, attempt the file operation that caused error -43 to check if the issue is resolved.
For example, some users found that after repairing disk permissions and verifying disk formats, error -43 persisted. Clearing Finder and system caches as described often cleared the blockage, allowing file moves or deletions to complete successfully.
Use Terminal to Move or Delete Files Directly
When Finder triggers error code -43, using Terminal commands like mv and rm can help you bypass the graphical interface and perform file operations directly. This approach reduces interference from Finder-related issues and targets the file system level.
Before proceeding, ensure you have an exact path to your file or folder. Mistyping commands in Terminal risks unintended data loss, so double-check paths and filenames. Avoid running commands with elevated privileges unless absolutely necessary.
- Open Terminal from Applications > Utilities.
- To move a file, type
mv /path/to/source /path/to/destinationand press Enter. For example,mv ~/Desktop/oldfile.txt ~/Documents/. If successful, Terminal will return to the prompt without errors. - To delete a file, type
rm /path/to/fileand press Enter. For example,rm ~/Documents/unwantedfile.txt. No output means success; you can verify deletion by listing the directory (ls /path/to/directory). - For folders, use
rm -r /path/to/folderto remove recursively. Be cautious, as this permanently deletes all contents. - Check the results by running
lson the target directory to confirm the file was moved or deleted.
Here’s a worked example deleting a file that Finder wouldn’t remove:
rm ~/Desktop/lockedfile.txt
Terminal returns to the prompt with no error, and running ls ~/Desktop no longer lists lockedfile.txt. This confirms the file was deleted directly, bypassing error -43 in Finder.
Check for External Software or Network Conflicts
Sometimes, error code -43 arises not from your Mac’s settings but due to interference from third-party software or network drive complications. Antivirus or security software can block file operations by mistakenly flagging legitimate actions as threats. To test this, temporarily disable your antivirus and attempt the file operation again. If it succeeds with the antivirus off and fails when it’s on, the software is likely the cause.
Network drives can also trigger error -43 if they disconnect improperly or become unstable. To address this, disconnect the network drive via Finder by selecting the drive and choosing "Eject." Then, reconnect it through the "Go" menu using "Connect to Server…" ensuring a fresh connection. This process often clears stale network links that cause file access issues.
To isolate software conflicts more broadly, restart your Mac in Safe Mode by holding the Shift key during startup until you see the login window. In Safe Mode, only essential macOS components load, disabling third-party extensions. Try your file operations here; success usually indicates software conflicts in normal mode.
When to Seek Professional Help
You should consider professional assistance when error code -43 persists despite completing all recommended software troubleshooting steps. Persistent occurrences may indicate underlying hardware issues, such as physical failure of your Mac’s storage device. Common signs of a failing drive include unusual noises, frequent crashes, slow file access, and repeated file operation errors beyond just error -43.
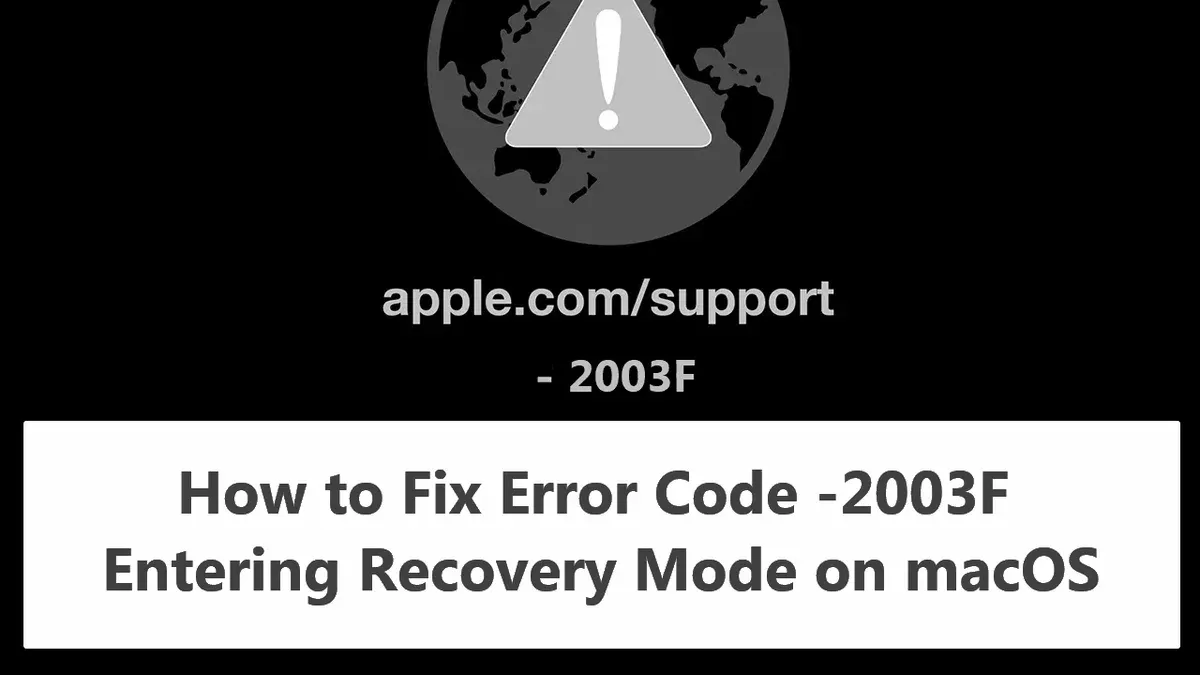
Apple hardware diagnostics and user reports show that a small but significant portion of storage drives develop mechanical or electronic faults that cause these persistent errors. If you notice these symptoms, immediately back up your data to avoid loss.
To proceed safely, follow these steps:
- Back up your important files using Time Machine or manual copy to an external drive; successful backup means your data is secure.
- Run Apple Diagnostics by restarting your Mac and holding the D key; you should see a test screen that reports any hardware issues found.
- If diagnostics report drive problems or if errors continue, contact Apple Support or an Apple Authorized Service Provider for professional evaluation and repair; you should receive guidance on repair options or drive replacement.
Recognizing when error -43 signals a hardware failure helps protect your data and ensures proper resolution beyond software fixes.
Frequently asked questions
What exactly causes error code -43 on Mac?
Error code -43 usually occurs when the system cannot locate a file or folder you are trying to move, delete, or copy. This can happen due to invalid characters in the filename, file system conflicts, or permission issues preventing access. Sometimes the file is corrupted or the drive is not properly mounted, which also triggers this error.
Can I fix error -43 without losing my files?
Yes, most fixes for error -43 focus on resolving file path, permission, or disk issues without deleting files. Using Disk Utility's First Aid or correcting permissions generally preserves your data. However, it’s wise to back up important files before attempting terminal commands or disk repairs to avoid accidental data loss.
Why does error -43 happen only on certain drives?
Error -43 often appears on drives with incompatible or corrupted file systems, such as external drives formatted in Windows NTFS without proper Mac support. Network drives or drives with mounting issues can also cause this error. The problem is tied to how macOS reads and writes to these drives and handles permissions there.
Is it safe to use Terminal commands to fix this error?
Using Terminal commands like mv or rm can be safe if you carefully enter the correct syntax and paths, as they bypass Finder’s interface. However, incorrect commands may lead to data loss, so double-check each command before running it. If you’re unsure, consider other repair methods or seek professional assistance.
When This Guide Doesn’t Cover Your Issue
This guide focuses on resolving error code -43 caused by file system conflicts, permissions, and related software issues. It does not cover hardware repair or data recovery from physically damaged drives. If you suspect your Mac’s hard drive or SSD has physical damage, such as clicking noises, failure to mount, or consistent read/write errors, seeking professional diagnostics and repair is essential. Similarly, if you are uncomfortable using Terminal commands or performing disk repairs, consulting an Apple Authorized Service Provider or experienced technician is recommended to avoid accidental data loss.
The most effective next step is to use Disk Utility’s First Aid on your startup disk or the affected external drive. Running First Aid can identify and repair common disk errors that often cause error -43. Open Disk Utility from Applications > Utilities, select your disk, then click “First Aid” and follow the prompts. This step often clears up underlying issues and may save you from more complex troubleshooting.
See also: How to Fix ‘The Disk You Inserted Was Not Readable on Mac’ Step-by-Step · How to Fix ‘Disk Not Ejected Properly’ on Mac: Step-by-Step Guide