
How to Fix ‘The Disk You Inserted Was Not Readable on Mac’ Step-by-Step
Follow a clear, step-by-step guide to fix ‘The disk you inserted was not readable on Mac’ and recover your data safely.
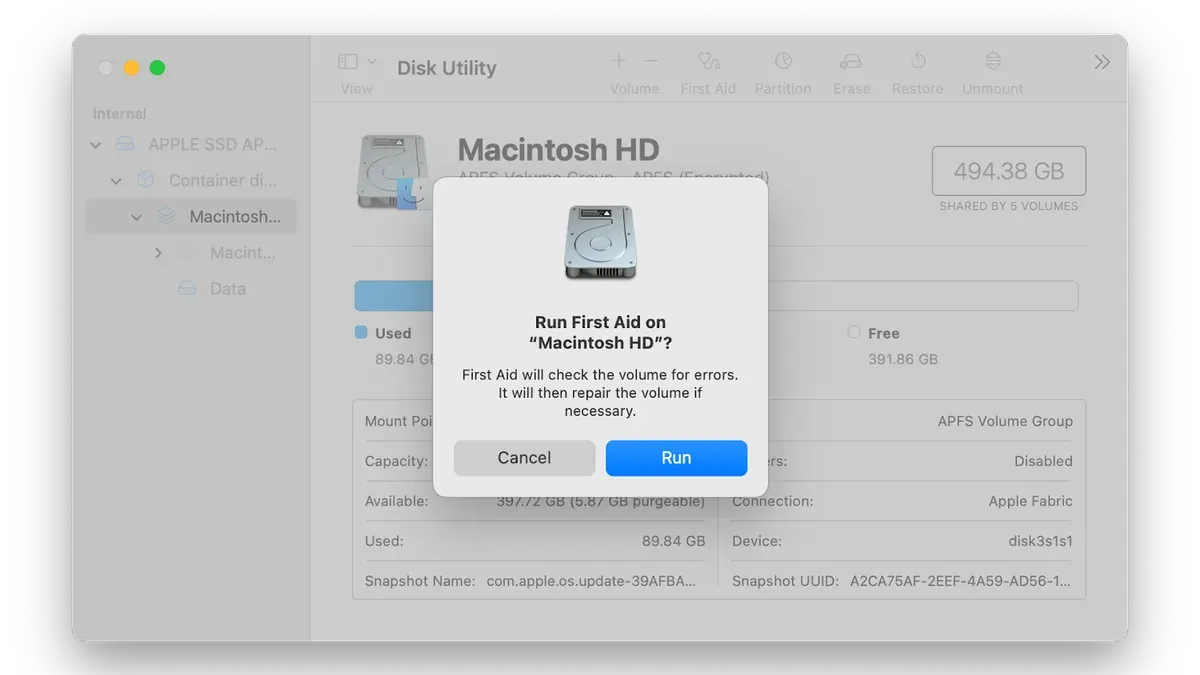
You connect your USB drive or external disk to your Mac, expecting quick access to your files, but instead, a message pops up: “The disk you inserted was not readable on Mac.” This frustrating alert leaves you wondering if your data is lost or if there’s a simple fix you can try yourself.
This article guides you through a patient, step-by-step approach to troubleshooting this issue. You’ll learn how to check hardware connections, use Disk Utility for repairs, handle permissions and formatting problems, recover data safely, and decide when professional help is necessary. If you want a clear path to resolve the problem, this guide covers “The disk you inserted was not readable on Mac fix” in a way that helps you understand each step before moving on.
Key takeaways
- Start by checking cables, ports, and physical connections to rule out hardware issues.
- Use Disk Utility to identify disk status, attempt repairs, and manually mount the disk.
- Check disk permissions and format compatibility to resolve common software-related problems.
- Recover important data using trusted free or paid tools before reformatting the disk.
- Reformat the disk carefully only after all recovery options are exhausted, and know when to seek professional assistance.
Before You Start: What You Need to Check and Prepare
Before troubleshooting the unreadable disk message on your Mac, make sure you have the right setup and tools. You will need a Mac with administrator access to perform repairs and access system utilities. Have the problematic disk or USB device ready, whether it's an external HDD, SSD, USB flash drive, or SD card. Keep in mind that common failure modes for these devices include physical damage, corrupted file systems, and formatting issues.
Also, prepare a reliable secondary storage device, such as another external drive or a large USB stick, to back up any recoverable data. This is crucial if data recovery is possible before attempting repairs or reformatting. Basic familiarity with Disk Utility and Terminal is helpful; these tools will be explained clearly in the next steps, so no prior expert knowledge is necessary.
Finally, understand that some disks may be physically damaged beyond software repair, which requires professional help. Having these preparations in place will help you follow the step-by-step process with confidence and make informed decisions along the way.
- Ensure your Mac is logged in with an administrator account. You should be able to change settings and run Disk Utility. When successful, you will see the Utilities folder under Applications.
- Connect the problematic disk or USB device to your Mac. It should appear in Finder or Disk Utility, even if unreadable.
- Have a backup drive connected or accessible so you can copy recovered files if needed. This device should be formatted and writable.
- Open Disk Utility (found in Applications > Utilities) to familiarize yourself with the interface. You’ll see a list of connected drives and volumes here.
- Open Terminal (also in Utilities) to prepare for advanced commands that may help mount or repair disks. You don’t need to run commands yet, just confirm the app opens.
Check Physical Connections and Try a Different Port or Cable
Before diving into software troubleshooting, rule out simple connection problems that often cause the unreadable disk error. Start by carefully inspecting the USB or Thunderbolt cable for any visible damage or loose ends. A frayed or bent cable can interrupt communication between your Mac and the disk.
Next, connect the disk to a different port on your Mac. Ports can sometimes fail or have insufficient power, so switching to another port may restore proper recognition. Avoid using USB hubs during this testing phase, as they add complexity and can introduce their own issues.
If you have access to another Mac or a PC, try connecting the disk there. If it is recognized on the second machine, the problem likely lies with your Mac’s hardware or settings rather than the disk itself.
- Disconnect the disk and inspect the cable for damage. If damaged, replace the cable. When working, proceed to step 2.
- Plug the disk directly into a different USB or Thunderbolt port on your Mac. If the disk mounts normally, you have identified a faulty port or cable.
- If the disk still does not appear, connect it to another Mac or PC. If it is recognized there, return to your Mac and continue troubleshooting software issues.
- A user resolved this error by switching from a faulty USB-C hub to a direct Mac port, which allowed the disk to mount correctly.
Use Disk Utility to Identify and Repair the Disk
Begin by opening Disk Utility, which you can find in Applications > Utilities or by searching with Spotlight. In the sidebar, carefully locate the problematic disk — note that physical disks appear at the top level with the disk size and manufacturer, while volumes are indented beneath them with volume names like “Macintosh HD.” Selecting the correct disk is crucial for accurate diagnosis.
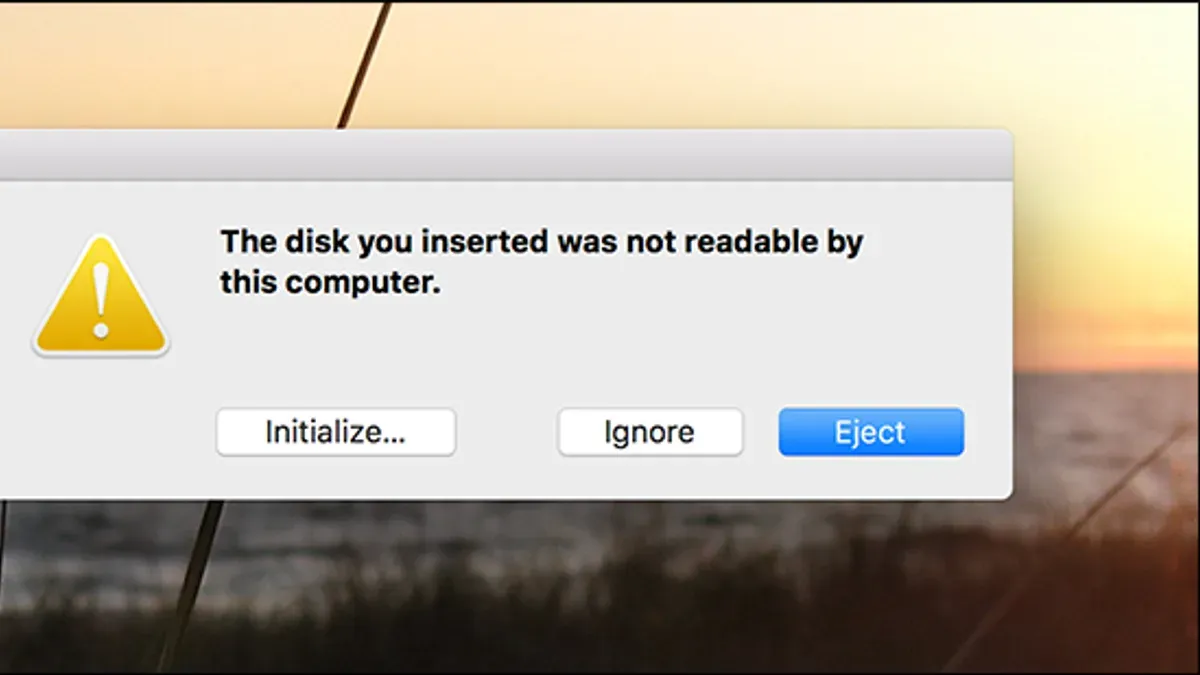
- Select the problematic disk or volume in the sidebar. You should see details like capacity and partition map type appear.
- Click the First Aid button in the toolbar. A prompt will ask if you want to run First Aid; confirm by clicking Run.
- Disk Utility will scan the disk's file system for errors. If the disk is healthy or successfully repaired, you will see a message stating that the disk appears to be OK.
- If First Aid finds errors it cannot repair, you will see a message like “The underlying task reported failure.” In this case, note the error details and consider data recovery options before attempting more invasive fixes.
Successful First Aid results include messages such as “The volume [name] appears to be OK” and a green checkmark. Failed attempts typically suggest the disk needs reformatting or professional repair. If First Aid fails repeatedly on a physical disk rather than a volume, the disk may have hardware issues beyond software repair.
Mount the Disk Manually Using Disk Utility or Terminal
If your Mac detects the disk but does not automatically mount it, you can try mounting it manually to access its contents. First, open Disk Utility from the Utilities folder in Applications. Locate the disk in the sidebar; if it appears grayed out, select it and click the Mount button at the top. If the disk mounts successfully, it will become accessible in Finder. If it fails, you may see an error indicating permission or format issues requiring further steps.
If Disk Utility does not mount the disk, use Terminal for a more detailed approach. Open Terminal and type diskutil list to display all connected disks and their identifiers, such as /dev/disk2s1. Identify your unreadable disk from the list, then run diskutil mount /dev/disk2s1 (replace with your disk’s identifier).
When the mount command succeeds, Terminal will confirm with a message like “Volume mounted successfully.” If it fails, errors such as “The disk could not be mounted” suggest underlying permission or format incompatibility problems. For example, a disk formatted with a Windows-only file system might require reformatting or third-party drivers.
- Open Disk Utility and find the grayed-out disk; click Mount. You should see the disk become active in the sidebar.
- If unsuccessful, open Terminal and enter diskutil list to find the disk identifier.
- Run diskutil mount /dev/diskXsY with your identifier. Success message means the disk is now accessible.
This manual mounting process reveals if macOS recognizes the disk but prevents auto-mounting due to permission or format issues, guiding your next troubleshooting steps.
Check and Repair Disk Permissions and Format Compatibility
Mac supports several disk formats, each with specific compatibility and limitations. Commonly supported formats include APFS and HFS+ (Mac native), FAT32, and exFAT (cross-platform). However, formats like NTFS, used primarily by Windows, are not natively writable on macOS without additional drivers, which can cause the "disk not readable" error.
| Disk Format | Read Support | Write Support | Limitations |
|---|---|---|---|
| APFS | Full | Full | Apple devices only, not readable by Windows |
| HFS+ | Full | Full | Older Macs only; limited Windows support |
| FAT32 | Full | Full | File size limit 4GB, less efficient |
| exFAT | Full | Full | Good cross-platform support, no file size limit |
| NTFS | Read-only (macOS default) | Not writable without drivers | Requires third-party drivers for write access |
If your disk is formatted with an unsupported or corrupted format, it may appear unreadable. To check, open Terminal and use the command diskutil info /Volumes/[DiskName] replacing [DiskName] with your disk's name. Look for the "File System Personality" entry, which shows the format. For permission issues, you can use the Terminal command diskutil verifyPermissions /Volumes/[DiskName] on older macOS versions, though newer versions manage permissions differently.
Third-party tools like Paragon NTFS or Tuxera NTFS can enable full NTFS write support if the disk is NTFS formatted and unreadable. However, if the format is corrupted or unknown, reformatting could be necessary.
- Open Terminal and type diskutil info /Volumes/[DiskName]. You should see the disk format listed under "File System Personality." If it is NTFS or an unsupported format, proceed to step 2.
- If NTFS, consider installing a trusted third-party NTFS driver to restore read/write access. After installation, reconnect the disk and check if it mounts correctly.
- If the disk format is corrupted or unreadable, back up any accessible data, then open Disk Utility, select the disk, and choose Erase to reformat it with a compatible format like exFAT or APFS. This will erase all data, so only do this after confirming recovery options.
Reformatting is a last resort due to data loss risk. Always try data recovery or permission repairs before proceeding. Understanding the disk format and resolving permission conflicts can often restore access without drastic measures.
Recover Data Before Reformatting Using Free or Paid Tools
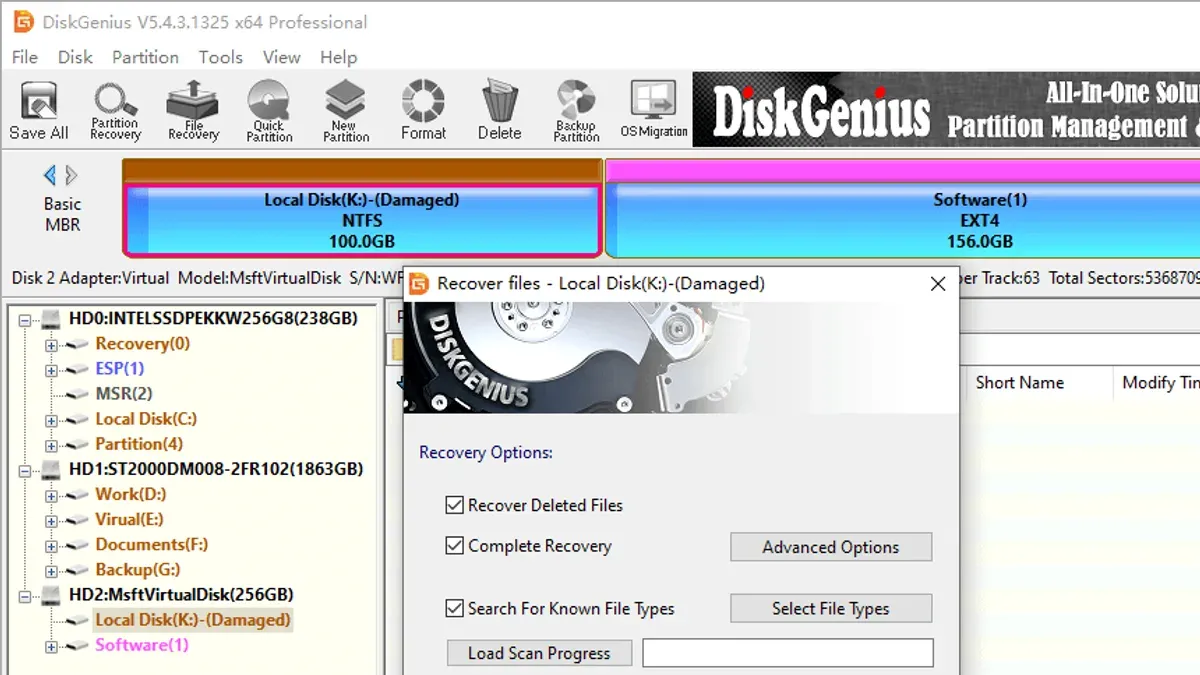
If your disk contains important data, avoid reformatting before attempting recovery. Data recovery tools can help retrieve files from corrupted or unreadable disks, but success varies based on damage severity. Trusted Mac-compatible options include Disk Drill, EaseUS Data Recovery Wizard, and Stellar Data Recovery, each offering user-friendly interfaces and support for various file systems.
Creating a disk image before recovery attempts protects your original data from further damage. Use Disk Utility’s “New Image” feature to clone the disk to a safe location. This lets you work on the copy, reducing risk during recovery.
Keep in mind free tools often limit recovered data volume or file types, making them suitable for minor issues or initial scans. If recovery fails or the disk shows severe corruption, professional data recovery services may be necessary despite higher costs.
- Use Disk Utility to create a disk image: Select the unreadable disk, click “File” > “New Image” > “Image from [disk name]”, choose a destination, and save. Success means you have a complete disk copy to work on.
- Run your chosen recovery software on the disk image or original disk. When scanning completes, review the list of recoverable files for the expected data.
- Save recovered files to a different drive to avoid overwriting. Confirmation appears when files are successfully restored.
- If free tools recover insufficient data, consider paid versions or professional recovery services for better success with complex corruption.
Reformat the Disk Safely to Restore Usability
If repairing and data recovery are unsuccessful or complete, reformatting the disk is the final step to restore its usability. This process erases all data and creates a new file system, making the disk compatible and accessible again. Choosing the correct format depends on how you intend to use the disk: APFS is ideal for modern Macs running macOS High Sierra or later, offering fast performance and encryption support; Mac OS Extended (Journaled) works well for compatibility with older Macs; and exFAT suits disks shared between macOS and Windows.
Follow these steps to reformat your disk using Disk Utility:
- Open Disk Utility from Applications > Utilities; select the problematic disk (not just the volume) in the sidebar.
- Click the Erase button on the toolbar; a dialog will prompt format options.
- Enter a new name for the disk to identify it after formatting.
- Choose the appropriate format (e.g., APFS, Mac OS Extended (Journaled), or exFAT) based on your needs.
- Set the Scheme to GUID Partition Map for best compatibility with Macs.
- Click Erase and wait for the process to complete; this usually takes less than a minute.
Formatting removes all existing data, so ensure your important files are backed up beforehand. After the disk is reformatted, it should mount automatically and appear in Finder. You can confirm its usability by copying a test file to the disk and safely ejecting it. For example, a USB drive that previously showed as unreadable will now mount properly, allow file transfers, and display its new format in Disk Utility.
Troubleshoot Common Failure Points and When to Seek Professional Help
If your disk produces clicking noises or is not detected at all by Disk Utility or System Information, these are strong signs of physical failure. Attempting further DIY fixes in such cases risks worsening the damage and reducing chances of data recovery. Repeated failures of software-based repairs or mounting attempts also indicate deeper issues beyond typical user troubleshooting.
Continuing to use a failing disk can lead to permanent data loss and complete hardware failure. It’s advisable to stop using the disk immediately to preserve its current state. Professional data recovery services typically handle such hardware failures, with success rates varying based on damage but generally higher when acted on promptly.
Finding a reputable Mac repair or data recovery professional involves checking for certified technicians experienced with Apple hardware and understanding their recovery processes and pricing. Costs for professional recovery can range widely depending on the failure severity and data volume involved, often requiring a diagnostic first.
- Stop using the affected disk immediately and disconnect it from your Mac to prevent further damage; successful when the disk is no longer in use.
- Search for Apple-certified repair centers or data recovery specialists with positive reviews and transparent pricing; successful when you identify a qualified service provider.
- Contact the chosen professional to describe your disk’s symptoms and inquire about diagnostic procedures and estimated costs; successful when you receive clear guidance on next steps and pricing.
- Follow the professional’s instructions on sending or bringing in the disk safely; successful when the disk is securely in transit or at the service location.
Frequently asked questions
Why does my Mac say ‘The disk you inserted was not readable’ even though it worked before?
This error can occur if the disk’s file system has become corrupted or if there are physical issues with the drive, such as bad sectors or a failing connection. Sometimes, software updates or changes in Mac’s system can affect compatibility with certain disk formats. Even if the disk worked previously, gradual damage or improper ejection can cause it to become unreadable.
Can I fix a corrupted disk without losing my data on Mac?
It is possible to repair some disk corruption using Disk Utility’s First Aid feature without erasing data. However, if the corruption is severe, you should first try to recover your data using recovery tools before attempting repairs. Avoid reformatting the disk before you have a backup, as that will erase all existing files.
What file formats are compatible with Mac and won’t cause this error?
Macs natively support formats like APFS, Mac OS Extended (Journaled), FAT32, and exFAT. Using these formats reduces the chance of compatibility errors. Formats from other operating systems, or disks formatted with unsupported schemes, are more likely to trigger the unreadable disk message.
Is it safe to ignore this error and keep using the disk?
Ignoring this error is not recommended because it usually indicates a problem that could worsen and lead to data loss. Continued use without addressing the issue may cause the disk to fail completely or corrupt files further. It’s best to diagnose and fix the problem or back up your data promptly.
What This Guide Does Not Cover
This guide focuses on software-based troubleshooting and basic hardware checks you can perform yourself. It does not cover physical hardware repairs or data recovery from severe physical damage, such as a mechanically failing drive or burned-out components. If your disk makes unusual noises, is physically damaged, or Disk Utility consistently fails to recognize it, professional data recovery services or hardware repair specialists are your best option. Attempting physical repairs without proper tools and expertise can worsen the issue and reduce the chances of successful data recovery.
For disks that remain unreadable after all software and connection checks, or if you suspect hardware failure, consulting an authorized Apple service provider or a reputable data recovery professional is recommended.
As a next step, carefully review the disk's status in Disk Utility and try to run First Aid if you haven’t done so yet. This simple step often resolves minor file system errors and helps you decide whether recovery or reformatting is appropriate.
See also: How to Fix ‘Disk Not Ejected Properly’ on Mac: Step-by-Step Guide · How to Understand and Manage MacBook Pro M1 Pro Battery Swelling Safely · How to Manage and Free Up MacBook Pro M1 Pro Storage Effectively



