How to Schedule an Email in Mail App and Outlook App: Step-by-Step Guide
Master scheduling emails in Mail app and Outlook with this step-by-step guide to send messages at the ideal time on your Apple and Windows devices.
Imagine you need to send an important update to a colleague but want it to arrive first thing in the morning. Or, you prefer drafting emails during the weekend and scheduling them to send during business hours. In 2026, knowing how to schedule an email in Mail app can help you manage your communications efficiently across your Apple devices.
This article guides you through the exact steps to schedule emails in both Apple Mail and Outlook apps on iPhone, iPad, Mac, and Windows. You'll learn how to use native features where available, find practical workarounds when they’re missing, and troubleshoot common issues that might arise when scheduling emails. Whether you want to streamline your workflow or ensure your messages hit inboxes at the perfect time, this guide covers everything you need.
Key takeaways
- Apple Mail on iPhone and iPad offers built-in email scheduling via the compose window's send options.
- Scheduling emails on Mac with Apple Mail requires macOS Ventura or later for native support.
- Outlook app supports scheduling across iOS, iPadOS, and Windows with consistent interface steps.
- Workarounds involve using Reminders or third-party apps if native scheduling is unavailable.
- Common issues include time zone mismatches and app permission settings that affect scheduled sends.
Before you start: What you need to schedule an email
Scheduling emails requires certain app versions, device capabilities, and compatible accounts to work smoothly. First, make sure you have the latest version of the Apple Mail or Outlook app installed on your device. For 2026, Apple Mail’s native scheduling feature is fully supported only on Mac devices running macOS Ventura 13.0 or later. On iPhone and iPad, Apple Mail lacks native scheduling, so workarounds or third-party integrations may be needed. The Outlook app, however, supports email scheduling across iPhone, iPad, Mac, and Windows platforms with version 4.2301 or newer.
Second, confirm your email account type supports scheduling. Microsoft Exchange, Microsoft 365, Outlook.com, and many compatible services allow scheduling emails. Personal IMAP or POP accounts often do not support this feature natively. Without a compatible account, scheduling may not function or could lead to delivery issues.
Lastly, ensure a stable internet connection when scheduling emails. Scheduled messages need to sync with the mail server at the designated time. Interruptions in connectivity can delay sending or cause failures. A reliable Wi-Fi or cellular data connection is essential for timely delivery.
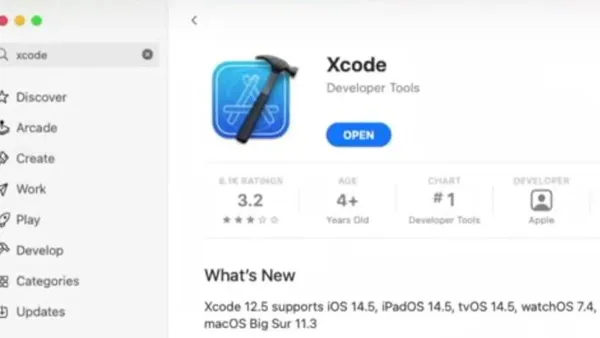
- Check your device’s app version by opening the App Store or Microsoft Store, searching for Apple Mail or Outlook, and confirming the installed version is at least macOS Ventura 13.0 for Apple Mail on Mac or version 4.2301 for Outlook app. You should see an “Open” button without an update prompt if up to date.
- Verify your email account type under Settings > Mail > Accounts on Apple devices or File > Account Settings in Outlook. Confirm it is Exchange, Microsoft 365, or a similar supported service. Accounts labeled IMAP or POP generally do not support scheduling.
- Test your internet connection by loading a webpage or sending a normal email. If pages load and emails send without delay, your connection is stable enough for scheduling tasks.
How to schedule an email in Apple Mail on iPhone and iPad
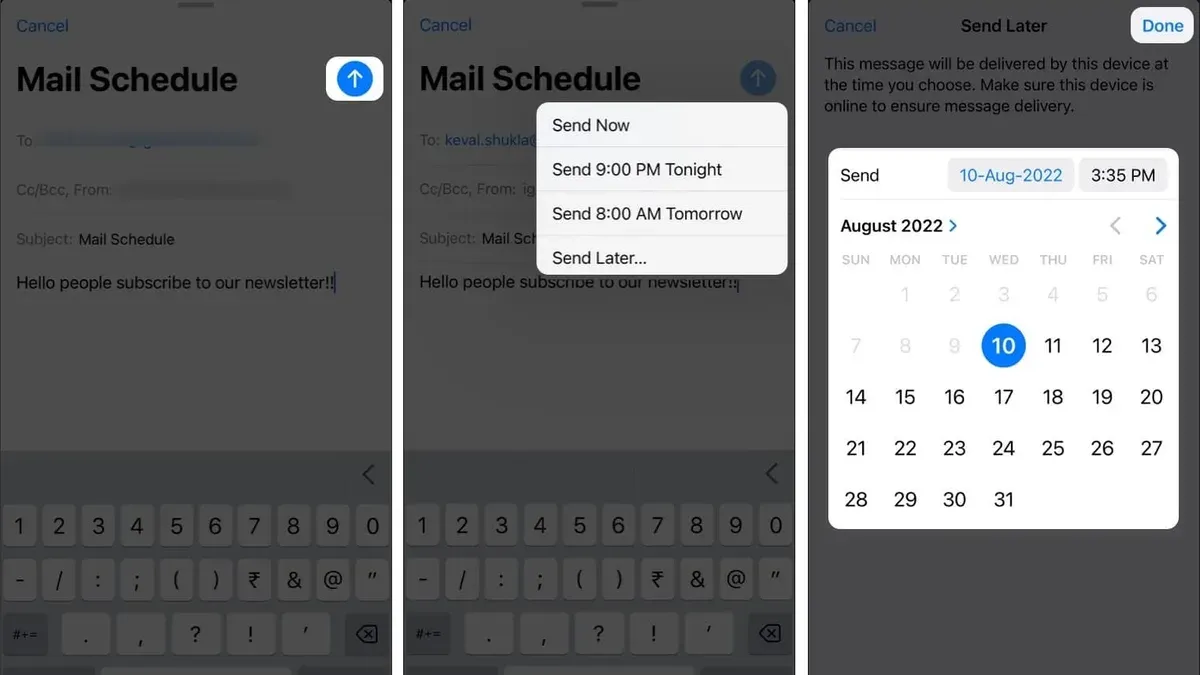
First, check if your Apple Mail app version on your iPhone or iPad supports email scheduling in 2026. To do this, open the Mail app, start composing a new email, then tap and hold the Send button. If you see a menu offering options to Send Now or Send Later with date and time selectors, your app supports native scheduling.
To schedule an email using the built-in feature, follow these steps:
- Open the Mail app and tap the Compose button to create a new email. You should see a new message window.
- Enter the recipient, subject, and body of your email as usual.
- Tap and hold the Send button until a menu appears.
- Select Send Later.
- Choose the desired date and time for delivery, then confirm. The email is now scheduled and will send automatically at that time.
If the native scheduling option does not appear, your Apple Mail version or device may not support it yet. In this case, you can use the Shortcuts app as a workaround to schedule emails. This method requires creating a shortcut that drafts and sends an email at a specified time.
To create a scheduling shortcut, open the Shortcuts app, tap + New Shortcut, search for and add the Send Email action, then configure the recipient, subject, and body. Next, add a Wait action set to the delay until your desired send time. Finally, run the shortcut manually or set it to run via automation.
Note that shortcut-based scheduling requires your device to be powered on and unlocked at the scheduled time for the automation to run successfully. This workaround lacks the seamless background scheduling of the native feature but offers flexibility until full Mail app support is available.
How to schedule an email in Apple Mail on Mac
In 2026, Apple Mail on macOS supports native email scheduling, though the feature differs slightly from iOS. To schedule an email directly, you can hold the Send button after composing your message, which brings up scheduling options. Alternatively, the Message menu includes a Schedule Send option for precise control. These native options allow you to pick a future date and time for sending your email.
If your version of Apple Mail on Mac lacks native scheduling, you can create an Automator workflow as an effective workaround. This involves setting up a calendar event that triggers sending the drafted email at a specified time. Although this method requires a bit more setup, it integrates smoothly with Apple Mail and macOS automation features.
- Compose your email in Apple Mail as usual.
- Hold down the Send button to reveal scheduling options or select Schedule Send from the Message menu.
- Choose the desired date and time for sending your email.
- Confirm your selection; the email will be queued and sent automatically at the scheduled time.
- If scheduling options are unavailable, open Automator and create a workflow that sends the email triggered by a calendar event.
- Save and activate the Automator workflow; your Mac will run it to send the email at the set time.
Keep in mind that scheduling features on macOS are generally more flexible than on iOS, offering direct menu access and integration with system automation. Scheduled emails sync across your devices if you use iCloud or compatible mail servers, ensuring consistency whether you check mail on Mac, iPhone, or iPad.
| Feature | Apple Mail on macOS | Apple Mail on iOS |
|---|---|---|
| Native Schedule Send | Yes, via Send button hold or Message menu | Yes, but limited to Send button hold |
| Third-party Automation Support | Automator workflows, third-party apps | Shortcuts app only |
| Sync Scheduled Emails | Via iCloud or mail server | Via iCloud or mail server |
Example Automator workflow: Create a calendar alarm that runs an AppleScript sending a prepared message. This setup requires you to draft the email and save it as a draft or script, then trigger the send action automatically.
How to schedule an email in Outlook app on iPhone, iPad, and Windows
Scheduling emails in the Outlook app is straightforward and consistent across your devices, with some interface differences between iOS and Windows. Outlook offers robust native support for scheduling, making it a reliable choice if you frequently plan your emails ahead.
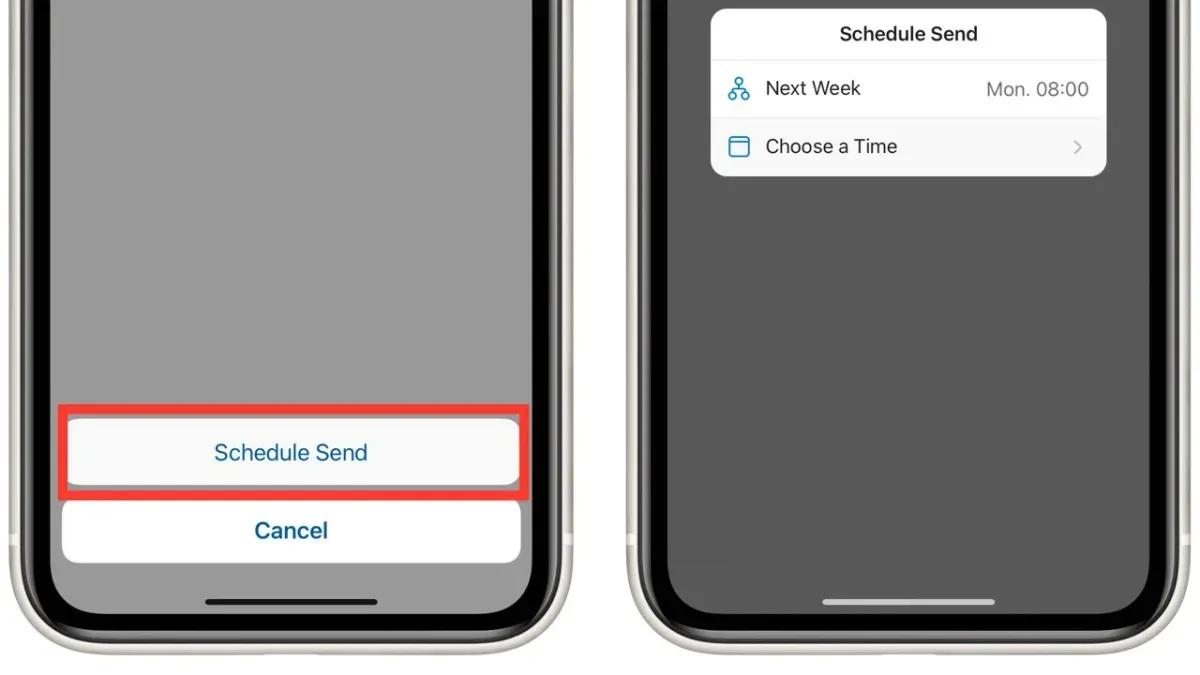
Schedule an email on iPhone and iPad
- Open the Outlook app and tap the New Message icon to compose a new email. You should see the compose window ready.
- Write your email as usual, then tap the three dots icon in the upper-right corner to open additional options.
- Select Schedule send from the menu; a date and time picker will appear.
- Choose your desired send date and time, then confirm by tapping Schedule. You will see a confirmation that your email is queued for sending.
Schedule an email on Windows
- Open Outlook on your Windows PC and click New Email to start composing.
- After drafting your message, go to the Options tab on the ribbon.
- Click Delay Delivery or Send Later (depending on your Outlook version), opening a dialog box.
- Under Delivery options, set the Do not deliver before date and time.
- Close the dialog and click Send. The message will remain in your Outbox until the scheduled time.
Scheduled emails sync across your devices if you're using the same Microsoft 365 or Outlook.com account. This means an email scheduled on your iPhone will appear in the Outbox or Scheduled folder on Windows, and vice versa, ensuring consistency.
Compared to Apple Mail, Outlook app’s scheduling feature is more integrated and easier to access, with clear options both on mobile and desktop. This makes Outlook a strong choice if you want a seamless scheduling experience across multiple platforms.
Schedule sending email in Outlook app: Tips for power users
Power users of the Outlook app can enhance their email scheduling with several advanced techniques. First, if you need to edit or cancel a scheduled email before it sends, open the "Drafts" or "Scheduled" folder, find the email, and select "Edit" or "Cancel Send." Once edited, you can reschedule it. This keeps your queue flexible and under your control.
- Open the Outlook app and go to the "Scheduled" folder.
You should see a list of emails queued for future sending. - Tap the email you want to change.
The email draft opens for editing or cancellation. - Choose "Edit" to modify the content or "Cancel Send" to stop sending.
The updated email appears in drafts or is removed from the queue.
Next, you can combine Outlook rules with scheduling for automation. For example, set a rule to delay all outgoing emails from a specific sender or with certain keywords by 10 minutes. This is done via "Settings" > "Mail" > "Rules" > "Add new rule." Using rules helps manage email flow and avoid mistakes.
- Go to Outlook Settings and select "Mail."
The mail settings panel appears. - Tap "Rules," then "Add new rule."
A form to create rule conditions opens. - Set conditions (e.g., sender or subject) and select "Delay Delivery" with desired minutes.
The rule is saved and activated.
For recurring scheduled emails, Outlook supports limited recurrence through the "Delay Delivery" options on Windows desktop but not directly on mobile apps. You can create a recurring calendar reminder to draft and schedule emails manually, or use Microsoft Power Automate for full automation.
Lastly, to ensure scheduling accuracy across time zones, always set the send time in your local time zone and confirm the time zone setting in Outlook's calendar and mail settings. This prevents common issues such as emails sending too early or late, especially when recipients are in different regions.
Troubleshoot common issues when scheduling emails
Sometimes scheduled emails don’t send as expected due to app or account issues. One frequent cause is that Apple Mail or Outlook app isn’t running in the background at the scheduled send time, especially on mobile devices with strict background app restrictions. Ensure your device settings allow the app to refresh or run in the background to avoid missed sends. Another common problem is account authentication errors—verify your email account is properly connected and able to send emails manually before scheduling.
Time zone mismatches can cause emails to send at incorrect times. Check your device’s time zone settings and ensure they match your current location or intended send time. Both Apple Mail and Outlook rely on system time, so discrepancies there affect scheduling accuracy.
Apple Mail’s scheduling feature is limited on some devices, causing confusion when the option is missing or inconsistent. If you don’t see the schedule option, check that your app is fully updated and that your device supports this feature natively. Otherwise, workarounds like the Shortcuts app or Automator may be necessary but require care to confirm the email is properly queued.
Outlook app users sometimes report syncing delays where scheduled emails don’t appear in the Outbox or are sent late. To mitigate this, ensure your Outlook app has recent sync updates and that your internet connection is stable. You can also manually refresh the app or restart it to force sync. Verifying scheduled emails are queued correctly involves checking the Scheduled folder or Outbox; the email should appear there with the correct send time.
- Open your Mail or Outlook app and navigate to the Scheduled folder or Outbox.
You should see your scheduled emails listed with accurate send times. - Check your device’s date, time, and time zone settings under Settings > General > Date & Time.
Ensure the time zone matches your current location. - Verify that your email account is signed in and working by sending a manual test email.
The email should send without error. - Confirm the app can run in the background (iOS Settings > Mail/Outlook > Background App Refresh).
Background App Refresh is enabled. - If using Apple Mail on devices without native scheduling, test the Shortcuts or Automator workflow.
The email should appear in Scheduled or Outbox after running the shortcut/workflow.
Following these steps helps resolve most common scheduling issues reported by users and referenced in official Apple and Microsoft support resources.
Compare Apple Mail and Outlook app scheduling: Which should you use?
When deciding between Apple Mail and Outlook app for scheduling emails, consider your device ecosystem and specific needs. Apple Mail offers native scheduling on Mac and iOS devices with a straightforward interface, but its availability on iPhone and iPad depends on app versions and sometimes requires workarounds like Shortcuts. Outlook app provides consistent native scheduling across iPhone, iPad, and Windows, making it a versatile choice for users working across platforms.
| Feature | Apple Mail | Outlook app |
|---|---|---|
| Native scheduling availability | Mac (native), iPhone/iPad (native if updated, else Shortcuts) | iPhone, iPad, Windows (native and consistent) |
| Ease of use | Simple on Mac; moderate with Shortcuts on iOS | Intuitive UI with clear scheduling options |
| Platform coverage | Apple ecosystem only | Cross-platform (Apple devices + Windows) |
| Integration with productivity tools | Works well with Apple Calendar and Reminders | Seamless with Microsoft 365 suite and Outlook Calendar |
| Reliability and limitations | Occasional syncing delays and reliance on app version | Generally reliable with robust syncing and editing |
For casual users primarily on Apple devices, Apple Mail’s native scheduling on Mac and iOS may suffice, especially if integrated with Apple’s calendar and reminders. However, business professionals who require cross-device consistency, advanced scheduling options, or integration with Microsoft 365 tools will benefit from Outlook app’s more robust and reliable scheduling features.
Consider this example: a business professional managing multiple client time zones and recurring emails will find Outlook’s scheduling and rule automation more efficient, while a casual user sending occasional scheduled emails may prefer Apple Mail’s simplicity on a Mac. Ultimately, your choice hinges on your platform preference, need for integration, and scheduling complexity.
Best practices for scheduling emails effectively
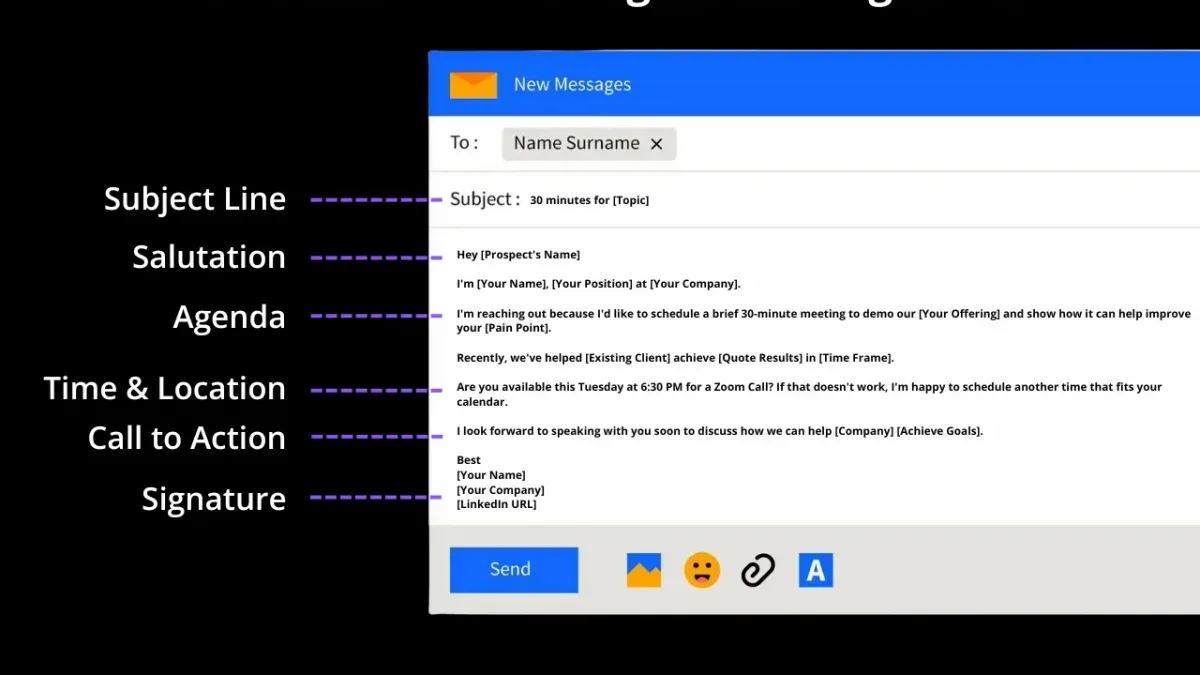
- Choose optimal send times for engagement. Schedule your emails to arrive during peak recipient activity, typically mid-morning or early afternoon on weekdays. Emails sent during these windows tend to have higher open rates, improving your chances of timely responses.
- Avoid overusing scheduling to maintain authenticity. Use scheduled sends strategically rather than excessively. Frequent use of delayed emails can feel impersonal or automated to recipients, so balance scheduled messages with real-time communication to keep your interactions genuine.
- Check scheduled emails for content and attachments before sending. Review your drafts carefully to ensure all text is clear and attachments are included. Scheduling allows time for a final check, helping you catch errors that might otherwise reduce professionalism.
- Use scheduling to manage time zones when emailing globally. When contacting recipients in different regions, set send times that align with their local working hours. This consideration increases the likelihood your email will be seen promptly and reduces confusion caused by timing mismatches.
Frequently asked questions
How to schedule mail in outlook app?
In the Outlook app on iPhone, iPad, or Windows, compose your email first. Then tap the three-dot menu or the arrow next to the Send button and select "Send Later." Choose your preferred date and time for sending, and confirm. Your email will be stored in the Drafts or Scheduled folder until it is sent.
How to schedule an email in mail?
Apple Mail on iPhone and iPad supports scheduling emails starting in 2026. After composing an email, press and hold the Send button, then select "Send Later." Pick the desired date and time, and confirm. On Mac, Apple Mail does not yet have native scheduling, so you need to use third-party plugins or Automator workflows to schedule emails.
How to schedule email in outlook app?
The Outlook app scheduling works similarly across devices. After writing your message, locate the "Send Later" option via the three-dot menu or arrow beside Send. Select the time and date, and save. This feature is built-in and does not require additional setup.
How to schedule an email in mail apple?
On Apple Mail for iPhone and iPad, hold down the Send button until scheduling options appear, then pick your send time. On Mac, native scheduling is not available as of 2026, so you need to rely on third-party tools or manual workarounds. Make sure your device is updated to iOS 17 or later for scheduling support.
Can you schedule email in apple mail?
Yes, in 2026 Apple Mail on iPhone and iPad supports email scheduling via the long-press Send button feature. However, Apple Mail on Mac does not yet include native scheduling, so you will need external solutions for that platform. Scheduling functionality requires up-to-date software versions.
What This Advice Does Not Cover and When to Look Elsewhere
Apple Mail’s native email scheduling features remain limited on some devices in 2026. For example, on certain iPads and older Mac models, you might not find a built-in scheduling option, requiring you to use Shortcuts or wait until the app is actively running. If you need more robust scheduling capabilities—such as recurring sends, advanced delay options, or guaranteed delivery regardless of device status—the Outlook app or specialized third-party tools are better suited to your needs.
Keep in mind that scheduling emails depends heavily on your device being connected to the internet at the scheduled send time. Offline conditions or background app restrictions may prevent your email from sending as planned. Also, some scheduling features require the app to remain open or Shortcuts automation to be enabled in settings.
To move forward confidently, open your Apple Mail or Outlook app now and try scheduling a test email for a few minutes ahead. This practical step helps you verify your device’s behavior and understand exactly how the scheduling works in your setup before relying on it for important messages.
See also: How to Unsend an Email in Mail App: Clear Steps for Apple Users · How to Block a Sender in the Mail App: Clear Steps for Apple Users · How to Set Up Mail Rules in the Mail App: A Step-by-Step Guide · How to Create an Email Signature in the Mail App: Step-by-Step Guide