
How to Block a Sender in the Mail App: Clear Steps for Apple Users
Discover easy steps to block a sender in Mail app on Apple devices and popular third-party apps to stop unwanted emails effectively.
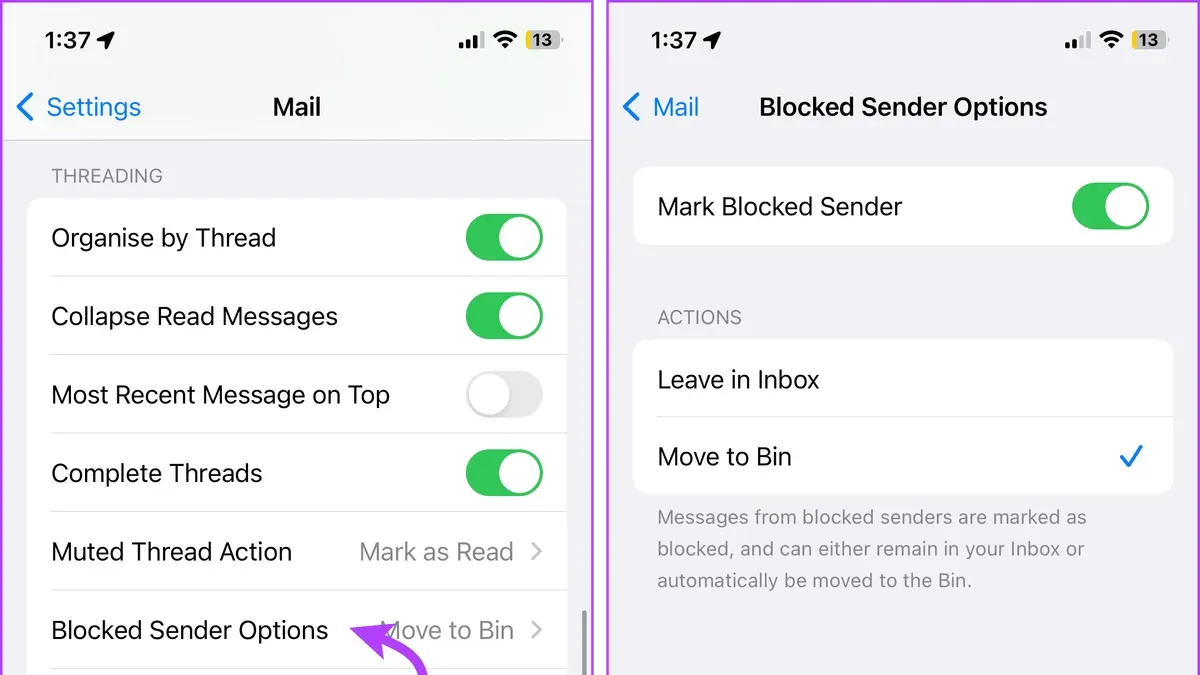
You open your inbox only to find unwanted emails from a persistent sender cluttering your view. Knowing how to block a sender in Mail app can save you time and reduce frustration by stopping these messages before they reach you.
This guide walks you through clear, step-by-step instructions for blocking senders not only in Apple Mail on both Mac and iPhone but also in popular third-party mail apps like Yahoo Mail and Outlook on your iPhone. You will also learn about the differences and limitations across these apps and some troubleshooting tips if blocking doesn’t work as expected.
Key takeaways
- Blocking a sender in Apple Mail on Mac involves selecting the email, then using the “Block Contact” option from the Mail menu.
- On iPhone, blocking is done through the sender’s contact card in Apple Mail or via app-specific blocking options in Yahoo or Outlook apps.
- Third-party apps may handle blocking differently, so knowing where to find these settings is crucial.
- If blocking fails, checking mail rules, filters, or server-side block lists can help.
- Understanding how blocking works depending on your email provider can prevent confusion and improve your control over unwanted mail.
Before you start: What you need to block a sender
Blocking a sender in your email app requires some preparation to ensure you know what to expect and have the right information ready. First, confirm you have access to the Mail app on your Apple device or the third-party mail apps like Yahoo Mail or Outlook installed. Without the app, you won’t be able to proceed with blocking senders within that platform.
Understand that blocking behavior varies depending on your email provider and the app's settings. Some apps support native blocking, while others may need workarounds or additional configuration. Your device type—whether it’s a Mac, iPhone, or iPad—also influences the exact steps to take, so knowing which device you’re using helps avoid confusion.
Before you start, gather the sender’s email address or locate an email from that sender in your inbox. This information is crucial because blocking often requires selecting the message or entering the exact email address to stop further emails effectively.
| Email App | Native Blocking Supported | Workarounds or Features Needed |
|---|---|---|
| Apple Mail (Mac & iOS) | Yes | None |
| Yahoo Mail App | Limited | Use app filter settings or report spam |
| Outlook App | Yes | May require server-side rules for full blocking |
- Check that the Mail app or your preferred third-party mail app is installed and updated on your device. You should see the app icon on your home screen or in the Applications folder.
- Identify your device type (Mac, iPhone, or iPad). On iOS devices, go to Settings > General > About to see the model; on Mac, click the Apple menu and choose About This Mac.
- Locate an email from the sender you want to block or have their exact email address ready. This is necessary for precise blocking actions.
- Understand that depending on your email provider and app, blocking might behave differently or need additional steps. Knowing this helps manage expectations if blocking doesn’t work immediately.
How to block a sender in Apple Mail on Mac
Blocking a sender in the Apple Mail app on macOS helps you automatically manage unwanted emails by moving future messages from that sender to the Trash or Junk folder. Follow these steps to block a sender directly within the Mail app.
- Open the Mail app on your Mac and locate an email from the sender you want to block. It can be in your Inbox or any other folder.
- Click on the email to select it, then go to the top menu bar and click Message. From the dropdown menu, choose Block Sender. Alternatively, you can right-click (or Control-click) on the email in the message list and select Block Sender from the context menu.
- Once you select Block Sender, you will see a confirmation that the sender has been blocked. From now on, emails from this sender will automatically move to the Trash or Junk mailbox, depending on your Mail preferences.
- To manage your blocked senders list, go to Mail > Preferences > Junk Mail tab. Here you can review all blocked contacts, unblock any sender by selecting them and clicking Remove, or add new ones manually.
- Remember, blocking a sender in Apple Mail on Mac does not necessarily block them across all your devices or other email apps; it works specifically within the Mail app on this Mac.
This method keeps your inbox cleaner by routing unwanted emails away automatically, but always check your Trash or Junk folders occasionally to ensure you’re not missing important messages.
How to block a sender in Apple Mail on iPhone
Blocking a sender in the iOS Mail app works a bit differently than on Mac. You start with an email from the unwanted sender and then access the contact options directly from the message header. Once blocked, emails from that sender are automatically moved to the Trash folder, helping keep your inbox clean without manual sorting.
- Open the Mail app and locate an email from the sender you want to block. When you tap on the email, it opens in full view.
- At the top of the message, tap the sender’s name or email address to open the contact options. This reveals details like phone number and email addresses if saved.
- Scroll down in the contact options and tap Block this Contact. A confirmation prompt appears.
- Confirm the block by tapping Block Contact again. After this, emails from this sender will automatically be sent to the Trash folder.
- To view or manage blocked senders, open the iPhone Settings app, go to Mail > Blocked. Here you see all blocked contacts and can add or remove them as needed.
Note that blocking on iPhone Mail only moves future emails from the blocked sender to Trash; it does not remove existing messages. Also, unlike on Mac, there isn’t a built-in way in the Mail app to mark blocked messages as junk or spam automatically.
How to block a sender in Yahoo Mail app on iPhone
When you receive unwanted emails in the Yahoo Mail app on your iPhone, blocking the sender helps keep your inbox cleaner by moving future messages from that sender directly to the Spam folder. The app offers a straightforward way to block senders, but the exact steps can be easy to miss if you're new to the interface.
- Open the Yahoo Mail app and locate an email from the sender you want to block. When you open the email, you will see options at the bottom or top of the screen.
- Tap the three-dot menu icon (more options) typically found near the top-right corner of the email view. This opens a list of actions you can take on the email.
- From the menu, select Block Sender. You will see a confirmation prompt explaining that future emails from this sender will go to the Spam folder.
- Confirm the block by tapping Block. After confirmation, you will notice a confirmation message or the sender no longer appears in your inbox.
- To manage your blocked senders list, tap the menu icon in the app’s main screen, then go to Settings > Security and Privacy > Blocked Addresses. Here you can review or unblock senders as needed.
Blocking a sender in Yahoo Mail on iPhone routes all future emails from that address to your Spam folder, rather than deleting them outright. This allows you to review blocked emails later if necessary. Keep in mind that blocking is specific to your Yahoo Mail account and does not affect other email apps you use.
Having a clear view of the blocked senders list within the app helps you stay in control and adjust your preferences anytime. If you don’t see the block option where expected, ensure your Yahoo Mail app is updated to the latest version, as interface layouts can change.
How to block a sender in Outlook app on iPhone
Blocking a sender in the Outlook app on your iPhone helps keep unwanted emails out of your inbox by directing them to the Junk folder. The process is straightforward but slightly different from Apple Mail's native blocking, so understanding these steps ensures you block effectively.
- Open the Outlook app and navigate to your inbox. Find and tap on an email from the sender you want to block. Once opened, you will see the email content and options at the top or bottom of the screen.
- Tap the three-dot menu icon (more options) typically located in the top-right corner of the email view. This opens a menu with several actions related to the email.
- Look for the option labeled "Move to Junk" or "Block Sender". Depending on your app version, you may see "Move to Junk" which effectively blocks the sender by sending future emails to the Junk folder. Tap this option. After selecting it, the email should move out of your inbox, indicating the sender is now blocked or marked as junk.
- To review or manage blocked senders, tap your profile icon or the menu icon in the top left corner to open the sidebar. Select the gear icon to open Settings.
- In Settings, scroll to find "Mail" then select "Blocked Senders" or a similar option. Here you can see all blocked email addresses, remove any if you wish, or add new ones manually by entering an email address.
Keep in mind that Outlook's blocking moves emails to Junk rather than deleting them permanently like some native mail apps. This method allows you to review blocked emails and recover any mistakenly blocked messages. Managing blocked senders within the app settings gives you control over your blocked list without affecting contacts on your device.
Troubleshooting when blocking a sender doesn’t work
Sometimes, despite blocking a sender, you may still see emails from them. This often happens because the sender uses different email addresses or variations of their address. Blocking one address won’t stop messages from another, so check the sender’s email closely for variations and block those as well.
Apple Mail and third-party apps have limitations; for example, some apps only move blocked emails to Trash or Junk but do not prevent delivery. Also, blocking settings might not sync immediately across all your devices. If blocked emails appear on other devices, verify that your mail accounts and sync settings are consistent across them.
Mail rules and spam filters can offer a more reliable solution in some cases. Review your mail settings to create rules that automatically move or delete messages based on sender, subject, or keywords. This can complement blocking and catch emails that slip through.
If you continue to receive unwanted emails despite these steps, contact your email provider or Apple Support. They can check for server-side filtering issues or app-specific problems that require advanced troubleshooting.
- Review the sender’s email address in a received message. If there are multiple variations, add each to your blocked list. You should see future emails from those addresses go to Junk or Trash.
- Check your device’s mail sync settings under Settings > Mail > Accounts. Confirm all devices use the same accounts and that mail syncing is enabled. After syncing, blocked emails should stop appearing on all devices.
- Go to Settings > Mail > Rules or Filters (if your provider supports it). Create a new rule to move emails from the sender’s domain or specific address to Trash. You will see those messages automatically redirected.
- If blocking still fails, contact your email provider’s support for server-level blocking options or Apple Support for app-specific help. Successful contact should result in further guidance or resolution.
Alternatives to blocking: Using mail rules and filters
Blocking a sender is a straightforward way to stop unwanted emails, but sometimes it’s not enough. Mail rules and filters offer a more flexible solution by automatically sorting, moving, or deleting emails based on criteria you define. These tools can catch emails that slip past blocking or handle variations in sender addresses that blocking might miss.
In Apple Mail and many other mail apps, rules let you specify conditions such as sender, subject, or keywords. For example, you can create a rule that moves all emails from a certain sender directly to the Trash or a specific folder, even if you haven’t blocked that sender. Unlike blocking, which focuses on ignoring or trashing emails from blocked contacts, rules give you more control over how those messages are managed.
Here is a simple step-by-step to set up a mail rule in Apple Mail on Mac to delete emails from an unwanted sender:
- Open Apple Mail and go to the Mail menu, then select Preferences. You should see the Preferences window open.
- Click the Rules tab, then select Add Rule. A new dialog box appears for rule creation.
- Name your rule clearly, e.g., "Delete Unwanted Sender."
- Set the condition to "From" "Contains" and enter the sender’s email address. This tells Mail which emails to target.
- Choose the action "Delete Message." This moves matching emails to Trash automatically.
- Click OK to save the rule, and confirm applying it to existing messages if prompted.
Consider using mail rules when blocking doesn’t catch all variations of a sender’s address or if you want to organize unwanted mail more precisely. Combining blocking and filtering offers a stronger, more customized approach to managing your inbox.
How blocking differs across email providers and apps
Blocking a sender depends heavily on your email provider's server capabilities and the app you use. Apple Mail’s blocking actions partly rely on the mail server to recognize and enforce the block, which means the effectiveness can vary between providers like iCloud, Gmail, or Yahoo.
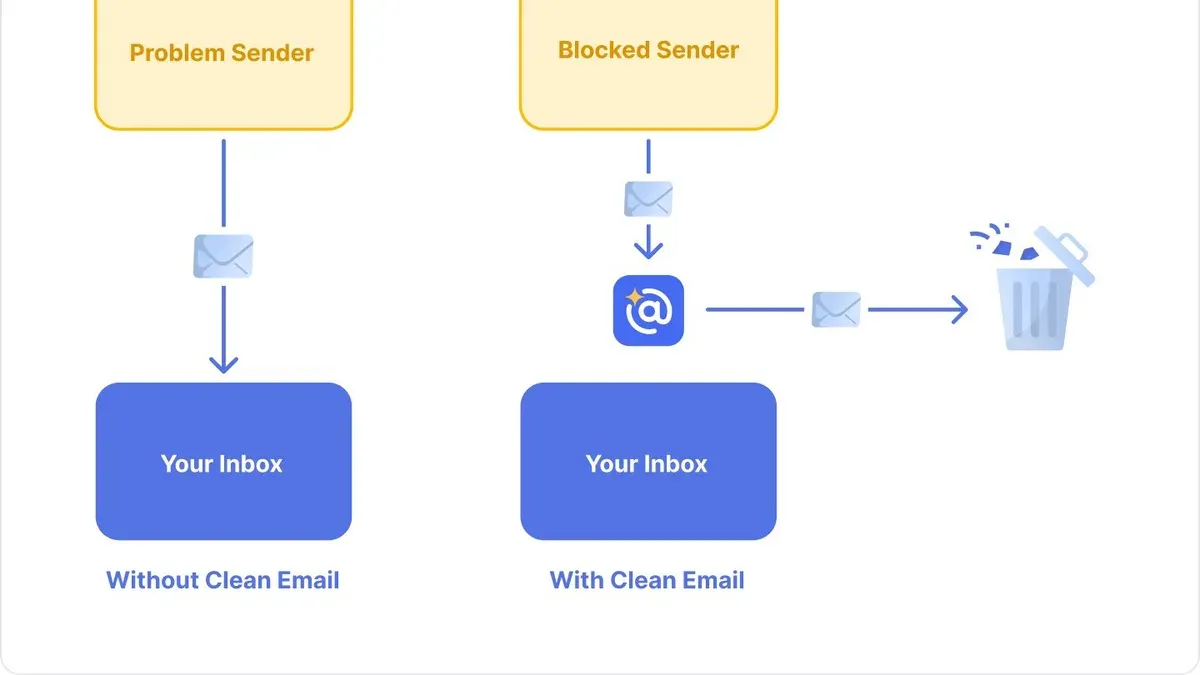
Gmail blocking functions differently from Apple Mail. When you block a sender in Gmail, emails from that address are automatically sent to Spam on the server side. This prevents them from ever reaching your inbox, regardless of the device or app you use. However, the Gmail app offers limited options to manage blocked senders compared to the full Gmail web interface.
Yahoo Mail on iOS allows blocking senders by marking emails as Spam, but it does not prevent the sender from appearing in your inbox if they use different email aliases. The block is app-specific and may not sync perfectly across devices.
Outlook and Exchange accounts handle blocking through server-side rules that move unwanted emails directly to the Junk folder. Outlook’s app and desktop client provide settings to block senders and manage safe and blocked lists, but some Exchange configurations may restrict user access to these features.
Understanding your email provider’s blocking policies is essential for effective results. Some providers offer robust server-side controls that work across apps and devices, while others rely on client-side blocking that only affects the app where you set it. Below is a comparison chart summarizing blocking features and their effects across popular providers and apps.
| Provider/App | Blocking Type | Effect | Sync Across Devices | Limitations |
|---|---|---|---|---|
| Apple Mail (iCloud) | Server and client-side | Moves emails to Trash/Junk | Yes | Depends on provider rules |
| Gmail (Web & App) | Server-side | Moves emails to Spam | Yes | Limited management in app |
| Yahoo Mail (iOS app) | App and server-side | Moves emails to Spam | Partial | Aliases can bypass block |
| Outlook (App & Exchange) | Server-side rules | Moves emails to Junk | Yes | Exchange policies may restrict |
Frequently asked questions
How to block a sender in email?
Blocking a sender in email usually involves locating an option to block the sender's address either in the message itself or within the app's settings. Many email apps have a “Block Sender” or “Block Contact” option accessible by clicking on the sender's name or email address. This action prevents emails from that sender from reaching your inbox, often moving them to the spam or trash folder automatically.
How do i block a sender in apple mail?
In Apple Mail on Mac, open an email from the sender you want to block, then click on the sender's name or email address and select “Block Contact.” This moves future emails from that sender to the Trash and can also display a notification that the message is blocked. On iPhone, you can block a sender by tapping the sender's name in the message header, selecting “Block this Contact,” which stops their emails from appearing in your inbox.
How to block sender in mail app iphone?
To block a sender in the Mail app on your iPhone, open an email from the sender, tap their name at the top, and then tap “Block this Contact.” After confirming, new emails from that sender will be automatically moved to the Trash folder. Keep in mind that this feature works best with contacts saved in your device's Contacts app.
How to block sender in apple mail?
Blocking a sender in Apple Mail involves selecting an email from that sender, clicking their name or email address, and choosing “Block Contact.” This setting routes future emails from them to the Trash and marks them as blocked. You can manage blocked contacts anytime via the “Blocked” tab in the Mail app’s preferences or settings.
Can you block a sender on email?
Yes, most email services and apps allow you to block senders to prevent unwanted emails. Blocking typically sends the sender’s future messages directly to spam or trash folders, reducing inbox clutter. However, the exact process and effectiveness can vary depending on the email provider and app used.
What Blocking a Sender Doesn’t Cover
Blocking a sender in Apple Mail or other mail apps stops emails from that specific address from appearing in your inbox, but it does not prevent the sender from emailing you again if they use a different email address. Additionally, some email providers handle blocking differently—some may move the emails to spam, others may delete them outright, and a few may not support blocking at all. If you receive persistent unwanted emails despite blocking, consider contacting your email provider’s support or exploring more advanced filtering options on their web interface.
For users dealing with harassment or spam that bypasses blocking, reporting the sender to your email provider or using third-party spam filtering services may offer better protection. Blocking is a useful first step but not a guaranteed solution for all unwanted emails.
The most useful next step is to review and customize your mail app’s rules or filters settings. Setting up specific rules—in Apple Mail on Mac, for example, by going to Mail > Preferences > Rules—can automatically move, delete, or flag emails based on sender, subject, or other criteria. This helps manage unwanted emails more precisely and complements blocking by handling cases where blocking alone falls short.
See also: How to Create an Email Signature in the Mail App: Step-by-Step Guide · How to Add a Gmail Account in the Mail App: Step-by-Step Guide



