
How to Safely Merge Two Photos Libraries in the Photos App
Discover a safe method to merge two Photos libraries in the Photos app, preserving all your edits, metadata, and organization seamlessly.
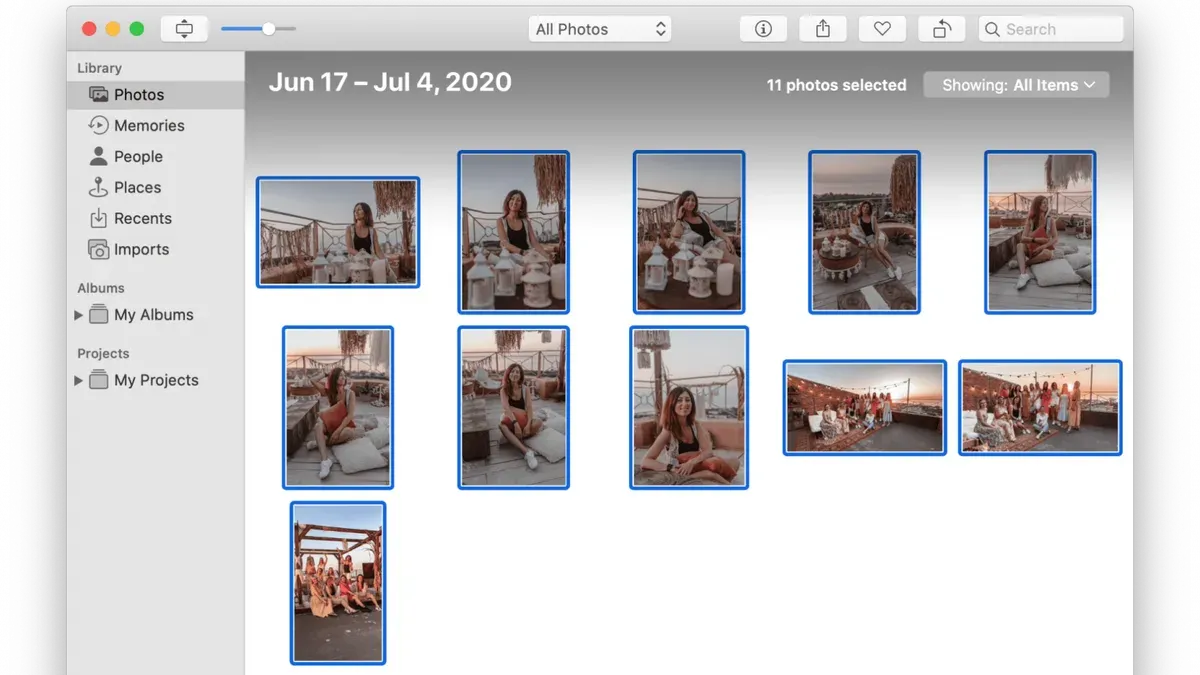
You have two separate Photos libraries on your Mac, each holding valuable memories, edits, and albums. Managing them separately can be confusing and inefficient, so combining them safely without losing any data is a common need.
This article explains how to merge two Photos libraries in Photos app with care, ensuring you keep all original images, edits, and organizational details intact. You'll learn a step-by-step process that goes beyond basic advice, focusing on exporting and importing photos thoughtfully, avoiding duplicates, and verifying your merged library's integrity.
Key takeaways
- Export photos from the source library using the “Export Unmodified Original” option to preserve metadata and edits.
- Import exported photos into the destination library via Photos > File > Import to maintain organization and avoid duplicates.
- Consider third-party tools like PowerPhotos for advanced merging and duplicate management.
- Verify your merged library by checking albums, edits, and missing items before deleting original libraries.
- Back up both libraries before starting to prevent data loss in case of errors.
Before You Start: What You’ll Need to Merge Photos Libraries
To merge two Photos libraries safely, you first need to gather the right resources and prepare your Mac. Ensure both Photos libraries are accessible—whether stored locally on your Mac or on connected external drives. You will also need ample free disk space; ideally, have at least twice the combined size of both libraries available. For example, if each library is around 20 GB, keep at least 80 GB free to accommodate copying and temporary files during the merge.
Backing up both libraries is essential to protect against accidental data loss. Use Time Machine or create manual copies of each library by duplicating them via Finder. This way, you can restore your photos if anything goes wrong during the process. Make sure you are comfortable navigating the Photos app and using Finder, as file management will be part of the steps.
Optionally, if you plan to use advanced merging techniques or duplicate removal, identify third-party apps or scripts beforehand. Have these tools downloaded and ready, but remember that the basic merge can be done without additional software if you follow the proper export and import steps.
- Locate both Photos libraries on your Mac or external drives using Finder. You should see files ending with ".photoslibrary" extensions.
- Check available disk space by clicking the Apple menu > About This Mac > Storage. Confirm you have at least double the combined library size free.
- Create backups by duplicating each library file in Finder or by running a Time Machine backup. You should see copies with similar names or a successful backup confirmation.
- Open the Photos app to ensure you can access each library by holding Option at launch and selecting the library. You will see your photos load without errors.
- If using third-party tools, download and install them now. Confirm they launch without issues.
Exporting Photos from the Source Library to Preserve Originals and Metadata
To merge two Photos libraries safely, start by exporting photos from the source library in a way that retains your original files and metadata. Using the Export > Export Unmodified Original option ensures you keep the original image or video file without any edits applied, which is crucial if you want to preserve the exact source material.
In contrast, exporting edited versions captures your changes but does not keep the original untouched file. If you want to keep both, you may need to export twice: once for unmodified originals and once for edited versions. This method avoids losing any edits or original quality.
When exporting, use the File Export dialog’s option to include metadata such as keywords, descriptions, location, and titles by checking Export IPTC as XMP or similar metadata options. This ensures that your organizational data travels with the files.
Organize exported photos into clearly named folders—such as by year, event, or album name—to simplify importing later. For example, create folders like 2024 Vacation or Family Reunion within your export destination. This structure helps maintain order and speeds up the next import step.
- Open the source Photos library and select the photos or albums you want to export. You should see your selection highlighted.
- Go to the menu and choose File > Export > Export Unmodified Original for [number] Photos. A dialog appears with export options.
- In the export dialog, check the box labeled Export IPTC as XMP (or similar) to include metadata like keywords and location. You should see options for filenames and subfolder format.
- Choose a destination folder on your disk. Create subfolders reflecting your organization, for example, a folder named Exported Originals - June 2024. The folder appears in Finder with your exported files inside.
- Click Export. After completion, verify the exported files in Finder show the original file types (e.g.,.HEIC,.MOV) and that XMP sidecar files exist where metadata is stored.
Importing the Exported Photos into the Destination Library Without Creating Duplicates
Once you have your photos exported from the source library, the next step is to carefully import them into your destination Photos library. The Photos app includes built-in duplicate detection that compares file metadata and image data during import. When duplicates are found, you’ll see a prompt offering options to skip importing those items, helping you avoid clutter and unnecessary copies.
Because albums and folders are not preserved through export/import, you will need to manually recreate your organization. After importing, consider using Smart Albums to group photos by criteria such as date, location, or keywords, which helps restore some structure without manual sorting.
- Open your destination Photos library by holding Option while launching Photos and selecting the library.
- Choose File > Import, then select the folder containing your exported photos. When the duplicate detection prompt appears, select “Skip” to avoid importing existing photos again.
- Wait for the import to complete. Check the bottom of the Photos window for a summary of imported items and skipped duplicates; the numbers should reflect only new photos added.
- Review your library size before and after import by right-clicking the library file in Finder and choosing “Get Info.” The size increase should correspond roughly to the number of new photos imported.
- Manually recreate albums or use Smart Albums to organize your imported photos. To check for missing metadata or edits, select a sample of imported photos and review their Info panel for details such as titles, keywords, and adjustments.
By following these steps, you maintain a clean, well-organized library while preserving your photo edits and metadata. The key is to rely on Photos’ duplicate detection and proactively handle album organization after import.
Using Third-Party Tools for Advanced Merging and Duplicate Removal
When managing large Photos libraries, third-party tools can streamline merging and improve duplicate detection beyond the built-in Photos app capabilities. Popular options like PowerPhotos and Gemini 2 specialize in handling multiple libraries, offering features such as library merging, in-depth duplicate scanning, and preservation of edits and metadata during transfer.
PowerPhotos allows you to merge entire libraries while maintaining album organization and photo edits. It can detect duplicates across libraries more comprehensively than Photos itself, reducing manual cleanup. Gemini 2 focuses on duplicate detection and removal, using intelligent algorithms to identify similar photos, including edited versions, and offers safe deletion options.
Using these tools typically involves installing the app, granting access to your Photos libraries, and following their merging or duplicate removal workflows. For example, PowerPhotos provides a guided merge assistant that shows progress and final reports on duplicates found. Gemini 2 scans your library and presents duplicates grouped for review before deletion.
However, limitations include the need for purchase licenses for full features, potential for accidental deletion if used carelessly, and occasional compatibility issues after major macOS or Photos updates. Free trials are often available to evaluate the tools before buying.
- Download and install the third-party app (e.g., PowerPhotos).
- Launch the app and add your Photos libraries using the "Add Library" option; you should see the libraries listed.
- Choose the merge or duplicate detection feature; the app will scan and display potential duplicates or merge options.
- Review the results carefully, confirming which photos or albums to keep; a successful scan shows detailed reports.
- Initiate the merge or deletion process; upon completion, verify the merged library in Photos to confirm photos, edits, and organization are intact.
Verifying Your Merged Library: Check for Missing Photos and Functional Integrity
- Open your merged Photos library and note the total photo count displayed at the bottom of the window. This number should approximately equal the sum of your original libraries’ photo counts, accounting for duplicates removed. When correct, your photo count reflects successful consolidation.
- Navigate to the Albums tab and compare the album list to those from your original libraries. Ensure key albums appear and the number of photos within each matches expectations. Albums should maintain their structure and organization.
- Open several edited photos at random and verify the presence of edits by checking if the "Revert to Original" option is available under the Image menu. If this option appears, your edits have been preserved during the merge.
- For a sample of photos, click the Info button (the “i” icon) and confirm metadata such as date, time, and location tags remain intact. Consistent metadata indicates a proper import without data loss.
- Check shared albums by visiting the Shared tab and verify that albums continue syncing correctly with iCloud. Upload a test photo to a shared album and confirm it appears across your devices to ensure syncing functions post-merge.
For example, if your original libraries had 5,000 and 3,500 photos respectively, the merged library should show roughly 8,000 photos after removing duplicates. Album names like “Vacation 2024” and “Family” should be intact with the correct photo count. Edited photos, such as those with crop or filter changes, should still show your modifications available for adjustment. Metadata like geotags helps confirm no data was lost during export and import. Finally, shared albums syncing confirms your library’s integration with iCloud services remains functional.
Troubleshooting Common Issues When Merging Photos Libraries
If the Photos app refuses to open one of your libraries, you might see an error like "Cannot verify library" or "Library damaged." Start by holding down the Option key while launching Photos to select the problematic library. Then run the built-in Repair Library tool by pressing Option again when opening it, and click "Repair." Expect a progress bar; when finished, the library should open if repair was successful.
For duplicates that slip through, use the Photos app's "File > New Smart Album" feature with criteria like "Photo is duplicated" or consider a third-party duplicate finder to manually confirm and delete extras. This prevents accidental loss.
If you notice missing metadata or edits after import, check if you exported unmodified originals rather than edited versions. To fix this, re-export photos from the source library choosing "Export Unmodified Originals" with metadata, then re-import. Metadata and adjustments should now persist.
Running low on disk space mid-process can halt imports. To resolve this, free up space by moving large files temporarily out of your startup disk or connect an external drive with ample space and move the Photos library there via Finder, then open it from the new location.
Accidental photo deletions can often be reversed via the "Recently Deleted" album in Photos. Items remain there for 30 days. Select and restore them if found. If not, restore from your Time Machine backup or other backups immediately to avoid permanent loss.
Frequently asked questions
Can I merge Photos libraries without losing edits or metadata?
Yes, you can merge Photos libraries while preserving edits and metadata by exporting photos as "Photos Library" or using the original files with accompanying sidecar files. Exporting with the "Export Unmodified Original for X Photos" option keeps the original metadata intact. However, exporting edited versions as JPEG or other formats may flatten edits, so choose export settings carefully to maintain your edits and metadata.
Is it safe to delete the original library after merging?
It is generally safe to delete the original library only after you have thoroughly verified that all photos, edits, albums, and metadata have been successfully merged into the destination library. Make sure to back up both libraries before deleting anything. Keep the original library until you confirm the merged library functions correctly and contains all your data.
How does iCloud Photos affect merging multiple libraries?
iCloud Photos syncs a single Photos library across your devices but does not merge multiple libraries automatically. If you use iCloud Photos, merging libraries requires importing photos into one library that is linked to iCloud. Keep in mind that iCloud may re-upload images during this process, and storage limits or upload times could affect the merge.
What tools help with removing duplicate photos after merging?
Third-party apps like PowerPhotos or Gemini 2 specialize in identifying and removing duplicate photos while preserving metadata and edits. PowerPhotos offers detailed library management and duplicate detection tailored for Photos libraries. These tools scan your merged library and allow you to review duplicates before deletion, reducing the risk of losing unique photos.
What This Guide Does Not Cover
This guide does not cover merging iCloud Photos libraries directly, as Apple does not allow multiple iCloud Photo libraries per account. If you rely primarily on iCloud Photos and want to consolidate your libraries, you will need to consider alternative approaches such as manually downloading photos from one library and re-uploading them to your iCloud account, which can be time-consuming and risks duplicate content or loss of metadata. This article focuses exclusively on merging local Photos libraries stored on your Mac.
If you are managing large libraries with complex album structures, extensive metadata, or require automated synchronization across multiple devices, you might want to explore professional digital asset management software or consult Apple Support for tailored solutions.
Next Step: Carefully Review Your Merged Library
After completing the merge process, take the time to carefully review your consolidated library. Look through your albums, check for missing or duplicated photos, and verify that edits and metadata such as keywords, dates, and locations are intact. This thorough review ensures that your photo collection remains organized and reliable. If you spot any issues, use the Photos app’s built-in tools or a trusted third-party duplicate finder to clean up the library. Regular backups before and after merging will protect your work and give you peace of mind.



