
How to Record a Presentation in Keynote: A Step-by-Step Guide
This guide shows you how to record a presentation in Keynote with voiceover, video, and music for polished, shareable slideshows.
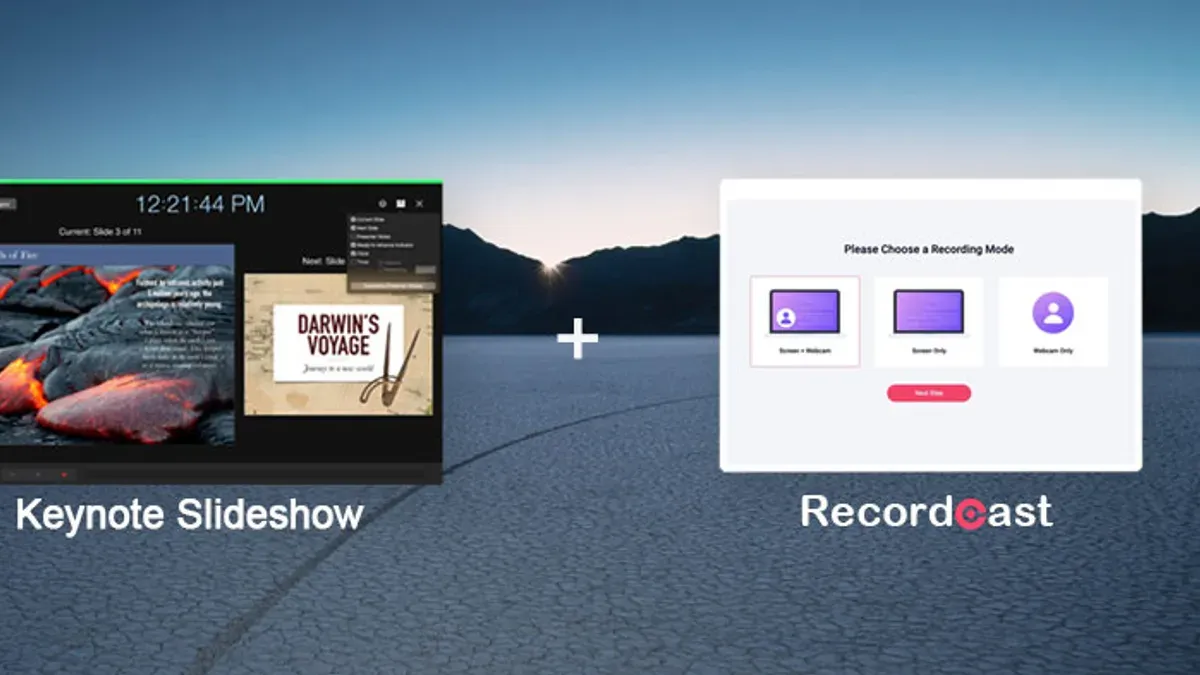
You have a Keynote presentation ready and want to add a voiceover or record yourself presenting it. Maybe you also want to include video or background music to make your presentation more engaging. Understanding how to record a presentation in Keynote can help you achieve this without relying on additional software.
This article guides you through the practical steps of preparing your Keynote slides for recording, capturing your voice and video, adding music, and sharing the final product across devices. It also compares Keynote’s recording features with those in Microsoft PowerPoint and addresses common issues you might encounter. By following this step-by-step guide, you’ll be able to create polished, recorded presentations that suit your needs.
Key takeaways
- Prepare your slides by organizing content and enabling presenter notes for smooth recording.
- Use Keynote’s built-in recording feature under Play > Record Slideshow to capture voiceover and slide timings.
- Add background music by dragging audio files into the slide navigator or using the Insert menu.
- Export recordings as video files for easy sharing on iOS, macOS, and other platforms.
- PowerPoint offers similar recording options but differs in interface and some editing capabilities.
Before you start: What you need to record a presentation in Keynote
To successfully record a presentation in Keynote, you need the right hardware and software setup. At minimum, you should have a Mac, iPhone, or iPad running Keynote version 10 or later, as earlier versions lack full recording features. A built-in or external microphone is essential to capture your voiceover clearly. If you want to add video of yourself alongside the slides, a camera such as the Mac’s FaceTime HD camera or an external webcam is required.
Keynote allows you to record your slides while narrating, capturing your voiceover and slide timings. You can also record video of yourself as you present. This combination makes your presentation more engaging and professional. However, Keynote’s recording features are optimized for Apple devices only, so Windows users may find Microsoft PowerPoint a better option due to its more extensive recording and cross-platform sharing capabilities.
Here’s an example setup: on a MacBook Pro with macOS and Keynote 12, you can record your screen and voice using the built-in microphone and FaceTime camera simultaneously. Alternatively, using an iPad with the latest Keynote app, you can record voiceover while manually advancing slides, but video recording requires additional apps or external setups.
- Ensure your device runs Keynote version 10 or later; open the app and check the "About Keynote" option under the app menu to verify. You should see the version number 10 or higher.
- Connect and test your microphone by opening System Preferences > Sound > Input and speaking to check input levels. You should see the input level bar move as you speak.
- If recording video, confirm your camera is working by opening an app like FaceTime or Photo Booth. You should see a live preview of yourself.
- Create or open your Keynote presentation and verify slide order and content are ready for recording.
- Optionally, decide if you want to add background music or sound effects later, as Keynote supports audio tracks in presentations.
How to create a Keynote presentation ready for recording
Start by opening Keynote and either create a new presentation or open an existing one you want to record. To create a new presentation, click File > New, then select a theme that suits your topic. When your slides are ready, check their order to ensure your narrative flows logically, as reordering slides during recording can be disruptive.
Adding speaker notes is essential to guide your voiceover. To do this, select a slide, then click the View menu and choose Show Presenter Notes. A notes pane will appear below the slide where you can type reminders or key points to mention. These notes are visible only to you during recording, helping you stay on track without crowding the slides.
Inserting multimedia elements like images, videos, and music can enhance your presentation. Use the Insert menu to add these items: choose Choose for images or videos from your files, or Choose under Audio to add music. Once inserted, you can resize or move these elements on the slide. For videos and audio, check playback settings by selecting the media and clicking the Format sidebar to ensure they start automatically or on click, depending on your preference.
Finally, consider the timing of your slides. You can set automatic transitions by selecting a slide, opening the Animate tab, and adjusting the Start Transition option and duration. This helps maintain a steady pace during recording and avoids long pauses. Preview your presentation by clicking Play to confirm the flow, notes visibility, and multimedia playback before you start recording.
How to record a presentation in Keynote with voiceover
Recording a voiceover in Keynote allows you to add narration that plays alongside your slides, enhancing your presentation. You can record your narration slide-by-slide or continuously throughout the entire presentation. Using Keynote's built-in recording tools, you can monitor audio levels and make adjustments as needed.
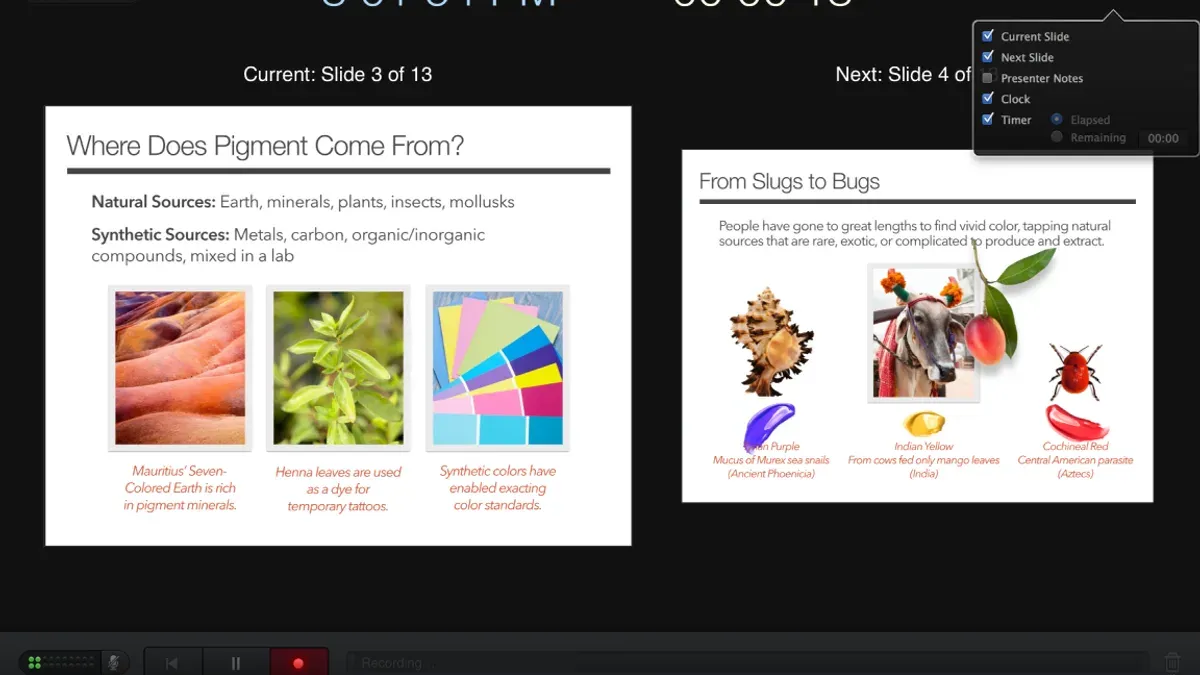
- Open your Keynote presentation and click Play in the toolbar, then select Record Slideshow. You will see the recording controls appear at the top of the screen, including a microphone icon and audio level meter.
- Ensure your built-in microphone is selected in your device’s sound input settings. The audio level meter should show activity when you speak, indicating the microphone is capturing sound.
- Begin speaking to record your narration for the first slide. You can either speak continuously and advance slides manually or record one slide at a time, pausing between slides.
- Use the Pause button if you need to stop recording temporarily. To redo a slide’s narration, navigate back to that slide and click Record again to overwrite the previous audio.
- When your narration is complete, click the Stop button. Keynote will save your voiceover attached to each slide, shown by a small audio waveform icon on the slide thumbnails.
- To review your recording, play the slideshow normally. You will hear your voiceover synced with each slide, and you can adjust the audio volume within Keynote if needed.
How to add music to a Keynote presentation
Adding background music can enhance your Keynote presentation by setting the mood or emphasizing key points. To start, import your audio file into Keynote. Keynote supports common audio formats like MP3, AAC, and WAV, so ensure your music file is compatible and that you have the rights to use it.
- Open your Keynote presentation and go to the slide where you want the music to start. You should see the slide in the main editor.
- Click on Insert in the menu bar, then select Choose and locate your audio file on your device. When imported, a sound icon will appear on the slide.
- To have the music play across all slides, select the audio icon, then open the Format sidebar. Under Audio settings, check Play across slides. You will see the audio timeline extend beyond the current slide, indicating continuous playback.
- If you prefer the music to play only on a specific slide, do not enable Play across slides. Instead, you can adjust playback options like Start audio on click or Automatically in the sidebar, depending on your preference.
- Adjust the volume using the Volume slider in the same sidebar to balance the music with any voiceover or slide sounds. If you want the music to loop, toggle Loop audio on to repeat the track until the slide ends.
Keep in mind that looping music works best on individual slides rather than across multiple slides. Also, avoid overly large audio files to prevent slowing down your presentation. If you want a more detailed visual guide, Keynote’s interface shows these settings clearly, with the audio icon and sidebar playback options easily accessible.
How to share and view your recorded Keynote presentation on different devices
After recording your presentation in Keynote, you’ll often want to share it with others or view it on various devices. Exporting your presentation as a video file is the most versatile method to ensure compatibility across platforms including macOS, iOS, and Windows. To do this, go to File > Export To > Movie. Set the resolution to 1080p for high quality, and choose a slide duration that matches your recording if you want slides to advance automatically. Click Next, select a save location, and click Export. This creates an.mp4 or.mov file playable on most devices.
For sharing, you can upload the exported video to iCloud Drive and send a link to collaborators, or attach the video directly to an email if the file size is manageable (usually under 25 MB). Alternatively, use external drives or USB sticks to transfer larger files. Recipients can then watch the video with default media players on their devices without needing Keynote.
Viewing recorded Keynote presentations on Windows requires exporting to video first, as Keynote files (.key) are not natively supported on Windows. Once exported, Windows users can open the video file with media players like Windows Media Player or VLC. If you want to share the editable presentation, you can export to PowerPoint format via File > Export To > PowerPoint, but note that recorded narrations and timings do not transfer and will need to be re-recorded in PowerPoint.
On macOS and iOS devices, you can open.key files directly in Keynote for full functionality including recorded voiceovers and timings. Cross-platform playback is most reliable through exported video files, especially for viewers without Apple devices or Keynote installed.
How to record on Microsoft PowerPoint compared to Keynote
Both Microsoft PowerPoint and Apple Keynote offer built-in tools to record presentations, including voice narration and slide timings. PowerPoint’s recording feature is accessed through the Slide Show tab, where you select Record Slide Show. It captures voice, slide timings, and ink gestures, similar to Keynote’s recording options. However, PowerPoint additionally supports webcam recording integrated directly during narration, which can be more straightforward for users needing video overlay.
The interface in PowerPoint for recording is typically more linear, with a single recording toolbar that appears during the session. Keynote’s interface places recording controls in a floating panel, allowing easier pausing and re-recording of individual slides. This difference means Keynote can feel more flexible for stepwise narration, while PowerPoint’s method is often quicker for recording the entire presentation in one go.
| Feature | PowerPoint | Keynote |
|---|---|---|
| Voice recording | Yes, with pause and re-record | Yes, with pause and re-record |
| Video overlay | Built-in webcam recording during narration | Requires separate camera app or system recording |
| Slide timing | Automatically recorded | Automatically recorded |
| Export options | Video formats including MP4, compatibility with Windows and Mac | Video export, optimized for Apple devices but playable on Windows with QuickTime |
| Interface ease | Linear, session-based controls | Flexible, slide-by-slide control |
Consider these user scenarios: if you primarily use Apple devices and want detailed slide-by-slide narration control, Keynote is preferable. For users who need seamless webcam integration and broader Windows compatibility, PowerPoint is the better choice. For example, educators recording lectures for Windows-based students might find PowerPoint’s export and webcam features more convenient.
Troubleshooting common issues when recording presentations in Keynote
Recording presentations in Keynote usually goes smoothly, but you may encounter a few common issues. Here are practical steps to resolve problems with audio, video, timing, and export.
Audio not recording or poor quality
- Check that your microphone is properly connected and selected by going to System Preferences > Sound > Input. You should see input levels move when you speak.
- In Keynote, open Preferences > Recording and verify the correct microphone is selected. If "No microphone detected" appears, reconnect your device or restart Keynote.
- Reduce background noise and speak clearly close to the microphone. If audio is distorted, lower the input volume slider in the Sound preferences.
Video or camera not working
- Ensure your camera is not in use by another app. Quit apps like FaceTime or Zoom that might block access.
- Grant camera access to Keynote in System Preferences > Security & Privacy > Camera. Keynote must be checked to use the camera.
- If the video preview is black or frozen, restart your Mac and try again.
Recorded timing not syncing with slides
- Confirm that slides are set to advance manually, not automatically. Go to Document > Slide Show > Transitions and uncheck any automatic timing.
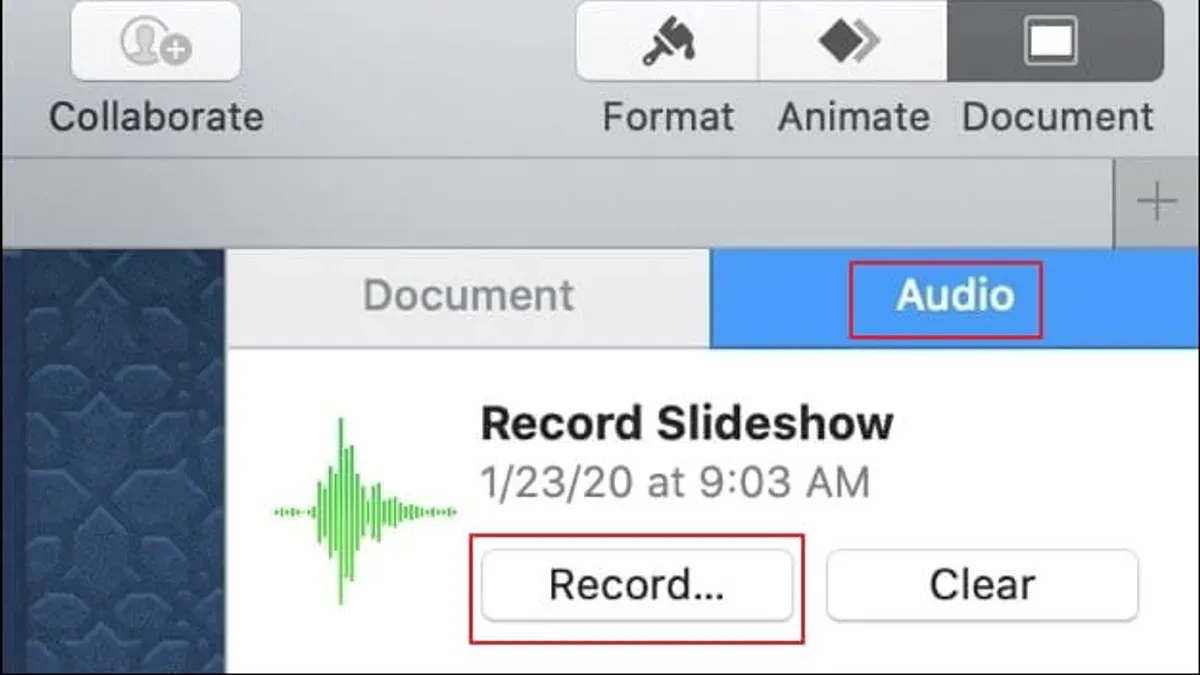
- If timing is off, re-record your narration and use the Record Slideshow Timing option in the Play menu to capture slide changes along with voice.
Export failures or playback issues on other devices
- Export your presentation as a video file via File > Export To > Movie. Use the recommended settings: 1080p resolution and 30 fps.
- If you see errors like "Export failed" or "Unsupported format," ensure that all media files are properly linked and not corrupted.
- Test the exported video on the target device before sharing. If playback is choppy or audio is missing, try exporting again with different resolution settings.
Following these steps will help you identify and fix most issues encountered when recording presentations in Keynote.
Frequently asked questions
How to make a keynote presentation?
Open Keynote and select a theme to start your presentation. Use the toolbar to add slides by clicking the “+” button, then choose layouts that fit your content. Enter text, images, and shapes by selecting the respective tools, and arrange elements by dragging them on the slide. Remember to save your presentation regularly to avoid losing changes.
How to record notes in powerpoint?
In PowerPoint, go to the Slide Show tab and click on “Record Slide Show.” This allows you to record voice narration and slide timings. You can also add speaker notes in the Notes pane below each slide to guide your narration during recording, but these notes won’t be recorded as audio automatically.
How to add music to keynote presentation?
To add music, open your presentation and click the Media button in the toolbar, then select Audio and choose a file from your device. After inserting, select the audio icon on the slide, then open the Format sidebar to set playback options like “Start Audio on Click” or “Loop Audio.” You can also drag the audio icon off the slide to make it invisible during the presentation.
How to view keynote presentation on windows?
Since Keynote files don’t open natively on Windows, export your presentation as a PowerPoint file via File > Export To > PowerPoint. Alternatively, export as a PDF or QuickTime video from File > Export To for easier viewing. You can also use iCloud.com to open Keynote presentations in a browser on Windows.
How to share keynote presentation?
Use the Share button at the top right of Keynote to invite others via email or Messages with view or edit permissions. You can also export the presentation to formats like PowerPoint, PDF, or video for broader sharing options. Sharing via iCloud ensures recipients can view and collaborate on the latest version online.
What This Guide Does Not Cover
This guide focuses on using Keynote's built-in recording and editing features to create and share presentations with voiceover and background music. It does not cover advanced video editing techniques such as multi-track editing, color grading, or adding special effects beyond what Keynote offers. Users requiring detailed video production, including complex animations or professional post-production, should consider dedicated video editing software like Final Cut Pro or Adobe Premiere Pro.
For presentations involving live streaming or interactive elements, specialized tools outside of Keynote may be necessary. Additionally, this guide assumes you have a basic familiarity with Keynote's interface and macOS or iOS devices.
Next Step: Practice Recording Your Presentation
The most useful next step is to open your Keynote presentation and start a test recording using the Record Slideshow feature found under the Play menu. Focus on speaking clearly and navigating your slides smoothly while recording your voiceover. This hands-on approach helps you identify timing and pacing adjustments before producing the final version. Remember to save your recording and preview it to ensure the audio syncs well with your slides before sharing.
See also: How to Export Keynote to PowerPoint: Step-by-Step Guide · How to Add Animations in Keynote: A Step-by-Step Guide



