How to Record Zoom Meeting Locally on Mac: Step-by-Step Guide
This guide shows how to record Zoom meetings locally on your Mac, including setup, alternatives, and troubleshooting for smooth recording.
You’ve got an important Zoom meeting to record, and you want the file saved directly to your Mac without relying on cloud storage. Whether you’re using a MacBook Pro, Air, or iMac, knowing how to record meeting locally in Zoom on Mac ensures you have quick access to your recordings for review or sharing.
This article guides you step-by-step through setting up local recording in Zoom’s native options, plus how to capture your screen using QuickTime Player as an alternative. You’ll also learn how to find your saved files and troubleshoot common recording issues specific to macOS, making your recording process smooth and reliable.
Key takeaways
- Enable local recording in Zoom settings before starting your meeting.
- Use QuickTime Player to record your screen if Zoom’s local recording is unavailable.
- Locate recordings in the default Zoom folder under Documents/Zoom.
- Check permissions in System Preferences if recording fails.
- Manage storage space to avoid interrupted recordings.
Before you start: What you need to record Zoom meetings locally on Mac
To record Zoom meetings locally on your Mac, you need to meet certain requirements and prepare your device accordingly. First, ensure you have a Zoom account with local recording permissions. Typically, only the meeting host or co-host can record locally; if you’re a participant, recording may not be available unless the host grants permission.
Next, verify that the Zoom app is installed on your Mac and updated to the latest version. Updates often include important fixes and improvements related to recording features. Also, check that you have enough free storage space on your Mac to save the video files, as recordings can consume several hundred megabytes to a few gigabytes depending on meeting length and video quality.
Additionally, your Mac’s system preferences must allow Zoom access to the microphone and screen recording. You can confirm this by going to System Preferences > Security & Privacy > Privacy tab, then selecting Microphone and Screen Recording to ensure Zoom is checked. As an alternative, you can use QuickTime Player’s screen recording feature if Zoom’s local recording isn’t available or practical.
- Open your Zoom app and sign in. You should see your name and profile picture confirming you are logged in.
- Confirm your account type and permissions by clicking “Settings” > “Recording” tab. If local recording options appear, you have permission.
- Go to System Preferences > Security & Privacy > Privacy tab > Microphone and Screen Recording sections. Check that Zoom is enabled in both lists.
- Check available disk space by clicking the Apple menu > About This Mac > Storage. Make sure there is sufficient free space for your recordings.
- Optionally, open QuickTime Player from Applications, then choose File > New Screen Recording to test alternative recording.
Start a Zoom meeting on Mac and enable local recording
- Open the Zoom app on your Mac by clicking its icon in the Applications folder or from the Dock. You should see the main Zoom window with options like New Meeting, Join, Schedule, and Share Screen.
- Click New Meeting to start an instant meeting. The Zoom meeting window will open with your video feed if your camera is on.
- Look at the bottom of the Zoom meeting window for the meeting controls toolbar. Locate the Record button, which looks like a small circle or dot icon.
- Click the Record button. A menu will appear with recording options. Select Record on this Computer to save the recording locally to your Mac’s storage.
- Once recording starts, you will see a Recording indicator in the top-left corner of the Zoom window. This confirms that the local recording is active.
- During the meeting, you can pause the recording by clicking the Pause button in the recording controls, which replaces the Record button while recording. Click Resume to continue recording.
- To stop recording, click the Stop Recording button, which appears in the same place as the Pause button. The recording will end, and Zoom will begin processing the recording file.
While recording, the Zoom controls remain visible at the bottom of the window, allowing you to manage recording without interrupting your meeting. The visual recording icon and toolbar buttons provide clear feedback on your recording status throughout the session.
Use QuickTime Player to record Zoom meeting on Mac screen
If you prefer an alternative to Zoom’s built-in recording, QuickTime Player offers a straightforward way to capture your Zoom meeting locally. It allows you to record your screen with audio input, giving you control over what exactly gets recorded.
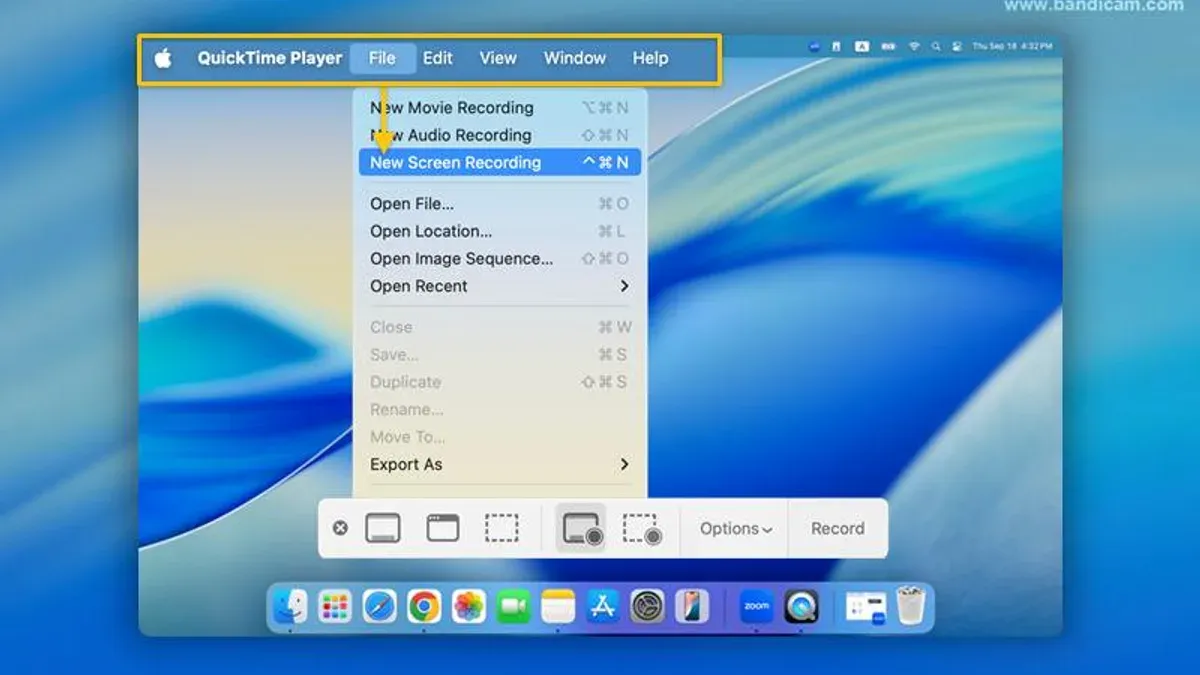
- Open QuickTime Player from your Applications folder or Spotlight search. You should see the QuickTime Player menu bar at the top of your screen.
- Click File in the menu bar and select New Screen Recording. A small recording window with a red record button will appear.
- Before starting, click the small arrow next to the red button to choose your microphone. Select Internal Microphone if you want to capture your voice or meeting audio through your Mac’s mic.
- Click the red record button. You will be prompted to either click to record the entire screen or drag to select the Zoom meeting window specifically. After selection, recording begins immediately.
- When the meeting or desired segment ends, click the Stop button in the menu bar at the top right (it looks like a square inside a circle). The recording will open in a new QuickTime window.
- Go to File > Save to choose a location and filename for your recording. By default, QuickTime saves files in the Movies folder, which you can access through Finder.
This method records everything visible on your screen and audio from the selected microphone, so ensure your Zoom meeting window is clear and unmuted for best results.
Access Zoom meeting recordings saved locally on your Mac
After you finish recording a Zoom meeting locally, your files are saved automatically to a default folder on your Mac. You can find these recordings in the Documents folder, inside a subfolder named Zoom. The full path usually looks like this: /Users/yourusername/Documents/Zoom/. Each recorded meeting has its own folder named with the date and meeting title. Inside, you will find several files depending on your recording options.
Zoom generates video files in .mp4 format, audio-only recordings in .m4a, and chat text files in .txt. These formats are widely compatible with media players on Mac and other devices. To play back your recording, simply double-click the .mp4 file, and it will open in the default video player.
You can rename the folder or individual files to keep your recordings organized. To move or back up recordings, drag the folders to another location such as an external drive or cloud storage. Remember to keep track of where you move them to avoid losing access.
If you have many recordings, it’s helpful to monitor your disk space since video files can be large. Regularly delete or archive older recordings to free up space. Using Finder's search and sort features can assist in managing these files effectively.
- Open Finder on your Mac.
- Navigate to Documents > Zoom. You should see folders named by date and meeting title.
- Open a folder to find the recorded files in .mp4, .m4a, and .txt formats.
- Double-click the .mp4 file to play the video recording and verify it opens correctly.
- To rename, click the file or folder name once and enter a new name.
- Drag the folder to another location like an external drive or cloud storage to back up.
- Use Finder’s storage management tools (Apple Menu > About This Mac > Storage > Manage) to check disk space and remove recordings as needed.
Fix common issues when recording Zoom meetings on Mac
If the Record button is missing or disabled, first check that you are the meeting host or have recording permission from the host. Without these, local recording won’t be available. If permissions are correct but the button remains disabled, move on to system settings.
- Open System Preferences and select Security & Privacy.
- Go to the Privacy tab and click Screen Recording in the sidebar.
- Ensure that zoom.us and QuickTime Player (if you use it) are checked. This grants the apps permission to record your screen.
- Next, select Microphone in the sidebar and confirm zoom.us and QuickTime Player are enabled here as well.
- If you changed these settings, quit and restart Zoom and QuickTime to apply them.
For storage space errors, check your Mac’s available disk space in About This Mac > Storage. Free up space by deleting or moving files if under a few gigabytes remain.
If audio doesn’t record or is very low, verify the microphone input level in System Preferences > Sound > Input. Select the correct microphone and increase input volume. In Zoom’s audio settings, ensure the right microphone is selected and not muted.
When using QuickTime for screen capture, note it records system audio only if you install an additional audio driver like BlackHole or Soundflower. Without this, QuickTime captures only microphone audio. As a workaround, use Zoom’s built-in local recording for full audio capture.
Zoom meeting mac OS tips and tricks for better recording
Before recording, adjust Zoom’s video and audio settings by going to Preferences > Video and Audio. Choose a higher resolution camera and test microphone levels to ensure clear sound. Enabling Original Sound in the Audio settings preserves audio quality, which is useful for music or presentations.
Use keyboard shortcuts to control recording efficiently: Command + Shift + R starts or stops local recording instantly. This saves time compared to clicking menus and helps you avoid missing important moments.
To minimize lag during recording, close unnecessary apps and browser tabs that consume CPU or memory. Turning off Mac notifications also prevents interruptions. If possible, connect to power and a stable internet connection to maintain performance.
For advanced recording, combine Zoom’s local recording with screen capture apps like OBS Studio or ScreenFlow. These tools offer more control over video layout, overlays, and editing, although they require additional setup.
Local recordings typically have larger file sizes and higher quality than cloud recordings, which compress files to save space. Cloud recordings offer easy sharing and backup but depend on Zoom’s server availability and your subscription plan.
Frequently asked questions
How to record zoom meeting on iphone?
To record a Zoom meeting on your iPhone, you need permission from the host to record. If you have it, tap the More button (three dots) during the meeting, then select Record to the Cloud. The recording will save to your Zoom account's cloud storage, which you can access later. Local recording directly on iPhone is not supported by Zoom.
How to fix zoom meeting in mac?
If Zoom meetings are not working correctly on your Mac, start by checking your internet connection and restarting the app. Ensure you have the latest Zoom version by going to zoom.us > Check for Updates. Also, verify your Mac's microphone and camera permissions in System Preferences under Security & Privacy > Privacy. Quitting background apps that use audio or video can help improve performance.
How to access zoom meeting recording?
Local Zoom recordings on Mac save by default in the Documents > Zoom folder. You can also find recordings by opening the Zoom app, clicking Meetings, then Recorded, and selecting the recording to open its folder. For cloud recordings, log in to your Zoom account online and navigate to Recordings to view and download files.
How to record Zoom meeting on iPhone?
Recording Zoom meetings on an iPhone requires host permission. When granted, tap the More icon and choose Record to the Cloud. The recording is stored in your Zoom cloud account and cannot be saved locally on the iPhone. You can later download or share it from the Zoom web portal.
How to fix Zoom meeting in Mac?
To fix issues with Zoom meetings on Mac, update Zoom to the latest version via the app menu. Check that microphone and camera access is enabled in System Preferences under Security & Privacy. Restart your Mac if problems persist, and close other apps that might interfere with Zoom’s audio or video functions.
What This Guide Does Not Cover
This guide does not cover Zoom cloud recording, which requires a paid subscription and stores recordings online rather than locally on your Mac. Keep in mind that local recording is only available to meeting hosts or co-hosts; participants cannot record without explicit permission. Additionally, when using QuickTime Player to record your Zoom meetings, audio and video are captured separately, so you may need extra steps to ensure clear audio capture.
For users who need integrated audio and video recording without extra configuration or those who want to save recordings directly to the cloud, exploring Zoom’s paid plans or third-party software might be more appropriate. Also, if you frequently encounter permission issues or limitations with local recording, consider consulting your account administrator or updating Zoom’s privacy settings on your Mac.
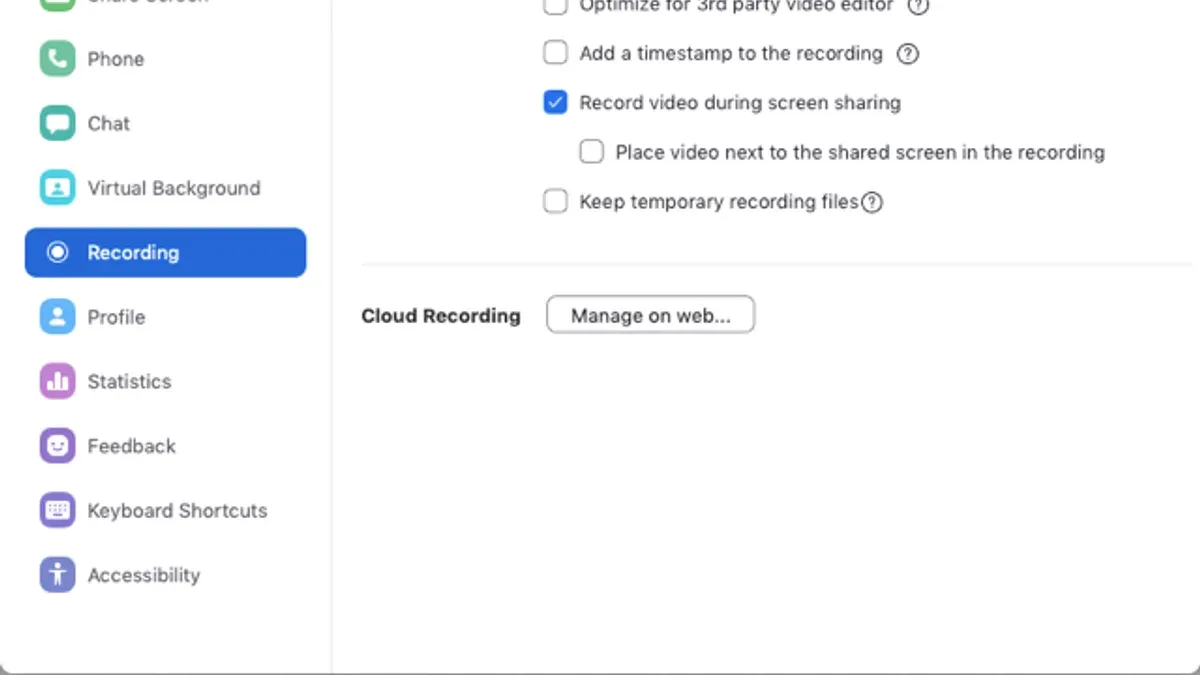
The most useful next step is to familiarize yourself with Zoom’s recording settings in the desktop app under Settings > Recording. Adjust your preferences there to control file formats, storage locations, and whether to record separate audio files. This ensures your recordings are saved exactly where and how you want them, helping you avoid common pitfalls before you start your next meeting.
See also: How to Fix Zoom No Audio on Mac: Step-by-Step Troubleshooting · How to Use Virtual Background in Zoom on Mac: Step-by-Step Guide