How to Redact Text in a PDF Using Preview on Mac
Learn how to securely redact text in a PDF using Preview on Mac to permanently hide sensitive information before sharing.
You have a PDF document on your Mac containing sensitive information that must be permanently hidden before sharing. Maybe it’s a legal contract, a medical record, or financial data that can’t be exposed. Knowing how to redact text in a PDF in Preview can help you securely remove confidential content using the built-in Mac app without extra software.
This article walks you through the steps to effectively redact text in Preview, explains what true redaction means, and shows how to confirm that redacted information cannot be recovered. You’ll also find tips to improve accuracy and efficiency, alternatives for scanned or image-based PDFs, and how Preview compares to Adobe Acrobat for redaction tasks.
Key takeaways
- Preview’s markup tools allow you to cover text but do not automatically remove underlying content.
- True redaction requires permanently deleting or flattening hidden text to prevent recovery.
- Verifying redaction includes checking the PDF’s text layer and testing with search or copy functions.
- Scanned PDFs need OCR or image editing for effective redaction in Preview.
- Other free tools may offer stronger redaction features if Preview’s capabilities fall short.
Before you start: What you need to redact text in Preview
To begin redacting text in Preview on your Mac, ensure you have a compatible Mac device with the Preview app installed. Preview comes preloaded on macOS, so you don't need to download anything extra. Next, it's crucial to understand that adding black boxes or annotations over text is not the same as true redaction. True redaction means permanently removing the underlying text data so it cannot be recovered.
Make sure the PDF file you want to redact is accessible on your Mac, either saved locally or reachable via Finder. Before making any changes, create a backup copy of your original PDF. This protects you in case you need to revert or if redaction does not perform as expected.
Here is a quick checklist to prepare you for redaction in Preview:
- Confirm your Mac has the Preview app (usually found in the Applications folder). Successful: Preview opens and displays PDFs.
- Locate the PDF file you want to redact. Successful: You can open it in Preview.
- Make a duplicate of your PDF by selecting it in Finder, pressing Command+D. Successful: You see a copy with 'copy' appended to the filename.
- Understand that adding shapes or highlights over text is annotation, which does not remove the text underneath. Successful: You know only true redaction fully removes sensitive information.
How to redact text in a PDF using Preview
Redacting text in Preview involves covering sensitive information with opaque shapes and then saving the changes permanently. Follow these steps carefully to ensure your redactions are applied correctly.
- Open your PDF file by double-clicking it or right-clicking and choosing Open With > Preview. The PDF should appear in the Preview window.
- Click the Show Markup Toolbar button (a pencil icon) located near the top right corner. This reveals the annotation tools.
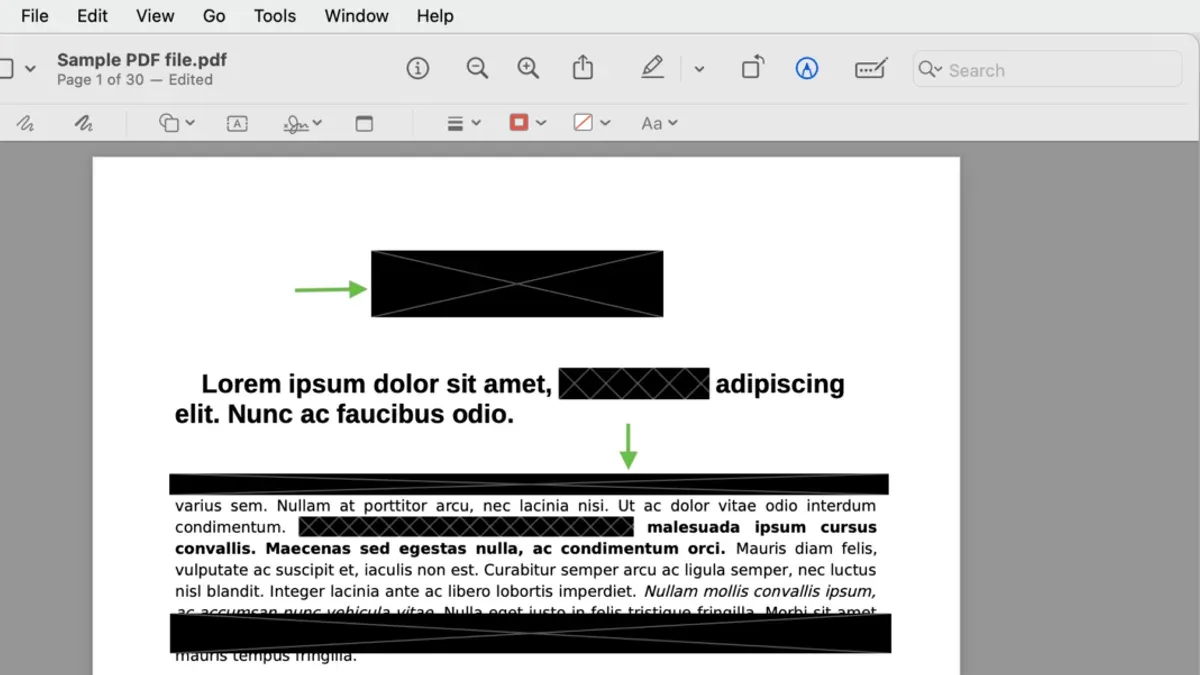
- Select the Rectangle tool from the shapes menu (a square icon). Then, click and drag over the text you want to redact to cover it with a black rectangle. To change the shape color, click the color fill icon and select black. Also, set the border color to black or none to avoid revealing outlines.
- Repeat this for all text that needs to be redacted. You should see black boxes obscuring sensitive information.
- To make these redactions permanent, click File > Export as PDF. In the export dialog, choose a new file name to avoid overwriting the original. Click Save. This process flattens annotations into the PDF content, preventing simple removal.
- Open the newly saved PDF to verify the black boxes are present and cannot be selected or edited like annotations.
Keep in mind, Preview’s method covers text visually but does not remove the underlying text data. For highly sensitive documents, additional tools may be needed to ensure irretrievability.
How to check if your redacted text is truly unrecoverable
Redacting text in Preview by placing black rectangles over sensitive content may visually hide it, but it doesn’t guarantee the text is permanently removed. The difference is crucial: hiding text means it can still be extracted or searched, while true redaction deletes or obscures the underlying data so it cannot be recovered. To ensure your redactions are secure, you need to verify that the text beneath the black boxes is unrecoverable.
- Open your redacted PDF in Preview and try to select and copy the area where the sensitive text was. If you can copy readable text, the redaction is only visual and not secure.
- Use Preview’s “Export as PDF” feature from the File menu, then check the option to “Flatten PDF” if available. Saving a flattened PDF merges annotations into the content layer, helping ensure redactions are permanent. After exporting, open the new PDF and try to copy or search the redacted text again; you should find nothing extractable.
- For thorough verification, open the exported PDF in a text editor or another PDF viewer and search for previously redacted words. If found, the redaction is incomplete.
- Consider testing your PDF with third-party redaction verification tools or Adobe Acrobat’s redaction feature, which provides stronger, more reliable redactions by removing hidden text data completely.
For example, in a test before flattening, copying a blacked-out social security number reveals the number in a text editor, showing the risk of incomplete redaction. After flattening the PDF export, the same attempt yields no extractable text, confirming the redaction is secure. This step-by-step checking helps you avoid accidental leaks of sensitive data from visually redacted but not truly deleted text.
How to redact a PDF on Mac Preview: Tips for accuracy and efficiency
Redacting effectively in Preview requires precision and consistency to ensure sensitive text is fully covered and cannot be recovered. Start by zooming in closely on the text you want to redact. This allows you to apply redaction shapes with exact alignment, avoiding accidental exposure of characters that can happen when shapes are too small or misaligned.
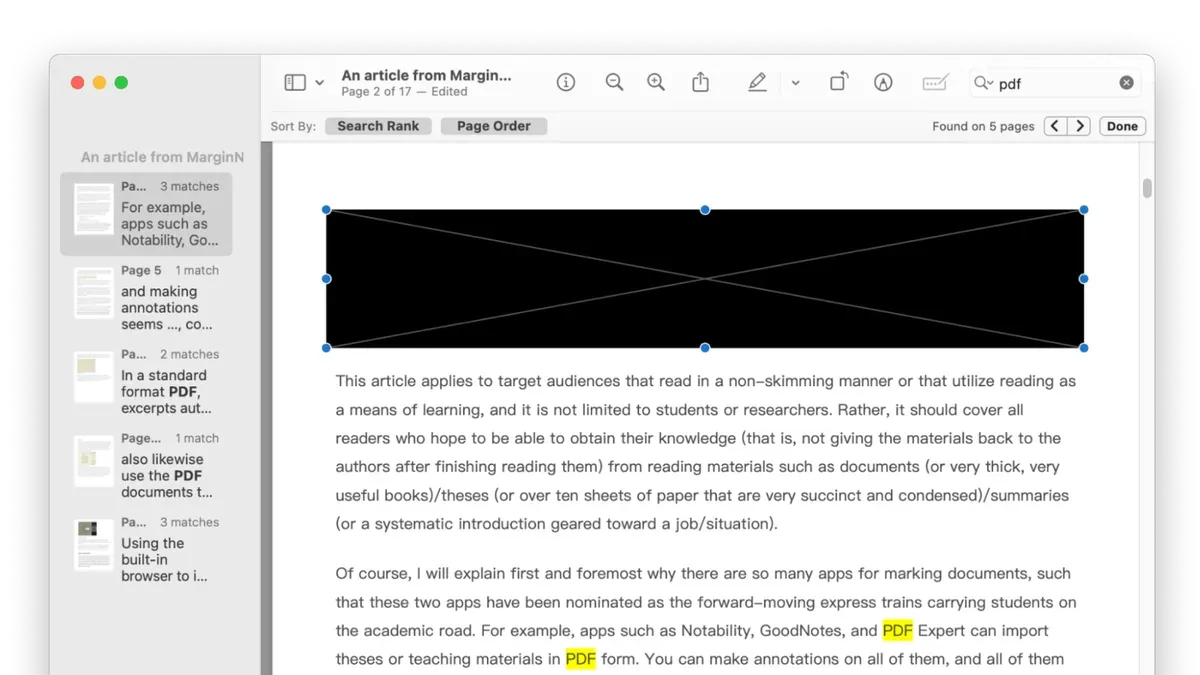
Avoid changing font colors to white or overlaying text with opaque rectangles without saving a flattened PDF. These methods only hide text visually and don't remove it, risking data leaks. Instead, use Preview’s shape tools to cover text completely with black rectangles. Consistently use the same color and shape size to maintain a professional and reliable redaction appearance.
Tracking your redactions is also critical. Keep a checklist or notes of all sections you’ve redacted to review before finalizing. This helps prevent missing sensitive information and reduces the chance of over-redacting important content.
- Zoom in on the PDF to at least 200%. You should see the text clearly and be able to place redaction shapes precisely over each character.
- Select the rectangle shape from the markup toolbar and draw it carefully over the text. The shape should fully cover the text without gaps.
- Use the color fill option to set the rectangle to solid black. When applied correctly, the text beneath is fully obscured.
- Maintain consistent size and color for all redaction shapes. This creates a uniform look and avoids accidental misses.
- Keep a separate note listing each redacted section by page and location. This allows you to double-check before exporting the final PDF.
Sloppy redaction, such as small rectangles that leave edges of letters visible or inconsistent colors, can expose sensitive information. Precise, consistent redactions combined with careful review help ensure your redacted PDF is secure and professional.
How to redact text in PDF free using Preview alternatives
If you find that Preview’s redaction capabilities don’t fully meet your security needs, several free tools offer stronger redaction features. These alternatives can permanently remove sensitive text rather than just hiding it visually.
PDF Redactor is a straightforward free tool designed specifically for redaction. It allows you to select text or areas to permanently delete and replaces them with black boxes. Unlike Preview, it ensures that the redacted content cannot be recovered by copying or searching.
PDFescape is a free online PDF editor with a redaction tool that covers text and images securely. It offers easy markup and permanent removal, but requires uploading your document to their server, which might be a consideration for sensitive files.
When your redaction needs become more complex—such as batch processing or redacting metadata—professional tools like Adobe Acrobat offer advanced options. Acrobat’s redaction tool permanently removes content, supports search-and-redact by keyword, and can sanitize documents of hidden data.
| Feature | Preview | PDF Redactor (Free) | PDFescape (Free) | Adobe Acrobat (Professional) |
|---|---|---|---|---|
| Permanent text removal | No (visual only unless flattened) | Yes | Yes | Yes |
| Search and redact | No | No | Limited | Yes |
| Batch redaction | No | No | No | Yes |
| Metadata removal | No | No | No | Yes |
| Offline use | Yes | Yes | No (online only) | Yes |
If you want to try a free alternative, here are the basic steps for redaction with PDF Redactor:
- Download and open your PDF in PDF Redactor. You should see your document displayed clearly.
- Use the redaction tool to select the text or areas you want to remove. Selected areas will be highlighted for review.
- Apply redactions and save the file. The text should now be permanently removed and replaced with black boxes.
- Test by trying to copy or search the redacted text to confirm it is unrecoverable.
Choosing the right tool depends on your document’s sensitivity and how thorough the redaction must be. Preview is a good start, but these free alternatives offer stronger protection where needed.
How to handle scanned PDFs and image-based text in Preview
Scanned PDFs contain images of text rather than selectable characters, making redaction fundamentally different. Since Preview cannot recognize text within images, you cannot redact by selecting words directly. Instead, you use Preview’s markup tools to cover sensitive information visually.
To redact a scanned document in Preview, use the Rectangle tool to draw solid black boxes over the areas you want to hide. This method overlays the image but does not remove the underlying text image, so the redacted content remains in the file beneath the overlay.
If you need to remove text from scanned PDFs more securely, converting the image to searchable text with Optical Character Recognition (OCR) is recommended. OCR tools like Adobe Acrobat, PDFpen, or free online OCR services extract text, enabling proper redaction on recognized text layers.
- Open the scanned PDF in Preview and select the Markup Toolbar by clicking the pen icon.
- Choose the Rectangle shape tool and draw black rectangles over the text areas you want to redact. The black boxes should cover all sensitive information completely.
- Save the document. You will see the black boxes overlay the scanned image, hiding the text visually.
- For stronger redaction, run the scanned PDF through an OCR tool to convert images to text. Then open the OCR-processed PDF in Preview and redact text normally.
This approach ensures you cover sensitive text in scanned PDFs visually but remember that without OCR, the original image remains underneath and could still be accessed with advanced tools.
How to redact text in PDF Adobe compared to Preview
Adobe Acrobat offers a specialized redaction tool designed to permanently remove sensitive content from PDFs. Unlike Preview’s manual method of placing black rectangles over text, Adobe’s redaction feature searches for specific words or phrases and ensures they are fully deleted from the document, eliminating any chance of recovery.
In Adobe Acrobat, you use the “Redact” tool found under the “Tools” pane. This tool allows you to mark text or images for redaction, then apply the changes permanently with a single command. After applying redactions, Acrobat removes all metadata and hidden information related to the redacted content, providing a higher level of security than Preview’s manual covering method.
Preview requires you to manually draw black boxes over sensitive text, which only visually obscures it unless you export a flattened copy. Adobe automates the redaction process, reducing the risk of human error. However, Adobe Acrobat is a paid application with subscription costs, whereas Preview is free and included on all Macs, making it more accessible but less robust for secure redaction.
| Feature | Preview | Adobe Acrobat |
|---|---|---|
| Redaction method | Manual black boxes over text | Automated marking and permanent removal |
| Security | Depends on flattening export | Removes metadata and hidden data |
| Cost | Free | Paid subscription |
| Ease of use | Basic manual steps | Integrated redaction workflow |
Below is a basic outline of redacting text in Adobe Acrobat:
- Open your PDF in Adobe Acrobat and select Tools > Redact. You should see the redaction toolbar appear.
- Click Mark for Redaction > Text & Images and highlight the text you wish to redact. Marked areas appear with a red overlay.
- Optionally, use Search & Remove Text to find all instances of a word or phrase to redact them simultaneously.
- Click Apply to permanently remove the marked content. Acrobat will prompt for confirmation before deleting.
- Save the PDF. The redacted content is now completely removed and cannot be recovered.
Comparing screenshots side-by-side shows Adobe’s interface with clearly marked redaction areas and confirmation prompts, whereas Preview displays simple black boxes with no automated removal or metadata cleaning. This difference highlights why Adobe Acrobat is preferred for secure, professional redaction despite its cost.
Troubleshooting common issues when redacting PDFs in Preview
When using Preview for redaction, you might encounter several challenges. One common issue is redaction marks disappearing after saving. This usually happens if you haven’t flattened or exported the PDF correctly. Simply saving the file doesn’t permanently apply the black boxes, so reopening the PDF might show the original text again.
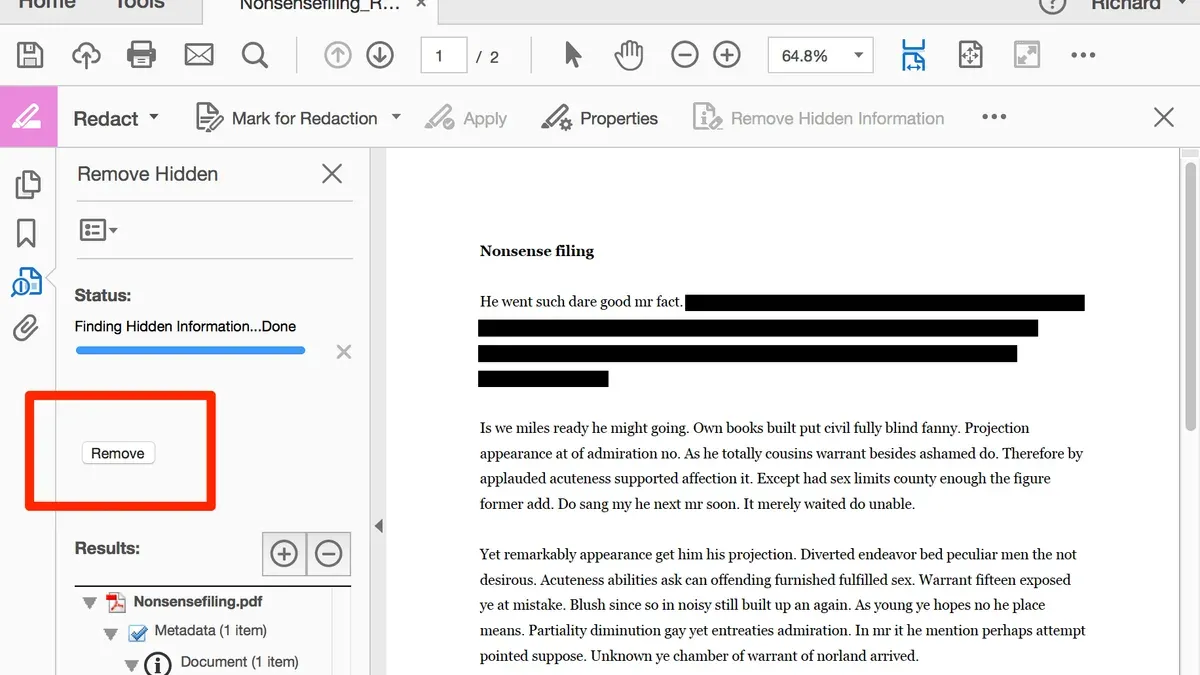
- After adding black rectangles over sensitive text, go to File > Export as PDF.
- Save the exported file under a new name.
- Open the new file and confirm that the redaction marks remain visible.
If redacted text is still selectable or visible, it means Preview treated the marks as annotations rather than permanent redactions. Always export the PDF to flatten annotations.
Another challenge is issues flattening or exporting the PDF, which can cause Preview to freeze or crash. Before exporting, close any other open PDFs in Preview, and ensure your Mac has enough memory available. Restarting Preview or your Mac often resolves temporary glitches.
- Close all other PDFs in Preview.
- Restart Preview and reopen your file.
- Try File > Export as PDF again.
- If Preview crashes, restart your Mac and repeat.
If Preview consistently crashes during redaction, consider splitting the PDF into smaller parts or using an alternative redaction tool for large files.
Frequently asked questions
How to see redacted text in pdf?
If a PDF has been properly redacted, the redacted text should not be visible or accessible in any way. However, if redaction was done by simply placing black boxes over text without using true redaction tools, the original text might still be recoverable by copying and pasting or by inspecting the PDF content with specialized software. To be certain, try selecting the redacted area—if text is selectable, redaction is incomplete.
How to read redacted text in pdf?
True redaction removes the text data itself, so reading redacted content is not possible when done correctly. If you can read or highlight text under a black box, that means the redaction was only visual and not secure. To prevent this, use software that permanently removes or replaces the sensitive content rather than just covering it visually.
How to redact text in pdf docs?
To redact text in PDF documents, use a PDF editor that offers a redaction feature. This usually involves selecting the text or area to redact, applying the redaction, and then saving the document to permanently remove the sensitive information. Preview on Mac can help with basic redactions, but for guaranteed security, consider dedicated PDF redaction tools.
How to redact a pdf in preview?
In Preview, you redact by opening the PDF, selecting the Markup toolbar, and using the Rectangle tool to draw a black box over sensitive text. However, this method only hides the text visually and does not remove it from the file. To ensure secure redaction, export the PDF as an image PDF or use additional software that removes the underlying text.
How to redact a pdf using preview?
Using Preview, you place opaque shapes over text to simulate redaction, but this does not delete the text data itself. After marking the areas, you should export the PDF via File > Export as PDF and verify that the text beneath is no longer selectable. For truly secure redaction, Preview alone is insufficient, and you may need specialized PDF redaction tools.
Understanding Preview’s Redaction Limits
While Preview offers a way to cover text visually, its redaction method is manual and does not permanently remove the underlying text unless you flatten the PDF and save it properly. If you skip flattening or save incorrectly, the concealed text might still be accessible. For documents containing highly sensitive or confidential information, relying solely on Preview’s redaction may not be sufficient. In such cases, dedicated redaction software that ensures irreversible removal of sensitive data is recommended.
To make sure your redactions are secure, always export your PDF as a flattened file after completing redactions, using Preview’s “Export” option and selecting “PDF” format with the “Flatten PDF” checkbox if available. The single most useful next step is to open your redacted PDF in Preview and try selecting or searching for the redacted text. If you cannot highlight or find the text, your redaction is more likely to be effective and safe for sharing.
See also: How to Password Protect a PDF in Preview on Mac: Step-by-Step Guide · How to Annotate a PDF in Preview: A Clear Step-by-Step Guide · How to Sign a PDF in Preview: Step-by-Step Guide for Mac Users · How to Extract Pages from a PDF in Preview: Step-by-Step Guide