How to Remove Duplicate Fonts in Font Book: A Step-by-Step Guide
Discover how to find and safely remove duplicate fonts in Font Book to keep your Mac’s font library organized and efficient.
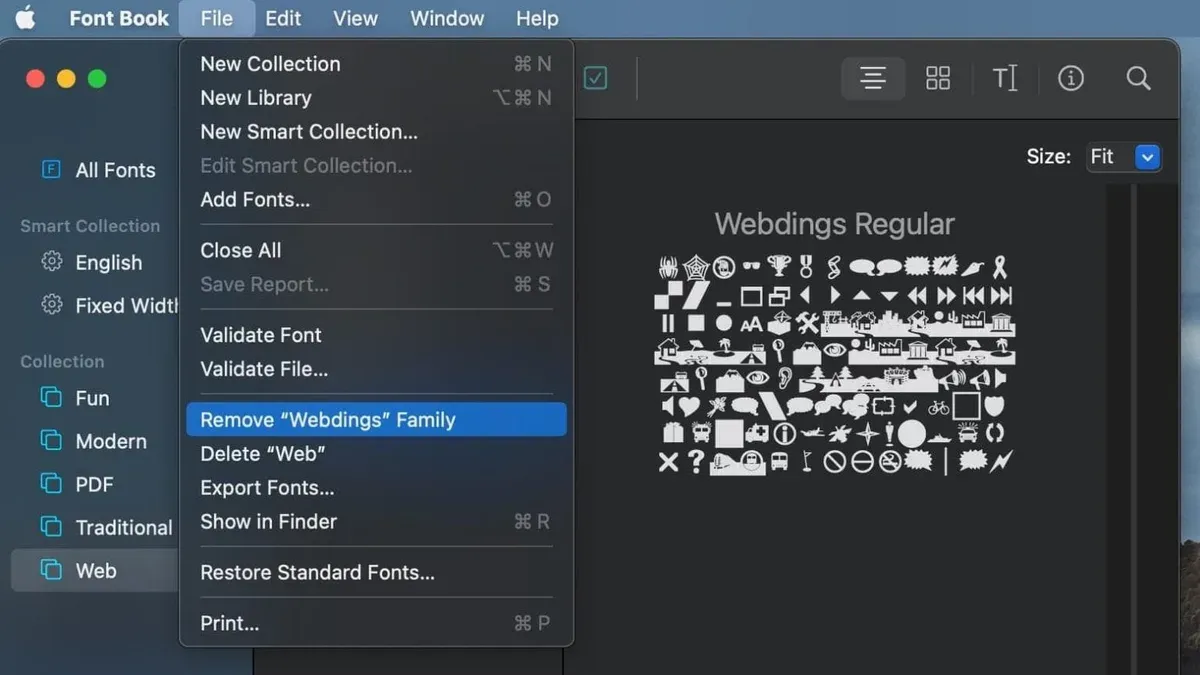
You’ve noticed that some fonts on your Mac appear twice when you open Font Book, causing confusion or conflicts in your design apps. This is a common issue that can slow down your workflow or create unexpected font behaviors.
This article explains how to remove duplicate fonts in Font Book, guiding you through finding duplicates and safely deleting them without affecting your system stability. You’ll also learn how to manage fonts downloaded from other apps like Adobe and how to avoid common mistakes that might lead to font conflicts.
Key takeaways
- Use Font Book’s built-in feature to locate duplicate fonts easily.
- Always resolve duplicates by validating and removing only verified duplicates to avoid system font damage.
- Delete unwanted fonts from the User or Computer collections in Font Book, not from system folders.
- Manage Adobe fonts within Adobe Creative Cloud to prevent duplication across apps.
- Check for hidden duplicates in text files or font lists to keep font management clean.
Before you start: What you need to know about fonts and Font Book
Font Book is the built-in font management app on your Mac that organizes and controls all the fonts installed on your system. It helps you view, enable, disable, and validate fonts, acting as the central hub to keep your font library tidy and accessible to all apps. Understanding how Font Book works is essential before you start removing duplicates to avoid accidentally disrupting system or app functionality.
Duplicate fonts occur when the same font is installed multiple times in different locations, such as your user Library, the system Library, or within app-specific folders like Adobe’s font caches. This duplication can lead to conflicts, slower system performance, and confusion when selecting fonts in design software. For example, you might see “Helvetica Neue” listed more than once, even if the file names differ slightly.
Before making any changes, it’s crucial to back up your fonts and important user data. This precaution ensures you can restore your setup if something goes wrong. A simple way to back up is by copying your Fonts folder—found at ~/Library/Fonts—to an external drive or cloud storage.
To modify fonts using Font Book, you’ll need administrator access. This permission allows you to make changes to system-level fonts and ensures that Font Book can properly update or remove font files. Without admin rights, you may be limited to managing only user-installed fonts.
As a practical example, cleaning up duplicates can reduce your system font folder size significantly. Imagine your system’s Fonts folder initially holds 500 MB of font files with many duplicates; after removal, it might shrink to around 400 MB, freeing space and improving font loading times across applications.
How to find duplicate fonts in Font Book
To tidy up your fonts, the first step is identifying duplicates using Font Book’s built-in tools. Start by opening the Font Book app, which you can find in your Applications folder or by using Spotlight search. Once open, focus on the 'All Fonts' collection in the sidebar; this shows every font installed on your Mac.
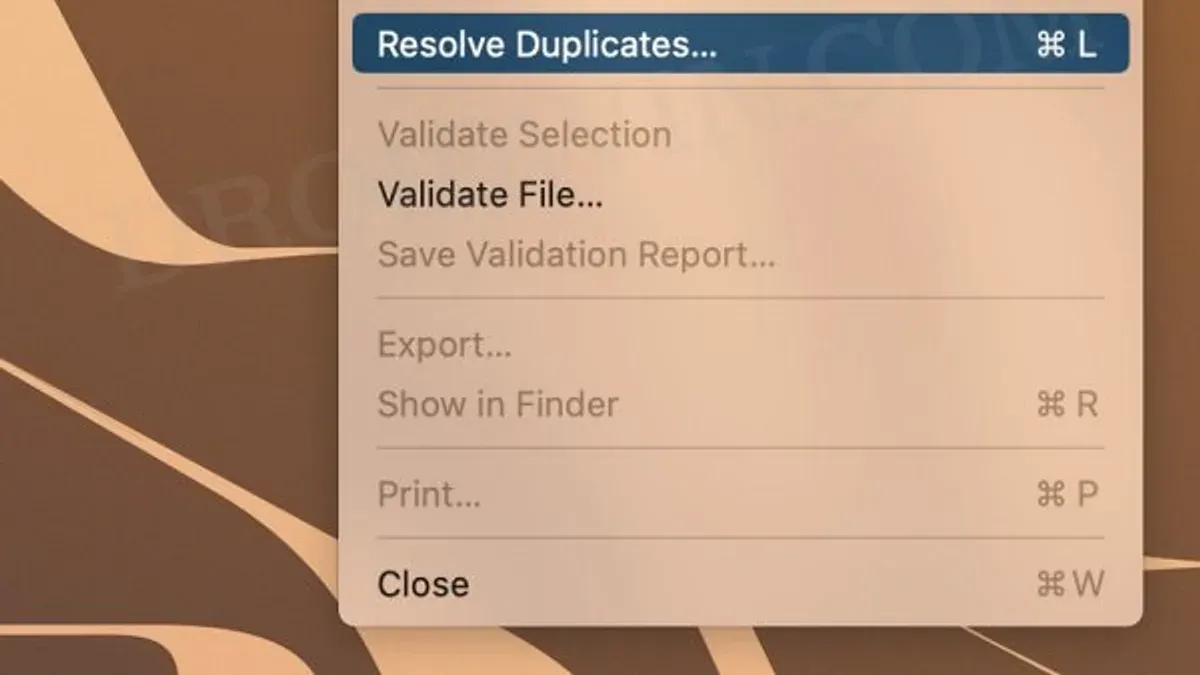
Next, look for the “Resolve Duplicates” button in the toolbar at the top of the Font Book window. Clicking this button prompts Font Book to scan your font library for duplicates and flag them for your review. The app marks duplicate fonts with a yellow warning icon, making them easy to spot.
Each flagged font will show one of several statuses: a duplicate font may be disabled automatically, or you might see an option to manually resolve conflicts. Disabled fonts remain on your system but are inactive, preventing conflicts. You can also see if a font is enabled and duplicated, which means you need to decide which version to keep.
Keep an eye out for the difference between exact duplicates and font families with similar names—Font Book will only flag exact duplicates. After identifying duplicates, you can proceed safely to remove or manage them, knowing which fonts are redundant.
- Open Font Book from Applications or Spotlight search. You should see the main window with a sidebar on the left.
- Click on the “All Fonts” collection in the sidebar. This lists every installed font on your Mac.
- Look for the “Resolve Duplicates” button in the toolbar and click it. Font Book will scan and highlight duplicate fonts.
- Check the font list for yellow warning icons next to font names. These indicate duplicates.
- Review the status of each duplicate: some may be disabled automatically, others require manual resolution. This helps you decide which duplicates to keep or remove.
Following these steps ensures you can identify duplicate fonts clearly before moving on to safe removal or management.
How to remove duplicate fonts safely using Font Book
When dealing with duplicate fonts, it’s crucial to understand the difference between disabling and deleting them. Disabling a font temporarily turns it off without removing it from your system, letting you test if any documents or apps rely on it. Deleting a font, on the other hand, permanently removes it from your Mac, so only proceed once you are confident it won’t cause issues.
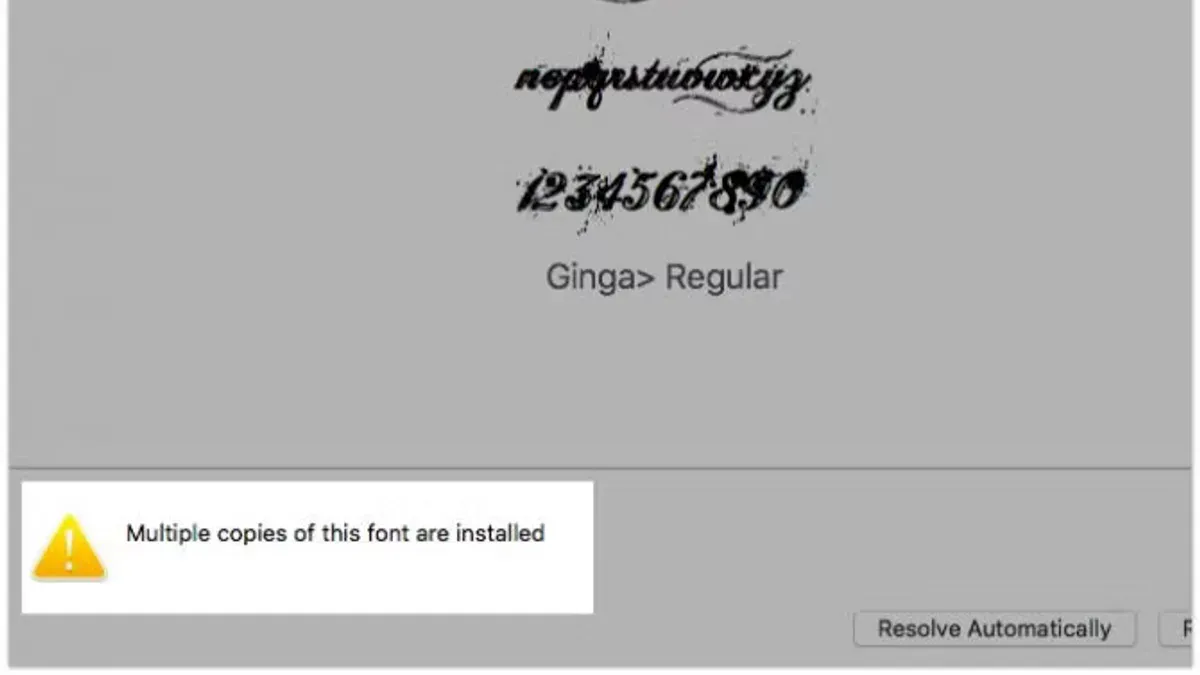
- Open Font Book and locate the duplicates flagged by the Resolve Duplicates feature. You will see duplicate fonts listed with a warning icon.
- Right-click on a duplicate font and select Disable. Disabled fonts will appear grayed out in the list. This action prevents the font from loading but keeps it installed, so you can check if your system or apps behave normally.
- Use your usual apps and documents for a few hours or days to confirm no missing font errors or display issues occur. If everything works well, you can proceed to delete the disabled duplicates.
- Back in Font Book, right-click the same disabled duplicate font and select Remove or Delete. You may be prompted to enter your administrator password. Upon deletion, the font disappears from Font Book and your system.
- Repeat this process for each duplicate font. After removal, your font list should show only one version of each font family, and system performance may improve.
Note that some system fonts are protected and cannot be deleted. Font Book will prevent you from removing these to avoid system instability. If a font cannot be deleted, you can safely leave its duplicate disabled to reduce conflicts.
For example, before removal, you might see “Helvetica” listed twice—one enabled and one duplicate disabled. After deleting the duplicate, only one Helvetica remains active, ensuring apps use the correct font without confusion or errors.
How to delete downloaded or unwanted fonts from your Mac
Fonts you download or install through various apps can accumulate outside of Font Book's control, often residing in user-specific Library folders. These fonts can take up significant disk space and may cause conflicts if left unmanaged. To fully remove unwanted fonts, you need to locate them manually and understand their relationship with applications like Adobe Creative Cloud.
- Open Finder and press Shift + Command + G to bring up the “Go to Folder” prompt.
- Enter
~/Library/Fontsand click Go. This folder contains fonts installed only for your user account. - Review the fonts here and select those you no longer want. Drag them to the Trash. You should see the font files disappear from the folder, indicating removal.
- Next, repeat the process for
/Library/Fonts(system-wide fonts) by entering it in the “Go to Folder” prompt. Only delete fonts here if you are certain they are user-installed, as system fonts are protected and should not be removed. - Open Font Book and check the “User” collection to confirm the fonts you deleted are no longer listed.
- If you use Adobe apps, remember that some fonts might be synced through Adobe Fonts or bundled in app installations. Deleting font files manually will not remove fonts synced by Adobe, so disable unwanted fonts in your Adobe Fonts settings to avoid conflicts.
Removing large font packs manually can free up noticeable disk space, sometimes several hundred megabytes, especially if you had extensive font libraries installed. Always empty your Trash after deleting fonts to reclaim this space fully.
How to delete fonts from Adobe apps and consolidate duplicates
Adobe Creative Cloud manages fonts separately from your Mac's Font Book, which can lead to duplicate fonts appearing in both places. Adobe Fonts syncs fonts on demand to your Adobe apps, sometimes creating conflicts or redundant copies. To keep your font library clean, it’s essential to identify and remove duplicates within Adobe’s font management and then consolidate your fonts for smoother workflow.
- Open the Adobe Creative Cloud desktop app and go to the Fonts tab. You’ll see a list of all Adobe Fonts currently synced to your account. When this works, you see a clear list of active fonts managed by Adobe.
- Review the fonts for duplicates by comparing the names and styles. Adobe often shows multiple versions of the same font family, such as different weights or styles, which may overlap with your Font Book fonts.
- To remove duplicates, click the toggle next to unwanted fonts to deactivate them. When successful, these fonts will no longer be available in Adobe apps, reducing redundancy.
- Next, open an Adobe app like Photoshop or InDesign, and check the font dropdown menu. You should see fewer duplicate entries, making font selection clearer.
- Adobe has a font consolidation feature that automatically merges duplicates across its cloud and local libraries. To leverage this, ensure your Creative Cloud app is updated, then sign out and sign back in to sync changes. After this, your Adobe font list will be streamlined.
- Finally, to sync changes between Adobe Fonts and your Mac's Font Book, open Font Book and verify that deactivated Adobe fonts no longer appear as duplicates. This synchronization helps prevent font conflicts across apps.
For example, before consolidation, you might see "Proxima Nova Regular" listed twice in Adobe Fonts and once in Font Book. After following these steps, only one instance will appear across both platforms, improving font availability and reducing confusion.
How to remove duplicates in text files to clean up font lists
Sometimes, you might work with font lists saved as text files, such as when managing font inventories or preparing data for development projects. Duplicate font names in these files can cause confusion or errors, so cleaning them up is helpful. macOS includes built-in tools that let you find and remove duplicate lines efficiently without needing extra software.
One straightforward method uses the Terminal app with standard commands. For example, if you have a text file named fonts.txt containing duplicate font names, you can create a cleaned version without duplicates.
- Open the Terminal app from Applications > Utilities.
- Navigate to the folder containing your text file by typing
cdfollowed by the folder path, then press Enter. For example:cd ~/Documents. - Run the command
sort fonts.txt | uniq > cleaned_fonts.txtand press Enter. This sorts the list and removes duplicate lines, outputting the result to cleaned_fonts.txt. - Check the new file by opening it in TextEdit or another text editor. You should see the font names listed once each, sorted alphabetically.
This process avoids manual scanning and ensures your font list is tidy for import or reference. If your font list needs more complex handling, such as case-insensitive duplicates or preserving original order, third-party apps like TextWrangler or BBEdit offer advanced find-and-replace and line filtering features.
Cleaning duplicates from text files supports a smoother font management workflow, especially when syncing with apps or scripts that read these lists. Keeping your font inventories clean reduces mistakes and helps you focus on managing fonts directly within Font Book and related software.
Troubleshooting common issues when removing fonts and duplicates
Sometimes, Font Book may not allow you to delete or disable certain fonts. This usually happens because these fonts are protected system fonts essential for macOS operation. When you try to remove such fonts, you might see an error message like "Unable to delete font. This font is required by the system." In these cases, avoid forcing removal, as it can cause system instability. Instead, focus on disabling duplicates or managing user-installed fonts.
If you encounter app errors after removing fonts, such as missing font warnings in Adobe apps or word processors, the application might still reference the deleted font. To fix this, open the app’s font management or preferences panel and clear font caches. Restarting the app often resolves these errors. For Adobe Creative Cloud, syncing the font library again can help reconcile the font list.
When something goes wrong during font removal, restoring fonts is crucial. macOS maintains a system font cache and a backup of standard fonts. If you mistakenly delete a needed font, you can restore it by running the command sudo atsutil databases -remove in Terminal to reset the font cache, then restarting your Mac. Alternatively, reinstalling macOS or restoring from a Time Machine backup will recover system fonts.
- Open Font Book and select the font you want to remove or disable.
You should see the font highlighted. - Attempt to disable the font using the Edit menu’s Disable option.
The font status should change to disabled if successful. - If deletion is blocked with an error about system fonts, leave the font enabled to avoid issues.
System fonts cannot be removed and will remain active. - If apps show missing font errors, clear font caches by quitting all apps, then open Terminal and run
sudo atsutil databases -remove.
Terminal will confirm cache removal. - Restart your Mac and relaunch the affected apps.
Apps should no longer report missing fonts.
Frequently asked questions
How to duplicate a font?
To duplicate a font on your Mac, open Font Book, select the font you want to copy, then use the menu option File > Export Fonts. Save the exported font file to a desired location. You can then import this file back into Font Book as a separate font, effectively creating a duplicate. This method keeps the original intact while allowing you to work with a copy.
How to remove fonts?
Removing fonts safely involves opening Font Book and locating the font you want to delete. Right-click the font and choose Remove <font name> Family, or use the Edit menu to Remove. If the font is a system font, it might be disabled rather than deleted to avoid affecting macOS functionality. Always check if the font is in use before removing it to prevent issues.
How to delete downloaded fonts?
Downloaded fonts installed by you appear in Font Book under the User collection. Select the unwanted downloaded font and choose Remove from the Edit menu or right-click menu. This deletes the font from your user library without affecting system fonts. If the font was added via a third-party app, you may need to remove it from that app’s font management panel as well.
How to delete fonts in adobe?
Adobe apps like Photoshop and Illustrator use fonts installed on your Mac, so managing fonts through Font Book will reflect in Adobe. To delete fonts specifically within Adobe Creative Cloud, use the Adobe Fonts web interface to deactivate fonts synced via Adobe Fonts. For locally installed fonts, remove them from Font Book to avoid conflicts in Adobe apps.
How to delete fonts from computer?
To delete fonts completely from your Mac, start with Font Book to remove or disable the font. Then, check the Fonts folders in your system directories such as /Library/Fonts and ~/Library/Fonts for leftover font files and delete them manually if necessary. Be cautious with system fonts, as deleting them can cause issues; it’s safer to disable or archive them instead.
What This Guide Does Not Cover
This guide focuses exclusively on using the Mac Font Book app to identify and remove duplicate fonts. It does not cover third-party font managers such as Suitcase Fusion or FontExplorer X in depth, which may offer additional features for managing complex font libraries. If you use corporate-managed devices or have highly customized font setups involving multiple user accounts or network fonts, you might require specialized assistance from your IT department or a professional font management service.
For most users, the next best step after cleaning up duplicates in Font Book is to restart your Mac and then check your most-used applications for font consistency. This ensures that any cached font data is refreshed and helps prevent conflicts or unexpected font substitutions. Keeping your font library tidy this way supports smoother performance across design and word-processing apps.