
How to Remove Duplicate Photos in Photos App: Step-by-Step Guide
Discover easy methods to remove duplicate photos in Photos app and keep your photo library organized without losing important images.
You open your Photos app and notice the same images appearing multiple times, cluttering your library and using up valuable storage. Managing these duplicate photos manually can be overwhelming, especially if your collection is large or synced across multiple devices.
This guide explains how to remove duplicate photos in Photos app using both manual and automated methods. You'll learn step-by-step instructions for the Photos app on Mac and iPhone, plus tips for Google Photos and third-party tools. Whether your library is small or extensive, this article helps you choose the safest and most efficient way to clean up your photo collection without losing important images.
Key takeaways
- Use the Photos app's built-in duplicate detection on Mac for easy removal of duplicates.
- On iPhone, manual review is necessary as the app does not yet offer automatic duplicate removal.
- Google Photos offers its own duplicate detection when syncing your library.
- Third-party apps can help scan large libraries but always back up before deleting.
- Manual deletion in Apple Photos Library requires caution to avoid losing photos synced across devices.
Before you start: What you need
Before removing duplicate photos from your Photos app, it’s essential to prepare your device and photo library to ensure a smooth and safe process. Start by making sure your Mac or iPhone is updated to the latest operating system version that supports the Photos features you’ll use. Updated software helps avoid compatibility issues and unlocks any recent improvements in photo management.
Next, check that you have enough free storage space on your device. Removing duplicates might temporarily require extra space for processing, especially if your library is large. Aim to have at least 10-15% of your total storage free to prevent slowdowns or failures during the cleanup.
Backing up your photo library is crucial to avoid accidental loss. Use iCloud Photos to keep your photos securely stored in the cloud and synced across devices. Alternatively, create a manual backup by exporting your entire photo library to an external drive or copying the Photos Library file on your Mac. After backing up, verify that your photos are accessible in the backup location before proceeding.
Finally, understand that the Photos app does not include a built-in tool for bulk deleting duplicate photos. You will need to either manually identify duplicates or use third-party applications for automated removal. This means you'll be choosing between a hands-on approach or relying on external software tailored for duplicate detection and deletion.
- Update your device: On iPhone, go to Settings > General > Software Update. On Mac, open System Preferences > Software Update. You should see a message if your device is up to date.
- Check available storage: On iPhone, go to Settings > General > iPhone Storage. On Mac, click the Apple menu > About This Mac > Storage. Confirm at least 10-15% free space is available.
- Back up your photos using iCloud: Open Settings > [your name] > iCloud > Photos and confirm iCloud Photos is enabled. You should see an indication that photos are syncing. Alternatively, on Mac, open Photos, then go to File > Export to save copies, or copy the Photos Library file from the Pictures folder to an external drive. Confirm the exported files or copied library are visible and accessible.
- Prepare for duplicate removal: Decide if you will delete duplicates manually or use a third-party app, since Photos app has no native bulk duplicate removal feature.
How to delete duplicate photos in Photos app on Mac
Apple Photos on Mac includes a helpful built-in feature called the Duplicates album in recent macOS versions, designed to identify exact duplicate photos automatically. This album groups identical images together, making it easier for you to review and decide which copies to delete or merge. Before deleting, carefully inspect each pair as similar but distinct shots might appear close and could be mistakenly removed.
- Open the Photos app on your Mac. When launched, look for the Duplicates album in the sidebar under the Utilities section. If you don’t see it, your macOS version might not support this feature yet.
- Click on the Duplicates album to see groups of duplicate photos. Each group shows the number of copies found. Review each group by selecting it to ensure you’re not deleting unique pictures.
- For each duplicate group, you can either choose Merge to combine metadata and keep one copy, or select unwanted duplicates and press Delete to remove them. The app will confirm removal and free up storage.
On Macs with older macOS versions without the Duplicates album, you can create a Smart Album to help locate potential duplicates manually. Use criteria like file name, date, or photo size to cluster possible duplicates, then inspect and delete unwanted copies yourself. This method requires more time and attention but works well for smaller libraries.
For large photo libraries, third-party apps designed for Mac can automate duplicate detection more thoroughly, scanning metadata and image content. These tools often offer batch removal options and detailed filtering but always back up your library before using them to prevent accidental loss.
For example, using the built-in Duplicates album on a moderately sized library might identify several dozen exact duplicates quickly, allowing you to merge or delete them in minutes. In contrast, manual smart album sorting can find some duplicates but may miss subtle ones and requires more effort.
How to delete duplicate photos in Photos app iPhone
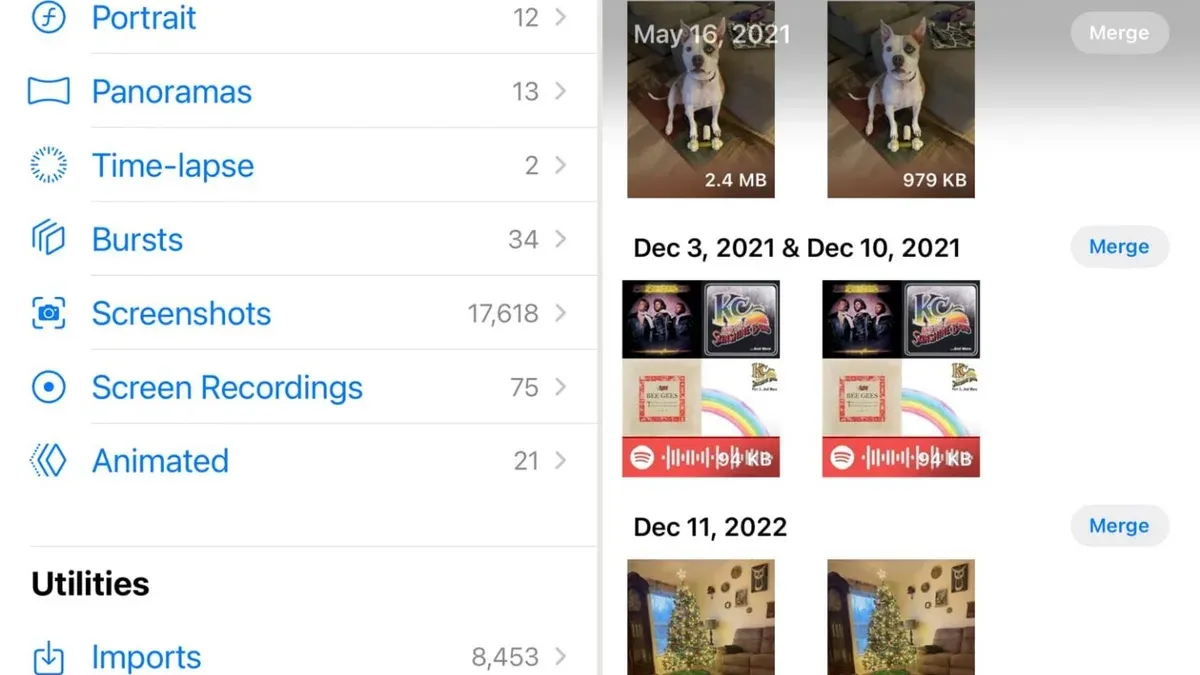
The Photos app on iPhone may include a built-in Duplicates album that helps you find and merge exact duplicate photos. This feature simplifies the process, but it might not be available on all iPhone models or iOS versions. When it is accessible, it groups duplicates together, letting you review and merge them safely, which keeps the best version and deletes extras.
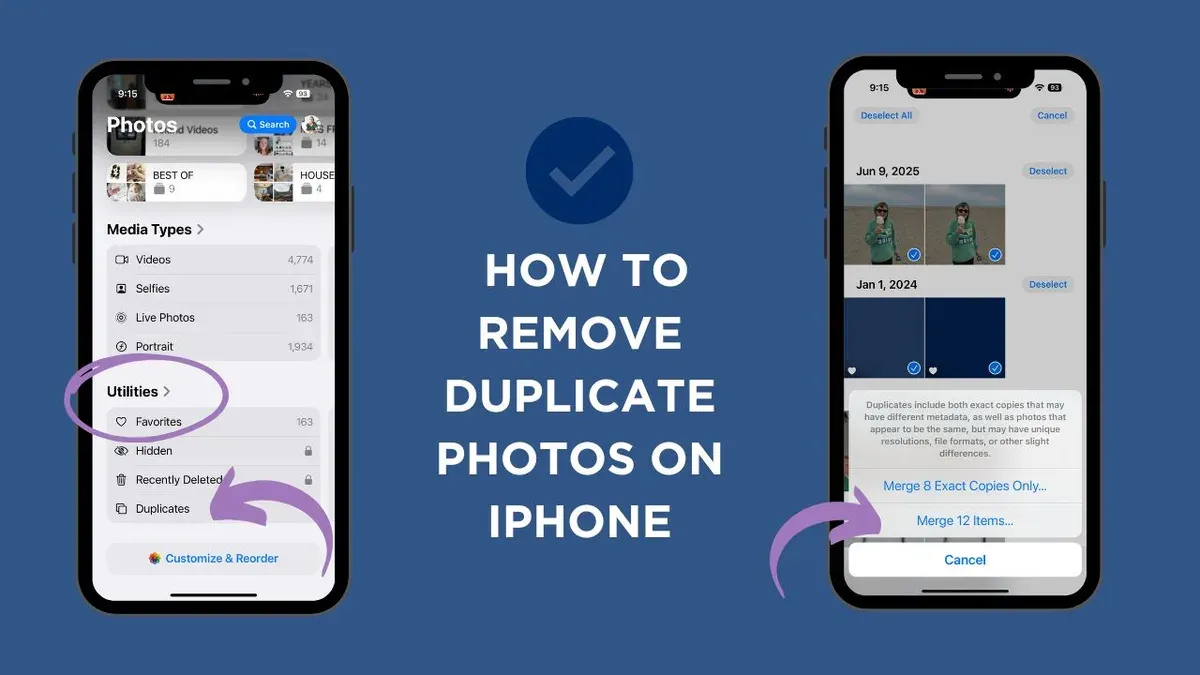
- Open the Photos app on your iPhone.
- Tap Albums at the bottom of the screen.
- Scroll down to find the Duplicates album under the Utilities section.
- Tap the Duplicates album to view grouped photos.
- Review the groups and tap Merge next to each group you want to combine. The app will keep the highest quality photo and delete the rest.
If the Duplicates album is not available, you can manually identify duplicates by scanning your recent photos or albums. Look for photos with similar thumbnails or timestamps. This manual process can be time-consuming, especially with large libraries.
For faster results, consider trusted third-party apps designed for iOS that scan your photo library for duplicates. These apps often provide preview options and let you select which duplicates to delete. Be sure to choose apps with good reviews and clear privacy policies since they access your photos.
Keep in mind that if you use iCloud Photos, any deletion or merging of duplicates on your iPhone will sync across all your devices using the same Apple ID. This synchronization helps maintain a clean library everywhere but also means you should be cautious when deleting photos to avoid losing images unintentionally.
Using the built-in Duplicates album is generally faster and safer than manual scanning. Manual identification might take significantly longer and increases the chance of accidental deletions. Third-party apps can speed up the process but require careful selection and sometimes additional permissions.
How to remove duplicate photos in Google Photos app
Google Photos automatically detects and prevents some duplicate photos from uploading by comparing new files with existing ones in your library. However, this detection mainly works during the upload process and may not catch all duplicates, especially if the photos were uploaded at different times or have slight variations. Because Google Photos does not offer a dedicated tool to find or remove duplicates already in your library, you need to rely on manual review or third-party solutions.
To manually identify potential duplicates, you can use Google Photos' search and album features. Searching by date, location, or specific people can help you spot photos that look very similar. For example, typing a date or event name in the search bar groups photos from that time or occasion, making it easier to compare images side by side. You can also create an album to gather suspected duplicates before deciding which to delete.
For bulk duplicate removal, several third-party tools and apps are designed to work with Google Photos. These tools scan your library and highlight duplicate or similar photos for review and deletion. When choosing a third-party app, ensure it has good reviews and explicitly supports Google Photos to avoid any data loss or privacy issues.
- Open Google Photos on your device or desktop, then use the search bar to enter a date or event to narrow down your photo collection. You should see groups of photos from that period, making duplicates easier to spot.
- Create a new album and add photos that appear duplicated by selecting them and tapping the “+” icon, then choosing “Album.” This gathers suspected duplicates for easier comparison.
- Review the album carefully to confirm which photos are duplicates by checking details like timestamps, location tags, and visual similarity.
- Delete unwanted duplicates by selecting them and tapping the trash icon. Deleted photos go to the Trash, where they remain for 60 days before permanent deletion.
- Explore trusted third-party duplicate photo finder apps that support Google Photos integration, install one, and follow its instructions to scan and manage duplicates in bulk.
How to remove duplicate photos in Mac Photo app using third-party tools
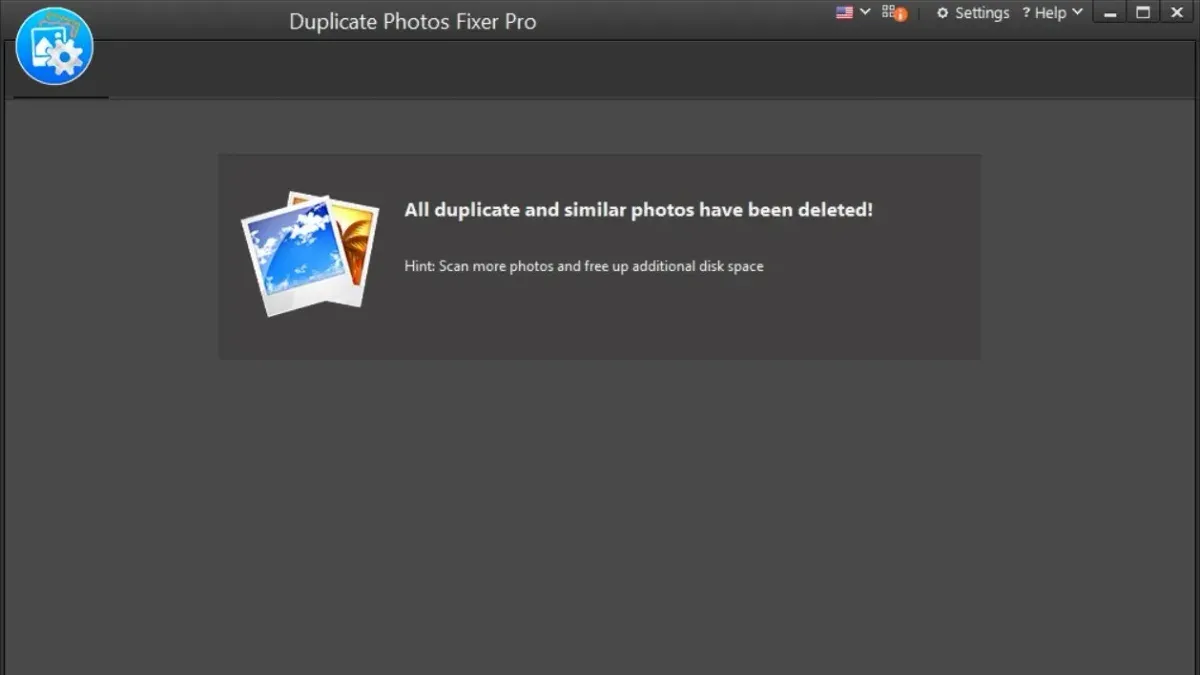
Several third-party apps can help you efficiently find and delete duplicate photos in your Mac Photos library. Popular options include Gemini 2, Duplicate Photos Fixer Pro, and PhotoSweeper. These apps vary in cost, features, and scanning accuracy, so choosing one that fits your needs and budget is key.
| App | Cost | Accuracy | Preview Feature | Backup Option |
|---|---|---|---|---|
| Gemini 2 | Paid (with free trial) | High - detects exact and similar photos | Yes, side-by-side previews | Creates recycle bin for safe recovery |
| Duplicate Photos Fixer Pro | Paid (affordable) | Good - exact and similar duplicates | Yes, before deletion | No automatic backup |
| PhotoSweeper | Paid (one-time purchase) | Very high - customizable similarity thresholds | Yes, detailed previews | Supports backup via external drives |
For example, using Gemini 2 to remove duplicates involves a straightforward process:
- Download Gemini 2 from the official website or the Mac App Store and install it. You should see the app icon in your Applications folder once installed.
- Open Gemini 2 and click "Scan for Duplicates." Select your Photos library folder or drag and drop it into the app window. The app will start scanning and display a progress bar.
- After scanning, review the duplicate groups Gemini 2 found. The app shows photos side-by-side, highlighting exact or similar matches. You can manually deselect any photos you want to keep.
- Once you confirm selections, click "Remove" to send duplicates to Gemini's safe cleanup bin. You can restore photos from here if needed before they are permanently deleted.
- Close Gemini 2 and open your Photos app to verify that duplicates are removed and your library is intact.
These apps include safety features like detailed previews before you delete anything and temporary quarantine zones or recycle bins to prevent accidental loss. While free tools might offer basic scanning, paid apps generally provide more accurate detection, customizable settings, and better user interfaces, making them worthwhile for large libraries or frequent use.
How to delete duplicate photos in Apple Photos Library manually
If you don't have access to automatic duplicate detection tools or prefer full control, manually identifying and deleting duplicates is effective but requires patience. You can start by creating Smart Albums that group photos based on potential duplicate indicators like date, file size, or filename. This narrows down the photos you need to review closely.
- Open the Photos app on your Mac and go to File > New Smart Album. A dialog box appears.
- Set the first criterion, for example, Date Captured is within the same day or a short time span. Click the plus (+) button to add more criteria.
- Add criteria such as File Size is less than or equal to a specific value to catch similar photos. You can also add Filename contains specific keywords or numbers.
- When done, click OK. The Smart Album now groups photos that likely include duplicates.
- Go through the Smart Album and sort photos by date or filename to visually compare similar images side by side. Use the Compare Photos feature by selecting two or more photos, then right-click and choose Compare Photos to view them simultaneously.
- Carefully select duplicates to delete by clicking the photo and pressing the Delete key or right-clicking and choosing Delete Photo. Confirm removal. Remember that deleting removes photos from all synced devices.
To speed up this manual process, focus on Smart Albums with narrow criteria and regularly back up your library before deleting. Also, use the zoom and fullscreen preview to spot subtle differences. This method requires attention to detail but ensures you never accidentally delete unique photos.
Troubleshooting common issues when removing duplicates in Photos app
If the Duplicates album does not appear on your device, first confirm that your Photos app is updated to the latest version. On Mac, the Duplicates album only shows if duplicate photos are detected; if none exist or the library hasn’t finished analyzing, it may not appear. On iPhone, ensure iCloud Photos is enabled and fully synced under Settings > Photos. Restarting the device can also help refresh the album display.
When the Photos app crashes or freezes during deletion, this often indicates high memory usage or software conflicts. Close other apps to free up RAM, then try deleting smaller batches of duplicates rather than large groups at once. If freezing persists, force quit Photos and restart your device. On Mac, running First Aid in Disk Utility can resolve potential disk issues affecting app performance.
Accidentally deleted photos can be recovered from the Recently Deleted album within 30 days. Open the Photos app, navigate to Albums > Recently Deleted, then select the photos to restore and tap Recover. This feature has a high success rate if action is taken promptly; after 30 days, recovery becomes unlikely without specialized software.
If duplicates still appear after deletion, this is often caused by iCloud sync delays. Confirm your device is connected to Wi-Fi and wait a few hours for changes to propagate across devices. You can manually trigger a sync by toggling iCloud Photos off and on under Settings > Photos, but be cautious as this can temporarily remove photos from your device until fully downloaded again.
Frequently asked questions
How to identify duplicate photos in apple photos?
You can spot duplicate photos in Apple Photos by visually scanning your library for similar images or by sorting photos by date to find repeated shots. On Mac, the Photos app now automatically groups duplicates in a "Duplicates" album under the "Utilities" section, making it easier to review them. If you don’t see this album, duplicates might need manual checking or third-party tools can assist with identification.
How to remove duplicate photos in apple photos?
To remove duplicates in Apple Photos, open the "Duplicates" album if available, select the copies you want to delete, and click "Merge" to keep the highest quality version. If the album is not present, you can manually delete duplicates by selecting unwanted photos and pressing the Delete key. Remember, deleting photos removes them from all synced devices using iCloud Photos, so be certain before deleting.
How to delete duplicate photos in apple photos app?
On the Apple Photos app, go to the "Duplicates" album under "Utilities," select the duplicate sets, and choose "Merge" or delete unwanted copies. If the app version lacks this feature, manually find duplicates by date or content and delete them. Always check the Recently Deleted album afterward to permanently remove unwanted photos and free up storage.
How to delete duplicate photos in apple photo library?
To delete duplicates directly from the Apple Photo Library on Mac, open the Photos app, locate duplicate images either through the "Duplicates" album or manual search, then select and delete the extras. Use the "Merge" option if available to combine duplicates and preserve metadata. After deleting, empty the "Recently Deleted" folder to reclaim space on your device and in iCloud.
What This Advice Does Not Cover and When to Seek Other Solutions
This guide focuses specifically on removing duplicate photos within the Photos app on Mac and iPhone, as well as Google Photos and some third-party tools. It does not cover duplicate videos or other media types, which often require different methods and apps tailored to those formats. If you have a large collection of videos or mixed media, consider specialized software designed for those files.
Be cautious when using third-party duplicate photo removal apps. Some may pose privacy risks or request excessive permissions. Always choose trusted apps with good reviews and back up your photo library before performing any mass deletions to avoid accidental data loss.
Automatic duplicate detection tools may not identify visually similar photos that differ technically, such as different edits or resolutions. A manual review is recommended to ensure you do not delete images you want to keep.
The most useful next step is to create a current backup of your entire photo library, then try the built-in duplicate photo detection features available on your Mac or iPhone. This approach balances safety and efficiency, helping you start clearing duplicates without risking your original photos.
See also: How to Manage and Fix Mac Studio M4 Max Storage Full Issues · How to Recover Deleted Notes in the Notes App: Step-by-Step Guide · How to Transfer Notes from Android to Mac in the Notes App



