How to Resize an Image in Preview on Mac: Step-by-Step Guide
This guide shows you how to resize an image in Preview on Mac, adjusting dimensions and resolution for print or web use.
You have a photo that’s perfect except it’s too large to upload or print at the size you want. Or maybe you need to make an image smaller without losing clarity. Knowing how to resize an image in Preview on your Mac lets you adjust pictures quickly and easily for a variety of uses.
This guide walks you through opening your image in Preview, finding and using the Adjust Size tool, and choosing the best settings for resizing based on pixels or physical dimensions. You’ll also learn how to resize images specifically for printing, as well as how to save your resized images correctly to preserve quality. Finally, we’ll compare resizing in Preview to resizing in the Photos app and troubleshoot common issues that can come up during the process.
Key takeaways
- Open your image in Preview and use the Adjust Size option under the Tools menu to resize.
- Resize images by pixels for screen use or by inches/cm for printing needs.
- Check the resolution (pixels per inch) to maintain image quality when resizing for print.
- Save resized images as JPEG or PNG depending on use and quality requirements.
- Preview resizing offers more control compared to the Photos app, especially for dimension and resolution.
Before you start: What you need to resize images in Preview
To resize images effectively using Preview on your Mac, you first need to confirm you have the Preview app. This app is installed by default on macOS and supports common image file types like JPEG, PNG, TIFF, and GIF. Make sure the image you want to resize is saved on your Mac and accessible through Finder or your Desktop.
Understanding the difference between image dimensions and resolution is essential before resizing. Dimensions refer to the width and height of an image, measured in pixels or inches, while resolution (often shown as DPI or PPI) indicates how many pixels fit into each inch of the image. For example, resizing an image to 800 pixels wide is different from resizing it to 5 inches wide; the latter depends on the resolution setting. An 800-pixel-wide image at 72 PPI will print much smaller than the same pixel width at 300 PPI, which is standard for printing.
Before you start resizing, clarify your goal. Are you preparing the image for web upload, which usually requires pixel dimensions and smaller file sizes? Or are you resizing for printing, where physical size in inches and a higher resolution matter more? Knowing this helps you choose the right units and resolution settings in Preview for the best results.
- Verify your Mac has the Preview app by searching for "Preview" in Spotlight or locating it in the Applications folder; you should see the app icon and be able to open it.
- Locate your image file on your Mac (JPEG, PNG, etc.) and ensure you can open it with Preview by double-clicking or right-clicking and choosing "Open With > Preview." When successful, the image will open in a new Preview window.
- Determine your target size or purpose for resizing. For example, if you want to upload the image to a website, note the required pixel width and height. If you plan to print, write down the desired print size in inches and the recommended print resolution (usually 300 DPI).
Open your image in Preview and access the adjust size tool
To begin resizing your image in Preview, first open the image file you want to adjust. You can do this easily by locating the image in Finder and double-clicking it—Preview is the default viewer for many image formats on Mac, so it will open the image automatically. Alternatively, you can drag the image file directly onto the Preview app icon in your Dock or Applications folder.
Once your image is open in Preview, look at the top menu bar to find the controls you need. Click on the Tools menu to see a dropdown list of editing options. From this list, select Adjust Size… to open the resizing dialog window.
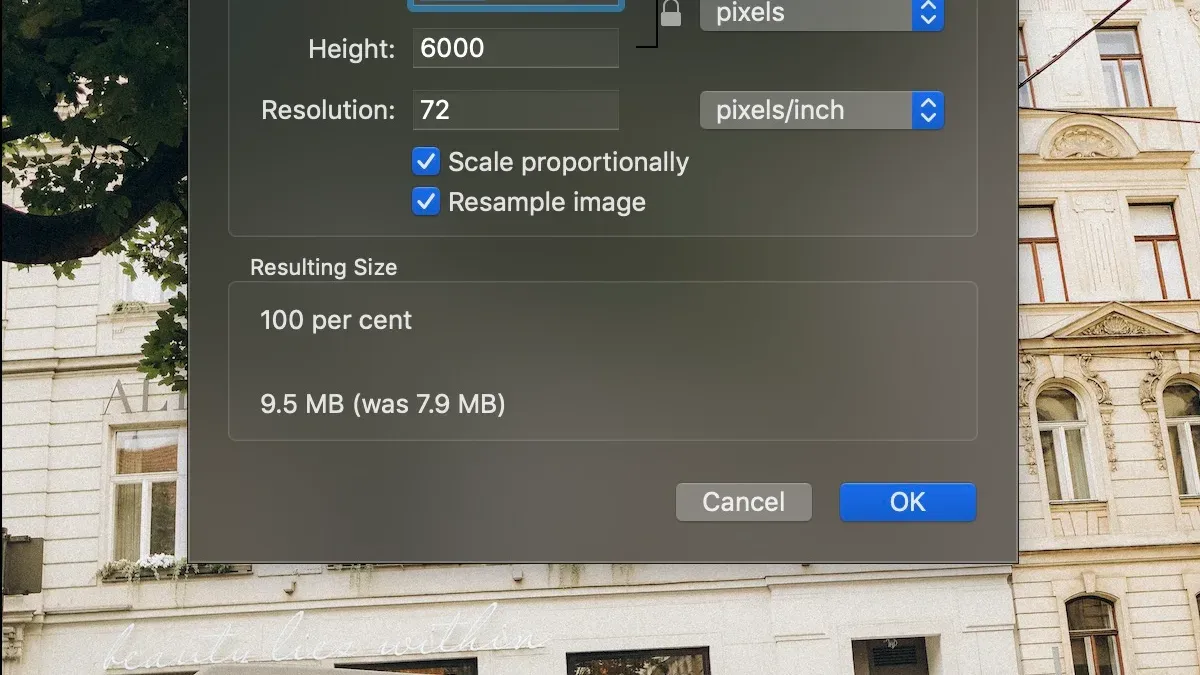
The resize dialog window presents several key settings that control your image dimensions. You will see fields for width and height, which can be adjusted in units such as pixels, inches, or centimeters. Below these, there is a resolution setting, usually displayed in pixels per inch (ppi), which affects image quality especially for printing. Make sure the box labeled “Scale proportionally” is checked to maintain the aspect ratio as you resize.
With this window open, you are now ready to enter specific size values depending on your needs. The interface is straightforward, showing how changes to one dimension affect the other to keep your image from stretching or squashing.
How to resize an image in Preview Mac using pixels or inches
To resize your image accurately in Preview, you can choose units like pixels, percent, or inches depending on your goal. Start by opening the image and selecting Tools > Adjust Size. In the dialog box, locate the Width and Height fields and the unit dropdown next to them. Click this dropdown to switch between pixels, percent, and inches, then enter your desired dimensions.
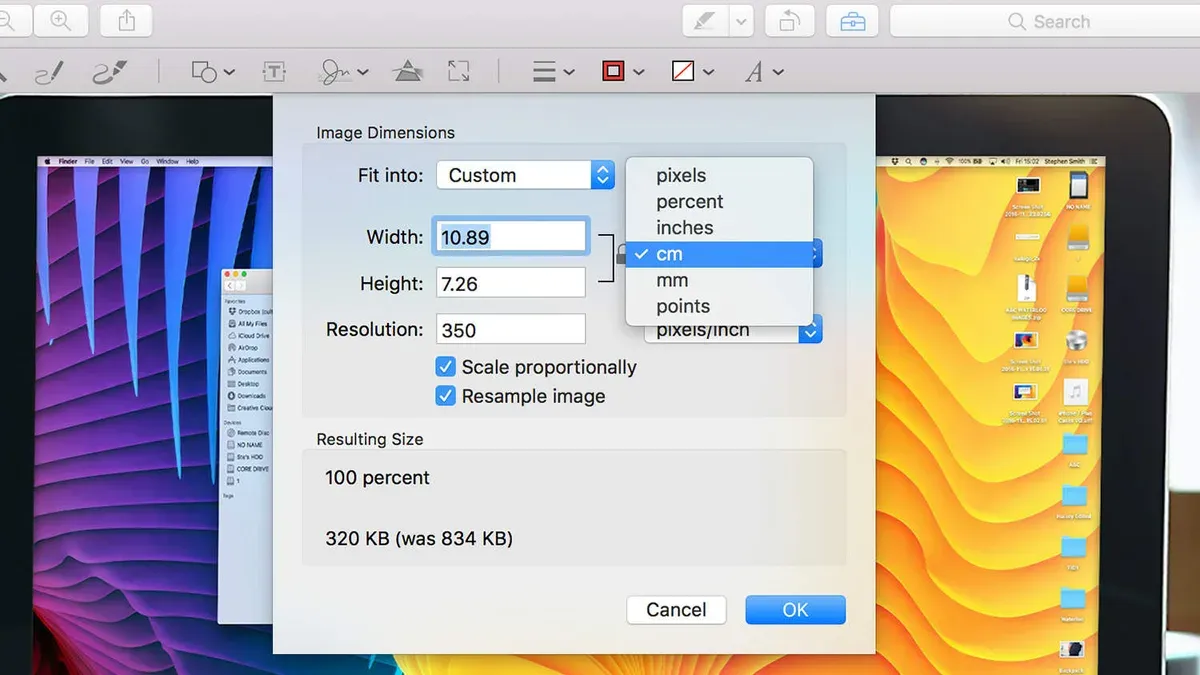
When resizing, the Scale proportionally checkbox is key to maintaining the original aspect ratio. If this box is checked, changing the width will automatically adjust the height to prevent distortion. Unchecking it lets you set width and height independently but can stretch or squash the image.
For example, if you start with a 4000 by 3000-pixel image and want to resize it to 1200 by 900 pixels, choose pixels as your unit. Enter 1200 for width and ensure Scale proportionally is checked so the height adjusts to 900 automatically. This reduces the image size by about 70%, which also lowers the file size significantly—often from several megabytes down to a few hundred kilobytes depending on the image format.
After resizing, avoid overwriting your original image by selecting File > Save As or Duplicate before saving. This keeps your original untouched and lets you keep multiple versions for different uses.
- Open your image in Preview and choose Tools > Adjust Size. The resize dialog appears.
- Click the unit dropdown next to Width and Height and select either pixels or inches, depending on your needs. The fields will update accordingly.
- Enter the new Width value. If Scale proportionally is checked, the Height will update automatically to keep the aspect ratio.
- Review the new dimensions shown and confirm the image preview looks correct.
- Choose File > Duplicate to create a copy, then save the resized image under a new name to avoid overwriting your original.
How to resize an image in Apple Preview for printing
When preparing an image for printing, understanding resolution—measured in dots per inch (DPI)—is crucial. DPI affects the sharpness and clarity of printed photos. Preview uses the image's pixel dimensions and DPI to calculate print size; higher DPI means better print quality but requires more pixels.
For example, a 300 DPI image is considered print quality, producing sharp prints. Conversely, 72 DPI images, common for screens, can appear pixelated or blurry when printed at large sizes. To get crisp prints, you need to set your image’s dimensions in inches and adjust DPI accordingly.
- Open your image in Preview and select Tools > Adjust Size. You’ll see the current width, height, and resolution.
- Change the measurement unit to inches from the dropdown next to the dimensions.
- Set the desired print size by entering width and height in inches. For example, 8 by 10 inches for a standard print.
- Make sure the checkbox for Resample image is unchecked if you want to keep the original pixel count and only change the DPI. This adjusts print size without altering image quality.
- Enter 300 in the resolution field to set the DPI for print quality.
- Click OK. Preview will update the image size and resolution. If you had Resample image checked, the pixel dimensions change, which can affect quality.
To verify the print quality, multiply the inches by the DPI. For example, an 8" x 10" image at 300 DPI will have 2400 x 3000 pixels, which ensures sharp print output. If your image has fewer pixels than this, the print may lose detail or look blurry.
By adjusting both size in inches and DPI in Preview, you control how large your image prints and maintain high quality. Always aim for around 300 DPI for physical prints to avoid pixelation.
How to make an image larger or smaller in Preview and save it correctly
Resizing images in Preview allows you to make them larger or smaller, but it's important to understand the limitations when enlarging. Increasing the size of a small image can cause noticeable quality loss, as Preview stretches the existing pixels rather than creating new detail. For example, enlarging a 500x500 pixel image to 2000x2000 pixels will result in a softer, less sharp image.
To reduce an image’s size and file weight, you can decrease its dimensions, which often leads to better image clarity and faster loading times. Smaller images use fewer pixels, so their file size shrinks significantly. For instance, lowering a 4000x3000 pixel image down to 1200x900 pixels can reduce file size by a large margin without compromising visible quality for web use.
- Open your image in Preview and select Tools > Adjust Size. You will see fields for Width, Height, and Resolution.
- To enlarge, enter larger values in Width or Height. Notice the preview updating; expect some softness if increasing size drastically.
- To reduce size, enter smaller values in Width or Height. The preview will show a crisper image and a smaller file size after saving.
- Make sure the “Scale proportionally” box is checked to maintain aspect ratio and avoid distortion.
- Click OK to apply changes, then select File > Save As to save a new copy. Choose JPEG or PNG format depending on your needs.
- When saving JPEGs, use the quality slider to balance file size and compression artifacts. A quality setting around 80-90% usually preserves good detail with moderate compression.
By following these steps, you can adjust your image size appropriately and save it without unintentionally degrading quality or creating overly large files.
How to resize an image in Photos app vs Preview
The Photos app on Mac offers basic resizing options primarily aimed at exporting images at different sizes rather than precise dimension control. It allows you to choose from preset export sizes like Small, Medium, Large, or Actual Size, which simplifies quick resizing but limits customization. In contrast, Preview provides detailed control over exact pixel dimensions or print sizes, making it better suited for tailored resizing needs.
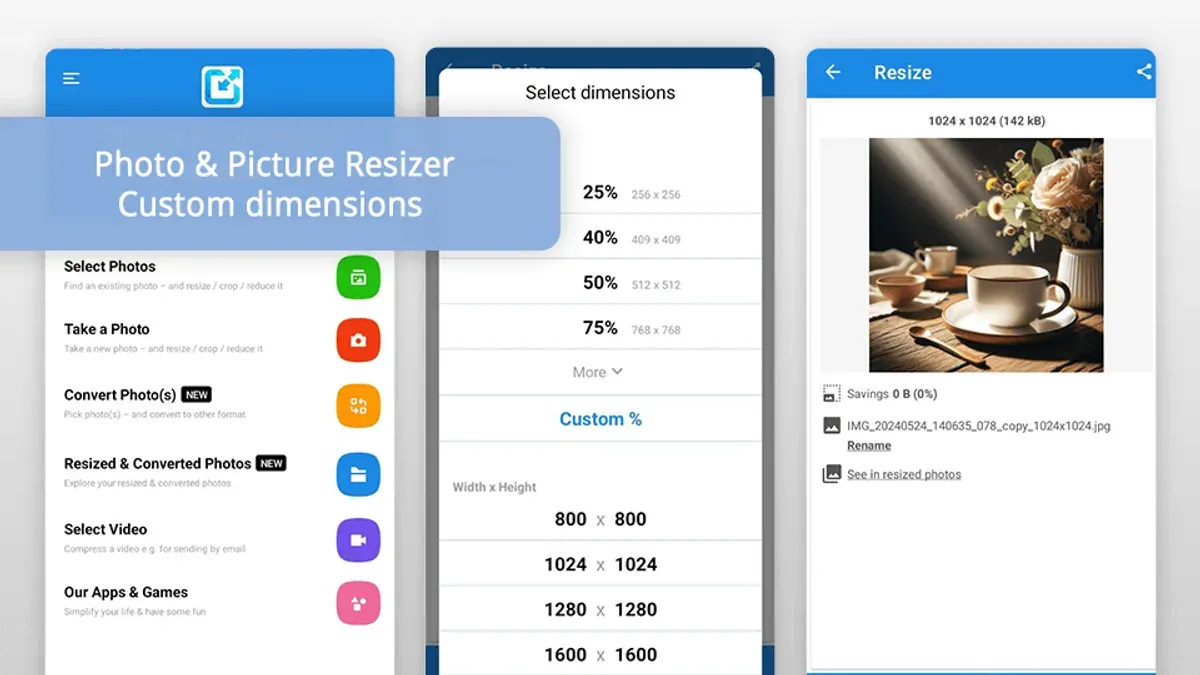
Here is a side-by-side comparison of the workflows:
- Open your image in Photos and click File > Export > Export 1 Photo. A dialog appears with size options.
- Select a size preset (e.g., Medium) and choose JPEG quality, then click Export. The exported image has resized dimensions but no option to specify exact pixels or inches.
- Open the same image in Preview and go to Tools > Adjust Size. You can enter exact width and height in pixels or inches and adjust resolution.
- Click OK in Preview to resize the image precisely, then save the file.
Regarding output quality, Photos resizing is quick and convenient but less precise, often producing standard sizes with default resolution settings. Preview grants you control over resolution and dimension, which is essential when preparing images for printing or specific digital uses. Preview is preferable when you need exact control over image size and quality, while Photos suits casual resizing for sharing or email where approximate size adjustments suffice.
Troubleshoot common issues when resizing images in Preview
When resizing images in Preview, you might notice the image becomes blurry or pixelated. This usually happens because enlarging an image beyond its original pixel dimensions forces Preview to create new pixels, reducing clarity. To minimize this, avoid increasing image size drastically and always check the pixel dimensions before resizing. Reducing image size generally preserves quality better but can make details less visible if too small.
If you find the 'Adjust Size' option grayed out or missing, the image file format could be the cause. Preview supports resizing mainly for common formats like JPEG, PNG, and TIFF. Some files, such as PDFs opened in Preview, don't allow resizing via the 'Adjust Size' tool. To fix this, ensure you are working with a supported image file, or convert the file to a compatible format if needed.
Verifying the image size and resolution after resizing is essential to avoid printing errors like unexpected size or poor print quality. After resizing, open the 'Adjust Size' window again and confirm the dimensions and resolution (DPI). For printing, a resolution of 300 DPI is standard for sharp results. If these values do not match your requirements, adjust them before saving the file.
- Open your resized image in Preview.
Expected: The image appears in the Preview window. - Go to the 'Tools' menu and select 'Adjust Size'.
Expected: The 'Image Dimensions' window opens without grayed-out options. - Check the 'Width', 'Height', and 'Resolution' fields.
Expected: Values reflect your intended size and 300 DPI for printing. - If any values are incorrect, adjust them and click 'OK'.
Expected: The image updates with the new size. - Save the image using 'File' > 'Save As' to preserve the resized version.
Expected: The new file carries the correct dimensions and resolution.
These steps address the most frequent resizing issues reported by users and discussed in Apple support communities. Paying attention to file format compatibility, image dimensions, and resolution helps maintain image quality and print accuracy.
Frequently asked questions
How to resize pic?
To resize a picture on a Mac using Preview, open the image, then go to the menu bar and select Tools > Adjust Size. Enter the desired dimensions in pixels, inches, or percentage, and make sure to check the Scale proportionally box to keep the image’s aspect ratio. Click OK and save the file to apply the new size.
How to resize image before printing?
Before printing, resizing your image in Preview helps ensure it fits the paper size and maintains quality. Open the image, choose Tools > Adjust Size, then set the physical dimensions (like inches or centimeters) to match your print requirements. Also, check the resolution is at least 300 pixels per inch (ppi) for clear print quality.
How to resize image in photos?
The Photos app on Mac does not offer a direct resize tool like Preview. Instead, you can export the image by selecting File > Export > Export 1 Photo, then choose a size option such as Small, Medium, Large, or Custom. This process changes the image size during export rather than editing the original file.
How to resize the picture?
To resize a picture in Preview, open it and go to Tools > Adjust Size. Input your preferred width or height, or set a specific resolution, then confirm the changes. Remember to save the edited image under a new name if you want to keep the original unchanged.
How to resize a picture in preview?
In Preview, resizing a picture involves opening the image, selecting Tools > Adjust Size, and entering new size values. You can choose pixels, inches, or a percentage, and ensure Scale proportionally is enabled to avoid distortion. After adjusting, save the image to keep your changes.
What This Guide Does Not Cover
While Preview offers a straightforward way to resize individual images, it does not support advanced editing features such as batch resizing multiple files at once or non-destructive editing that preserves your original image separately. If you need to resize large numbers of images quickly or require precise control over image layers, formats, or color profiles, you should consider dedicated image editing software like Adobe Photoshop, Affinity Photo, or specialized batch processing tools. These programs provide more flexibility and options for professional or complex workflows.
For users focused on quick, simple resizing of single images for everyday tasks like printing or sharing online, Preview remains an accessible and efficient choice.
To continue improving your workflow with Preview, a useful next step is to experiment with the 'Adjust Size' settings and familiarize yourself with how resolution (measured in pixels per inch) affects both the image’s physical dimensions and quality. Testing different values will help you better match your image sizes to specific needs, such as ensuring sharp prints or optimized web uploads without unnecessary file size increases.
See also: How to Remove Background from an Image in Preview: Step-by-Step Guide · How to Annotate a PDF in Preview: A Clear Step-by-Step Guide · How to Sign a PDF in Preview: Step-by-Step Guide for Mac Users