How to Use Apple Loops in GarageBand: A Step-by-Step Guide
Discover how to easily add and arrange Apple Loops in GarageBand across Mac, iPhone, and iPad with clear, step-by-step instructions.
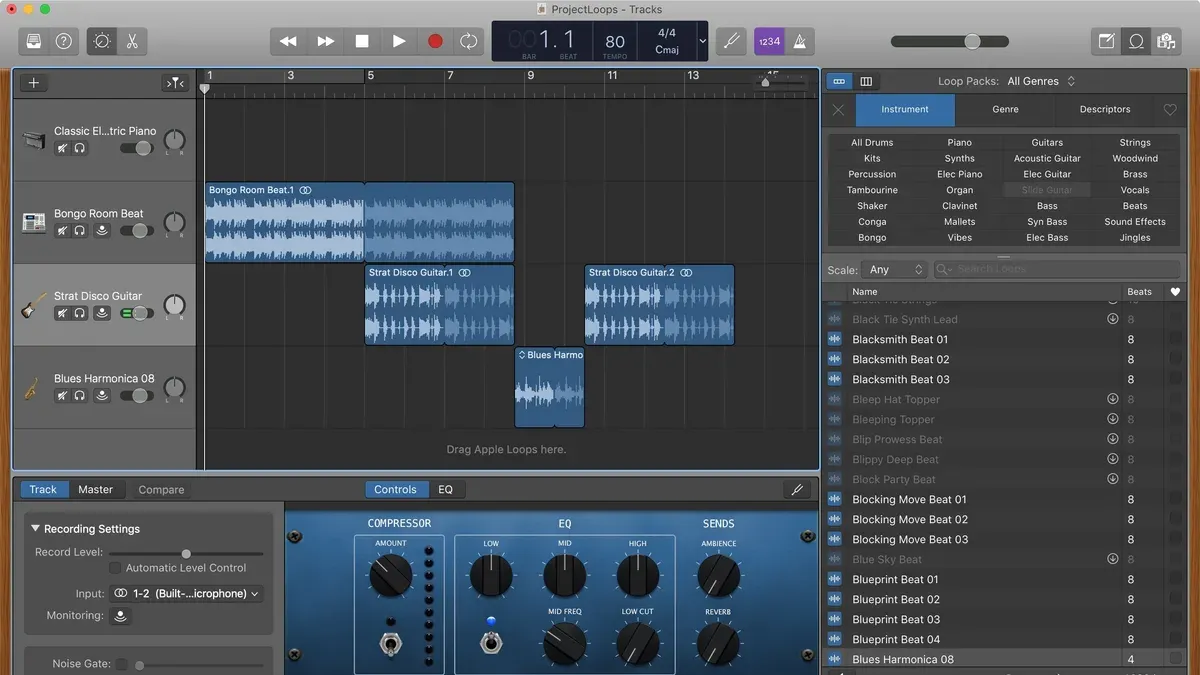
You’ve just opened GarageBand and want to add some musical flair using Apple Loops, but you’re unsure where to start or how to make the loops fit your project. Maybe you’ve noticed loops that don’t behave as expected or wondered if you can use MP3 files alongside Apple Loops. This guide walks you through how to use Apple Loops in GarageBand across Mac, iPhone, and iPad, with step-by-step instructions tailored to each device.
You’ll learn how to locate and insert loops, loop non-Apple files like MP3s, arrange loops to build a track, and handle common issues. Whether you’re adding a drum beat on your Mac or layering synths on your iPhone, these clear steps will help you integrate loops confidently and troubleshoot typical problems.
Key takeaways
- Access Apple Loops via the Loop Browser on Mac or the Loop icon on iPhone/iPad.
- Drag and drop loops to add them, then adjust length by dragging region edges.
- Convert MP3s to Apple Loops by trimming and setting the cycle region.
- Arrange loops across tracks and use the grid to snap loops in time.
- Close GarageBand properly on iPhone to avoid losing unsaved loop edits.
Before you start: What you need to use Apple Loops in GarageBand
To use Apple Loops in GarageBand, ensure you have the app installed on your Mac, iPhone, or iPad and are familiar with basic navigation such as opening projects and browsing sound libraries. Apple Loops are pre-recorded, royalty-free audio clips designed to loop seamlessly when repeated, adapting automatically to your project's tempo and key. This makes them different from generic sound loops, which may require manual adjustments to fit your track.
GarageBand includes a built-in library of free Apple Loops accessible via the Loop Browser. You can also find additional loops online, both free and paid, but be aware that loops outside the Apple Loop format might not adjust automatically and may need extra editing. Apple Loops typically come in smaller file sizes compared to standard MP3 loops because they contain metadata that tells GarageBand how to adapt them, rather than just fixed audio.
Hardware-wise, Apple recommends using a device running a recent version of GarageBand on macOS, iOS, or iPadOS with sufficient storage. Loop libraries can consume several gigabytes, so having at least a few gigabytes of free space is advisable. A Mac, iPhone, or iPad with moderate to high performance will give you smoother playback and faster editing when working with multiple loops.
- Open GarageBand on your device. You should see options to create a new project or open an existing one.
- Locate and open the Loop Browser by clicking the loop icon (a loop symbol) or tapping the loop button, depending on your device. The Loop Browser lets you preview and select Apple Loops.
- Check that your device has enough free storage by visiting system settings or Finder/File Manager to avoid interruptions when downloading additional loops.
- Confirm you understand that Apple Loops will automatically change tempo and key to fit your project, which is visible when dragging loops into the timeline and hearing them sync seamlessly.
- Note that non-Apple Loop files like MP3s will not adjust automatically and require manual editing for tempo and pitch to match your project.
How to access Apple Loops in GarageBand on Mac
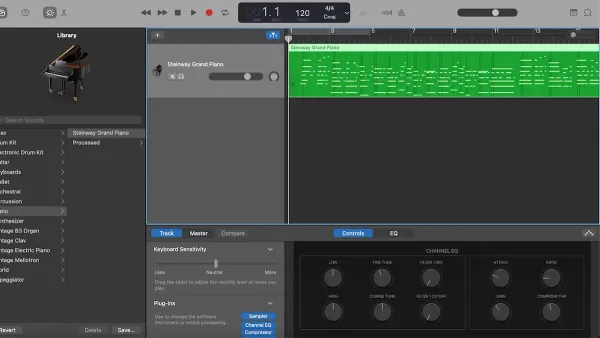
To start using Apple Loops on your Mac, you first need to open the Loop Browser. You can do this by clicking the loop icon located in the top-right corner of the GarageBand window. Alternatively, press the keyboard shortcut Command + L. Once the Loop Browser opens, you will see a panel displaying a wide variety of loops organized by different categories.
- Click the loop icon or press Command + L to open the Loop Browser. You should see a panel appear on the right side of the screen displaying loop options grouped by instruments, genres, and moods.
- Use the search bar at the top of the Loop Browser to type keywords related to the sound you want, such as “drums” or “ambient.” The results will update dynamically, showing only loops matching your search.
- Apply filters by clicking the filter buttons below the search bar: select Instrument (e.g., Guitar, Bass), Genre (e.g., Rock, Electronic), or Mood (e.g., Happy, Dark). This helps narrow down loops to fit your project style.
- Hover your cursor over a loop and click the play button to preview it. This lets you hear the loop in isolation before adding it to your project timeline.
- Drag a loop from the Loop Browser directly into your project timeline. GarageBand will automatically adjust the loop’s tempo and key to match your current project settings, ensuring seamless integration.
The Loop Browser also displays a waveform and loop length, helping you choose loops that fit your track’s structure. If you want to add multiple loops, simply drag each one to a new track or different position in the timeline. This visual interface makes exploring and using Apple Loops straightforward on Mac.
How to use Apple Loops in GarageBand on iPhone and iPad
Using Apple Loops on your iPhone or iPad in GarageBand is intuitive once you know where to look and how to interact with the touch interface. The Loop Library is your starting point, providing access to a wide range of categorized loops that fit your project’s tempo and key. While the core features are similar across devices, the larger screen on iPad offers a more spacious browsing experience compared to the compact iPhone view.
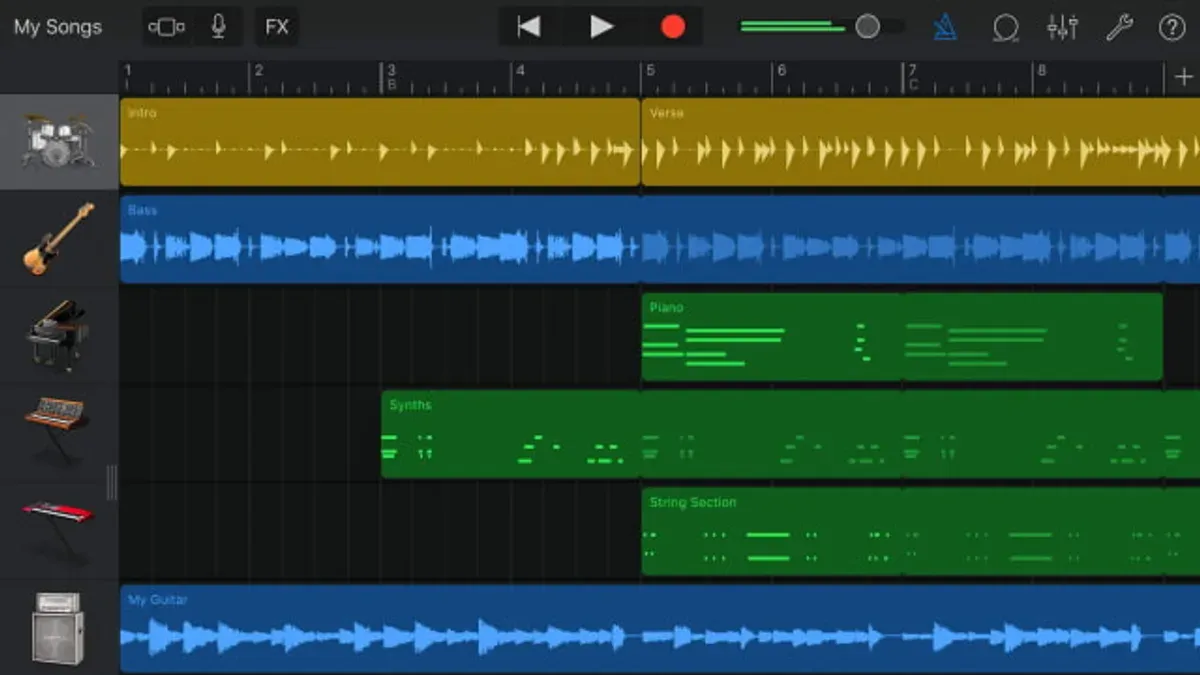
- Tap the Loop Library icon located in the control bar at the top right of the GarageBand screen. This opens the Loop Library panel, revealing loop categories and a search bar. You should see a list of loop genres such as Drums, Bass, and Instruments.
- Browse or search loops by scrolling through categories or entering keywords in the search bar at the top of the Loop Library. On iPad, categories and loops appear side by side for easier navigation, while on iPhone, you toggle between categories and loop lists.
- Preview loops by tapping the play button next to any loop name. This plays a short sample so you can decide if it fits your track.
- Add a loop to your project by tapping and holding the loop, then dragging it onto an empty track or the timeline area. Release your finger to drop the loop in place. You should see the loop clip appear on the track aligned with the playhead.
- Adjust loop length and position by dragging the edges of the loop region left or right to shorten or extend it. Move the entire loop clip along the timeline by tapping and dragging it horizontally. This works the same on iPhone and iPad, but the iPad’s larger screen makes precision easier.
- On iPad, use split-screen or multitasking to view additional tools alongside the Loop Library for a smoother workflow, which is not available on iPhone due to screen size constraints.
Following these steps will let you confidently browse, add, and arrange Apple Loops on your iOS device, adapting your workflow to the device’s specific interface while making the most of GarageBand’s loop functionality.
How to loop MP3s and other non-Apple Loops in GarageBand
GarageBand allows you to import MP3, WAV, and other audio files to create custom loops, even though these files don’t have the adaptive tempo and key metadata that Apple Loops include. To start, import your audio file from the Files app or iTunes library directly into your GarageBand project. Once imported, you can trim the audio clip to isolate the section you want to loop and enable loop playback to repeat it seamlessly.
After importing, trimming is crucial. Select the audio region, then drag the yellow handles at the edges of the waveform to set precise loop points. This step helps avoid awkward silence or overlapping sounds at the loop boundaries. Unlike Apple Loops, non-Apple Loops do not automatically match your project’s tempo and key, so you need to adjust these manually using the Tempo and Transpose settings in the Track Editor.
Optimizing loop smoothness requires careful zooming in on the waveform to align the loop points with zero-crossings — points where the waveform crosses the center line. This reduces clicks or pops when the loop restarts. You may also apply fade-ins and fade-outs by dragging the small white fade handles on the audio region to smooth transitions.
- Open your GarageBand project and tap or click the Tracks area.
You should see your existing tracks and an empty space to add new audio. - Import your MP3 or WAV file by choosing File > Import > Audio File or dragging the file from the Files app.
The audio appears as a new region in the timeline. - Select the audio region and drag the yellow trim handles to isolate the part you want to loop.
The waveform updates to show only the trimmed section. - Enable looping by clicking the Loop button (circular arrow) on the region.
The region will repeat continuously. - Adjust tempo and key manually in the Track Editor by changing Tempo and Transpose controls to match your project.
The loop now fits better with other tracks. - Zoom in on the waveform and align loop points to zero-crossings to reduce audio clicks.
The loop playback sounds smooth without pops. - Optionally, apply fade-ins and fade-outs by dragging the fade handles on the audio region.
Transitions become less abrupt.
Keep in mind that non-Apple Loops lack the automatic adaptability of native Apple Loops, so matching tempo and key requires more manual fine-tuning. Additionally, complex time stretching may degrade audio quality more noticeably with imported files. However, with careful trimming and adjustment, you can effectively integrate your own MP3s and other audio files into GarageBand projects as custom loops.
How to loop and arrange Apple Loops to build a track
Building a dynamic track with Apple Loops involves more than just repeating a single loop. Start by creating loop sections and extending them to your desired length. In GarageBand, drag the loop’s right edge to lengthen it; this repeats the audio seamlessly, letting you customize the track duration. A simple loop repeated without variation can sound monotonous, so layering multiple loops for harmony and rhythm adds richness and depth.
To layer loops, add new tracks and drag different Apple Loops onto each. For instance, combine a drum loop with a bass loop and a keyboard chord progression to create texture. You should hear distinct parts blending smoothly since Apple Loops automatically match your project’s tempo and key, which helps maintain musical coherence.
Track automation is key to keeping your arrangement engaging. Use the Automation button (looks like a pair of scissors with a curve) to adjust volume, panning, or effects like reverb over time. For example, gradually increase a loop’s volume during a build-up or pan a loop from left to right to create movement. This prevents your track from sounding static and adds professional polish.
When arranging loops, vary their order and introduce breaks or transitions to avoid repetitiveness. You might mute some loops temporarily or add filter effects for variation. Apple Loops work well across styles: in rap, use tight drum and vocal loops to drive rhythm; in jazz, layer melodic loops with live instrument recordings for a natural feel. Comparing a simple, single loop repeated endlessly to a track with layered loops and automation illustrates how these techniques enhance musical interest and flow.
How to close GarageBand on iPhone properly
Closing GarageBand correctly on your iPhone helps prevent data loss and ensures your projects remain safe. Before closing, always save your current project by tapping My Songs in the top-left corner. This action automatically saves your work and takes you back to the project browser.
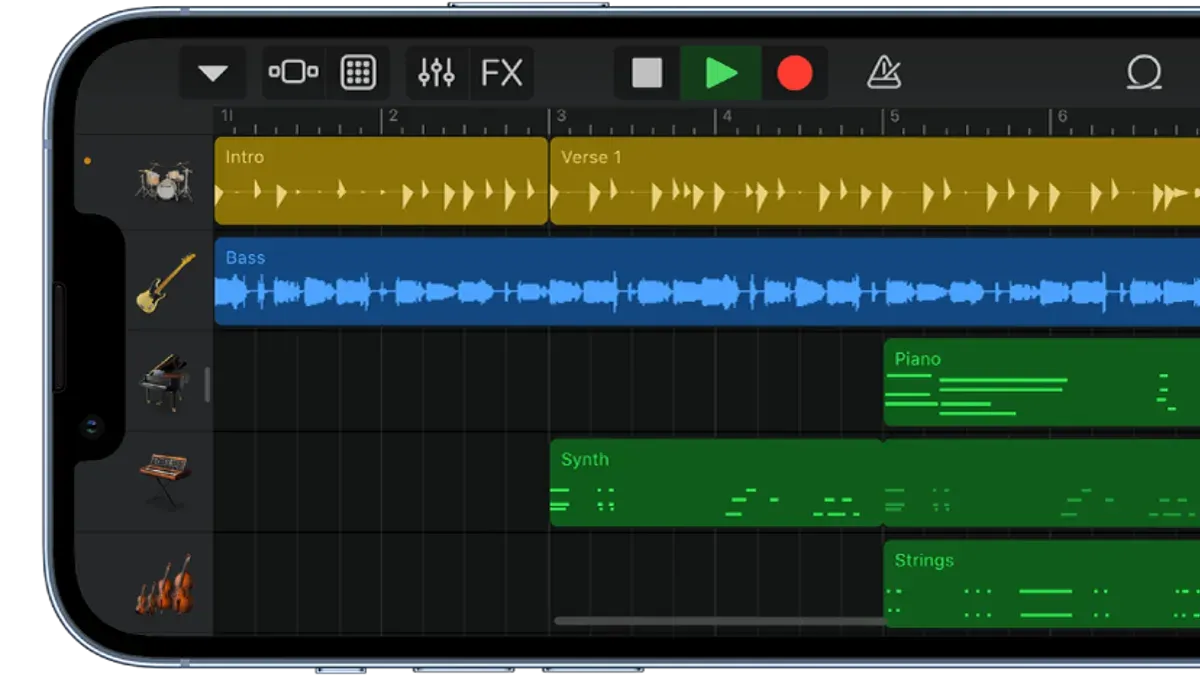
After saving, use the app switcher to close GarageBand. To do this, swipe up from the bottom edge of the screen and pause in the middle (or double-click the Home button on older iPhones). This displays the app switcher with all recently used apps as cards.
- Locate the GarageBand app card in the app switcher.
- Swipe the GarageBand card upwards off the screen. When the card disappears, the app has been closed.
Force quitting GarageBand is generally unnecessary because iOS manages app lifecycles efficiently. The system suspends apps in the background to save battery and resources without closing them entirely. Only force quit GarageBand if the app becomes unresponsive or behaves unexpectedly.
Remember that simply pressing the Home button or swiping to the Home screen does not close the app; it only puts it into the background. Using the app switcher method ensures GarageBand is fully closed if needed.
Troubleshooting common issues with Apple Loops in GarageBand
When Apple Loops don’t sync with your project’s tempo or key, first check your project settings. Go to Settings > Project and verify the tempo and key match your expectations. Apple Loops should automatically adapt, but if they don’t, manually adjust the project tempo or key to see if syncing improves.
If the Loop Browser is empty or does not display loops, confirm that GarageBand is fully installed and updated. Sometimes loops need to be downloaded separately; open GarageBand’s Sound Library > Download All Available Sounds to ensure all loops are present.
Performance lag when using multiple loops often results from insufficient device resources. Free up storage by deleting unused files and close background apps to reduce CPU load. On Mac, check Activity Monitor; on iPhone or iPad, close other apps via the app switcher. This can significantly improve playback smoothness.
If importing loops fails or you hear audio glitches, verify the file format compatibility. GarageBand supports AIFF, WAV, CAF, Apple Loops, and MP3s, but damaged or unsupported files can cause issues. Trim your audio clips before importing to reduce glitches and ensure smoother looping.
Remember, GarageBand is not available natively on Windows or PC platforms. Attempting to run it via emulators may cause errors and unpredictable behavior.
Common error messages and fixes
| Error Message | Likely Cause | Fix |
|---|---|---|
| "Loop file missing" | Loop not downloaded or deleted | Download loops via Sound Library |
| "Audio file incompatible" | Unsupported format or corrupted file | Convert file to WAV or AIFF, then re-import |
| "Project too large to play smoothly" | Too many tracks or loops consuming resources | Reduce track count, close apps, free storage |
Performance benchmark tips
- Check CPU and memory usage during playback; usage under 70% generally ensures smooth performance.
- Test playback with and without added effects to isolate performance drops.
- Keep your device’s operating system and GarageBand updated for optimal compatibility and efficiency.
Frequently asked questions
How to use apple garageband?
To use Apple Loops in GarageBand, start by opening the Loop Browser, which you can find by clicking the loop icon in the control bar on Mac or tapping the loop button on iPhone and iPad. From there, browse loops by instrument, genre, or mood, then drag or tap a loop to add it to your project timeline. You can adjust the length, pitch, and volume of loops to fit your track. Remember to save your project regularly to avoid losing progress.
How to loop in garageband?
Looping in GarageBand involves selecting a region or loop and extending it to repeat seamlessly. On Mac, drag the right edge of a region to the right to loop it. On iPhone or iPad, tap the region, then use the loop handles to drag and extend it. This repeats the audio or MIDI content, allowing you to build patterns easily. Double-check that your project tempo matches the loop’s tempo for smooth playback.
How to loop mp3 in garageband?
GarageBand does not natively recognize MP3 files as Apple Loops, but you can import MP3s by dragging them into your project. Once imported, convert the MP3 audio region into a loop by trimming the region to a precise length and then dragging its edge to loop. Adjust the tempo and use the Flex Time feature on Mac to align the MP3 loop with your project’s tempo. Note that looping MP3s may require extra editing to avoid audible glitches.
How to use garageband app on iphone?
Open GarageBand on your iPhone and start a new project or open an existing one. Access Apple Loops by tapping the loop icon and browse through the available loops. Tap a loop to preview and add it to your track. Use the track view to arrange loops and record new parts using on-screen instruments or an external MIDI device. Save your work by tapping the My Songs button and naming your project.
How to use garageband iphone?
Using GarageBand on iPhone involves creating or opening a song, adding loops or recording audio, and arranging tracks in the timeline. Tap the loop icon to add loops, or use the instrument icons to play and record sounds. You can adjust volume, pan, and effects for each track by tapping the mixer icon. To finish, save your song in the My Songs browser and export or share it as needed.
What This Guide Does Not Cover
This guide does not cover advanced music theory or professional mixing techniques beyond loop usage. If you want to create complex arrangements or master detailed audio engineering, consider exploring dedicated resources or software specialized for those purposes. GarageBand's loop features are optimized for Apple devices, so if you are a Windows or PC user, you will need to look for alternative music production software that supports similar loop functionality. Additionally, some third-party loops may require additional licensing; always verify the terms before using them in commercial projects to avoid legal issues.
The single most useful next step is to open GarageBand and start experimenting directly with Apple Loops on your device. Try dragging loops into your project, adjusting their length, and layering different sounds to get comfortable with how loops interact in real time. This hands-on practice is key to understanding the workflow and will help you gain confidence in building your own tracks efficiently.
See also: How to Use Smart Instruments in GarageBand: A Step-by-Step Guide · How to Make a Hip Hop Beat in GarageBand: Step-by-Step Guide · How to Export a Song as MP3 in GarageBand: Step-by-Step Guide · How to Remove Vocals from a Song in GarageBand: Step-by-Step Guide