How to Use Reactions in FaceTime on Mac: A Step-by-Step Guide
Discover how to quickly enable and use reactions in FaceTime on Mac to enhance your video calls with expressive animated responses.

You’re on a FaceTime call using your Mac and want to react to something someone just said, but you’re not sure how to quickly send those familiar animated reactions. Unlike on iPhone, using reactions on FaceTime on Mac offers a unique experience with different controls and gesture options. Knowing exactly how to enable and trigger these reactions can make your calls more engaging and expressive.
This article explains how to use reactions in FaceTime on Mac step-by-step. You'll learn how to turn on reactions, use them during calls, trigger them with your keyboard or trackpad, troubleshoot common issues, and even how to customize or disable them if you prefer. By the end, you’ll feel confident adding those visual responses to your FaceTime conversations on Mac.
Key takeaways
- FaceTime reactions on Mac require macOS Monterey or later and an active FaceTime call.
- Reactions can be triggered via click, keyboard shortcuts, or trackpad gestures.
- If reactions don’t appear, check your FaceTime settings and macOS updates.
- You can customize which reactions appear or turn them off entirely in FaceTime preferences.
Before you start: What you need to use FaceTime reactions on Mac
To use FaceTime reactions on your Mac, you need to meet certain hardware and software requirements. FaceTime reactions are supported on Macs running macOS Ventura or later versions. Older macOS versions do not support these reaction features, so updating your system is essential if you want to access them.
Your Mac model must be compatible with macOS Ventura or newer. Most Macs introduced in 2017 or later support these versions, but you can check your Mac's compatibility by visiting Apple's official support page. Using an Apple ID signed into FaceTime is also necessary, as reactions are tied to your FaceTime account.
A stable internet connection with sufficient upload and download speeds is important for smooth FaceTime calls and real-time reactions. Connection interruptions or slow speeds can cause delays or failures in showing reactions.
Before you begin, ensure FaceTime is enabled on your Mac. Open the FaceTime app, sign in with your Apple ID if you haven’t already, and grant permissions for the app to access your camera and microphone through System Settings > Privacy & Security. Without these permissions, FaceTime reactions may not display correctly or at all.
Note that FaceTime reactions on Mac differ slightly from those on iPhone in terms of how you trigger and view them, offering a user experience optimized for desktop interaction.
System Requirements for FaceTime Reactions
| macOS Version | FaceTime Reactions Supported |
|---|---|
| macOS Ventura and later | Yes |
| macOS Monterey and earlier | No |
- Check your Mac’s model by clicking the Apple menu > About This Mac. Confirm it supports macOS Ventura or later.
- Open System Settings > General > Software Update. If an update to macOS Ventura or newer is available, install it. Once updated, you should see FaceTime reaction options during calls.
- Launch the FaceTime app and sign in with your Apple ID if you haven't done so. You should see your account name at the top of the app window when signed in.
- Go to System Settings > Privacy & Security > Camera and Microphone. Make sure FaceTime is enabled to access both. When enabled, FaceTime reactions will have the necessary permissions to function.
- Test your internet connection speed using a reliable online speed test. Aim for at least 5 Mbps upload and download speeds for optimal FaceTime reaction performance.
How to turn on reactions on FaceTime on Mac
To start using reactions during your FaceTime calls on Mac, you first need to make sure the feature is enabled in your settings. This process involves checking FaceTime itself and possibly adjusting system permissions or notification settings to ensure reactions work smoothly.
- Open the FaceTime app on your Mac. You can find it in the Applications folder or search for it using Spotlight.
- From the menu bar at the top of your screen, click FaceTime and then select Preferences from the dropdown menu. This opens the FaceTime settings window.
- In the Preferences window, look for an option labeled Reactions or similar. If you see a checkbox or toggle for reactions, make sure it is turned on. Enabling this activates the reactions feature for your FaceTime calls.
- If you don’t see a reactions option in FaceTime preferences, check your macOS version by clicking the Apple menu and selecting About This Mac. Reactions require macOS Ventura or later, so if you have an earlier version, you will need to update your system.
- Next, ensure FaceTime has permission to send notifications, as reactions often rely on notification settings. Open System Settings, go to Notifications, find FaceTime in the app list, and make sure notifications are allowed.
- Close the Preferences window and restart FaceTime to apply the changes. When you start a call, reactions should now be available to use.
After completing these steps, you should see confirmation that reactions are enabled, such as reaction icons appearing during calls or options to trigger reactions in the call interface.
How to use reactions on FaceTime on Mac during a call
- During an active FaceTime call, move your cursor to the FaceTime window to reveal the control bar.
- Click the Reactions button—it looks like a smiling face icon—located on the right side of the control bar. This opens the reactions menu.
- In the reactions menu, you will see several reaction options including Heart, Thumbs Up, Thumbs Down, Clap, and Star. These are the standard Apple FaceTime reactions available on Mac.
- Click the reaction you want to send. Once selected, the reaction animation will play on your video tile and appear on all participants’ screens in the call.
- Observe how the reaction animates briefly over your video feed and is visible to others, providing an expressive, real-time response.
- Note that reaction animations on Mac are designed to fit the larger screen and have subtle differences from iPhone reactions, which include effects like balloons or confetti. The Mac reactions focus on clean, simple overlays rather than full-screen effects.
For example, if you click the Clap reaction during a call, you will see animated clapping hands appear briefly over your video, and other participants will see this animation on their screens as well. On iPhone, the same reaction might trigger a more elaborate animation across the full screen, but on Mac, it stays confined to the video tile for a less intrusive experience.

How to make reactions on FaceTime on Mac with keyboard and trackpad
To quickly add reactions during your FaceTime calls on Mac, you can use keyboard shortcuts and trackpad gestures. These methods offer a faster, more fluid way to express yourself without navigating through menus.
- Use keyboard shortcuts: Press Control + Command + R to open the reactions menu instantly. Then use the arrow keys to select a reaction like Heart, Thumbs Up, or Clap, and hit Return to send it. When done correctly, the reaction animation appears on the video tile.
- Trigger specific reactions directly: Some macOS versions allow direct shortcut keys, for example, Control + Command + H for Heart or Control + Command + C for Clap. Check your FaceTime shortcuts in System Preferences under Keyboard Shortcuts > App Shortcuts and customize if necessary.
- Use the trackpad: During a call, perform a three-finger tap or force click on the participant’s video tile to bring up the reaction options quickly. Then click the desired reaction to send it. This gesture reduces extra clicks and keeps your focus on the call.
- Accessibility tips: If you use VoiceOver or other assistive technologies, keyboard shortcuts help navigate reactions smoothly without relying on the mouse. Customizing shortcut keys can also ease your interaction.
By mastering these keyboard and trackpad methods, you can react more promptly and naturally during FaceTime calls on your Mac, making conversations livelier and more engaging.
How to activate FaceTime reactions if they are not working
If you notice that FaceTime reactions are not appearing or functioning on your Mac, several common issues could be the cause. Start by confirming that both your macOS and FaceTime app are fully updated. Outdated software may lack the necessary features or fixes to support reactions properly.
- Check for updates: Open System Settings, go to General > Software Update, and install any available macOS updates. Then, open the App Store, click on your profile, and update FaceTime if an update is listed. Once updated, you should see improved reaction functionality.
- Verify your internet connection and FaceTime server status: A weak or unstable connection can prevent reactions from syncing. Test your internet speed and stability, and visit Apple's System Status page to ensure FaceTime services are operational. A stable connection and active servers should enable reactions to work smoothly.
- Ensure all call participants have reactions enabled: Reactions only appear if everyone in the call has the feature enabled and is running compatible software. Ask participants to verify their settings and updates; otherwise, reactions may not display correctly.
- Reset FaceTime preferences or log out and back in: Sometimes, corrupted settings cause issues. To reset, open FaceTime, go to FaceTime > Preferences > Settings, sign out of your Apple ID, then sign back in. Upon rejoining a call, reactions should activate properly.
- Understand common error messages: Errors like "Reactions not supported" usually indicate version mismatches or disabled settings. Addressing updates and preferences as above typically resolves these errors.
After following these steps, users often report that reactions begin working as expected, with animations appearing promptly on video tiles. If problems persist, consider restarting your Mac or contacting Apple Support for further assistance.
How to use iPhone reactions on FaceTime when calling from Mac
When you join a FaceTime call from your Mac with participants using iPhones, the reactions you see and send adapt to the device capabilities. Mac FaceTime reactions are simpler animations overlayed on video tiles, while iPhone reactions often feature full-screen effects and more variety. Despite these differences, the essential reaction types like Heart, Thumbs Up, and Clap are compatible and displayed appropriately across devices.
Mac users can send reactions using the standard Mac set, and iPhone participants will see these as compatible animations on their screens. Conversely, if iPhone users trigger reactions unique to their devices, such as full-screen heart bursts, Mac users will see a simplified version that fits the Mac’s reaction style. This cross-device behavior ensures everyone experiences visible responses, even if the visual richness varies.
To maintain consistency in mixed-device calls, focus on the common reactions supported by both platforms. Avoid relying on iPhone-exclusive reactions if you want all participants to see similar effects. This approach helps keep communication clear and engaging regardless of device.
| Reaction Type | Mac Appearance | iPhone Appearance |
|---|---|---|
| Heart | Overlayed heart animation on video tile | Full-screen heart bursts |
| Thumbs Up | Simple thumbs-up overlay | Full-screen thumbs-up effect |
| Clap | Clapping hands overlay | Full-screen clapping animation |
| Fireworks (iPhone-only) | Not displayed or replaced by default animation | Full-screen fireworks effect |
- Start a FaceTime call on your Mac with at least one participant using an iPhone. You should see the call interface with participant tiles.
- Open the reactions menu on your Mac during the call by clicking the reactions button. The menu displays the standard Mac reaction set.
- Select a reaction like Heart or Clap. The animation will appear on your video tile and on iPhone participants’ screens, adapting to their device’s style.
- Observe any reactions sent by iPhone users. On your Mac, these will appear as simplified overlays matching Mac reaction visuals.
- For consistent experience, encourage participants to use reactions common to both platforms. This minimizes confusion caused by device-specific effects.
How to customize FaceTime reactions on Mac
FaceTime reactions on Mac offer limited official customization options, focusing mainly on controlling notifications and sound effects. You can adjust these settings to tailor your experience during calls, but Apple does not currently provide options to change reaction animations or add new ones directly within FaceTime.
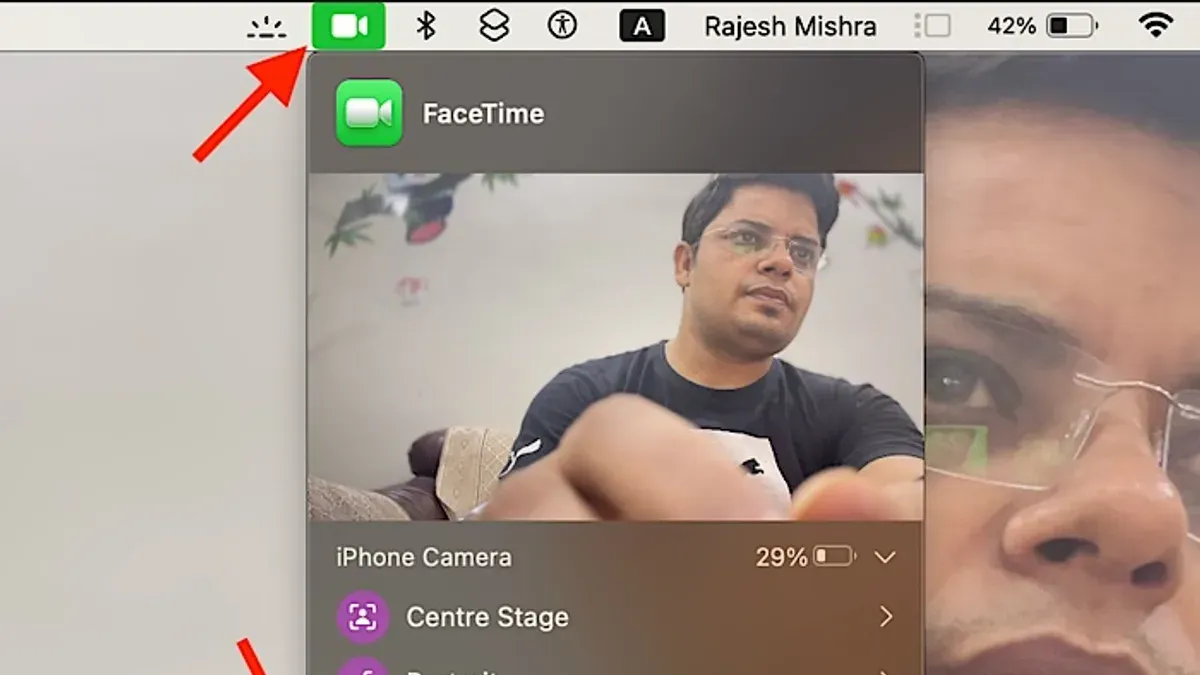
- Open the FaceTime app on your Mac, then click FaceTime in the menu bar and select Preferences. You should see the main settings window.
- In Preferences, look for the Reactions section. Here, you can toggle the sound effects for reactions on or off. When enabled, you will hear a subtle sound accompanying each reaction.
- To manage how reaction notifications behave during calls, open System Settings (or System Preferences depending on your macOS version), then navigate to Notifications & Focus > FaceTime. You can customize alert style and whether banners or sounds appear when reactions are sent.
- Currently, there are no official settings to alter the visual style or timing of reactions on Mac. Apple maintains a consistent, simple overlay distinct from the iPhone’s full-screen animations.
- Regarding third-party enhancements, there are no widely recognized apps or extensions that integrate with FaceTime to expand or customize reaction features. Apple’s closed system limits external modifications for security and stability.
While customization is modest, adjusting sound and notification preferences helps you control how reactions impact your call experience without distractions.
How to turn off reactions on FaceTime on Mac
If you find FaceTime reactions distracting or simply unnecessary during your calls, you can easily disable them through the FaceTime preferences. Turning off reactions stops animations and sound effects from appearing on your and other participants' screens, creating a quieter call experience. You can always re-enable reactions later if you change your mind.
- Open the FaceTime app on your Mac and click FaceTime in the top menu bar, then select Preferences. You should see the Preferences window open.
- In the Preferences window, locate the Reactions section. Here, uncheck the box labeled Enable Reactions. This disables the reactions feature.
- Close the Preferences window. You will no longer see reaction animations or hear reaction sounds during calls, confirming that reactions are turned off.
Before disabling reactions, consider whether you want to miss out on the quick, expressive feedback they provide during conversations. Some users find reactions enhance communication, while others prefer a distraction-free call. If you decide to turn reactions back on later, simply follow these steps again and check the Enable Reactions box.
User feedback often notes that disabling reactions can help maintain focus in professional or large group calls where animations might interrupt the flow. Make sure to communicate your preference with frequent call participants if it affects shared call experiences.
Frequently asked questions
How to enable reactions on facetime?
To enable reactions on FaceTime, open the FaceTime app on your Mac and start or join a call. Reactions are enabled by default in recent macOS versions, but ensure your Mac is updated to at least macOS Monterey or later. If reactions don’t appear, check System Preferences under Notifications to allow FaceTime notifications, as reactions rely on this setting.
How to trigger reactions on facetime?
During a FaceTime call on your Mac, hover over the video or click the reactions button (a smiley face icon) in the call controls. Select the reaction you want, such as a heart, thumbs up, or clap, and it will animate on the screen. You can also use keyboard shortcuts or trackpad gestures if configured, making it quick to respond without interrupting the conversation.
How to facetime on mac?
To FaceTime on Mac, open the FaceTime app and sign in with your Apple ID. Enter the contact’s email or phone number in the search bar, then click the video or audio call button to start. You can join group calls by adding multiple contacts before starting or by accepting an invite link.
How to turn on reactions in facetime?
Reactions are automatically active if your Mac supports them and is running a compatible macOS version. If reactions aren’t working, check that FaceTime has permission under System Preferences > Notifications. Also, make sure Low Power Mode is off, as it can disable animations including reactions.
How to enable reactions on FaceTime?
Enabling reactions involves making sure your Mac is updated and FaceTime notifications are allowed. Open System Preferences, go to Notifications, select FaceTime, and enable Allow Notifications. This ensures reactions display properly during calls. No additional toggle inside FaceTime is needed for reactions themselves.
What This Guide Does Not Cover
This guide focuses specifically on using FaceTime reactions on Mac and how they interact with iPhone reactions during cross-device calls. It does not provide detailed instructions for reactions on iOS devices alone or cover third-party FaceTime alternatives and unofficial modifications. If you are looking for advanced customization beyond the built-in FaceTime features or need help with FaceTime on other platforms, you may want to consult specialized resources or Apple Support.
The single most useful next step is to open FaceTime on your Mac and start a call with a contact who also uses an Apple device. This hands-on approach allows you to practice enabling, triggering, and customizing reactions in real time, helping you become comfortable with the process and troubleshoot any issues as they arise.
See also: How to Export Chat History in Messages on Mac: Step-by-Step Guide · How to Stop Messages Syncing to Your Mac in Messages App · How to Send SMS from Mac Using Messages: Step-by-Step Guide