Master Smart Conform in Final Cut Pro: Step-by-Step Editing Guide
Discover how to use Smart Conform in Final Cut Pro to automate cropping and reframing for perfectly framed videos across platforms.
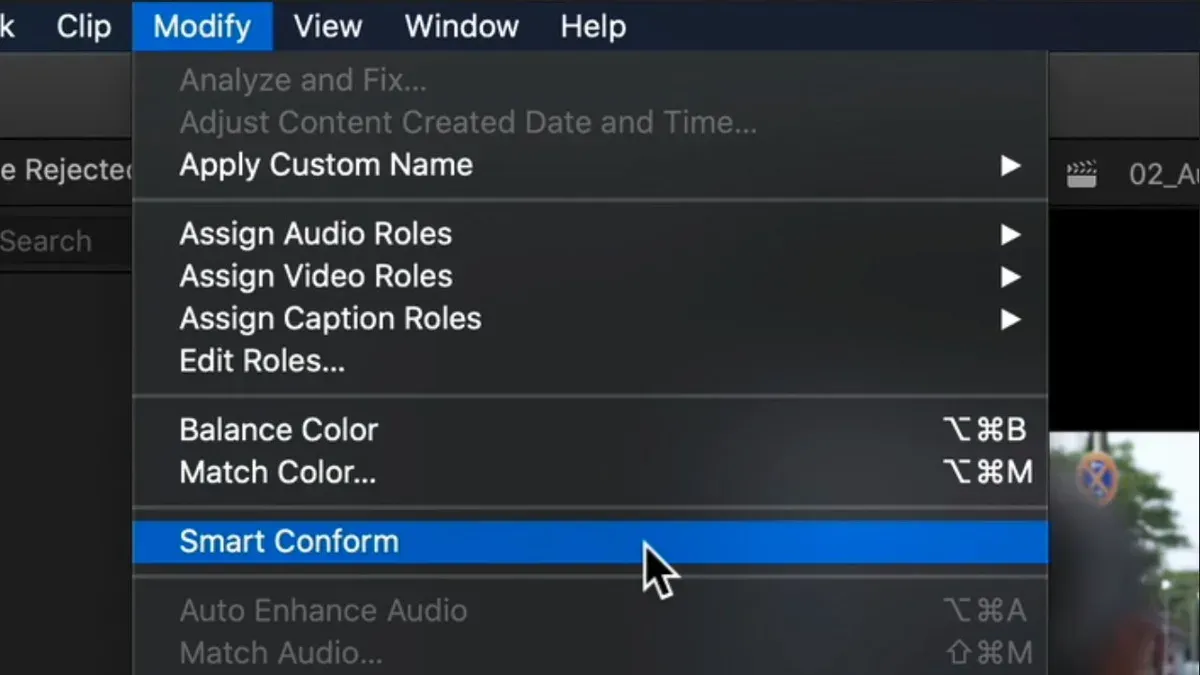
You have a project with footage shot in various aspect ratios, and you need to create perfectly framed videos for Instagram, YouTube, and other platforms. Manually adjusting each clip to fit different formats can be tedious and time-consuming.
This article explains how to use Smart Conform in Final Cut Pro to automate reframing and cropping, helping you maintain focus on key subjects across aspect ratios. You'll learn where to find Smart Conform, how to activate it on clips, and how to integrate it within your broader editing workflow, including text tracking and sequence setup. Step by step, you'll gain practical skills to optimize your editing process and deliver versatile, well-framed videos efficiently.
Key takeaways
- Activate Smart Conform in the Video Inspector to automatically crop clips for different aspect ratios.
- Set up your project sequence settings to match your target output before applying Smart Conform.
- Use tracking adjustments to keep text aligned and readable when clips are reframed.
- Copy color corrections and effects between clips to maintain consistent looks after Smart Conform.
- Troubleshoot common issues like misframed subjects by manually adjusting the crop or anchor point.
Before you start: Prepare your Final Cut Pro project for Smart Conform
Ensuring your project is properly prepared sets the stage for an effective Smart Conform workflow. Begin by checking the native aspect ratios and resolutions of your video clips. For example, you may have a mix of 1920x1080 (16:9) and 1080x1920 (9:16) footage. Knowing these details helps you anticipate how Smart Conform will automatically reframe your clips.
Next, review your sequence settings by selecting the timeline and choosing Modify > Properties. Confirm the resolution and frame rate match your intended output, such as 1920x1080 at 30fps. This ensures consistent playback and editing behavior when Smart Conform is applied.
Make sure your Final Cut Pro application is updated to the latest version. Smart Conform features rely on recent updates, so accessing the App Store > Updates and installing any available updates is essential.
Organize your media into clearly labeled libraries and events. For example, grouping clips by aspect ratio or project section speeds up your workflow and helps you locate content quickly. A tidy library view with thumbnail previews aids visual confirmation before editing.
Finally, back up your project before applying Smart Conform. Duplicate your library or export a project archive via File > Duplicate Project as Snapshot. This precaution preserves your original edits and settings in case you need to revert changes after reframing.
- Open your Final Cut Pro library and identify all clip aspect ratios using the Inspector. You should see detailed resolution info for each clip.
- Check sequence settings under Modify > Properties. Confirm frame size and frame rate reflect your desired output; the timeline should display these settings.
- Open the App Store and navigate to Updates. If Final Cut Pro requires updating, install the latest version and relaunch the app.
- Organize clips into events named by aspect ratio or content type. The sidebar should show your labeled events and grouped clips.
- Duplicate your project via File > Duplicate Project as Snapshot. Verify the new snapshot appears in your library, ready for Smart Conform editing.
What is Smart Conform in Final Cut Pro and how does it work?
Smart Conform is an automatic reframing feature in Final Cut Pro designed to adjust your clips to fit different aspect ratios seamlessly. Unlike manual cropping, where you select and reposition the frame yourself, Smart Conform uses face detection and area prioritization algorithms to identify key subjects in the footage. This ensures that faces and important elements remain centered and visible when adapting clips for formats such as square, vertical, or widescreen.
Final Cut Pro analyzes each clip by scanning for faces and motion within the frame. The software then intelligently crops or zooms to keep these focal points in view while conforming to the target aspect ratio. This process eliminates the need for time-consuming manual adjustments and helps maintain visual consistency across multiple platforms.
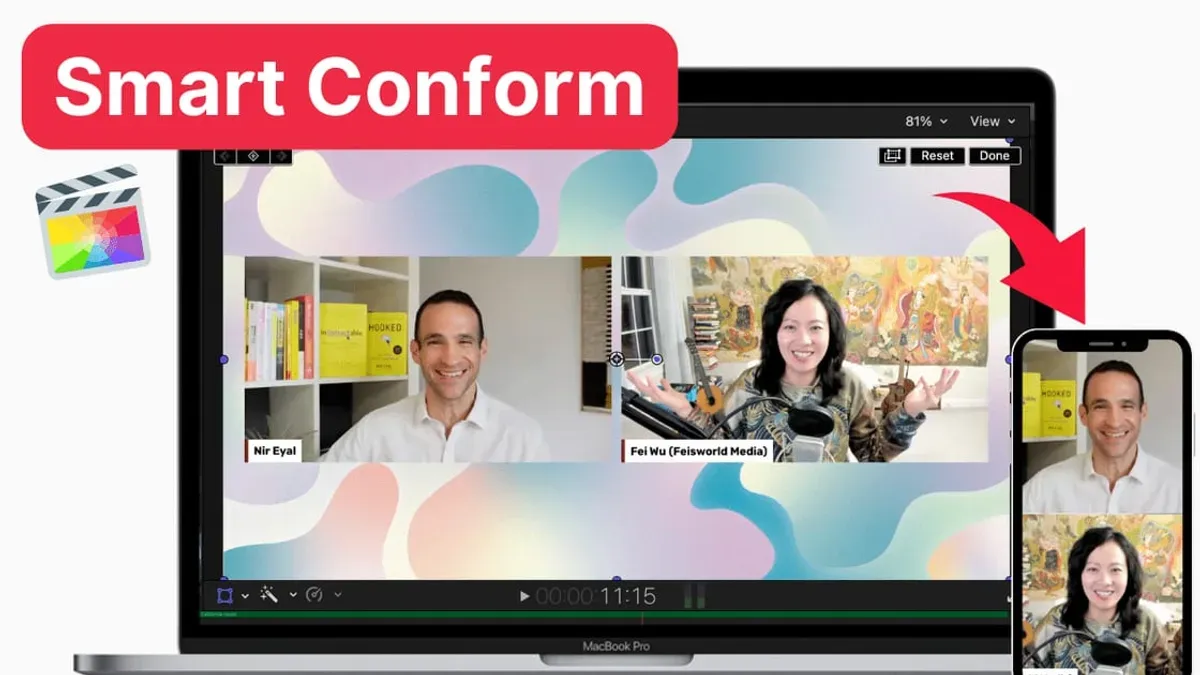
Use cases for Smart Conform include preparing content for social media platforms like Instagram and TikTok, which often require vertical or square videos, as well as multi-platform delivery where a single project needs to be output in various formats. Comparing side-by-side clips, the Smart Conform version preserves key visual elements better than a basic manual crop, which can inadvertently cut off important parts of the subject.
Where is Smart Conform in Final Cut Pro and how to activate it on clips
To locate Smart Conform, first select a clip in your timeline. Then, open the Inspector panel by clicking the button that looks like a slider icon in the upper-right corner of Final Cut Pro. In the Inspector's Video tab, you will find the Smart Conform checkbox near the Transform controls. This is where you enable Smart Conform for individual clips.
- Select the clip you want to reframe in your timeline. The clip should be highlighted.
- Open the Inspector panel by clicking the slider icon in the top-right area; the Video tab should be active by default.
- Scroll down slightly to locate the "Smart Conform" checkbox under the Transform section.
- Check the box to activate Smart Conform; the clip will automatically adjust its framing based on detected faces and key elements.
To apply Smart Conform to an entire timeline, select all clips or create a compound clip first, then enable Smart Conform in the Inspector for that selection. This method saves time when working with many clips requiring the same reframing.
If you want to adjust how Smart Conform works, click the gear icon next to the checkbox to access preferences like face detection sensitivity or framing style. These settings help fine-tune the reframing effect to your needs.
Should you need to disable Smart Conform, simply uncheck the box. The clip will revert to its original framing without any cropping or repositioning.
Visual guides in the interface highlight the Smart Conform controls when you hover over them, providing immediate feedback. This helps confirm you are activating the correct function.
How to use Final Cut Pro to smart conform clips for different aspect ratios
To reframe clips for formats like square (1:1) or vertical (9:16), start by changing your project’s aspect ratio. Go to Modify > Project Properties, then click Change next to Video Properties. Select the desired resolution and aspect ratio, such as 1080x1080 for square or 1080x1920 for vertical. Confirm the change to update the timeline accordingly.
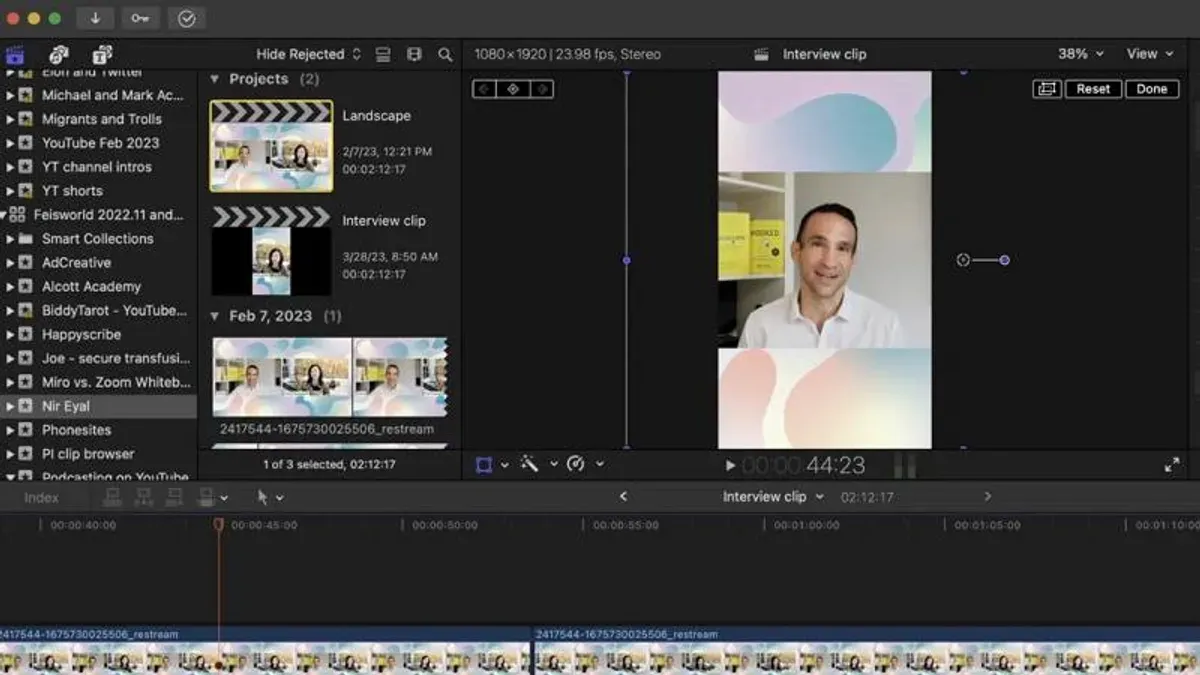
Next, apply Smart Conform to your clips if not already enabled. Final Cut Pro will automatically detect faces and key areas to reframe the clip for your new aspect ratio. Review each clip in the timeline to check how the reframing looks side-by-side with the original 16:9 version. You can toggle between these to compare framing.
If Smart Conform misses important content, adjust the framing manually. Select the clip, open the Inspector, and use the Transform controls to reposition or scale the clip. Keyframes can be added to animate framing changes over time, ensuring critical elements remain in view throughout the clip.
Once satisfied, export your project using File > Share and choose the appropriate preset for your target platform. The reframed timeline will output videos perfectly tailored to the new aspect ratio, ready for social media or other uses.
- Change project aspect ratio: Go to Modify > Project Properties, click Change, select new resolution (e.g., 1080x1080), and confirm. Your timeline updates to the chosen format.
- Enable Smart Conform on clips (if not already): Select a clip, open Inspector > Video tab, check Smart Conform. Final Cut Pro reframes clips automatically.
- Review reframed clips: Compare the reframed clip with the original 16:9 version by toggling clips or using split view to ensure key content is preserved.
- Tweak framing manually if needed: Use Inspector > Transform controls to reposition or scale clips, adding keyframes for dynamic adjustment if necessary.
- Export the reframed sequence: Use File > Share to export your project in the new aspect ratio, ensuring the output matches your target platform’s requirements.
How to track text in Final Cut Pro while using Smart Conform
Smart Conform reframes your clips by focusing on faces and key areas, which can shift the visual composition. To keep your text elements aligned with moving subjects, especially faces, you need to use Final Cut Pro’s built-in tracking tools. This ensures text stays properly positioned even after Smart Conform adjusts the framing.
Start by selecting the clip with Smart Conform applied. Use the Tracker located in the Video Inspector under the Transform controls to track the subject's movement. You can link your text element to the tracking data by parenting or attaching it to the tracked object, so it moves in sync.
- Select your Smart Conform-adjusted clip and open the Video Inspector.
- Click the Tracker button and draw a tracking box around the face or subject you want the text to follow; you should see the tracking analysis start automatically.
- Once tracking finishes, add a text title to your timeline and position it near the tracked subject.
- In the timeline, select the text and use the Attach To option to link it to the tracked clip or tracking data; the text will move along with the subject.
- Play back the timeline to confirm the text stays aligned with the moving subject within the Smart Conform frame.
After Smart Conform reframing, you can still edit text properties like font, size, and color as usual. If the text position needs fine-tuning, adjust its transform controls while watching the clip playback to maintain consistent alignment.
For example, when tracking a moving face, the timeline shows the tracking keyframes applied to the text layer. This visual confirmation helps you understand how the text follows the subject, avoiding awkward shifts caused by Smart Conform’s reframing.
How to copy color settings and other effects when using Smart Conform
Maintaining a consistent visual style is crucial when using Smart Conform to reframe clips. To copy color grading and effects between clips with Smart Conform applied, start by selecting the source clip that has the desired color settings and effects. Use Command+C or right-click and choose Copy to copy those attributes.
Next, select the target clip where you want to apply the settings. Right-click and choose Paste Attributes. In the dialog box, make sure Color Board, LUTs, and any relevant filters are checked before confirming. This ensures all visual adjustments transfer correctly.
Because Smart Conform scales clips to fit different aspect ratios, verify that effects like color grading and LUTs maintain their appearance after reframing. Review the clip in the Viewer and compare it side-by-side with the original. If you notice any color shifts or inconsistencies, adjust the color settings slightly to compensate.
- Select the source clip with your finalized color grading and effects. You should see the color board and effects applied in the Inspector.
- Press Command+C or right-click and select Copy. This copies all applied attributes.
- Select the clip that has Smart Conform enabled and requires the same color look.
- Right-click the clip and choose Paste Attributes. In the popup, check Color Board, LUTs, and any other effects you want to transfer, then click Paste. The clip should now reflect the source's color and effect settings.
- Play the clip and compare it with the original to confirm consistent color grading. If colors appear off, open the Color Board and fine-tune exposure or saturation slightly.
Following these steps helps avoid common issues where color grading appears distorted or inconsistent after reframing. Managing LUTs and filters alongside Smart Conform ensures your video maintains a cohesive look across all aspect ratios.
How to change sequence settings in Final Cut Pro for Smart Conform workflows
Adjusting your sequence settings in Final Cut Pro is essential to optimize Smart Conform for different output formats like social media or broadcast. To start, open your project and select the timeline you want to modify. Then, navigate to the top menu and click Modify > Project Properties. Here, you can customize the resolution, frame rate, and aspect ratio to fit your target platform's requirements.
For example, changing from a 16:9 widescreen sequence to a 9:16 vertical format involves setting the resolution to 1080 x 1920 pixels. After applying this change, Smart Conform will automatically reframe your clips to suit the new aspect ratio, focusing on detected faces and key action points. You may notice some clips need manual adjustment to perfect the composition post-reframe.
Keep in mind that changing sequence settings affects all clips in the timeline, so existing clips will reorient according to the new aspect ratio. It's helpful to create separate sequences for different platforms (like Instagram Stories vs. YouTube) to maintain organized workflows and prevent unintentional changes.
- Open your Final Cut Pro project and select the timeline you want to change. You should see your current sequence timeline in the viewer.
- Go to the menu and choose Modify > Project Properties. A window with sequence settings will appear.
- Under Video Properties, change the resolution to 1080 x 1920 for a vertical video. Confirm the frame rate matches your source footage, such as 30 fps.
- Click OK to apply the new settings. The timeline will update to the new aspect ratio, showing black bars or shifted clips if they don’t fit perfectly.
- Review clips in the timeline. Smart Conform will automatically reframe most clips, but adjust any poorly framed shots manually using the Transform controls.
- Save your project and consider duplicating the sequence before changing settings if you want to preserve your original edits for other platforms.
How to edit text and add fonts in Final Cut Pro alongside Smart Conform
After applying Smart Conform to your clips, you may need to adjust text layers to ensure they remain well-positioned and legible. Select the text clip in the timeline and open the Text Inspector. Here, you can edit the content, font size, color, and alignment. Make sure to review your text overlay in different aspect ratios because Smart Conform reframes the clip, which can shift text placement unexpectedly.
- Click the text clip in your timeline. The Text Inspector appears on the right side.
- Edit your text content and adjust font size and style. You should see the text update in the Viewer immediately.
- Drag the text layer in the Viewer to reposition if needed. The text should stay within the visible frame after reframing.
- Scrub through the clip to check text alignment throughout the sequence.
To add new fonts, close Final Cut Pro and install the fonts via the Font Book on your Mac. After installation, reopen Final Cut Pro and your new fonts will appear in the font dropdown menu in the Text Inspector.
When working with vertical or square videos, choose font sizes and layouts that maximize space without overcrowding. Use bold, high-contrast fonts to maintain readability on smaller screens. Avoid placing text too close to the edges, as Smart Conform adjustments might crop or move it.
Confirm text visibility by viewing the project in its target aspect ratio. If text appears cut off or too small, return to the Text Inspector and fine-tune font size and position. Comparing font styles side-by-side in different aspect ratios helps determine the best choice for clarity and style.
Troubleshooting common issues when using Smart Conform in Final Cut Pro
Smart Conform is a powerful tool, but you may encounter some common issues while using it. One frequent problem is Smart Conform not detecting faces or key areas correctly, which can result from clips with low resolution, fast motion, or obscured subjects. To resolve this, try enhancing clip quality before applying Smart Conform or manually adjust reframing in the Inspector’s Transform controls.
Another issue is reframing clipping important content, such as text or graphics near the edges. If this happens, review each clip’s framing and override automatic settings by disabling Smart Conform on that clip, then manually reposition it. This approach ensures critical elements remain fully visible.
Performance slowdowns are common with large projects or complex timelines. To mitigate this, work with proxy media or temporarily disable background rendering during Smart Conform application. This can noticeably improve responsiveness without compromising final output quality.
Sometimes, exported videos show quality degradation after reframing. Verify that your project and export settings maintain the original resolution and bitrate. Avoid excessive scaling which can cause pixelation; if needed, refine framing manually to balance composition and quality.
If Smart Conform repeatedly fails to deliver satisfactory results, consider manual reframing. This is particularly useful for clips with unusual compositions or where artistic control is essential. Manual adjustments give you precise control over framing that automatic tools might miss.
- Identify the issue by observing clip behavior after applying Smart Conform. If faces aren’t detected, proceed to step 2.
- Enhance clip quality or switch to a higher-resolution source, then reapply Smart Conform. Confirmation: faces or key areas are now detected automatically.
- If important content is clipped, disable Smart Conform on that clip and manually adjust framing. Confirmation: critical elements are fully visible.
- For slow performance, enable proxy media via File > Transcode Media > Create Proxy Media, then retry editing. Confirmation: smoother timeline performance.
- Check export settings under File > Share > Settings to ensure resolution and quality match the source. Confirmation: exported video retains clarity.
- If auto reframing remains unsatisfactory, manually adjust clips frame-by-frame. Confirmation: final framing matches your intended composition.
Frequently asked questions
How to smart conform in final cut pro?
To smart conform a clip, select it in your timeline or browser, then open the Inspector and find the "Spatial Conform" setting. Choose "Smart Conform" from the dropdown menu to let Final Cut Pro automatically analyze and crop your clip for the target aspect ratio. This helps ensure key subjects remain centered when converting between formats like 16:9 to 1:1 or 9:16.
How to copy color settings in final cut pro?
Select the clip with the desired color adjustments, then press Command+C to copy. Next, select the clip(s) you want to apply these settings to, right-click and choose "Paste Attributes." In the dialog, check "Color" and any other effects you want to transfer before clicking "Paste." This copies color corrections without affecting other clip properties.
How to edit text in final cut pro?
Click on the text layer in your timeline or viewer to select it. Open the Text Inspector to modify content, font, size, and alignment. You can also adjust tracking, line spacing, and apply animation presets to customize the text appearance directly within the editing interface.
How to add fonts to final cut pro?
First, install your desired fonts into your Mac’s Font Book application. Once installed and activated there, restart Final Cut Pro if it was open. The new fonts will then be available in the Text Inspector font menu for use in any project.
how to use final cut pro
Start by creating a new library and event, then import your media files. Organize clips in the browser, drag them onto the timeline to build your sequence, and use tools like the Blade and Trim for precise edits. Apply effects, transitions, and adjust audio levels through the Inspector before exporting your final video.
Understanding the Limits of Smart Conform
Smart Conform in Final Cut Pro works best when your clips have clearly framed subjects and relatively stable motion. If your footage includes complex camera movements, multiple faces, or overlapping subjects, Smart Conform may not perfectly track the framing, requiring you to manually adjust keyframes for precise control. This guide focuses solely on using Final Cut Pro's built-in Smart Conform tools and does not cover advanced manual keyframe animation or the use of third-party plugins for reframing and tracking.
For projects demanding intricate motion tracking or advanced reframing techniques, consider complementing Smart Conform with manual adjustments or specialized plugins designed for those purposes. Doing so ensures your final output maintains professional-level precision across all aspect ratios.
Now that you understand Smart Conform’s capabilities and limitations, the most useful next step is to experiment with sequence settings tailored for your target platforms. Setting your project’s resolution and aspect ratio upfront, such as choosing a 9:16 sequence for vertical video, will help Smart Conform automatically optimize your clips and reduce the need for later corrections.
See also: How to Create Speed Ramps in Final Cut Pro: A Step-by-Step Guide · How to Create Compound Clips in Final Cut Pro: A Step-by-Step Guide · How to Use Keyframes in Final Cut Pro: Step-by-Step Guide · How to Delete Render Files in Final Cut Pro: Step-by-Step Guide