
How to Add Live Camera Video in Keynote: A Step-by-Step Guide
Discover how to add live camera video in Keynote with easy steps to enhance your presentations with real-time video feeds.
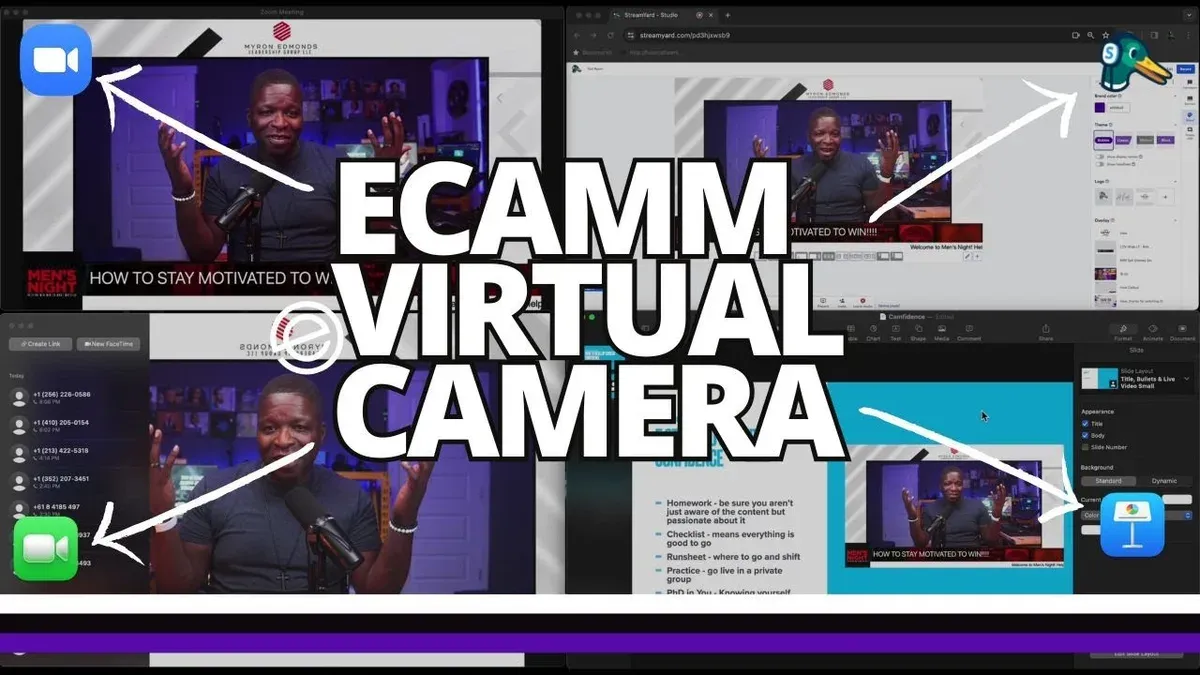
Preparing a Keynote presentation and wanting to include a live video feed from your camera can make your content much more engaging. You might wonder how to add live camera video in Keynote to show yourself or a live demonstration directly within your slides.
This guide walks you through everything you need to know to set up a live camera feed inside your Keynote presentation. From the necessary tools and third-party apps to inserting and managing the live video, you'll get clear, step-by-step instructions to confidently enhance your presentations. You'll also learn how to troubleshoot common issues and use additional Keynote features like speaker notes alongside your live video.
Key takeaways
- You need a third-party app like CamTwist or OBS to capture live camera video for Keynote integration.
- Insert the live video feed as a window or screen capture within Keynote slides for real-time display.
- Use Keynote’s layering tools to combine live video with images or other slide elements.
- Adding speaker notes helps you stay on track when presenting with live video.
- Common issues include camera permissions and app compatibility, which can be resolved through settings adjustments.
Before you start: What you need to add live camera video in Keynote
To add live camera video to your Keynote presentation, you need a compatible device and some preparation. Keynote itself does not natively support direct live video input, so you will use third-party apps or workarounds to integrate a live feed. Make sure your Mac or iPad has a built-in camera or an external webcam connected. Devices like the MacBook Pro (2016 or later), MacBook Air (2018 or later), iMac (2017 or later), and recent iPad Pro or iPad Air models are well-suited for this task.
Check that your Keynote app is updated to the latest version available on the App Store to ensure compatibility with video input workflows. Typical frame rates for live camera video range from 24 to 30 frames per second, depending on your device’s processing power and the capture method you use. Using an external webcam or a video capture device via USB or Thunderbolt can improve video quality and stability.
Before proceeding, grant Keynote and any third-party app you plan to use permission to access your camera and microphone. You can do this by going to System Preferences > Security & Privacy > Privacy > Camera and Microphone on a Mac, or Settings > Privacy > Camera and Microphone on an iPad. Without these permissions, the video feed will not function correctly.
- Confirm your device model supports camera input and runs the latest Keynote version.
You should see your device name and current Keynote version in the App Store or About This Mac. - Connect an external webcam or video capture device if you prefer higher video quality.
The device should appear as a selectable camera source in your system settings. - Open System Preferences (Mac) or Settings (iPad) and navigate to Privacy > Camera and Microphone.
Ensure Keynote and your third-party app have toggled permission for both camera and microphone. - Install any required third-party software that enables live video feed capture compatible with Keynote.
After installation, the app should display your live camera feed ready for integration.
Use a third-party app to capture live camera video
To add live camera video into Keynote, you need a virtual camera app that captures your camera feed and outputs it as a video source Keynote can recognize. Popular options include OBS Studio, Ecamm Live, and ManyCam, each varying in setup complexity and features. OBS Studio is free and open source but requires more initial configuration, while Ecamm Live offers user-friendly controls at a cost, and ManyCam balances usability and features.
- Download and install your chosen virtual camera app from the official website. After installation, launch the app and grant camera and microphone access when prompted on your Mac; this is essential for the app to capture your live feed.
- Inside the app, select your physical camera as the video source. For example, in OBS Studio, add a "Video Capture Device" source and choose your built-in or external webcam.
- Enable the virtual camera output. In OBS Studio, click the "Start Virtual Camera" button; in Ecamm Live and ManyCam, toggle the virtual camera feature on. When enabled, the app creates a virtual camera device your Mac recognizes.
- Go to System Preferences > Security & Privacy > Privacy, then check that the virtual camera app has permissions for Camera and Screen Recording. Without these, the app may not function correctly or appear as a source.
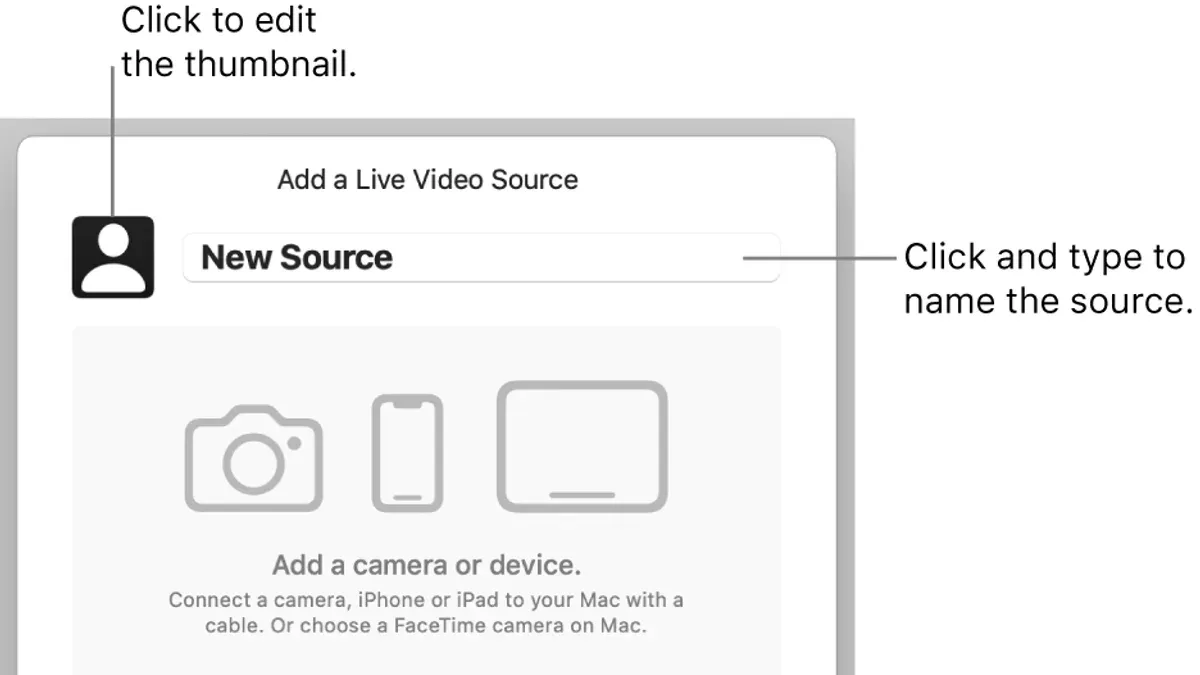
- Open Keynote and start or edit a presentation. When inserting a video, look for your virtual camera listed as a video input option. Selecting it should display your live camera feed within Keynote, confirming successful setup.
Comparing the apps, OBS Studio requires setting up scenes and sources but offers advanced control, making it suitable if you want to customize overlays or multiple inputs. Ecamm Live simplifies the process with an intuitive interface but is paid software. ManyCam provides a middle ground with easy setup and useful features like virtual backgrounds. Choose based on your comfort level and feature needs.
Insert the live camera feed into your Keynote presentation
Now that your virtual camera app is running and creating a live video source, it’s time to embed this feed into your Keynote slides. This step transforms the live camera input into a visible, movable video object on your slide.
- Open your Keynote presentation and select the slide where you want the live video to appear. You will see the slide preview on the right and the toolbar on top.
- Click on the Insert menu in the top menu bar, then choose Choose or Insert Video. In the file browser, look for your virtual camera source, which should appear as a video device or source. Select it and click Insert. When done correctly, a video frame representing the live feed appears on your slide.
- Alternatively, if your virtual camera app supports drag-and-drop, drag the virtual camera feed directly from the app or its interface onto your Keynote slide. The live video window should embed immediately.
- Click and drag the corners of the video frame to resize it. Position the live video window where it complements your slide content without obstructing key points. You can also use the alignment guides to help position it neatly.
- To ensure the live feed plays automatically during your presentation, select the video object, open the Format sidebar, go to Movie settings, and set Start Movie to Automatically. This setting makes sure the live video starts without needing a click.
- Enter presentation mode by clicking Play in the toolbar. Verify that the live camera feed displays smoothly within the slide and updates in real time as expected.
Here is an example slide layout: the live video feed is positioned in the lower right corner, sized to occupy about one-quarter of the slide, leaving space for your main content. This balance helps keep the video visible but not overwhelming.
Remember, if the live video does not appear or freezes, revisit your virtual camera app settings or check Keynote’s permissions. Testing before your actual presentation helps avoid surprises.
How to use a picture on Keynote alongside live video
Combining static images with live video in Keynote slides creates visually engaging layouts that keep your audience focused. You start by inserting pictures into your slides as you normally would, using the Insert > Choose menu or dragging images directly onto the slide. Once your picture is in place, add the live camera video feed as a video object and position it thoughtfully.
Layering is key: place your image either above or below the live video window depending on your desired effect. For example, you can position a transparent logo image above the video feed to create branding without covering the video content. Alternatively, using the Format > Image > Instant Alpha tool, you can make parts of your picture transparent to blend smoothly with the live video behind it.
Masking is another technique to consider. Apply a shape mask to your image or video by selecting the object, then clicking Format > Image > Mask with Shape. This helps integrate the live video within a custom frame or cutout in your picture. When combining media, ensure your slide’s focal points remain clear—avoid overcrowding by limiting the number of layered elements.
- Insert your desired picture onto the slide; you should see it appear immediately.
- Add the live camera video feed as a video object and drag it over or under the image depending on your layout.
- Use Format > Image > Instant Alpha on your picture to remove unwanted background areas; the transparent sections will reveal the live video beneath.
- Apply a mask with Format > Image > Mask with Shape to either the picture or video to create interesting cutouts or frames.
- Adjust the size and position of both elements to maintain clear focus on your key content without clutter.
For example, a slide with a presenter’s live video framed inside a circular mask can be placed next to a full-slide infographic image. Before adding transparency or masks, the video might block important parts of the image; after applying these techniques, both media coexist clearly and attractively.
How to add videos to Keynote and differentiate from live video
Adding prerecorded videos to Keynote is straightforward and differs from embedding a live camera feed. Prerecorded videos are static files you insert from your device, allowing you to control exact playback, while live video streams provide dynamic, real-time content during your presentation. Understanding when to use each helps you choose the best approach for your presentation goals.
How to insert prerecorded videos
- Open your Keynote presentation and select the slide where you want the video.
You should see the selected slide highlighted. - Click the Media button in the toolbar, then choose Choose to browse your files.
A file dialog appears for you to select a video file. - Select the video file from your computer and click Insert.
The video appears on your slide as a movable and resizable object. - To control playback, select the video and open the Format sidebar, then click Movie. Here you can set options like Play Automatically or Loop.
Changes apply immediately to the selected video.
Differences between prerecorded videos and live camera feeds
Prerecorded videos offer precise control over content, ensuring consistent playback without surprises, but they lack interactivity and real-time responsiveness. Live camera feeds provide immediacy and engagement by showing what is happening as you present, but require more setup and depend on stable hardware and software integration.
| Feature | Prerecorded Video | Live Camera Video |
|---|---|---|
| Content | Fixed, edited footage | Dynamic, real-time feed |
| Control | Playback controls like pause, rewind | Continuous stream, limited playback control |
| Setup | Simple file insertion | Requires virtual camera apps and permissions |
| Reliability | High, no dependency on hardware | Dependent on camera and software stability |
| Use cases | Prepared demos, polished clips | Live demonstrations, interactive sessions |
Choose prerecorded videos when you need guaranteed smooth playback of specific content, or when internet or hardware constraints exist. Opt for live camera video when interaction and real-time presence will enhance your message and audience connection.
How to add speaker notes in Keynote to support your live video presentation
Adding speaker notes helps you stay organized and confident while presenting live video content. These notes can include reminders about key points, cues for switching camera angles, or prompts for interactive moments. You’ll add and view these notes without your audience seeing them, keeping your presentation smooth and professional.
- Open your Keynote presentation and go to the slide containing the live camera video. You should see the slide preview in the main window.
- Click the View menu and select Show Presenter Notes. A panel will appear beneath the slide where you can type your notes.
- Click inside the presenter notes panel and type notes that align with the live video segment. For example, “Discuss project overview while camera shows workspace” or “Pause live feed briefly to answer questions.” These notes guide your timing and content.
- Repeat this process for each slide featuring live video to maintain a clear flow throughout your presentation.
- When presenting, use Presenter View by clicking Play > Play Slideshow in Window or connecting an external display. This view shows your slides, live video, and speaker notes on your device, while the audience sees only the slides and video.
For instance, on a slide with a live camera feed of a product demo, your speaker notes might read: “Highlight key features, mention benefits, respond to live questions.” These targeted notes help you coordinate your commentary with the real-time video effectively.
How to view Keynote presentation on Windows with live video
Keynote does not have a native application for Windows, which limits direct playback and editing capabilities on that platform. When you share a Keynote presentation containing live camera video with Windows users, they cannot experience the live feed natively. Instead, they must rely on alternative methods that come with trade-offs in functionality.
One common workaround is to export your Keynote file as a video or PDF. Exporting as a video creates a fixed recording of your presentation, but this process removes any live camera feed functionality, converting it into a static prerecorded video. Exporting as a PDF maintains slide content but completely loses video and animation features, including live video.
Another option is to use iCloud’s online version of Keynote through a web browser on Windows. While this allows viewing and some editing of Keynote files, the live camera video embedded via third-party virtual cameras does not stream through iCloud. Users will see a placeholder or static content instead of a live feed. Therefore, this method does not fully support live video presentations.
For presentations requiring live video on Windows, consider using screen sharing software during a live session. Presenters can run Keynote on a Mac or iPad and share their screen via platforms like Zoom or Microsoft Teams. This approach preserves the live video feed in real time for Windows viewers but requires a stable internet connection and simultaneous live delivery.
In summary, Windows users cannot natively view live camera video in Keynote files. Exporting loses interactivity, iCloud lacks live feed support, and screen sharing remains the most effective cross-platform solution for live video presentations.
Troubleshoot common issues when adding live camera video in Keynote
If your virtual camera does not appear in Keynote, first check that the third-party app providing the virtual camera is running and updated. Restart the app and Keynote if needed. If you see an error like "No video source detected," ensure the virtual camera is selected as your video input in Keynote's media insertion panel.

When live video freezes or lags, close other high-CPU or bandwidth apps. Lower your camera resolution in the virtual camera app settings to reduce processing load. Using a wired Ethernet connection instead of Wi-Fi can improve stability and reduce latency.
Audio issues such as missing sound or syncing problems often occur if the virtual camera app does not capture audio or if Keynote’s audio input defaults to the Mac’s microphone. Confirm that the virtual camera app is set to transmit audio and that Keynote’s sound input matches the virtual camera’s audio source.
Permission errors for camera or microphone access can prevent live video from appearing. Go to System Settings > Privacy & Security > Camera and Microphone, then enable access for Keynote and your virtual camera app. Restart the apps after changing permissions.
For better performance and reduced latency, close unnecessary background apps and disable visual effects in macOS settings. If you notice delays, try lowering the frame rate in your virtual camera app to around 15-20 fps. A Mac with at least 8GB RAM and a recent processor generally handles live video smoothly.
Frequently asked questions
How to put to keynote?
To add content to Keynote, open your presentation and navigate to the slide where you want to add something. Use the toolbar and select Insert, then choose the type of content like Text, Image, or Shape. For live camera video, you need to use a third-party app that captures the camera feed and provides it as a virtual camera source, which you can then insert as a video input within Keynote.
How to use keynote on windows?
Keynote is designed for Mac and iOS, so there is no native Windows app. However, you can use iCloud.com in a web browser on Windows to access Keynote online. This allows you to create, edit, and present Keynote files, but features like live camera video integration may be limited or unavailable in the web version.
How to use keynote?
Start Keynote and choose a theme for your presentation. Add slides and insert text, images, or multimedia using the Insert menu. To enhance engagement, you can include live camera feeds by connecting a compatible third-party virtual camera app and inserting that feed as a video source. Use the presenter notes feature to keep track of your points while presenting.
How to view keynote on windows?
You can view Keynote presentations on Windows by exporting your slides as a PowerPoint file or PDF from Keynote on Mac or iCloud.com. Alternatively, open iCloud.com in a browser on Windows, log in, and use the Keynote web app to view and present your slides. Keep in mind that some advanced features like live camera video may not function fully in the Windows environment.
How to download keynote?
Keynote is available for free from the Mac App Store for Mac users and the App Store for iPad and iPhone users. Simply search for "Keynote" and download the app to your device. There is no official Keynote app for Windows, so use the web version via iCloud.com if you need to access presentations on a Windows PC.
Understanding the Limits of Adding Live Camera Video in Keynote
This guide does not cover creating live video directly inside Keynote because the app lacks native support for this feature. Instead, it relies on third-party virtual camera software to capture and feed live video into your presentation, which may have a learning curve and potential compatibility issues depending on the software you choose. If you are using Windows, note that Keynote does not support live camera video natively, so you will need to explore alternative presentation tools or methods to achieve similar results. Additionally, the quality and smoothness of real-time video depend heavily on your hardware capabilities and network conditions if streaming is involved, which can affect viewer experience.
The most useful next step is to select and familiarize yourself with a reliable virtual camera app that integrates well with Keynote and your device. Take time to understand its settings and test the live feed thoroughly before your presentation to ensure smooth operation and confidence when you present.
See also: How to Embed a Video in Keynote: A Step-by-Step Guide · How to Record a Presentation in Keynote: A Step-by-Step Guide · How to Export Your Keynote Presentation as a Video: Step-by-Step Guide · How to Control Keynote with iPhone: A Step-by-Step Guide



