How to Export Your Keynote Presentation as a Video: Step-by-Step Guide
Step-by-step guide to export your Keynote presentation as a video, including settings, tips, and troubleshooting for the best results.
You’ve just finished crafting a compelling Keynote presentation and want to share it as a polished video. Whether you’re preparing a lesson, pitching a project, or creating content for social media, converting your slides into a video can make your work more engaging and accessible.
This article guides you through how to export a presentation as video in Keynote, covering each step from opening your file to optimizing video settings for your intended audience. You’ll also find practical troubleshooting tips to handle common issues during export so that your final video looks and plays exactly as you want.
Key takeaways
- Use File > Export To > Movie to start the video export process in Keynote.
- Adjust slide duration, resolution, and playback options in the export dialog for best results.
- Choose between 720p, 1080p, or 4K resolution depending on your sharing platform.
- Include recorded narration and slide transitions to enhance viewer experience.
- Address common export errors by checking file permissions and available storage space.
Before You Start: What You Need to Prepare
Before exporting your Keynote presentation as a video, ensure your slides are finalized with all desired media and animations in place. Any missing content or incomplete transitions will be part of the video output, so review your presentation carefully.
Next, check that you have enough disk space available. Video files can be large; for example, a 5-minute presentation exported at 1080p resolution may require several hundred megabytes, while longer videos or higher resolutions like 4K will demand significantly more space.
Decide on the target resolution and video format based on where you plan to share or upload your video. Keynote supports exporting in.mov format using H.264 or HEVC codecs, which are widely compatible with platforms like YouTube, Vimeo, and social media.
Finally, confirm your Mac or iOS device is updated to a Keynote version that supports video export. Older versions may lack this feature or have limited options, so using the latest Keynote ensures full functionality and smoother export.
- Open your completed Keynote presentation. You should see all slides and media as intended.
- Verify available disk space on your device by checking the storage summary in Finder or Settings. Ensure there is sufficient free space relative to your expected video size.
- Determine your export settings based on your sharing platform’s recommendations, such as 720p for quick uploads or 1080p for higher quality.
- Update Keynote if necessary by opening the App Store and checking for updates, then launching the updated app to confirm.
Open Your Presentation and Access the Export Options
First, launch Keynote on your device and open the presentation you want to export as a video. You should see your slides and the editing interface ready for use.
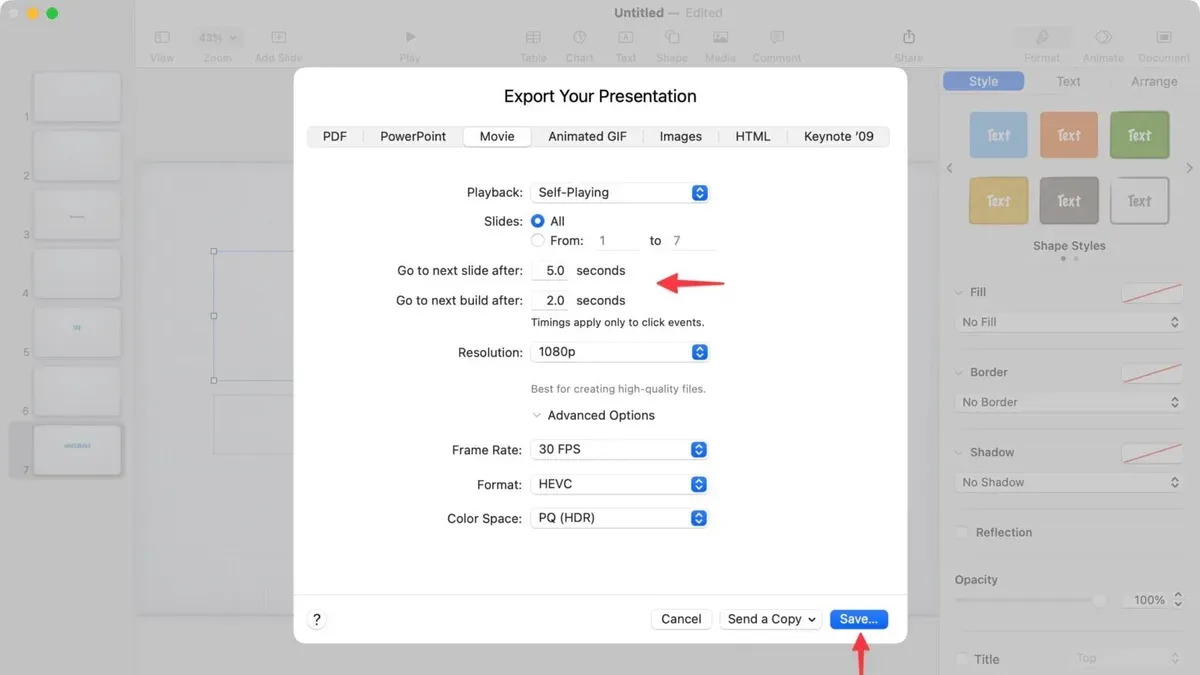
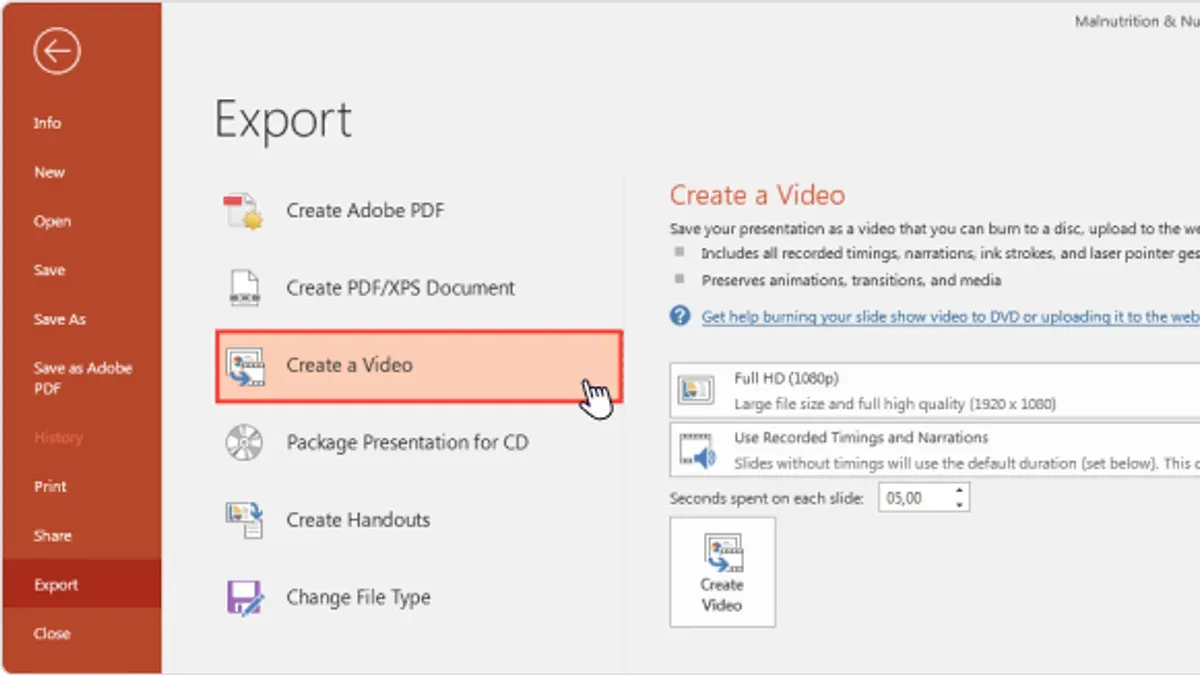
Next, navigate to the top menu bar and click on File. From the dropdown menu, hover over Export To, which will expand to show several format options. Select Movie to proceed with exporting your presentation as a video file.
Keynote offers different export formats for various purposes. Exporting to PDF creates a static document suitable for printing or sharing slides without animations. Choosing PowerPoint exports your file for use in Microsoft PowerPoint, retaining editable slides but not video formats. Selecting Movie converts your presentation into a video file, preserving animations, transitions, and timings, making it ideal for sharing or uploading online.
| Export Format | Description | Use Case |
|---|---|---|
| Static slides without animations or transitions | Printing, offline sharing, simple review | |
| PowerPoint | Editable slides compatible with Microsoft PowerPoint | Collaboration, editing in PowerPoint |
| Movie | Video file with animations, transitions, and timings | Online sharing, presentations as videos |
After selecting Movie, Keynote will open the export settings dialog where you can customize video options before saving your file, covered in the next section.
Configure Video Settings for Export
Once you select Movie as your export format, you'll see options to configure your video settings. First, choose the playback resolution: 720p, 1080p, or 4K. Higher resolutions like 4K offer sharper image quality but result in larger file sizes and longer export times. For example, exporting a 10-slide presentation at 720p might produce a file under 100 MB, while 4K could easily exceed 500 MB.
Next, decide the playback speed or duration per slide. Keynote allows you to set a fixed number of seconds per slide or use recorded timings if you have rehearsed your presentation. Choosing 5 seconds per slide for a 10-slide deck creates a roughly 50-second video. Increasing duration increases the video length and file size proportionally.
Then, choose whether to include slide transitions and animations. If you want the video to reflect the dynamic flow of your presentation, keep these enabled. Disabling them produces a simpler video but may lose some visual interest.
Finally, consider including presenter notes or audio narration. If you recorded voiceover during your presentation, ensure the "Include Audio" box is checked. Presenter notes are not included in the video but can be used for reference during export.
- Click the resolution dropdown and select 1080p. You should see an estimated file size increase compared to 720p.
- Set the slide duration to 5 seconds per slide. The estimated video length updates accordingly.
- Check the box for "Include Slide Transitions" to keep animations in the video.
- If you have recorded narration, select "Include Audio" so it is added to the exported video.
- Review the estimated file size and export time shown to confirm these settings fit your needs before proceeding.
Export and Save Your Video File
After configuring your video settings, click the Next button to proceed to the export step. This action opens a dialog where you can choose the destination folder for your video file and specify the file name. A clear and descriptive file name, such as PresentationName_FinalVideo.mov, helps you easily identify the export later.
Once you confirm the location and file name, click Export to start the rendering process. You will see an export progress bar indicating the status. The time it takes to export depends on your presentation length and resolution: a 5-minute presentation at 720p typically takes a couple of minutes, while longer presentations or higher resolutions like 1080p might take noticeably more time.
When the export completes, navigate to the folder you selected and play the video file to ensure it exports correctly. Check that animations, transitions, and audio play smoothly without glitches. If any issues arise, revisiting the export settings or restarting Keynote can often resolve them.
Optimize Your Video for Sharing or Uploading
After exporting your Keynote presentation as a video, consider the best format and size for your sharing platform. Commonly accepted video formats include MP4 (H.264 codec), which offers a good balance of quality and compatibility for YouTube, Vimeo, social media, and email attachments. MOV files may offer higher quality but are larger and less widely supported.
To reduce file size without significant quality loss, use built-in tools like QuickTime Player’s Export As feature on Mac or free converters such as HandBrake. For example, compressing a 500 MB video with HandBrake can reduce it to under 100 MB by adjusting the bitrate and resolution, making uploads faster and less likely to be rejected.
Organize your videos by using clear, descriptive file names with dates or project identifiers, and add tags or metadata if your platform supports it. This helps you retrieve files quickly and ensures your audience can find the right content easily.
- Open your exported video in QuickTime Player or HandBrake.
You should see the video loaded and ready for export or conversion. - Select the export or conversion option, choosing MP4 (H.264) format.
The output format and codec options should be visible. - Adjust resolution and bitrate settings to balance quality and size — for example, 1080p at 5 Mbps for social media.
You should see an estimated file size before exporting. - Start the export or conversion process.
The progress bar should indicate the operation is underway. - Rename the final video file with a descriptive name including date or project details.
The file should be saved to your chosen location with the new name.
Troubleshoot Common Export Issues
Sometimes, you might find the Export to Movie button is grayed out or missing. This often happens if your Keynote version is outdated or if the presentation file uses features incompatible with video export. Ensure you are using the latest version of Keynote and that your presentation does not contain unsupported content like certain embedded objects.
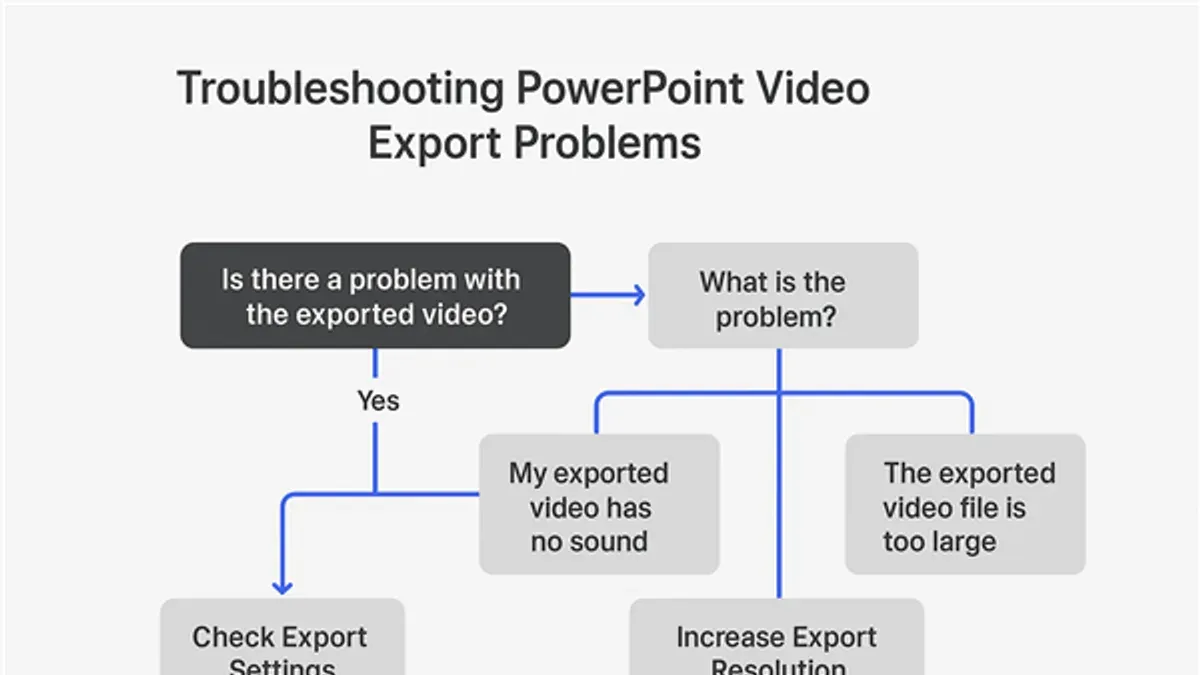
If your exported video lacks animations or transitions, double-check the Include Animations box in the export settings. Missing audio or narration usually means you did not select the Include Audio option before exporting. Both settings must be explicitly enabled to preserve these elements.
Should the export process stall or cause Keynote to crash, verify you have sufficient disk space and close other apps to free up memory. Exporting large presentations can be resource-intensive, so these steps help avoid interruptions.
After exporting, if your video won’t play or shows errors, confirm the saved file’s format is compatible with your media player. Trying another player like QuickTime or VLC can help isolate playback issues.
- Check Keynote version via Keynote > About Keynote. If outdated, update via the App Store. Once updated, open your presentation and confirm the Export to Movie option appears enabled.
- In the export dialog, ensure Include Animations and Include Audio checkboxes are ticked. Export a short test video and verify animations and sound are present during playback.
- If export freezes, close all other applications and check available disk space by clicking Apple menu > About This Mac > Storage. Free up space if under 10% free, then retry export.
- For playback issues, right-click the exported video file, choose Open With, and select a different player like VLC. Confirm the video plays smoothly with animations and audio.
Frequently asked questions
Can I export a Keynote presentation as a video with embedded audio narration?
Yes, you can export a Keynote presentation as a video with embedded audio narration. To do this, record your narration directly within Keynote using the Record Slideshow feature before exporting. Make sure to enable the option to include recorded timing and audio during the export process, so the narration is embedded in the video file.
What is the best video resolution to choose when exporting a Keynote presentation?
The best video resolution depends on your intended use. For most purposes, 1080p (1920 x 1080) provides a good balance of quality and file size. If you need higher clarity for large displays, choose 4K (3840 x 2160), but keep in mind this will create much larger files. For quick sharing or smaller screens, 720p (1280 x 720) is sufficient and helps reduce file size.
How do I include slide transitions and animations in the exported video?
To ensure slide transitions and animations appear in the exported video, record the slideshow with timings by using the Record Slideshow feature in Keynote. This captures the duration and effects as you play through the presentation. When exporting, select "Play recorded slideshow" under the Timing options, so the export reflects all transitions and animations exactly as timed.
What should I do if the exported video file is too large to share?
If your exported video file is too large, try lowering the export resolution to 720p or adjusting the compression settings if available. You can also shorten slide durations or remove unnecessary animations to reduce length. Alternatively, use video compression software or online tools to reduce file size without significant quality loss before sharing.
What This Guide Doesn’t Cover
This article focuses on exporting your Keynote presentation as a video with practical settings and troubleshooting tips. It does not cover advanced video editing after export, such as cutting, adding effects, or combining clips. If you need to perform detailed edits or automate your export process using scripts or batch actions, consider using dedicated video editing software like Final Cut Pro or Adobe Premiere Pro. These tools provide a broader range of features suited for professional video production beyond Keynote’s export capabilities.
As your next step, review your exported video carefully on the device or platform where you plan to share it. Verify that the resolution, frame rate, and playback timing match your expectations. Adjust your settings and re-export if necessary to ensure a smooth viewing experience for your audience. This hands-on review helps catch issues early and guarantees your presentation looks its best in video form.
See also: How to Embed a Video in Keynote: A Step-by-Step Guide · How to Record a Presentation in Keynote: A Step-by-Step Guide · How to Export Keynote to PowerPoint: Step-by-Step Guide · How to Create a Custom Theme in Keynote: Step-by-Step Guide