How to Convert Pages to Word Documents Using Pages
Follow easy steps to convert Pages documents to Word format on Mac, iPad, or iPhone for seamless sharing and editing.
You have a document created in Apple Pages that needs to be shared with colleagues who use Microsoft Word. Perhaps you received a.pages file but can’t open it on your Windows computer, or you want to preserve formatting while collaborating. Understanding how to convert Pages to Word in Pages ensures your document remains accessible and editable across platforms.
This article walks you through the step-by-step process of converting Pages documents to Word format on your Mac, iPad, or iPhone. It covers practical tips for choosing the right method based on your device, handling multiple files, and avoiding common issues that might affect formatting or compatibility.
Key takeaways
- Use the Export function in Pages to save documents as.docx files compatible with Word.
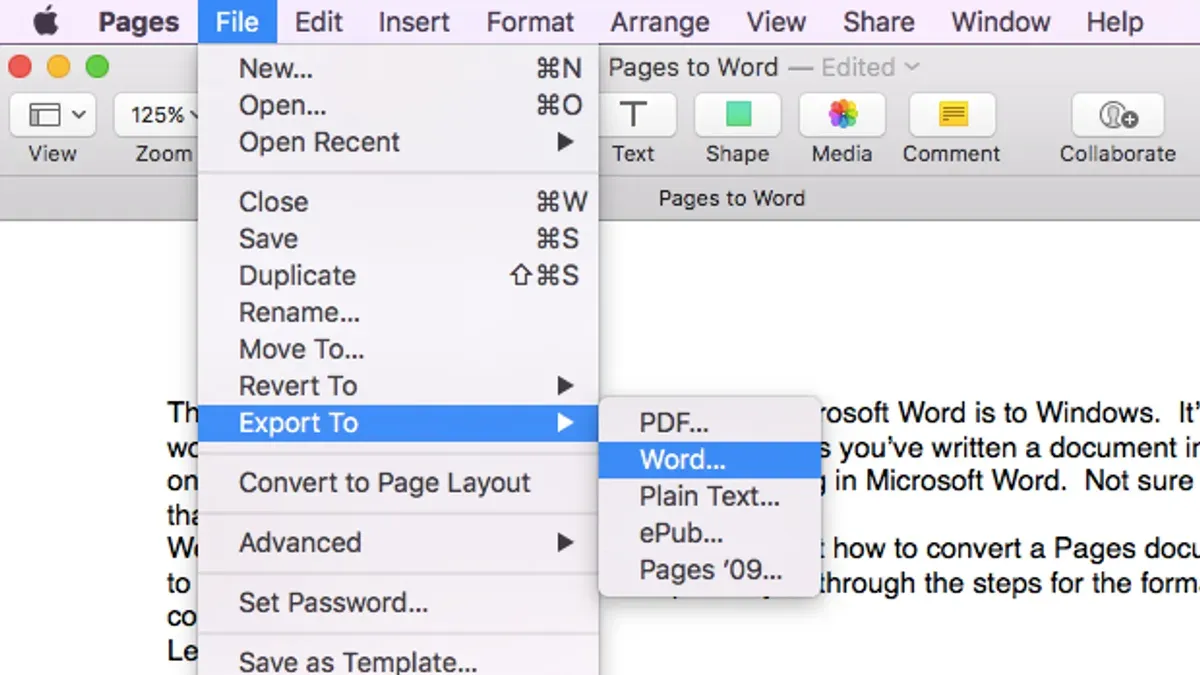
- On Mac, go to File > Export To > Word for the cleanest conversion.
- On iPad or iPhone, tap the More button (three dots), then Export, and select Word format.
- Batch conversion requires using the Mac shortcut Automator or third-party apps.
- Check converted files for layout changes, especially with complex tables or images.
Before you start: What you need to convert Pages to Word
To convert a Pages document to Word format smoothly, you need a few essentials in place. First, ensure you have the latest version of Apple Pages installed on your Mac, iPad, or iPhone. Updates often improve export functionality and compatibility. Next, make sure you have Microsoft Word or a compatible app ready to open the converted .docx files; without this, you won’t be able to view or edit the Word document after conversion.
Know exactly where your Pages file is stored. It could be on your device locally or saved in iCloud Drive. Having easy access to the file location helps avoid delays or errors during conversion. Pages supports exporting to .docx, .pdf, .rtf, and .epub formats, but for Word, the .docx format is standard and widely compatible.
Be aware that complex formatting like custom fonts, text boxes, or embedded media (videos, interactive charts) may not convert perfectly. Users often report small discrepancies such as shifted layouts or missing media in the Word file. Preparing your document with simpler formatting can help minimize these issues. Understanding these points sets the right expectations and ensures a smoother conversion process.
How to convert a Pages document to Word on a Mac
To convert your Pages document into a Microsoft Word file on your Mac, start by opening the document in the Pages app. Once your file is open, look to the top menu bar and click File. From the dropdown, select Export To, then choose Word... from the submenu that appears.
- After selecting Word..., a dialog box will appear with export options. Here, you can choose to include comments if your document has them and you want to keep them in the Word version. Confirm your choices by clicking Next.
- Next, you will be prompted to choose the save location and enter a file name for the exported Word document. Pick a folder you can easily find, such as Documents, and name your file clearly to avoid confusion.
- Click Export to complete the process. Pages will create a.docx file at the location you specified.
- To verify the conversion, open the exported.docx file in Microsoft Word. Check that the formatting, such as fonts, images, and spacing, closely matches the original Pages document. Minor differences can occur, so review the document carefully before sharing.
Remember, the export dialog’s option to include comments can be especially useful if you collaborate with others using Word. Also, choosing a clear file name and location helps avoid losing track of your new Word file. If any formatting looks off, simple adjustments in Word usually resolve these quickly.
How to convert Pages to Word on iPad or iPhone
To convert a Pages document to Word format on your iPad or iPhone, start by opening the Pages app and locating the document you want to convert. This process allows you to export the file in a format compatible with Microsoft Word, which you can then share or save as needed.
- Open the Pages app and tap on the document you want to convert. You should see the document open in edit mode.
- Tap the More button, represented by three dots (…) in the upper-right corner of the screen. A menu will appear with several options.
- From the menu, select Export. This will show a list of available export formats.
- Choose Word from the export options. Pages will prepare the document for export, converting it into a.docx file.
- Next, select how you want to share or save the Word document. Options typically include saving to the Files app, sending via Email, or uploading to a cloud storage service like iCloud Drive, Dropbox, or Google Drive.
- After exporting, open the Word file on the receiving device or app to verify the conversion. Check for any formatting changes or missing elements, especially if your document contains complex layouts or graphics.
When sharing the Word file, consider the app compatibility on the recipient’s device. Using the Files app to save and then share can help avoid issues with large attachments or unsupported email clients. Also, if you plan to edit the document further on your iPad or iPhone, using Microsoft Word or other compatible apps ensures smoother handling of the converted file.
How to convert Pages to Word or PDF for versatile sharing
Pages lets you export your document as both Word and PDF files, each serving different sharing and editing needs. Word format is best when your recipient needs to edit the document, while PDF preserves the exact layout and is ideal for read-only sharing or printing.
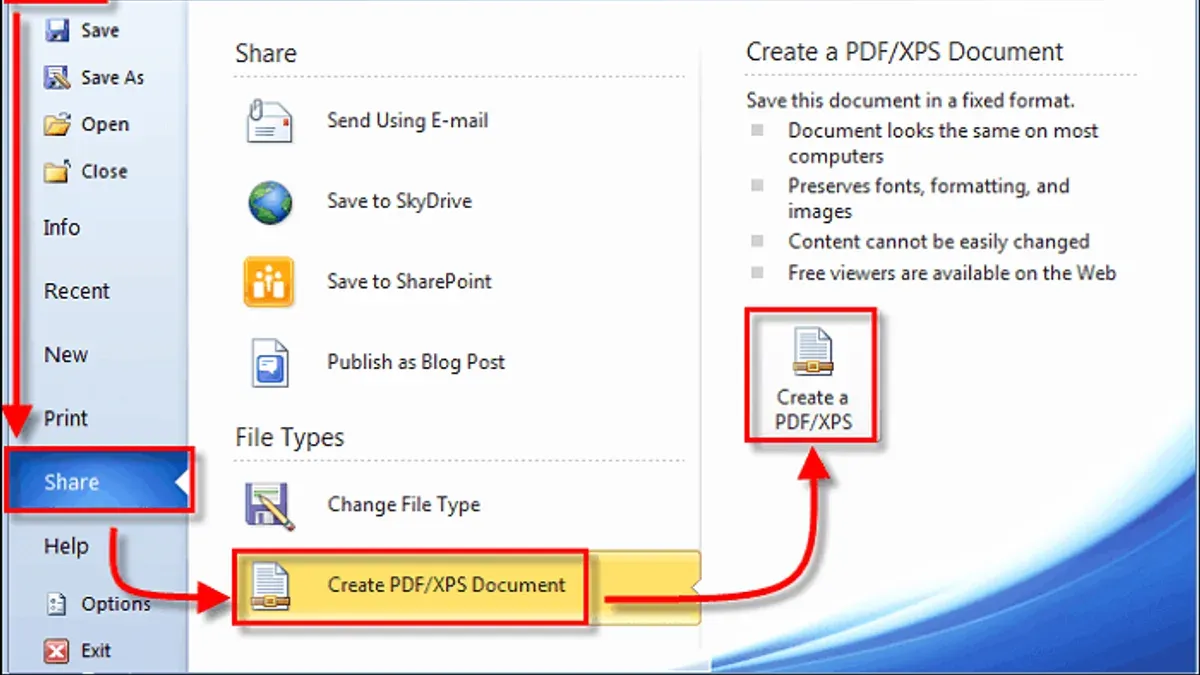
To export your document as a Word file, open your Pages document and click the File menu, then select Export To and choose Word. In the dialog box, pick the .docx format and click Next. Choose a save location and click Export. You should see a Word file ready to be opened in Microsoft Word or compatible apps.
To export the same document as a PDF, repeat the process: go to File > Export To > PDF. Here, you can select the image quality; typically, Good balances quality and file size. Click Next, choose your location, and export. The PDF will maintain your document’s layout and formatting exactly.
Comparing the two, the Word file size is usually larger and may slightly alter complex layouts when opened in Word apps. The PDF is smaller and keeps the design intact but is not easily editable. Exporting both formats from the same Pages file helps you cover different sharing scenarios efficiently without reopening or reformatting the document.
How to convert Word documents to Pages format
If you have a document created in Microsoft Word that you want to edit or enhance using Apple Pages, the process starts by opening the Word file within Pages. This imports the document and converts it into Pages format. Since some elements like fonts, spacing, or complex layouts may not transfer perfectly, reviewing the imported document carefully is essential to ensure it looks as expected.
- Open Pages on your Mac, iPad, or iPhone.
- Go to File > Open (or tap the + button and choose Import on iOS devices).
- Select the Word document (.doc or.docx) you want to convert. Pages will import and open it automatically.
- Check the document for any formatting changes, such as altered fonts, spacing, or missing images. Pages may display a side-by-side view comparing the Word and Pages versions for easier inspection.
- Make any necessary adjustments to restore the intended appearance and layout.
- Save the document by choosing File > Save or Save As to store it as a native Pages file (.pages).
Keep in mind that while Pages does a good job converting most Word documents, some formatting differences are common, especially with advanced Word features like macros or custom styles. Simple documents convert with minimal issues, but complex files may require manual fixes after import. Verifying the document side-by-side helps you spot what changed and decide what to adjust.
How to convert multiple Pages files to Word quickly
If you have several Pages documents to convert into Word format, doing them one by one can be time-consuming. Automating this process with Mac’s Automator or Shortcuts app can save you significant effort. These tools allow you to batch export multiple Pages files, streamlining your workflow.
To create a batch export using Automator, you can build a workflow that takes Pages documents from a folder, exports each as a Word file, and saves them to a chosen location. For example, your workflow might include actions like “Get Specified Finder Items,” followed by “Open Finder Items,” then a script that triggers Pages to export the file as Word, finally moving the exported document to an output folder.
- Open Automator and create a new workflow.
- Add “Get Specified Finder Items” and select your Pages files.
- Add a “Run AppleScript” action with a script to open each Pages file and export it as Word.
- Add “Move Finder Items” to save exported Word files to a designated folder.
- Run the workflow and check that Word files appear in your output folder.
Similarly, the Shortcuts app on Mac or iOS can automate batch exporting by looping through files in a folder and exporting them one by one. However, both methods require some scripting knowledge and setup time.
Keep in mind that batch converting doesn’t guarantee perfect formatting in every document. You’ll still want to review each converted file manually to catch any issues. Also, third-party tools and scripts exist that claim to batch convert Pages to Word, but use these cautiously as they may not handle formatting well or could compromise file integrity.
Organize your output files by naming them systematically or using separate folders for each batch. This helps you track which files have been converted and reviewed, making the process smoother and less error-prone.
How to convert 3 pages to 2 pages in Word after converting from Pages
When you convert a Pages document into Word, the page count can change due to differences in default margins, fonts, and spacing between the two apps. For example, a document that was 3 pages in Pages might become 4 pages in Word because Word may use larger margins or different line spacing. To reduce your Word document back to 2 pages, you need to adjust formatting carefully to avoid losing or overcrowding content.
Start by checking and adjusting the margins. Go to Layout > Margins in Word and choose Custom Margins to reduce top, bottom, left, and right margins slightly, such as changing from 1 inch to 0.75 inch. Next, reduce the font size by 1 or 2 points if your current font is 12pt, try 11pt or 10.5pt. Also, adjust paragraph spacing by selecting the text, then under Home > Paragraph > Line and Paragraph Spacing, reduce spacing before and after paragraphs.
Word includes a tool called Shrink One Page accessible via the Print Preview dialog or by adding it to the Quick Access Toolbar. This feature attempts to fit content onto fewer pages by tweaking spacing automatically. Use it cautiously, as it may crowd text.
- Open your converted Word document and note it spans 3 pages.
- Go to Layout > Margins > Custom Margins and reduce margins to 0.75 inches all around. Confirm the document now fits closer to 2.5 pages.
- Select all text (Ctrl+A or Cmd+A) and reduce font size from 12pt to 11pt under the Home tab. The page count should drop further.
- Adjust paragraph spacing: under Home > Paragraph > Line and Paragraph Spacing, set spacing before and after paragraphs to 0 pt and line spacing to 1.0 or 1.15.
- Try the Shrink One Page feature by adding it to the Quick Access Toolbar (File > Options > Quick Access Toolbar > Choose commands > Shrink One Page > Add). Click it to reduce page count to 2.
- Review your document to ensure no text is cut off or overly cramped, adjusting manual line breaks or image sizes as needed.
This stepwise approach lets you condense a 3-page Word document derived from Pages into 2 pages while maintaining readability and ensuring important content is intact.
Troubleshooting common issues when converting Pages to Word
When converting Pages documents to Word, you might encounter problems such as missing fonts, altered tables, or displaced images. These issues often arise because not all formatting elements translate perfectly between the two formats. If you notice fonts replaced by defaults or tables losing their structure, check that your original Pages document uses standard fonts and simple table designs before exporting.
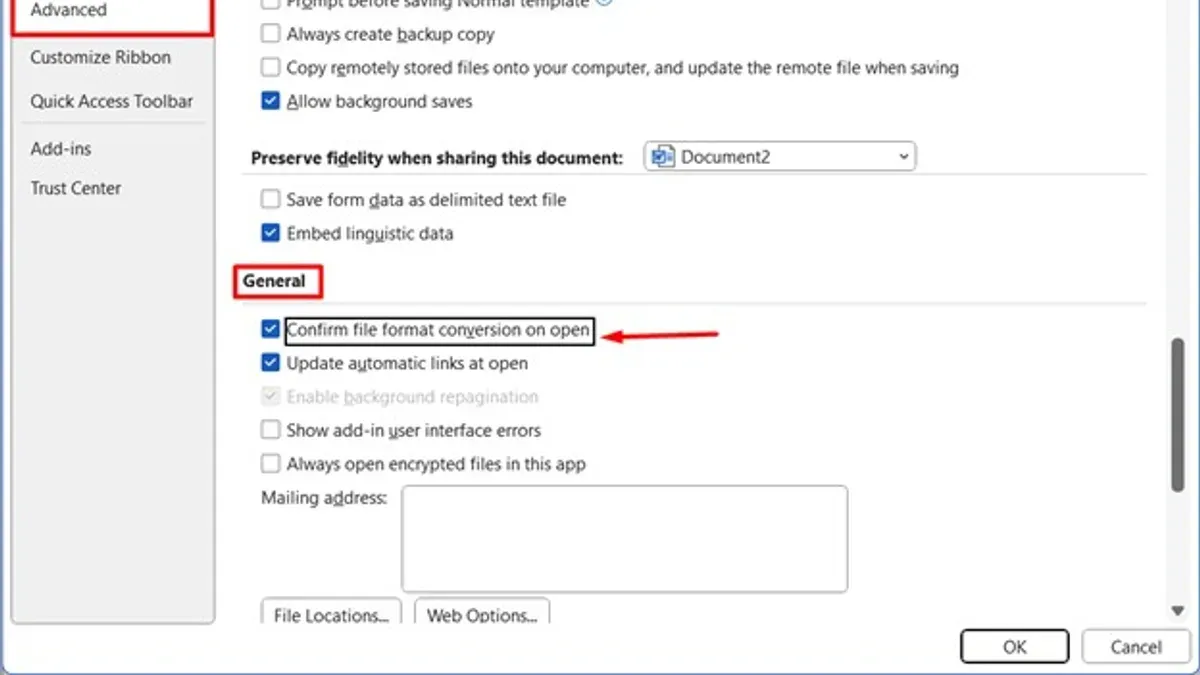
Another common issue is the export option being greyed out or missing. This can happen if the document is in an incompatible state, such as being locked or having unsaved changes. Save and close the document, then reopen it to see if the export options become available.
File compatibility errors when opening.docx files in Word could indicate corruption or that the file was not properly saved. In such cases, try exporting again or open the file in another compatible app like Google Docs to check if the issue persists.
Here are some steps to resolve typical problems:
- Ensure your document is saved and closed in Pages; then reopen it to refresh export options. You should see the export menu active.
- Use the File > Export To > Word path carefully, confirming you select the .docx format. The export dialog should appear without greyed-out options.
- If fonts appear incorrect in Word, install the missing fonts on your device or switch to widely supported ones like Arial or Times New Roman before exporting.
- For tables or images that shift position, simplify the layout in Pages by avoiding nested tables or complex text wrapping, then export again. The layout should be more stable.
- If Word reports file corruption or cannot open the document, try opening the file in another app like Pages or Google Docs, then re-export or save as Word from there.
Common error messages include "The file is corrupt and cannot be opened," or "This document contains elements that Word cannot display." Apple Support suggests updating Pages and Word to their latest versions to minimize compatibility problems.
Finally, keeping a backup of your original Pages file before conversion helps you revert if needed. Regularly updating your software and using standard fonts and simple layouts reduces most formatting and export issues.
Frequently asked questions
How to convert pages to word document?
To convert a Pages document to a Word file, open the document in the Pages app, then go to the File menu and select Export To. Choose Word from the options, adjust any settings if needed, and click Next. Finally, select the save location and click Export to create a.docx file.
Can you convert a pages document to word?
Yes, you can convert a Pages document to Word format easily using the Pages app. The built-in export feature supports saving the document as a Word file compatible with Microsoft Word, making sharing and editing on different platforms straightforward.
Can you convert a pages file to word?
Absolutely. A.pages file can be converted to a Word document directly within the Pages app by exporting it as a Word file. If you don’t have the app, you can also use iCloud’s Pages web app to export the file to Word format.
How to convert from pages to word?
Open your document in Pages, then click File > Export To > Word. Confirm the export settings and click Next. Choose where to save the file and hit Export. This process creates a Word (.docx) file ready for use in Microsoft Word.
How to convert apple pages to word?
On your Mac, iPad, or iPhone, open the Pages document. Tap or click File, select Export To, then pick Word. Follow the prompts to save the document as a.docx file. This converted file can be opened and edited in Microsoft Word without loss of most formatting.
What This Advice Does Not Cover
This guide focuses on straightforward conversion processes for typical Pages documents. If your document contains complex layouts, heavy multimedia elements, or interactive content, the conversion may not preserve every detail perfectly. In these cases, you might need to manually adjust formatting, images, or embedded objects once the file is opened in Word. For professional publishing or documents with intricate designs, consider using specialized software or consulting a design expert to ensure fidelity.
If you frequently work with highly formatted documents or require flawless conversion for collaboration, exploring dedicated conversion tools or third-party apps might be a better option than relying solely on Pages’ built-in export functions.
The single most useful next step is to try exporting a simple Pages document to Word now, following the step-by-step instructions earlier. This hands-on experience helps you understand the conversion process and any adjustments needed, giving you confidence to handle more complex documents as they come.
See also: How to Add Page Numbers in Pages: Step-by-Step for Mac, iPad, and iPhone · How to Add a Table of Contents in Pages: A Complete Step-by-Step Guide