How to Export Emails to PST in Outlook on Mac: Step-by-Step Guide
Discover effective methods to export emails to PST in Outlook on Mac using Windows PC and third-party tools to back up or migrate your email data.
You need to back up your Outlook emails on your Mac or move them to a Windows PC, but when you look for a direct export option to PST format, you find none. This is a common hurdle because Outlook for Mac does not support exporting emails directly to PST files.
This article explains how to export emails to PST in Outlook on Mac by walking you through practical workarounds and methods that include using a Windows PC and third-party tools. You will also learn how to handle Apple Mail exports to PST, import PST files back into Outlook on Mac, and troubleshoot common issues along the way.
Key takeaways
- Outlook for Mac cannot export PST files directly; a Windows PC or third-party tool is needed.
- Using Outlook on Windows to export PST is the most reliable method if you have access to a PC.
- Third-party applications can convert Mac Outlook or Apple Mail data to PST but require caution when choosing software.
- Importing PST files back to Outlook on Mac requires the Microsoft Outlook for Mac 2016 or later version.
- Common export issues include corrupted files and incomplete data, often resolved by verifying mailbox integrity before export.
Before you start: What you need to know and prepare
Outlook for Mac does not provide a built-in option to export emails directly to PST files. PST (Personal Storage Table) is a proprietary file format used by Microsoft Outlook on Windows to store copies of emails, calendar events, and other data. Many users want to export emails to PST format for backup purposes, migration to Windows Outlook, or compatibility reasons.
Before proceeding, make sure you have the latest version of Outlook for Mac installed to avoid compatibility issues. It’s essential to back up your Outlook data to prevent accidental loss during the export process. You may also need access to a Windows PC or reliable third-party software because native PST export is not supported on Mac.
| Feature | Outlook for Mac | Outlook for Windows |
|---|---|---|
| Export to PST file | Not available natively | Available via File > Open & Export > Import/Export wizard |
| Export to OLM file | Available via File > Export | Not supported |
| Export to MBOX or EML | Requires third-party tools | Supported with add-ons or manual methods |
Understanding these differences helps set realistic expectations for the export process. Preparing your environment and tools accordingly will save time and avoid frustration.
How to export Outlook emails to PST using a Windows PC
Since Outlook for Mac cannot create PST files directly, using a Windows PC remains the most straightforward method to export your emails in PST format. First, you need to transfer your Mac Outlook data to Windows. You can do this by exporting your emails as an OLM file on Mac, then moving that file to the Windows PC, or by syncing your Mac Outlook account with an Exchange or IMAP server that is accessible on Windows Outlook.
Once your data is on the Windows PC, open Outlook and import the OLM data or simply let the synced account populate your mailbox. The import process typically takes a few minutes to an hour, depending on the mailbox size. After your emails appear in Windows Outlook, follow these steps to export them to PST:
- Click on File in the Windows Outlook menu.
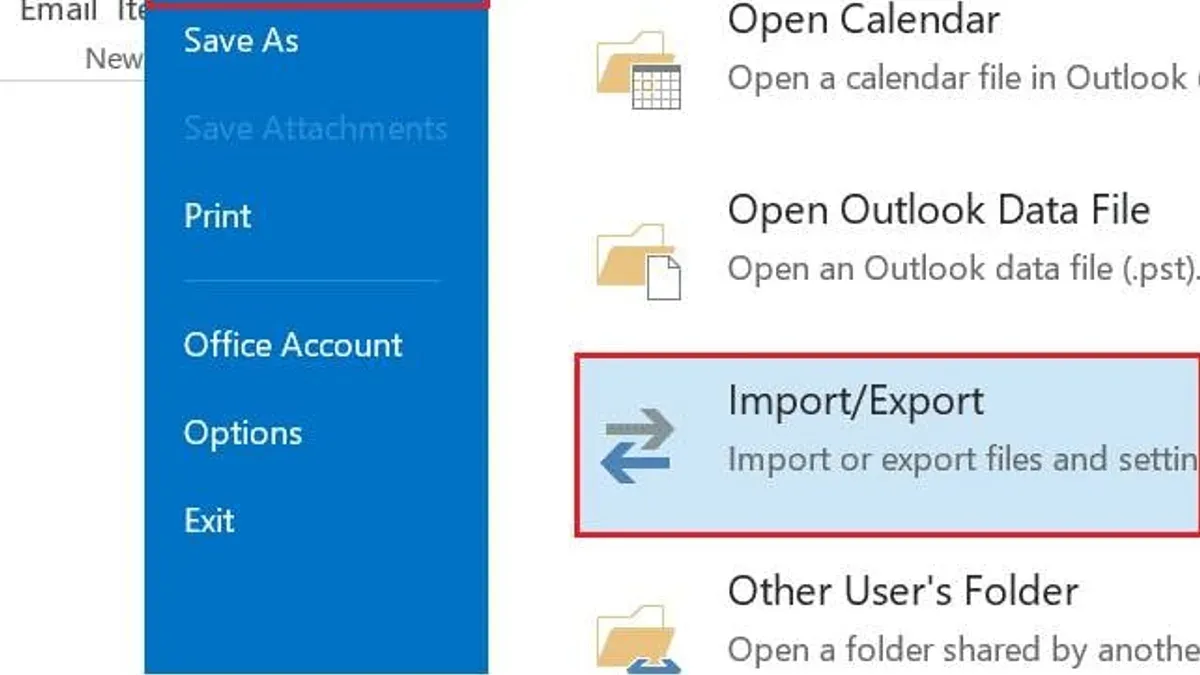
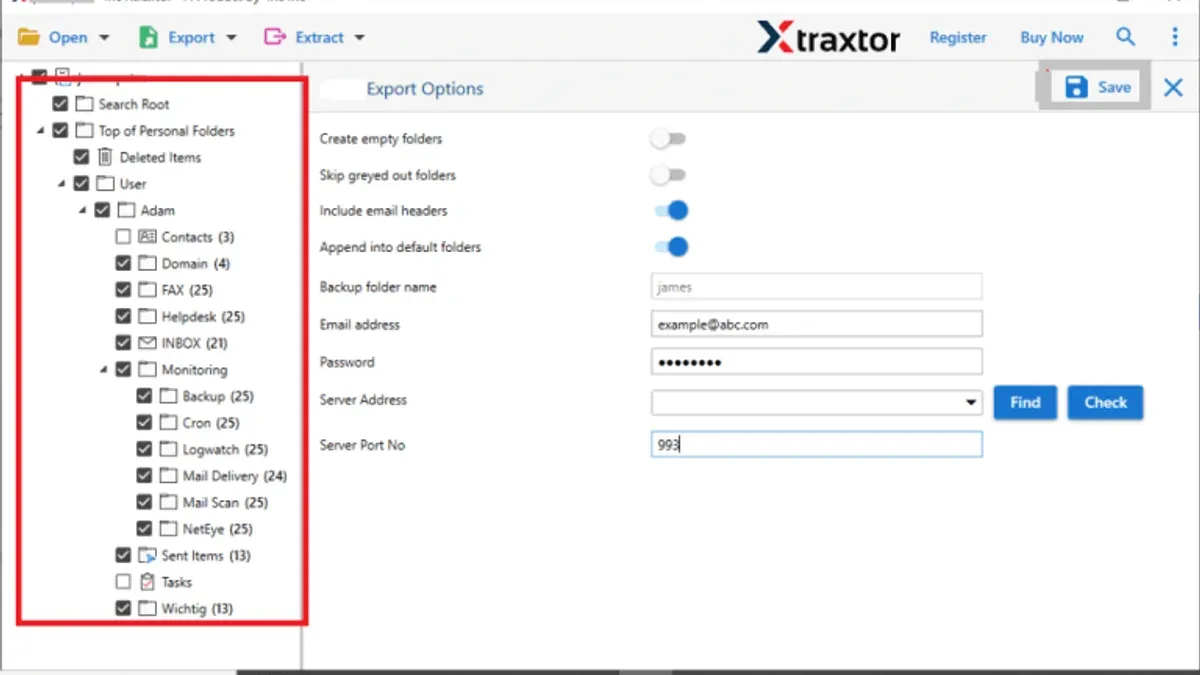
- Select Open & Export and then choose Import/Export.
- In the Import and Export Wizard, select Export to a file and click Next.
- Choose Outlook Data File (.pst) and click Next.
- Select the email account or folders you want to export. Make sure to check Include subfolders to capture all emails, then click Next.
- Choose the destination path and file name for the PST file, then click Finish. You can optionally set a password for added security.
After the export completes, verify the PST file by opening it within Outlook using File > Open & Export > Open Outlook Data File. This confirms all desired emails are present. The PST file can then be transferred back to your Mac for storage or migration purposes, typically via external drive or cloud storage. Note that exporting large mailboxes (multiple gigabytes) may take considerable time and disk space.
How to export emails from Outlook on Mac using third-party tools
Since Outlook for Mac does not natively support exporting to PST, trusted third-party tools offer a practical alternative. Popular options include Stellar Converter for OLM, OLM to PST Converter by SysTools, and Gladwev OLM Extractor Pro. These tools convert OLM files, which Outlook for Mac uses to store data, into PST files compatible with Windows Outlook.
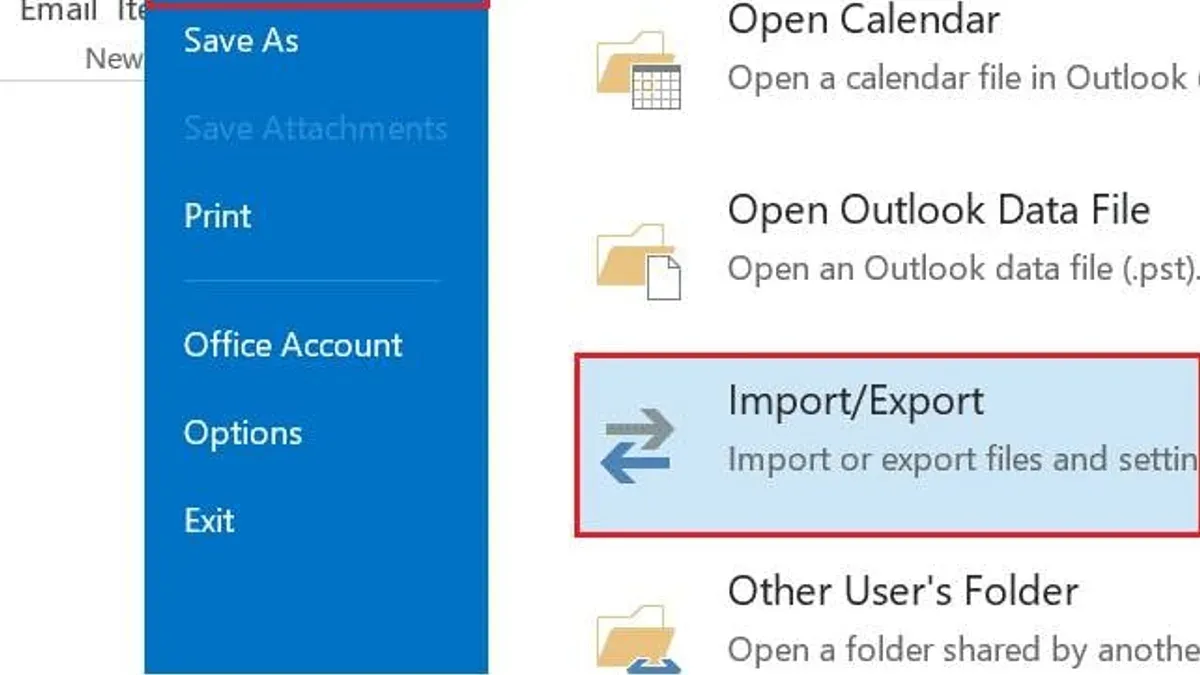
To use Stellar Converter for OLM, first download and install it from the official website. Open the software and select your OLM file by browsing to its location. Next, choose the folders or emails you want to export. Finally, click the export button and select PST as the output format; the software will create a PST file you can use on Windows or import back to Outlook on Mac.
Third-party tools vary in cost, ease of use, and security. While they simplify the export process, some require a purchase or license. Pay attention to user reviews and ensure you download software from reputable vendors to avoid data loss or privacy risks. Most tools provide preview options and selective export, which helps manage large mailboxes efficiently.
| Tool | Main Features | Price Range | User Reliability |
|---|---|---|---|
| Stellar Converter for OLM | Selective export, preview, user-friendly interface | Mid-range | High |
| SysTools OLM to PST Converter | Batch export, supports corrupted files, detailed filters | Mid to high | High |
| Gladwev OLM Extractor Pro | Preserves folder hierarchy, fast processing | Mid-range | Moderate to high |
How to export Apple Mail to PST for Outlook on Mac
Apple Mail stores emails in the MBOX format, which is not compatible with Outlook's PST files. To use Apple Mail emails in Outlook on Mac or Windows, you first need to export your emails as MBOX files and then convert these to PST format using specialized tools.
- Open Apple Mail and select the mailbox you want to export.
- Go to the menu bar, choose Mailbox > Export Mailbox. Select a destination folder where Apple Mail will save the emails as an MBOX file. You should see a folder containing files with the mailbox name once the export is complete.
- Use a reliable MBOX to PST converter tool to convert the exported MBOX files into PST format. These tools typically allow you to add the MBOX file, select folders or emails to convert, and then export them as a PST file. A successful conversion will save a.pst file that can be imported into Outlook.
- Open Outlook on Mac or Windows, go to File > Import, and select Outlook Data File (.pst or.olm). Locate and import the converted PST file. Your Apple Mail emails will now be accessible within Outlook.
Conversion success depends on the tool used, so choosing one with positive user feedback and clear instructions is recommended. Exporting Apple Mail to PST via MBOX conversion typically works well for standard mailbox sizes and common email formats.
How to import PST to Outlook on Mac
Outlook for Mac supports importing PST files, but it comes with certain limitations. Large PST files may take time to import, and some complex folder structures or custom data might not transfer perfectly. To ensure a smooth import, follow the step-by-step instructions carefully and verify your data afterward.
- Open Outlook on your Mac. From the menu bar, select File > Import. You should see an import options window.
- Choose Outlook for Windows archive file (.pst) and click Continue. A file browser will appear for you to locate your PST file.
- Navigate to the PST file you want to import, select it, and click Import. The import process will begin, which may take a few minutes depending on the file size.
- Once completed, click Finish. Imported emails, contacts, and calendar items will appear under a new folder named On My Computer or similar in the sidebar.
- Review the imported data by expanding folders and checking emails or contacts. Compare the folder structure with your original PST to confirm completeness.
- To avoid duplicate data, do not import the same PST file multiple times. If you notice duplicates, you may need to remove them manually or use a cleanup tool.
If the import process fails or some items are missing, consider splitting large PST files before import or using a third-party tool specialized in PST to Mac conversions.
Below are screenshots illustrating the import steps and a before-and-after folder view for clarity.
Troubleshooting common issues when exporting Outlook emails to PST on Mac
If you encounter errors like "Export failed" or "The PST file is corrupted," first verify that the source OLM or PST file is not damaged. Use tools like ScanPST on Windows or third-party repair utilities to fix minor corruption before export. If exports are incomplete or some emails are missing, check folder permissions and ensure no filters are active during export.
Large mailboxes often cause timeouts or partial exports. Splitting your mailbox into smaller folders and exporting them separately can help. Note that Outlook limits PST files to 50 GB in older versions, which might cause export failures if exceeded.
To verify the integrity of your exported PST, open it in Windows Outlook or a PST viewer. Look for missing folders or unusual file sizes. If you see errors like "Cannot open PST file" or "Data file is unreadable," try exporting again after repairing the original files.
Common error messages and fixes include:
- "Export failed due to timeout": Export smaller mailbox sections or use a wired connection.
- "PST file cannot be created": Check disk space and file permissions on the destination folder.
- "Some items could not be exported": Review email item properties for unsupported attachments or formats.
Following these steps systematically helps resolve most export issues and ensures a reliable PST file for backup or migration.
Frequently asked questions
How to export PST files on Mac?
Mac Outlook does not support exporting directly to PST format. To get a PST file, you need to export your emails from Outlook on Mac to an OLM file first. Then, use a third-party conversion tool to convert the OLM file to PST. Alternatively, export your emails on a Windows PC where Outlook supports direct PST export.
How to export Outlook mail on Mac?
You can export Outlook mail on Mac by going to the File menu, choosing Export, and selecting the items you want to save, such as mail, contacts, or calendar. This creates an OLM file, which is Outlook’s native archive format on Mac. Save the OLM file to your desired location for backup or transfer.
Can I export emails from Outlook on Mac directly to PST?
No, Outlook for Mac does not have a built-in option to export emails directly to PST files. PST export is only available in the Windows version of Outlook. To get a PST file from Mac Outlook data, you must export to OLM first and then convert the OLM to PST using specialized third-party software.
How to open PST files on Mac?
You cannot open PST files directly with Outlook for Mac. Instead, import the PST file into Outlook on a Windows PC first, then export the data to an OLM file or use third-party tools that can convert PST files to a format compatible with Mac Outlook. Some mail clients and converters can also read PST files on Mac.
Understanding the Limits of Exporting Outlook Emails to PST on Mac
Outlook for Mac does not natively support exporting emails directly to PST files. Because of this limitation, exporting PST files typically requires access to a Windows PC with Outlook installed or the use of third-party conversion tools. These software options often involve additional costs and varying security standards, so it’s essential to choose trusted providers and back up your data before proceeding.
Large mailboxes can complicate the export process, sometimes requiring you to split your mailbox into smaller parts or prepare for longer export times. Additionally, certain email attributes, such as read/unread status, flags, or some metadata, may not fully transfer or appear differently after conversion between formats.
For users with complex email setups or strict security requirements, consulting an IT professional or using enterprise-grade migration tools might be a more reliable approach than manual exporting.
The single most useful next step is to decide whether you have convenient access to a Windows PC with Outlook or need a trustworthy third-party tool. This choice will guide you toward the most efficient export method tailored to your situation.
See also: How to Add a Shared Mailbox in Outlook on Mac: Step-by-Step Guide · How to Switch Back to Legacy Outlook in Outlook on Mac: Step-by-Step