How to Extract Pages from a PDF in Preview: Step-by-Step Guide
This guide shows you how to extract specific pages from a PDF using Preview on Mac, saving them as separate files with ease.
You're working on a Mac and need to pull out just a few pages from a lengthy PDF without cluttering your desktop with extra software. Preview, the built-in app on macOS, offers a straightforward way to handle this task. If you’ve ever wondered how to extract pages from a PDF in Preview efficiently, this guide will walk you through the process step by step.
We’ll start by covering the basics—what you need to have ready before you begin. Then, you’ll learn how to extract specific pages, remove pages you don’t want, and save your extracted content as new PDFs. Along the way, common pitfalls unique to Preview’s interface will be addressed, so you can work confidently and avoid frustrating mistakes.
Key takeaways
- Use Preview’s thumbnail sidebar to select and extract specific pages easily.
- Drag selected pages to the desktop or a Finder folder to create a new PDF.
- Remove unwanted pages by selecting them and pressing the Delete key.
- When drag-and-drop fails, use the Print dialog’s page range and PDF save options.
- Save extracted pages with clear filenames and organize them in dedicated folders for easy access.
Before you start: What you need to extract pages in Preview
To begin extracting pages from a PDF using Preview, confirm that you are using a Mac with the Preview app installed. Preview is the default PDF viewer on macOS, so it should already be available on your system without needing additional downloads. Next, make sure the PDF file you want to work with is accessible on your Mac, either saved locally or in a folder you can easily open.
Preview allows you to extract, remove, and save pages from PDFs without requiring any third-party software. This makes it a straightforward choice for basic PDF page management tasks. While Preview's interface may vary slightly depending on your macOS version, core features like the sidebar thumbnails and page management menus remain consistent across updates.
When you open a PDF in Preview, you should see a sidebar on the left showing thumbnail images of each page. This sidebar is essential for selecting pages to extract or remove. Additionally, menu options such as "File," "Edit," and "View" provide the tools you need to manage pages effectively. Familiarizing yourself with these interface elements will help ensure a smooth extraction process.
- Open your PDF file by double-clicking it or right-clicking and selecting "Open With > Preview." You should see the PDF open with thumbnails visible on the left-hand sidebar.
- If the sidebar is not visible, click "View" in the menu bar and select "Thumbnails" to display page previews. This confirms you can navigate and select pages.
- Check that the PDF file opens without errors and that all pages load correctly. This ensures you are working with a complete file ready for editing.
How to extract specific pages from a PDF using Preview
Start by opening your PDF file in Preview. To see the page thumbnails, click the Sidebar button in the toolbar and select Thumbnails. This view allows you to easily identify and select the pages you want to extract.
- Select pages: Hold the Command (⌘) key to click and select multiple non-contiguous pages, or hold Shift to select a range of pages consecutively. Selected thumbnails will be highlighted.
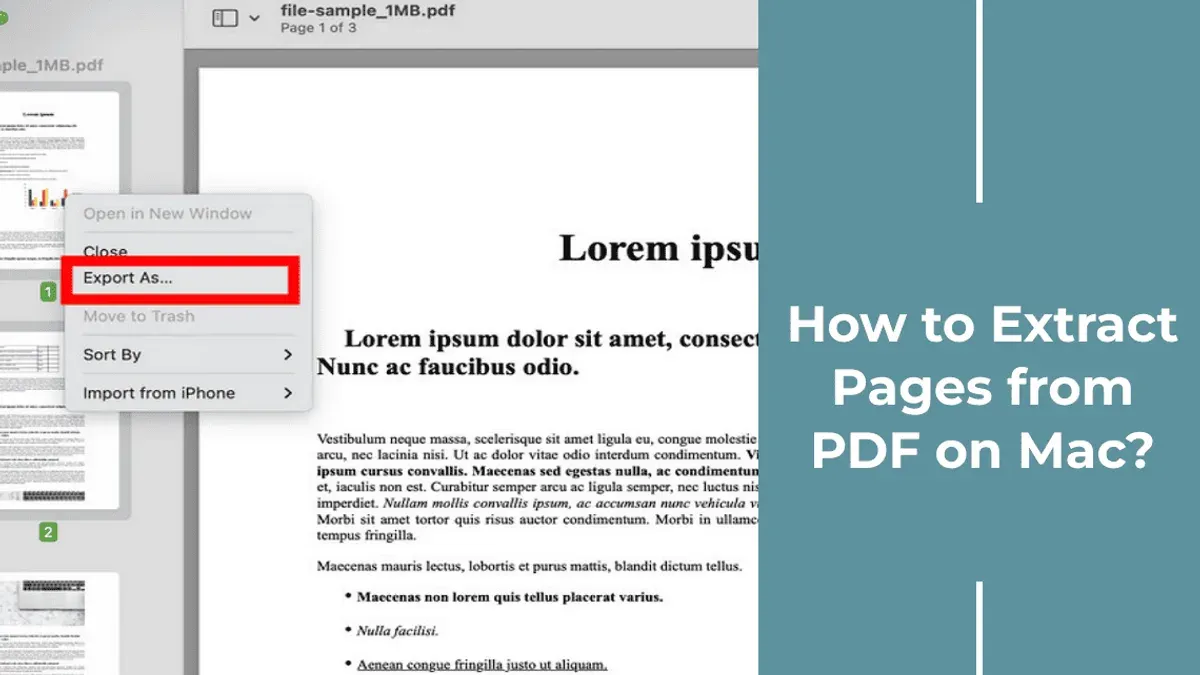
- Drag pages to create a new PDF: Click and drag the selected thumbnails out of Preview and drop them onto your desktop or a Finder folder. This automatically creates a new PDF containing only those pages.
- Rename your new PDF: Click the new file’s name and type a descriptive title to keep your extracted pages organized and easy to find later.
- Alternative method - Print and save: If you want to extract pages that are not adjacent or prefer a custom range, choose File > Print. In the print dialog, enter the page numbers or ranges in the Pages box, then click the PDF button at the bottom left and select Save as PDF. This creates a new PDF file with only your selected pages.
By following these steps, you can efficiently extract specific pages and save them as a new PDF without extra software. Make sure to name the extracted file clearly to avoid confusion when managing multiple documents.
How to remove pages from a PDF in Preview
Removing pages from a PDF in Preview is straightforward once you know where to find the necessary tools. Start by opening your PDF file in Preview, then reveal the sidebar if it’s not visible by clicking the Sidebar button in the toolbar or selecting View > Thumbnails. This will display small previews of each page, making it easier to select the pages you want to delete.
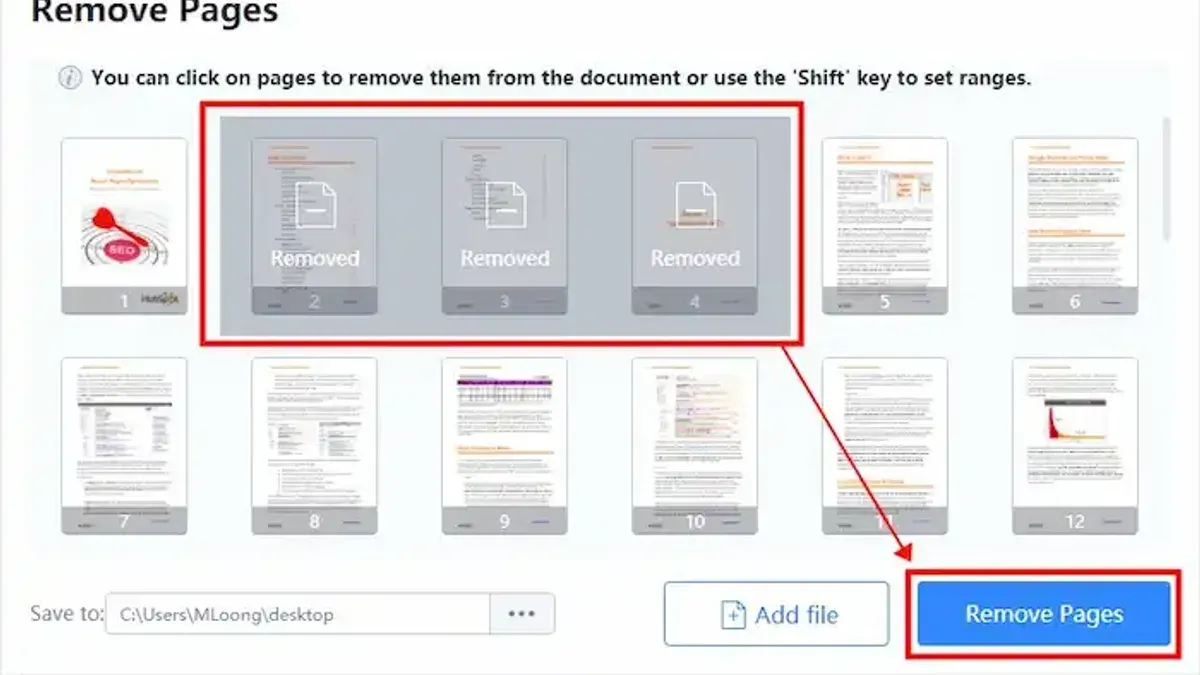
- Click on the thumbnail of the page you want to remove. To select multiple pages, hold the Command key while clicking each page. When you have selected the page(s), they will be highlighted.
- Press the Delete key on your keyboard, or go to the Edit menu and choose Delete. The selected pages will disappear from the sidebar, indicating they have been removed.
- Save the changes by selecting File > Save if you want to overwrite the original PDF. If you need to keep the original file intact, choose File > Save As to save a new copy with the pages removed.
For example, if your PDF originally has 10 pages and you remove 3, the updated file will show 7 pages in the sidebar. This visual confirmation helps you verify that the unwanted pages have been successfully deleted before saving.
Remember, deleting pages is permanent in the saved file, so if you might need the original document later, always save your edited PDF as a copy. This way, you avoid accidentally losing important information while cleaning up your document.
How to extract one page from a PDF in Preview
- Open your PDF file in Preview. The document should display in the main window, and you’ll see a sidebar on the left showing page thumbnails.
- In the sidebar, click the thumbnail of the page you want to extract. For example, to extract page 5 from a 10-page PDF, click the thumbnail labeled "5." This highlights the selected page.
- Drag the selected page’s thumbnail out of the sidebar and drop it onto your desktop or into a Finder folder. This action creates a new PDF containing only that single page. You should see a new PDF file appear where you dropped it.
- Alternatively, you can use the Print-to-PDF method for a single page. Go to the menu bar, select File > Print, then set the "Pages" field to "5" to print just page 5. Click the PDF button in the lower left of the print dialog, and choose Save as PDF. Name your file and choose a location, then save.
- Finally, rename the extracted PDF if you want to make it clear it contains only one page, such as "Page 5 Extract.pdf." This helps keep your files organized and avoids confusion later.
How to extract pages from a PDF on Mac when Preview’s drag-and-drop doesn’t work
Sometimes, the drag-and-drop method to extract pages in Preview may be disabled or unresponsive. This often happens because the PDF is secured, meaning its permissions restrict copying or editing. Scanned PDFs without selectable text or thumbnails can also prevent drag-and-drop from functioning properly.
If drag-and-drop is not working, an effective alternative is to use the Print menu to extract pages. This method bypasses restrictions by letting you specify page ranges and save them as new PDFs.
- Open the PDF in Preview and go to File > Print. A print dialog will appear.
- In the print dialog, locate the Pages field and enter the page numbers or ranges you want to extract (e.g., 2-4, 7).
- Click the PDF button at the bottom left of the dialog and choose Save as PDF.
- Name your new file and select a save location, then click Save. This creates a new PDF containing only the pages you specified.
Before trying extraction again, check the PDF’s permissions by selecting Tools > Show Inspector and viewing the Info tab. If the document is locked or restricted, drag-and-drop will likely not work.
If you encounter interface glitches such as unresponsive thumbnails or menus, restarting Preview or updating macOS can resolve these issues. Sometimes UI bugs temporarily disable features like drag-and-drop.
Compared to drag-and-drop, the Print-to-PDF method succeeds more consistently, especially with protected or scanned PDFs. Error messages like “This document is locked” often appear when drag-and-drop is attempted on secured files, but printing to PDF usually remains available.
How to combine extracted pages into a new PDF using Preview
After extracting pages individually or in groups, you can merge them into one custom PDF using Preview. This process is especially useful when creating a summary document from multiple PDFs, such as combining three extracted pages from different sources into a single file with a specific order.
- Open one of the extracted PDFs in Preview. You should see its pages as thumbnails in the sidebar.
- Open the folder containing the other extracted PDFs or pages. Drag the thumbnails of the pages you want to add from the folder directly into the sidebar of the open Preview window. When successful, the pages appear in the sidebar where you dropped them.
- Rearrange the pages by clicking and dragging thumbnails up or down in the sidebar to set your desired page order. For example, if you combined page 2 from PDF A, page 1 from PDF B, and page 3 from PDF C, you can reorder them as page 1, page 2, page 3 to suit your needs.
- Go to the menu and select File > Save As or File > Export as PDF. Enter a new name for your combined PDF and choose a save location. This preserves your original extracted files while creating the merged document.
By dragging and dropping pages into one Preview window, you avoid needing third-party apps and maintain control over page order. This method is practical for compiling reports, presentations, or any time you want selected content combined cleanly.
How to extract pages from a PDF online when Preview is not an option
If you cannot use Preview or need to extract PDF pages on another device, several reputable online tools offer convenient alternatives. Websites like Smallpdf, ILovePDF, and PDF2Go allow you to upload your PDF, select pages to extract, and download the new file without installing software. These tools can be helpful but come with some limitations and privacy considerations.
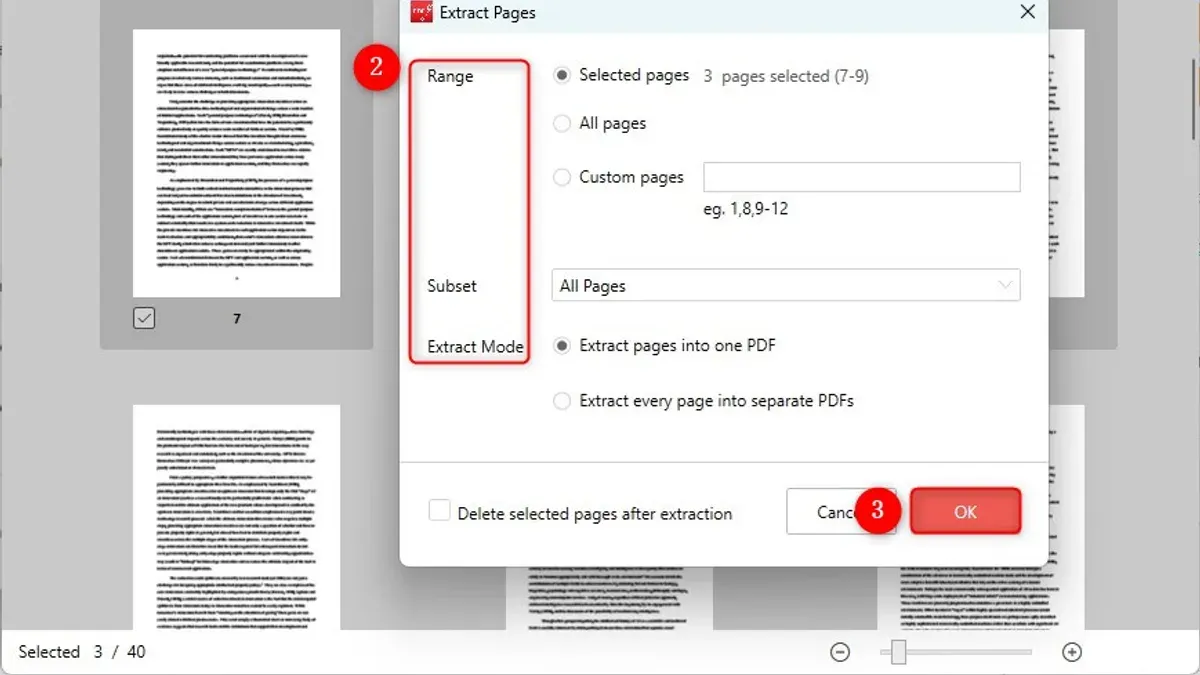
Before using online extraction tools, ensure you have a backup of your original PDF. Uploading sensitive or confidential documents poses privacy risks, as the files are processed on external servers. Review each service’s privacy policy to understand how your data is handled. Many free tools limit file size or restrict advanced features, so they can complement but not fully replace Preview for complex tasks.
| Tool | Key Features | Privacy Notes |
|---|---|---|
| Smallpdf | Drag-and-drop interface, page selection, output formats | Files deleted after 1 hour; SSL encrypted |
| ILovePDF | Batch processing, page range selection, merge options | Uploads encrypted; stored short-term |
| PDF2Go | Page extraction, editing, OCR available | Files removed after 24 hours; secure connection |
To extract pages online, follow these steps:
- Open your chosen online PDF extraction tool in a web browser. The main upload interface should appear.
- Upload your PDF by clicking the upload button or dragging the file into the designated area. You should see the PDF thumbnails or page numbers load.
- Select the pages you want to extract, usually by clicking checkboxes or specifying page ranges. The tool will highlight or mark your selections.
- Click the extract or save button to create the new PDF with only your chosen pages. A download link or prompt should appear.
- Download the extracted PDF and verify it contains only the pages you selected. Save it to your preferred location.
How to save and organize your extracted PDF pages efficiently
After extracting pages from a PDF in Preview, managing your new files thoughtfully helps keep your workflow smooth and avoids confusion. Start by giving each extracted PDF a clear, descriptive name. A good naming convention includes the original file name plus the page range, such as Report2026_pages_3-5.pdf. This immediately tells you what the file contains without opening it.
Create a dedicated folder on your Mac for extracted PDFs, for example, Extracted PDFs inside your Documents folder. This centralizes all your edited files, making them easier to find and preventing clutter in other directories. You can also create subfolders by project or date if you handle many PDFs regularly.
When saving your extracted pages in Preview, use the File > Save As option instead of just Save. This ensures you don’t overwrite the original file and keeps both versions available. Preview’s Save As dialog lets you pick the folder and filename, so you can apply your naming system right away.
To further organize, add Finder tags or comments to your extracted PDFs. Right-click the file in Finder, select Tags, and choose colors or create custom tags like Reviewed or To Edit. Adding comments in Finder’s Info panel helps record notes about the file’s content or status, making future searches and sorting more effective.
- After extracting pages, choose File > Save As. You should see a dialog to name your new PDF and select where to save it.
- Name the file using the original PDF’s base name plus the pages included, for example, Invoice2026_pages_10-12.pdf. You will see the file name updated in the dialog.
- Create or navigate to a dedicated folder like Documents > Extracted PDFs, then save your file there. The folder will now contain your new, clearly named extracted PDF.
- In Finder, right-click the saved PDF and select Tags. Choose or add a tag color or label. The file icon will display the tag color immediately.
- Open Get Info on the file (Command + I), then add comments in the Comments section. These notes will be searchable later and visible in Finder’s preview pane.
Frequently asked questions
How to extract pages in a pdf?
To extract pages from a PDF, open the file in Preview, display the sidebar with thumbnails, then select the pages you want. Drag those pages to your desktop or a folder in Finder to create a new PDF containing only the selected pages. Alternatively, use the File menu’s Export as PDF option after selecting the pages.
How to extract pages from pdf file?
Open the PDF in Preview and enable the sidebar to see page thumbnails. Select the desired pages by clicking while holding Command for multiple selections. Drag these selected pages out of Preview to create a new PDF, or copy and paste them into a new Preview window and save the file.
How to remove one page from a pdf in preview?
Show the sidebar in Preview, click the thumbnail of the page you want to remove, and press the Delete key on your keyboard. Confirm removal if prompted. Remember to save the edited PDF afterward to keep the changes.
How to extract pages from pdf mac preview?
In Preview on Mac, open the PDF and reveal the sidebar with thumbnails. Select the pages you want by clicking with Command pressed for multiple pages. Drag these pages out of the Preview window to create a new PDF file containing only those pages.
How to remove pages from a PDF in Preview Mac?
Open the PDF in Preview and show the sidebar thumbnails. Select the pages to delete by clicking on their thumbnails, then press the Delete key or choose Edit > Delete. Save the document to apply the changes permanently.
What This Guide Does Not Cover and When to Look Elsewhere
Preview works well for basic page extraction and removal but has limitations. It cannot extract pages from password-protected or DRM-restricted PDFs unless you have the correct permissions. Additionally, this guide does not cover advanced PDF editing features such as optical character recognition (OCR) or extracting text beyond page-level operations. If you are working with very large PDFs or documents with complex layouts, you might notice slower performance or some restricted functionality within Preview.
If your needs extend beyond simple page management — for example, if you require text recognition, form editing, or batch processing of hundreds of pages — consider specialized PDF software designed for those tasks. Also, when dealing with secured files, ensure you have authorization or use tools that can handle that level of encryption legally and appropriately.
The single most useful next step is to practice extracting and saving pages on a test PDF file first. This will help you become comfortable with Preview’s interface and avoid accidental data loss. Pay close attention to saving your extracted pages as a new document through the “File” > “Export as PDF” option to keep your original intact and maintain an organized workflow.
See also: How to Compress a PDF in Preview: Step-by-Step Guide · How to Annotate a PDF in Preview: A Clear Step-by-Step Guide · How to Sign a PDF in Preview: Step-by-Step Guide for Mac Users