How to Fix External Drive Not Mounting in Disk Utility
Discover effective steps to fix your external drive not mounting in Disk Utility and recover access to your data safely on your Mac.
You connect your external drive to your Mac, expecting it to show up in Disk Utility, but it doesn’t appear or won’t mount. This common issue can be frustrating, especially if you’re unsure whether the drive is damaged or if the problem lies elsewhere.
This article covers how to fix external drive not mounting in Disk Utility by guiding you through clear, step-by-step diagnostic actions. You’ll learn how to interpret Disk Utility’s status messages, run disk checks safely, attempt manual mounting, and perform system-level resets—all aimed at protecting your data before considering formatting or professional recovery.
Key takeaways
- Check if your external drive is visible and note its status in Disk Utility before proceeding.
- Run First Aid to detect and repair common disk errors safely within Disk Utility.
- Try mounting the drive manually if automatic mounting fails.
- Use Terminal commands like diskutil list to identify drives and diskutil mount to mount them.
- Reset your Mac’s USB or Thunderbolt ports by restarting and disconnecting other peripherals to eliminate connection issues.
Before You Start: What You Need
Before troubleshooting your external drive not mounting in Disk Utility, make sure your Mac is connected to power. This prevents interruptions during the process. Connect your external drive using a reliable cable and a functional port, preferably directly to your Mac rather than through a hub.
Identify your drive type—whether it’s an HDD, SSD, USB, or Thunderbolt device. Note any recent events such as drops, power loss, or cable replacements that might have affected the drive. This information helps in diagnosing the issue accurately.
Ensure you have basic familiarity with Disk Utility, including how to open it from Applications > Utilities. Also, check that you have the necessary permissions to make changes on your Mac, typically requiring administrator access.
Finally, if possible, back up any important data on your external drive before proceeding. Some troubleshooting steps may risk data loss, so having a backup is a crucial safety measure.
- Connect your Mac to power and attach your external drive with a reliable cable and port.
Expected result: The drive is physically connected and powered. - Confirm your drive type and recall recent incidents involving the drive.
Expected result: You have clear details about the drive’s nature and condition. - Open Disk Utility (Applications > Utilities > Disk Utility) and verify you can access it.
Expected result: Disk Utility launches successfully. - Ensure you have administrator permissions on your Mac.
Expected result: You can perform changes within Disk Utility. - Back up important data from the external drive if accessible.
Expected result: Your data is safely copied elsewhere.
Check Disk Utility for Drive Visibility and Status
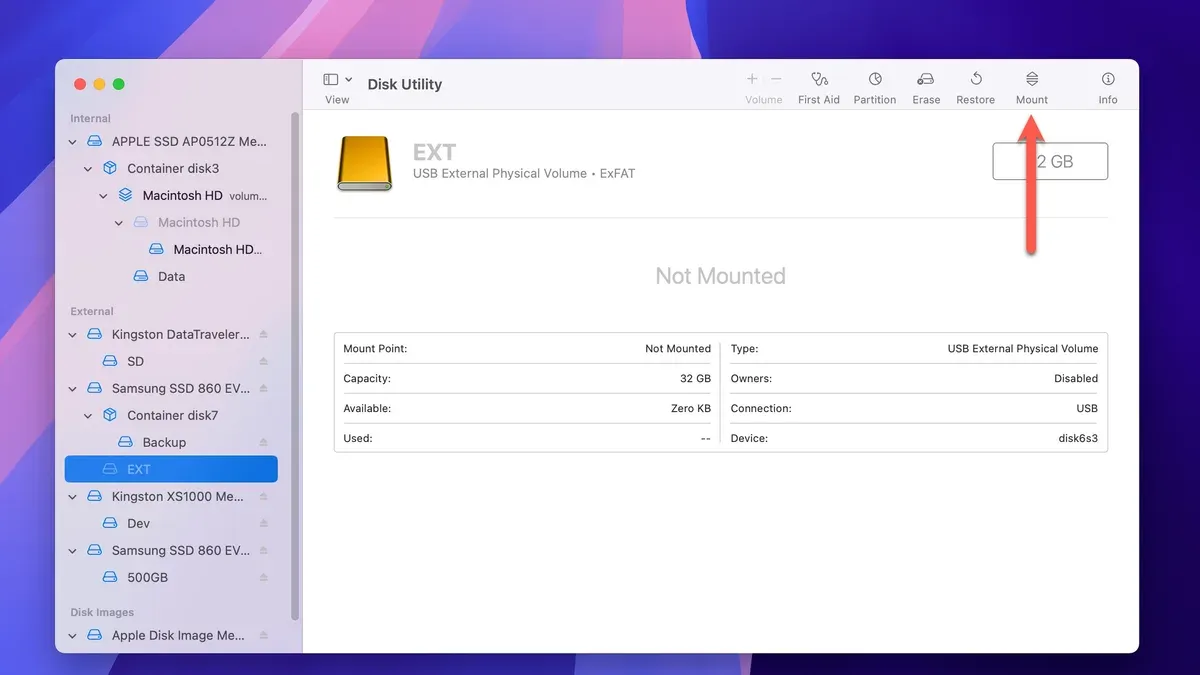
Start by opening Disk Utility, found in the Utilities folder within Applications. In the sidebar on the left, look under the category labeled External to find your connected drive. If the drive appears normally, you should see its name along with any volumes it contains. A healthy external drive typically shows volumes indented beneath the main drive name.
If the drive is grayed out, it means the system recognizes it but the drive is not currently mounted. A drive with no volumes listed might indicate a formatting or partitioning problem, while a drive missing entirely from the list suggests a connection or hardware issue. Understanding these visual cues helps decide your next troubleshooting steps.
Note the terminology: Unmounted means the drive is recognized but not accessible in Finder; Not Mounted or Offline can indicate the drive is not initialized or has failed to respond. If Disk Utility does not list your drive at all, open System Information (Apple menu > About This Mac > System Report) and select USB or Thunderbolt under Hardware. This confirms whether your Mac detects the device at a hardware level, separating connection issues from software or drive problems.
- Open Disk Utility (Applications > Utilities > Disk Utility).
- Look in the sidebar for your external drive under External.
- Identify if the drive is normal, grayed out, missing volumes, or absent.
- If absent, open System Information and check under USB or Thunderbolt for your device.
Run First Aid to Diagnose and Repair Disk Issues
First Aid in Disk Utility is a built-in tool that checks your external drive for common problems like file system errors and partition map inconsistencies. Running First Aid can often resolve issues preventing your drive from mounting properly without risking data loss.
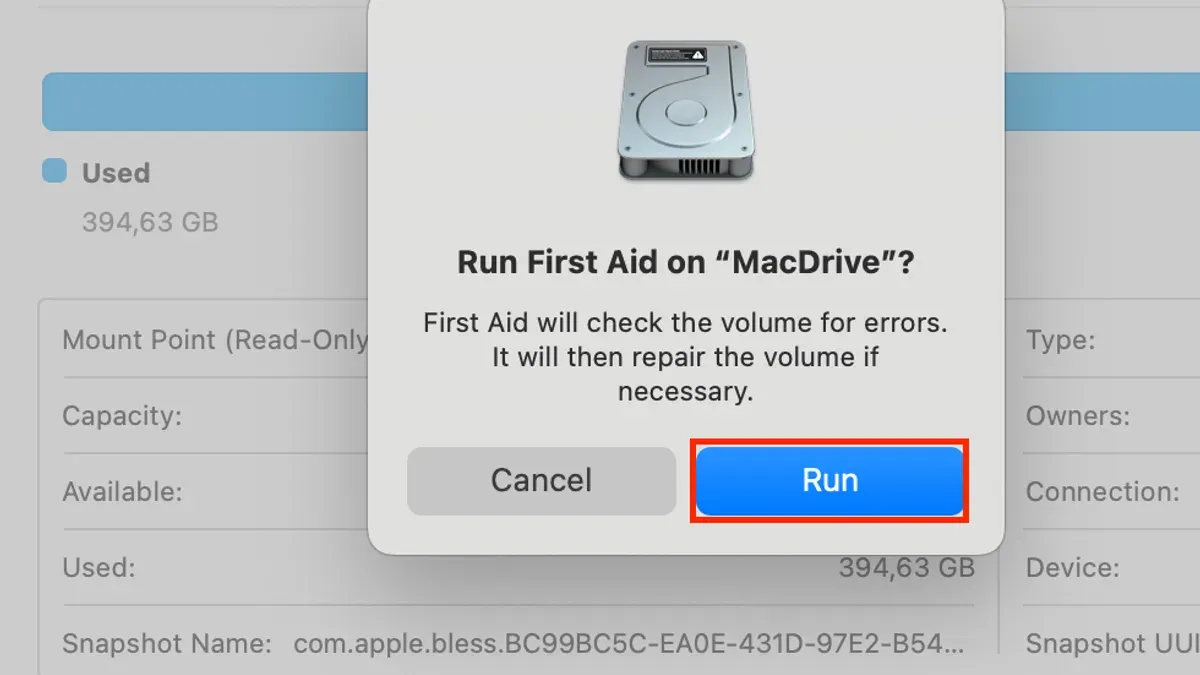
- Open Disk Utility and select your external drive or the specific volume under it in the sidebar. You should see the drive's name and capacity clearly listed.
- Click the First Aid button in the toolbar, then confirm by clicking Run. Disk Utility will begin checking the disk's integrity.
- Watch the progress window for messages. If it reports that the disk appears to be OK or has been repaired, try mounting the drive again.
- If First Aid finds errors it cannot repair, you may see messages like “First Aid found corruption that needs to be repaired” or “The underlying task reported failure”. In this case, do not attempt further repairs yourself.
- Stop and consider backing up any accessible data immediately. Persistent First Aid failures often indicate deeper disk damage requiring professional data recovery.
Typically, Disk Utility’s First Aid successfully fixes minor disk errors and mounts the drive. However, if errors persist, further intervention beyond software repair may be necessary to safeguard your data.
Mount the Drive Manually Using Disk Utility
When your external drive appears in Disk Utility but doesn’t mount automatically, you can try to mount it manually. Look for the drive in the sidebar and select it. The Mount button should appear in the toolbar or under the File menu. Clicking this attempts to make the drive accessible in Finder.
Drives may fail to auto-mount due to incompatible file systems, disk errors, or permission issues. For example, a drive formatted for Windows (NTFS) might show but won’t mount without additional software. Disk errors or corrupted directories can also prevent mounting, and permission conflicts sometimes block access.
If the mount succeeds, the drive icon appears on your desktop and in Finder’s sidebar. If it fails, Disk Utility often displays an error message such as “The disk could not be mounted” or error codes like “Error: -69846”. These indicate deeper issues requiring further diagnosis or professional help.
Be cautious about forcing a mount on a failing drive. Repeated mount attempts on a damaged disk can worsen data loss risks. If mounting repeatedly fails, avoid formatting or forcing mounts and consider data recovery options.
- Open Disk Utility and select your external drive in the sidebar. You should see the drive's details on the right.
- Click the Mount button in the toolbar. If the button is grayed out, the drive may be unrecognizable or severely damaged.
- If mounting is successful, the drive will appear on your desktop and in Finder, allowing access to its files.
- If mounting fails, note any error message displayed. Common errors include “The disk could not be mounted” or error codes like -69846. Stop and avoid further mount attempts if errors persist.
Use Terminal Commands to Identify and Mount the Drive
If Disk Utility does not mount your external drive, Terminal commands offer an alternative way to check for the drive’s presence and attempt mounting. This approach is useful for advanced users comfortable with command-line tools, but you should proceed carefully to avoid unintended changes.
- Open Terminal (found in Applications > Utilities) and type diskutil list, then press Return. This command lists all connected disks and volumes. Look for your external drive by its size, partition names, or identifiers like /dev/disk2. If you don't see it, the Mac may not recognize the drive at the hardware level.
- Once you identify the disk identifier, try mounting the drive by typing diskutil mount /dev/disk2 (replace /dev/disk2 with your drive’s actual identifier) and press Return. A successful command returns a message like "Volume mounted successfully." If it fails, you might see errors indicating why mounting is blocked.
- To diagnose mounting errors, check system logs by opening Console.app or using Terminal commands such as log show --predicate 'process == "diskmanagementd"' --last 1h. This can provide more detail on why mounting failed, such as file system corruption or permission issues.
Exercise caution when using Terminal commands, as incorrect inputs can affect system disks or data integrity. Only run commands you understand fully, and avoid force-mounting drives without knowing the risks involved.
Reset Mac’s USB or Thunderbolt Ports and Restart
If your external drive still fails to mount after software checks, the issue might be at the hardware or system level. Start by safely disconnecting your drive and its cables from the Mac. Wait a few seconds, then reconnect the drive using a different USB or Thunderbolt port if available. This simple step can isolate whether a specific port or cable is faulty, as some users find their drive mounts successfully after switching ports or cables.
Next, reset your Mac’s system management controller (SMC) or NVRAM/PRAM to refresh hardware recognition, including USB and Thunderbolt ports. The process varies by Mac model: on Intel-based Macs, shut down your Mac, then hold the Shift-Control-Option keys and the power button simultaneously for about 10 seconds before releasing and powering on. For resetting NVRAM/PRAM, restart your Mac and immediately press and hold Option-Command-P-R for about 20 seconds until the Mac restarts again.
After these resets, restart your Mac normally. This clears temporary glitches that can block external drive detection. Many users report that drives previously unmountable become visible and accessible after these steps. If the problem persists, testing with another cable or external drive can confirm whether the issue lies with your Mac’s ports or the drive itself.
Troubleshoot Common Failure Points
When previous steps don’t resolve your external drive’s mounting issues, it’s time to consider common failure points that can cause Disk Utility to fail. First, check if the drive uses a file system incompatible with macOS, such as certain Windows or Linux formats. Disk Utility might detect the drive but not mount it if the file system is corrupted or unsupported. In such cases, backing up data on another system or consulting a recovery tool is advisable before proceeding.
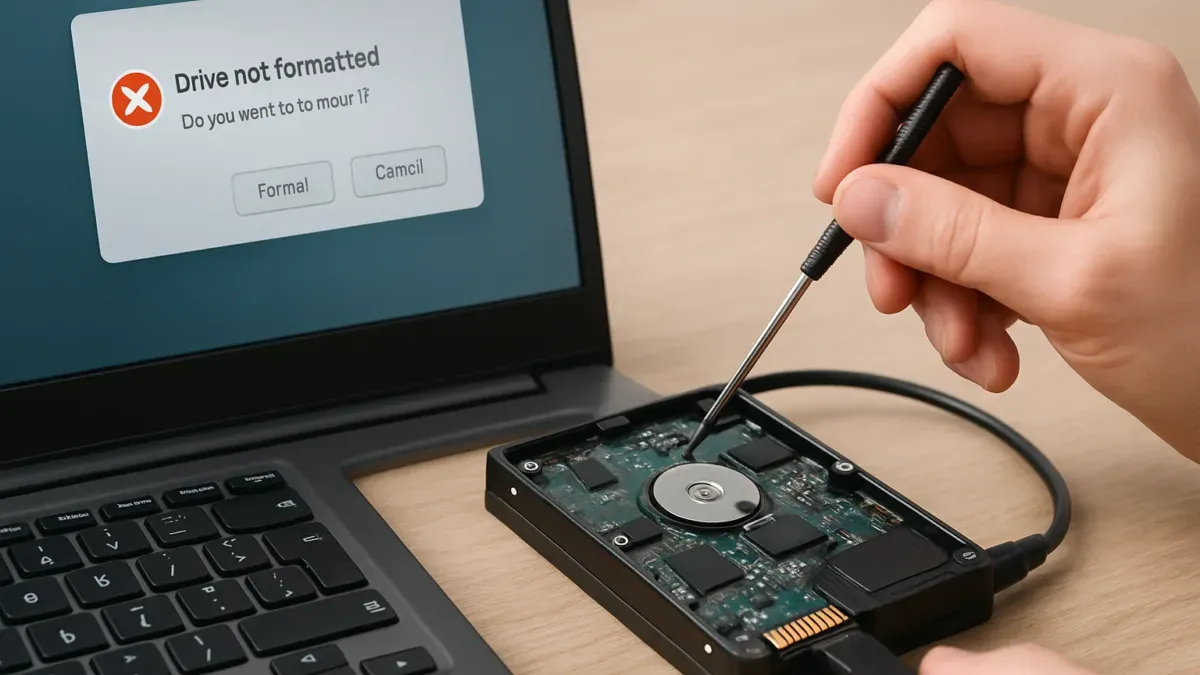
Corrupted partition tables also prevent mounting. If you see the drive listed but with no partitions or strange volume names, the partition map may be damaged. Reformatting can restore functionality but erases all data, so only do this if data recovery is not critical or has been completed.
Hardware failure signs include unusual clicking noises, the drive not spinning up, or inconsistent recognition by your Mac. These symptoms often indicate mechanical issues requiring professional data recovery services. If you notice these signs, avoid further attempts to mount or repair the drive yourself to prevent worsening the damage.
Common scenarios include a USB drive that suddenly stops spinning or an external HDD making repetitive clicking sounds. In these cases, contacting a professional data recovery service is the safest route to preserve your data.
- Inspect the drive’s physical behavior when connected; any unusual noise or failure to spin means hardware issues.
Result: No mounting despite retries; hardware failure suspected. - Check the file system type in Disk Utility or Terminal; if unsupported, consider accessing the drive on a compatible system or recovery software.
Result: Drive visible but unmountable due to file system issues. - Look for missing or corrupted partitions; if so, decide if reformatting is acceptable after data backup.
Result: Drive mounts after reformat, but data is lost. - If hardware failure signs persist, stop further self-repair attempts and contact a professional service.
Result: Data recovery specialists handle your drive to prevent data loss.
Frequently asked questions
Why does my external drive show up but won’t mount in Disk Utility?
This usually means the drive is detected by your Mac but has a problem preventing it from mounting properly. Common causes include corrupted file system structures, partition issues, or insufficient power supply. Running First Aid in Disk Utility can help identify these issues, but if it fails, the drive may need professional data recovery or reformatting.
Can I recover data if First Aid fails to fix the drive?
Yes, data recovery is often possible even if First Aid cannot repair the drive. First Aid focuses on fixing disk errors but does not recover lost files. You can use specialized data recovery software or consult professional services to attempt file retrieval before considering any formatting or reinitialization.
What should I do if my Mac doesn’t recognize the external drive at all?
Start by checking your cables and ports for physical issues and try connecting the drive to a different port or Mac. Resetting the Mac’s USB or Thunderbolt controllers by restarting or performing an SMC reset may help. If the drive still doesn’t appear, it might have hardware damage or require professional evaluation.
Is it safe to reformat a drive that won’t mount?
Reformatting will erase all data on the drive, so it should only be done after you have recovered important files or accepted data loss. If the drive is not mounting due to file system corruption, reformatting can restore usability. However, make sure to attempt data recovery first if the files are valuable.
What This Guide Does Not Cover
This guide does not cover physical hardware repairs or advanced data recovery techniques that require specialized tools or expertise. If your external drive is making unusual noises, is physically damaged, or remains unrecognized after all software troubleshooting steps, it is best to consult a professional data recovery service. Attempting hardware repairs or using unverified recovery software without proper knowledge can lead to permanent data loss.
Additionally, this article does not address drive encryption issues or complex partition problems that might require expert intervention or specialized software.
Next Step: Back Up Your Data Regularly
If your drive mounts successfully after these steps, prioritize creating a complete backup of its contents immediately. This safeguards your data against future mounting problems or hardware failures. Regular backups using Time Machine or other reliable methods ensure you won’t lose valuable information and reduce the pressure to troubleshoot in urgent situations.
See also: How to Force Eject a Disk in Disk Utility: Step-by-Step Guide · How to Erase a Drive in Disk Utility: A Clear Step-by-Step Guide