How to Fix Google Chrome High Memory Usage on Mac Step-by-Step
Discover step-by-step solutions to fix Google Chrome high memory usage on Mac and improve your system’s speed and stability.
When you notice your Mac slowing down, and Google Chrome is the main culprit using a large portion of your memory, it can be frustrating. You might find Chrome’s windows and tabs are sluggish or even causing your system to freeze.
This article guides you through how to fix Google Chrome high memory usage on Mac with clear, step-by-step instructions. You’ll learn how to identify which tabs or extensions consume the most memory, manage them effectively, and adjust both Chrome’s and your Mac’s settings to improve performance. Each step includes explanations so you understand why it matters, not just what to do.
Key takeaways
- Use Chrome’s built-in Task Manager (Shift + Esc) to spot memory-heavy tabs and extensions.
- Close or suspend unused tabs and disable unnecessary extensions to reduce memory load.
- Clear browsing data beyond cache, including cookies and site data, to free up memory.
- Keep Chrome and macOS updated to benefit from performance improvements and fixes.
- Monitor Chrome’s memory in Mac’s Activity Monitor and troubleshoot persistent high usage effectively.
Before You Start: What You’ll Need
To effectively manage and reduce Google Chrome’s high memory usage on your Mac, you need to prepare a few essentials. First, ensure you have access to your Mac with administrative privileges. This allows you to make necessary system changes and updates without restrictions. Next, a basic familiarity with Chrome’s settings and Mac’s built-in Activity Monitor is important. You don’t need to be an expert, but knowing where these tools are and how to open them will make the process smoother.
Lastly, patience is key. Diagnosing memory issues involves checking various settings and evaluating Chrome’s behavior step-by-step. Avoid rushing through the steps to ensure each action takes effect as expected. Having these tools and a calm approach will reduce frustration and help you follow the instructions carefully for the best results.
- Log in to your Mac with an account that has administrative privileges. You should be able to install updates and access system settings. When done correctly, you will have full control over system preferences.
- Open Google Chrome and familiarize yourself with the menu bar at the top. Try accessing Chrome’s settings by clicking the three dots in the upper right corner and selecting “Settings.” You should see Chrome’s configuration panel.
- Locate and open the Activity Monitor on your Mac by navigating to Applications > Utilities > Activity Monitor. Confirm that the window shows processes and resource usage in real time.
Check Chrome’s Task Manager to Identify Memory Hogs
Chrome’s built-in Task Manager helps you see exactly which tabs and extensions are using the most memory. This clarity allows you to target the biggest resource consumers first, rather than guessing. You can open it quickly with a keyboard shortcut and then sort the list to spot heavy users at a glance.
- Press Shift + Esc while Chrome is active. A new Task Manager window opens displaying all active tabs, extensions, and processes.
- Click the Memory footprint column header to sort processes by memory usage. The highest memory consumers move to the top, making them easy to identify.
- Look for tabs running multimedia content like videos or complex sites, as they often use more memory.
- Check extensions listed as processes; some poorly optimized or unnecessary extensions can use significant memory.
- Note the names of the highest memory users so you can decide which tabs to close or which extensions to disable or remove.
By regularly reviewing Chrome’s Task Manager, you gain insight into which parts of your browsing experience impact memory the most. This helps you manage resources efficiently without blindly closing tabs or extensions that might be important to you.
Close or Suspend Unnecessary Tabs and Extensions
Each open tab and active extension in Chrome consumes memory, so reducing their number can significantly lower Chrome’s overall memory usage. Start by closing tabs you no longer need. To do this, click the “X” on the tab or press Command + W. You should notice an immediate drop in memory consumption when you close tabs that were using considerable resources.
If you often keep many tabs open but don’t need them all active simultaneously, consider using a tab suspension extension. Extensions like "The Great Suspender" or "Auto Tab Discard" automatically put inactive tabs to sleep, freeing up memory until you revisit them. After installing such an extension, check its settings to customize when and how tabs are suspended.
Extensions themselves can also cause high memory usage. To manage them, click the three-dot menu, go to More Tools > Extensions, and review what’s installed. Disable extensions you rarely use by toggling their switch off, or remove them entirely by clicking Remove. After disabling or uninstalling, monitor the Activity Monitor or Chrome memory usage to confirm a reduction.
- Identify tabs you no longer need and close them by clicking the “X” or pressing Command + W. You should see a decrease in memory use.
- Install a tab suspension extension from the Chrome Web Store and configure its settings to suspend inactive tabs automatically. Memory usage should stabilize or reduce over time.
- Open Chrome’s Extensions page via the menu and disable or remove extensions that use excessive memory. After this, check memory usage again to confirm improvement.
Clear Browsing Data Beyond Cache to Free Up Memory
While clearing the cache is a common step, cookies and site data also contribute significantly to Chrome's memory usage on your Mac. Over time, these stored files accumulate and can slow down performance by requiring more resources to manage and load.
To clear this data selectively, follow these steps to avoid losing important saved information like passwords or site preferences:
- Open Chrome and click the three-dot menu in the top-right corner, then select Settings. You should see the Settings page load.
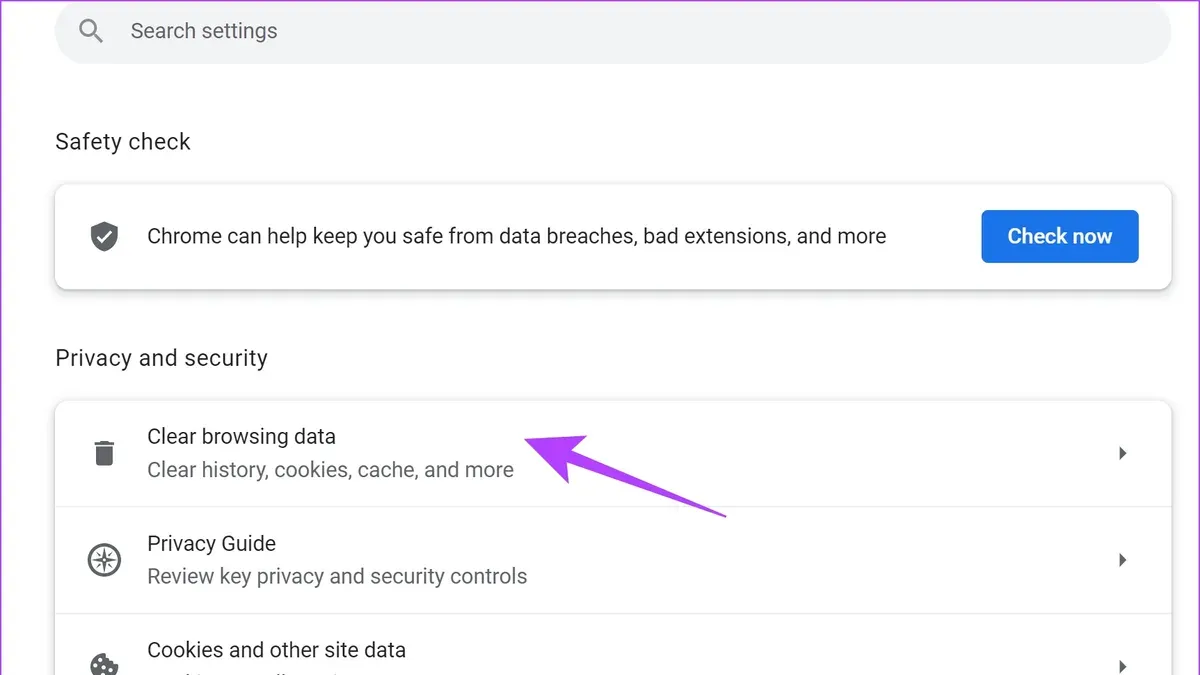
- Scroll down and click Privacy and security on the left sidebar, then select Clear browsing data. A popup with options will appear.
- Switch to the Advanced tab. Here you can choose a time range—select All time to remove everything or a shorter period if you want to keep recent data.
- Check Cookies and other site data and Cached images and files. Uncheck Passwords and other sign-in data if you want to keep saved logins. Click Clear data. The popup will close once done.
- Restart Chrome to let changes take effect. You may notice faster tab loading and reduced memory use.
Clearing cookies and site data frees memory by removing stored scripts and files that can otherwise pile up. For example, some users report a visible drop in Chrome’s memory footprint after clearing site data accumulated over weeks. Just remember that clearing cookies will sign you out of most websites, so keep that in mind before proceeding.
Update Chrome and macOS for Optimal Performance
Keeping both Google Chrome and macOS updated is crucial for managing memory effectively on your Mac. Updates often include bug fixes and memory optimizations that improve how Chrome uses system resources, preventing slowdowns caused by inefficient memory handling in older software versions.
- Open Google Chrome and click the three-dot menu in the upper-right corner. Select Help > About Google Chrome. You should see Chrome automatically check for updates and begin installing if any are available. When the update finishes, the browser will prompt you to relaunch. Relaunch to apply the update.
- Click the Apple menu () in the top-left corner of your screen and choose System Settings or System Preferences depending on your macOS version. Then select Software Update. If an update is available, click Update Now and follow the prompts to install it. Your Mac may restart to complete the update.
Running outdated versions of Chrome or macOS can cause memory leaks or inefficient resource allocation, as seen in past update notes referencing fixes for tab memory leaks and improved memory compression. Staying current ensures you benefit from these improvements and reduces the chance of high memory usage impacting your system.
Adjust Chrome’s Settings to Limit Memory Use
Chrome offers several settings that can directly impact how much memory it consumes on your Mac. Adjusting these can help reduce unnecessary memory load, especially if you notice high usage even after managing tabs and extensions.
- Open Chrome and click the three-dot menu in the upper right corner, then select Settings. You should see the main settings page.
- Scroll down and click System. Here, locate the option labeled Use hardware acceleration when available. Toggle this off. Disabling hardware acceleration can reduce memory use if your Mac’s GPU causes issues, though some graphical features may slow slightly.
- Still in the System section, turn off Continue running background apps when Google Chrome is closed. This stops Chrome processes from running after you close the browser, which can free up memory but means background apps like extensions won’t stay active.
- Go back to the main Settings page and select Privacy and security, then click Site Settings. Here, review permissions like JavaScript, Flash, and Background sync. Restrict or block these for sites you don’t trust or don’t need active scripts running constantly. This limits heavy scripts that increase memory consumption.
Users often find that disabling hardware acceleration and background apps reduces Chrome’s memory footprint noticeably. Managing site permissions further cuts down scripts running invisibly, which otherwise accumulate memory use over time.
Use Mac’s Activity Monitor to Monitor and Manage Chrome’s Memory
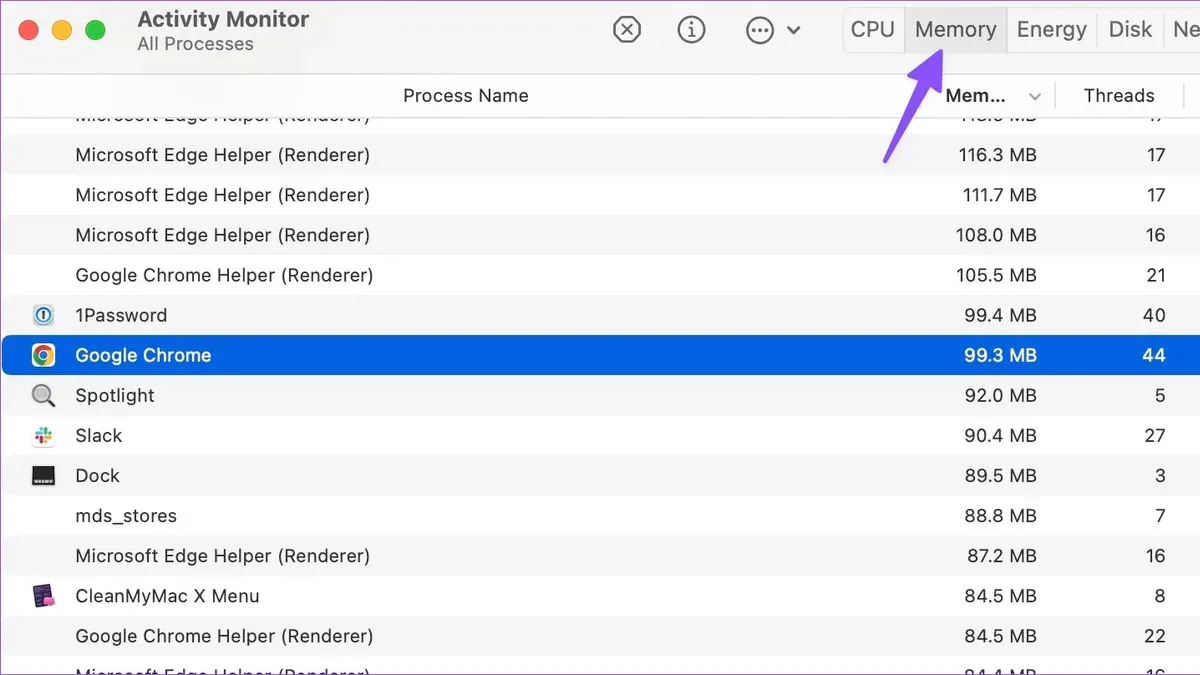
Activity Monitor is the built-in macOS tool that helps you see how much memory Chrome is using overall and on a process-by-process basis. By filtering for Chrome processes, you can identify which ones are consuming unusually large amounts of RAM and take action to improve performance.
- Open Activity Monitor from the Applications > Utilities folder or use Spotlight by typing "Activity Monitor" and pressing Enter. You will see a list of all running processes.
- In the search bar at the top right, type “Chrome” to filter the list to only show Google Chrome related processes. You will see several entries such as “Google Chrome Helper” alongside the main Chrome process.
- Look at the “Memory” column to identify processes using a high amount of RAM relative to others. For example, some helper processes might use hundreds of megabytes, while others use much less.
- If you find a process with excessive memory use causing slowdowns, select it and click the stop (X) button in the toolbar. Choose “Force Quit” to safely terminate that process without closing the entire browser.
- After quitting problematic processes, monitor Chrome’s responsiveness and memory use, which should improve. You can repeat this check periodically to keep Chrome running smoothly.
By using Activity Monitor this way, you gain a clear view of Chrome’s memory behavior on your Mac and can intervene directly when specific processes become a problem.
Troubleshoot Common Issues When Memory Usage Remains High
If Chrome’s memory usage stays high despite following the earlier steps, deeper issues might be at play. One common cause is malware or unwanted software interfering with Chrome’s processes. Running a reputable malware scanner or Chrome’s built-in Cleanup Tool can detect and remove harmful programs that consume excess memory.
Another advanced step is creating a new Chrome user profile. Sometimes, profile corruption causes persistent memory leaks. To do this, go to Chrome’s settings, click on “Add” under the People section, and create a fresh profile. Launch Chrome with this new profile and monitor memory usage; if it improves, your original profile likely contains problematic data or extensions.
As a last resort, resetting Chrome to its default settings can resolve stubborn memory problems. This action restores Chrome’s settings to their original state, disabling extensions and clearing temporary data without deleting bookmarks or saved passwords. You can find this option under Settings > Reset and clean up > Restore settings to their original defaults. After resetting, observe if memory usage stabilizes, indicating that previous custom settings or extensions were the cause.
Frequently asked questions
Why does Google Chrome use so much memory on Mac?
Google Chrome uses a multi-process architecture, which means each tab, extension, and plugin runs in its own process. This design improves stability and security but increases overall memory consumption. On Mac, this can be more noticeable because Chrome isolates processes to prevent one from crashing the entire browser, leading to higher memory use compared to some other browsers.
Can disabling extensions really reduce Chrome’s memory usage?
Yes, disabling or removing unnecessary extensions can significantly reduce Chrome's memory usage. Extensions run background processes that consume RAM, so turning off ones you don’t need frees up resources. Check which extensions you rarely use by visiting chrome://extensions and disable them to see if performance improves.
Is it safe to clear all browsing data to fix memory problems?
Clearing browsing data like cookies and cached images is generally safe but comes with trade-offs. While it can free memory and improve speed, you may need to log back into websites and lose some site preferences. If you want to avoid losing passwords or autofill data, choose the specific types of data to clear in the “Clear browsing data” menu under Chrome’s settings.
How often should I monitor Chrome’s memory usage on my Mac?
Monitoring Chrome’s memory usage periodically is helpful, especially if you use many tabs or extensions. Checking once a week or whenever you notice slowdowns can help you identify memory-hungry tabs or extensions early. Use Chrome’s built-in Task Manager (Shift+Esc) or Mac’s Activity Monitor for quick checks without interrupting your workflow.
Honest Limits of This Guide
This guide focuses on software-based solutions within Google Chrome and macOS to manage and reduce high memory usage. It does not cover hardware upgrades such as adding more RAM or replacing your Mac’s internal storage. Nor does it explore third-party memory management tools that claim to optimize performance. If your Mac has very limited RAM—such as 4GB or less—or if Chrome continues to consume excessive memory despite these steps, you may need to consider hardware improvements or trying a more lightweight browser designed for low-memory environments.
The most useful next step is to regularly use Chrome’s built-in Task Manager to monitor which tabs or extensions consume the most memory. By closing or suspending these memory-intensive processes early, you prevent Chrome from bogging down your system and keep your Mac running smoothly without requiring complex tweaks.
See also: Set Google Chrome as Your Default Browser on Mac: A Clear Step-by-Step Guide · How to Import Passwords from Chrome to Apple Passwords App