How to Fix Microsoft Teams Camera Not Working on Mac: A Clear Troubleshooting Guide
Learn how to fix Microsoft Teams camera not working on Mac with clear, easy troubleshooting steps to get your camera back in meetings fast.
You've joined a Microsoft Teams meeting on your Mac, but your camera refuses to turn on. Others can't see you, and you're not sure what's causing the issue.
This guide will walk you through how to fix Microsoft Teams camera not working on Mac by helping you identify the problem clearly and choose the safest, most effective solutions first. You'll learn how to check your settings, restart apps, update software, and manage camera access step by step—without unnecessary technical jargon or wasted effort.
Key takeaways
- Check that Microsoft Teams has permission to access your camera in System Preferences > Security & Privacy > Camera.
- Restart Microsoft Teams and your Mac to clear temporary issues affecting the camera.
- Ensure both Microsoft Teams and macOS are updated to the latest versions for compatibility.
- Close other apps that might be using the camera, as only one app can access it at a time.
- If problems persist, consider resetting Teams or checking hardware connections before seeking professional help.
Recognize When Your Teams Camera Isn’t Working
Before attempting fixes, it’s crucial to confirm that the camera problem occurs only within Microsoft Teams and not system-wide. Start by opening Teams and navigating to the device settings: click your profile picture, select Settings, then Devices. Here, check the Camera preview window. If it’s blank, frozen, or shows an error message like “No camera detected,” this indicates a Teams-specific issue.
Next, verify that your Mac’s camera functions properly outside Teams. Open apps like FaceTime or Photo Booth. If the camera preview appears normal and works as expected in these apps, the problem is isolated to Teams. However, if these apps also fail to display your camera, the issue may be with your Mac’s hardware or system settings.
When you see a blank or error-filled preview in Teams but a working camera in FaceTime, you can confidently proceed with Teams-focused troubleshooting. This distinction helps avoid unnecessary changes to system-level settings or hardware checks. Confirming this ensures you apply the most effective and safe fixes first.
- In Teams, open Settings > Devices and observe the camera preview.
- Open FaceTime or Photo Booth on your Mac to test the camera functionality.
- If Teams shows errors but other apps display the camera correctly, the issue is specific to Teams.
You’ll know this step worked if the problem is confirmed as Teams-only, allowing you to focus on Teams-related fixes confidently without worrying about hardware or Mac-wide camera issues.
Understand Why Your Camera Might Not Work in Teams on Mac
Several common causes can prevent your Microsoft Teams camera from working on your Mac. One frequent issue is that macOS privacy settings may block Teams from accessing your camera. You can check this by going to System Settings > Privacy & Security > Camera, then ensuring Microsoft Teams is listed and enabled. Many users miss this step, which is a simple but critical permission setting.
Another possible cause is outdated software. Running an older version of Microsoft Teams or macOS can create compatibility problems that affect the camera feed. Keeping both updated often resolves such issues. Additionally, conflicts arise when other applications are already using the camera, preventing Teams from accessing it simultaneously.
Hardware problems like loose connections or a faulty built-in camera can also cause failures, so verifying your camera works with other apps helps narrow this down. Lastly, network glitches or rare account-specific bugs within Teams can disrupt the video feed even when the camera itself is functional.
If you suspect permission issues, follow these steps to grant camera access:
- Open System Settings.
- Go to Privacy & Security > Camera.
- Find Microsoft Teams in the list and toggle it on.
- Restart Microsoft Teams to apply changes.
You’ll know this worked if your camera preview in Teams starts showing your video instead of a black screen or error message.
Allow Microsoft Teams to Access Your Camera in Mac System Settings
If Microsoft Teams cannot use your camera, the first safe fix is to check if it has the necessary permission in your Mac’s privacy settings. Without access, Teams won’t be able to activate the camera even if it’s working perfectly elsewhere.
Follow these steps to grant camera access to Microsoft Teams:
- Open System Preferences from the Apple menu.
- Select Security & Privacy, then click the Privacy tab.
- On the left side, scroll down and select Camera.
- Look for Microsoft Teams in the list on the right. If the checkbox next to it is unchecked, click to enable camera access.
- If Teams is not listed, try launching the app and attempting to use the camera again—macOS should prompt you for access.
- After enabling access, quit Microsoft Teams completely and reopen it to apply the new permission settings.
You’ll know this fix worked if Teams shows your camera preview properly or allows video calls without errors. If the camera still doesn’t activate, move on to other troubleshooting steps.
Restart Microsoft Teams and Your Mac to Clear Temporary Glitches
If your Microsoft Teams camera isn’t working despite having proper permissions, a quick restart can often fix the issue. Sometimes the app or your Mac’s system faces temporary conflicts that prevent the camera from being recognized. Restarting refreshes software states and clears minor glitches that cause errors like “Camera not found” or a black video preview.

To restart Teams properly, you need to quit the app completely rather than just closing its window. Follow these steps:
- Click on the Microsoft Teams menu in the top left next to the Apple icon.
- Select Quit Microsoft Teams to close it fully.
- Wait a few seconds, then reopen the app from your Dock or Applications folder.
If the camera still doesn’t work, reboot your Mac to reset hardware and system drivers. This step refreshes connections between your camera and apps, often resolving deeper conflicts. Restart your Mac by clicking the Apple menu and choosing Restart.
You’ll know this worked when your camera preview in Teams shows your video correctly without error messages. If the problem disappears after restarts, it confirms the issue was a temporary software or driver glitch.
Update Microsoft Teams and MacOS to Ensure Compatibility
Keeping both Microsoft Teams and your MacOS up to date is essential for preventing known bugs and compatibility issues that can cause your camera to malfunction. Teams updates frequently include patches for camera-related problems; for instance, versions after 1.6.00.12345 have addressed camera initialization errors. Similarly, MacOS updates often contain improvements to camera drivers and permission frameworks, which are crucial for seamless camera operation within apps.
To update Microsoft Teams, open the app, click your profile picture at the top right, then choose "Check for updates." Teams will automatically download and install any available updates. After updating, restart Teams to apply changes. You’ll know the update worked if your camera starts displaying correctly in Teams or if error messages related to camera access disappear.
For MacOS, go to the Apple menu, select "System Settings," then click "General" and "Software Update." If an update is available, especially one mentioning security or hardware improvements, install it. These updates can fix underlying system-level camera issues that affect Teams. Always use the official Mac App Store or System Settings for updates to avoid corrupted or incomplete installations.
Updating applies when you notice persistent camera problems despite having correct permissions and no app conflicts. It’s a safe first step before more advanced troubleshooting. If after updating your camera still doesn’t work, you can move on to checking app conflicts or hardware issues.
Close Conflicting Apps and Manage Camera Usage
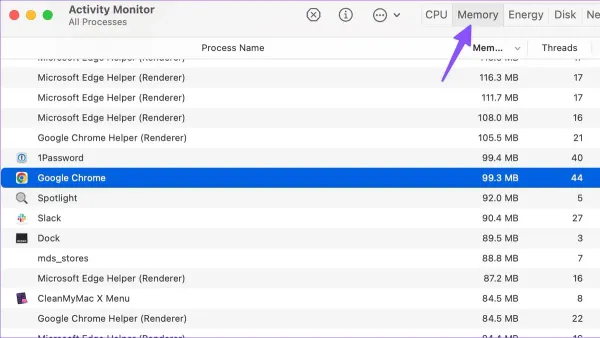
If your Microsoft Teams camera still isn’t working after checking permissions and restarting, another app may be using the camera, blocking Teams from accessing it. Apps like Zoom, FaceTime, or photo apps can lock the camera exclusively, preventing Teams from turning it on. To identify which apps are currently using the camera, open the Activity Monitor from your Applications > Utilities folder. In Activity Monitor, look under the “Energy” tab for processes showing “Camera” or “VDCAssistant” as active.
For example, you might see Zoom or FaceTime listed with significant energy impact and camera usage. If you find such apps, quit them by selecting the app’s process and clicking the “X” button in Activity Monitor’s toolbar. Alternatively, close these apps normally from their menus. After closing, revisit Teams and check if the camera preview now works.
This fix applies when you notice camera errors in Teams while other camera apps are open or recently used. The steps are:
- Open Activity Monitor from Applications > Utilities.
- Click the “Energy” tab and identify apps using the camera (look for “Camera” or “VDCAssistant” in process details).
- Quit these apps via Activity Monitor or their normal exit option.
- Return to Microsoft Teams and check the camera preview.
You know the fix worked when Teams shows a live camera preview without errors. If the camera still doesn’t activate, continue troubleshooting with the next steps. Avoid force quitting unknown system processes, as this may cause instability.
Reset Microsoft Teams and Check Hardware Connections
If you have tried the basic troubleshooting steps without success, resetting Microsoft Teams by clearing its cache can resolve deeper issues caused by corrupted settings. This fix applies when Teams continues to fail recognizing your camera despite updates and restarts.
- Quit Microsoft Teams completely by right-clicking its icon in the Dock and selecting Quit. Confirm no Teams processes remain in Activity Monitor.
- Open Finder, press Command + Shift + G, and enter
~/Library/Application Support/Microsoft/Teams. - Delete the contents of the
Cache,GPUCache, andIndexedDBfolders to clear stored data. - Restart Microsoft Teams and test your camera to see if the problem is fixed.
You will know this worked if Teams now detects your camera without error or the preview displays correctly.
Check Physical Camera Connections
If you use an external webcam, ensure it is firmly connected to your Mac’s USB port. Try unplugging and reconnecting the camera or using a different port to rule out loose or faulty connections. If possible, test the webcam with another app like FaceTime to confirm it works properly. This isolates hardware faults from software issues.
Testing with an alternate camera—such as a different USB webcam or your Mac’s built-in camera—helps determine if the problem lies with the original device. If the alternate camera works, your external webcam may be malfunctioning.
Consider Reinstalling Microsoft Teams
If cache clearing and hardware checks do not resolve the issue, reinstalling Microsoft Teams can replace corrupted application files. Uninstall Teams by moving it to Trash from the Applications folder, then download the latest version from the official Microsoft website and install it anew. This step is a last resort after confirming your camera hardware works correctly.
Know When to Seek Professional Help
If your Microsoft Teams camera issue persists despite following all software troubleshooting steps, it may indicate a hardware problem. Signs of hardware failure include your Mac not recognizing the camera at all, the camera light not turning on, or the camera producing distorted or no images even outside Teams. In these cases, attempting further software fixes could be ineffective or risky.

When you notice these symptoms, it’s time to contact professional support. You can reach out to Microsoft Support for guidance specific to Teams or visit an Apple Genius Bar for hardware diagnostics and repair. Prepare to describe the issue clearly, mention the troubleshooting steps you have tried, and provide your Mac model and macOS version.
To get the most from professional help, follow these steps:
- Confirm that all software updates and resets have been completed.
- Note any error messages or unusual camera behavior.
- Contact Microsoft Support via their official website or the Microsoft Teams Help menu.
- If hardware issues are suspected, schedule an appointment with the Apple Genius Bar through the Apple Support app or website.
- Follow the technician’s advice on repair or replacement.
You’ll know the problem is resolved when your camera functions normally in Teams and other apps without error messages or performance issues. Avoid attempting hardware repairs yourself to prevent voiding your warranty or causing further damage.
Frequently asked questions
Why does Microsoft Teams say my camera is in use by another app?
This message appears when another application on your Mac is currently accessing the camera, preventing Teams from using it simultaneously. Common apps that may cause this include FaceTime, Photo Booth, or other video conferencing tools. To resolve this, close any apps that might be using the camera and then restart Teams.
How do I check if Teams has permission to use my Mac’s camera?
Open System Settings and go to Privacy & Security > Camera. Look for Microsoft Teams in the list and ensure the toggle next to it is turned on. If the permission is off, Teams cannot access your camera until you enable it here.
What if my camera works in other apps but not in Teams?
If your camera functions correctly in apps like FaceTime or Zoom but not in Teams, the issue likely lies within Teams itself. Restart the Teams app and your Mac to clear temporary glitches. Also, check that Teams is updated to the latest version to ensure compatibility.
Can outdated MacOS versions cause camera problems in Teams?
Yes, running an outdated MacOS can lead to compatibility issues with Microsoft Teams, including camera malfunctions. Updating to the latest MacOS version ensures your system supports Teams’ features fully and fixes known bugs affecting camera performance.
Know the Limits of This Guide
This guide focuses on software and simple hardware checks you can perform yourself to fix Microsoft Teams camera issues on your Mac. It does not cover problems caused by third-party camera drivers or extensive hardware damage such as a broken camera module or logic board issues. If you suspect physical damage or if the camera doesn’t work in any application despite following all these steps, it’s best to seek professional diagnostics and repair services. Also, specialized software conflicts beyond the scope of Teams or macOS settings may require expert attention.
The most useful next step is to thoroughly check your Mac’s System Preferences under Security & Privacy > Privacy > Camera to ensure Microsoft Teams has permission to use your camera. This simple but often overlooked setting is essential for camera functionality. Granting access here resolves the majority of camera issues without further complexity.
See also: How to Share Screen with Audio in Microsoft Teams on Mac: Step-by-Step · Master Portrait Mode in FaceTime on Mac: A Step-by-Step Guide · How to Turn Off FaceTime on Mac: Complete Step-by-Step Guide