
How to Install and Use Keka on Mac: A Clear Step-by-Step Guide
This guide shows you how to install Keka on Mac and use it to compress and extract files with ease and security.
You often receive a compressed file from a colleague or need to archive large folders to save space. If you're wondering how to install Keka on Mac to handle these tasks efficiently, this guide will walk you through the process.
This article covers everything from preparing your Mac for installation to practical usage tips for compressing and extracting files with Keka. You'll also learn about Keka's compatibility with other compression tools and important security considerations before you start using it.
Key takeaways
- Keka requires macOS 10.12 or later and at least 100 MB of free space for installation.
- You can download Keka safely from the official website or the Mac App Store to avoid malware risks.
- Keka supports popular formats like ZIP, 7Z, and TAR for compressing and extracting files.
- Using Keka alongside WinRAR archives is straightforward since it handles RAR files but cannot create them.
- Enabling the "App Store and identified developers" setting in Security & Privacy ensures smooth installation without permission issues.
Before you start: What you need for Keka installation
To install Keka on your Mac, ensure your system meets the basic requirements. Keka supports macOS versions 10.12 (Sierra) and later, including the latest releases. The installer file is relatively small, typically around 30 MB, so a stable internet connection is needed to download it.
Familiarity with installing Mac applications will help you navigate the process smoothly. Keka is designed primarily for macOS, but Windows versions exist separately and must be downloaded from the official site if needed.
- Verify your Mac OS version by clicking the Apple menu and selecting 'About This Mac'; you should see your current macOS version displayed.
- Ensure you have an active internet connection to download the Keka installer from the official website; a successful connection allows you to access and download the file without interruptions.
- Prepare to install apps by checking your security settings under System Preferences > Security & Privacy > General tab; you should be able to allow apps downloaded from identified developers.
How to download and install Keka on Mac
- Open your web browser and go to the official Keka website at https://www.keka.io. You should see the homepage with a clear download button for macOS.
- Click the download button to get the latest Keka DMG file. The file will typically be named like "Keka_x.x.x.dmg" and saved in your Downloads folder.
- Once the download finishes, locate the DMG file and double-click it to open. A new window will appear showing the Keka app icon and a shortcut to the Applications folder.
- Drag the Keka icon onto the Applications folder shortcut in this window. This copies Keka to your Mac's Applications directory.
- After copying, eject the DMG by clicking the eject button next to its name in Finder's sidebar or by right-clicking and selecting "Eject".
- Open your Applications folder and double-click Keka to launch it for the first time. If prompted with a security warning about an unidentified developer, go to System Preferences > Security & Privacy > General tab, and click "Open Anyway" to allow the app to run.
- Once opened, Keka is ready to use and will appear in your Dock and Launchpad.
This process ensures you install Keka safely and correctly, using the official source and macOS's built-in security features.
How to use Keka on Mac for compressing and extracting files
Keka supports compressing files into formats such as 7zip, Zip, Tar, Gzip, and more. You can compress files or folders either by dragging them onto the Keka window or by using the context menu from Finder.
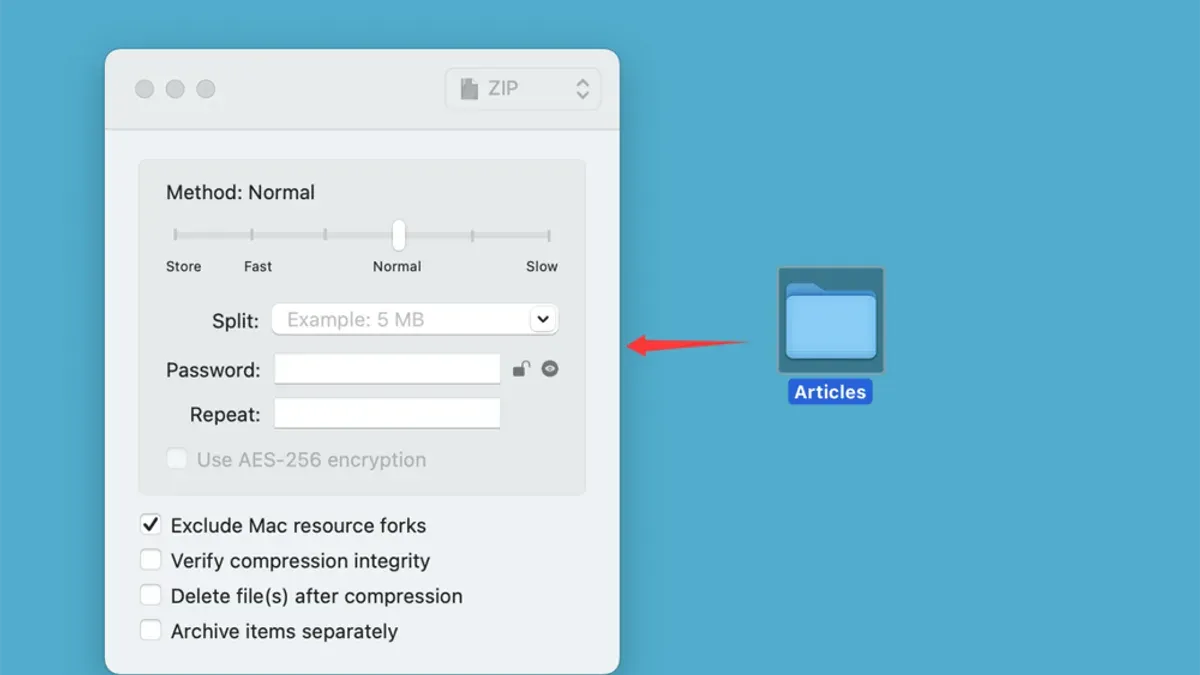
- Open Keka. Set your preferred archive format from the format dropdown; for example, select "7zip".
- Drag a folder or files onto the Keka window. You should see a progress bar indicating compression is underway, and then a new archive file appears in the same folder as the original.
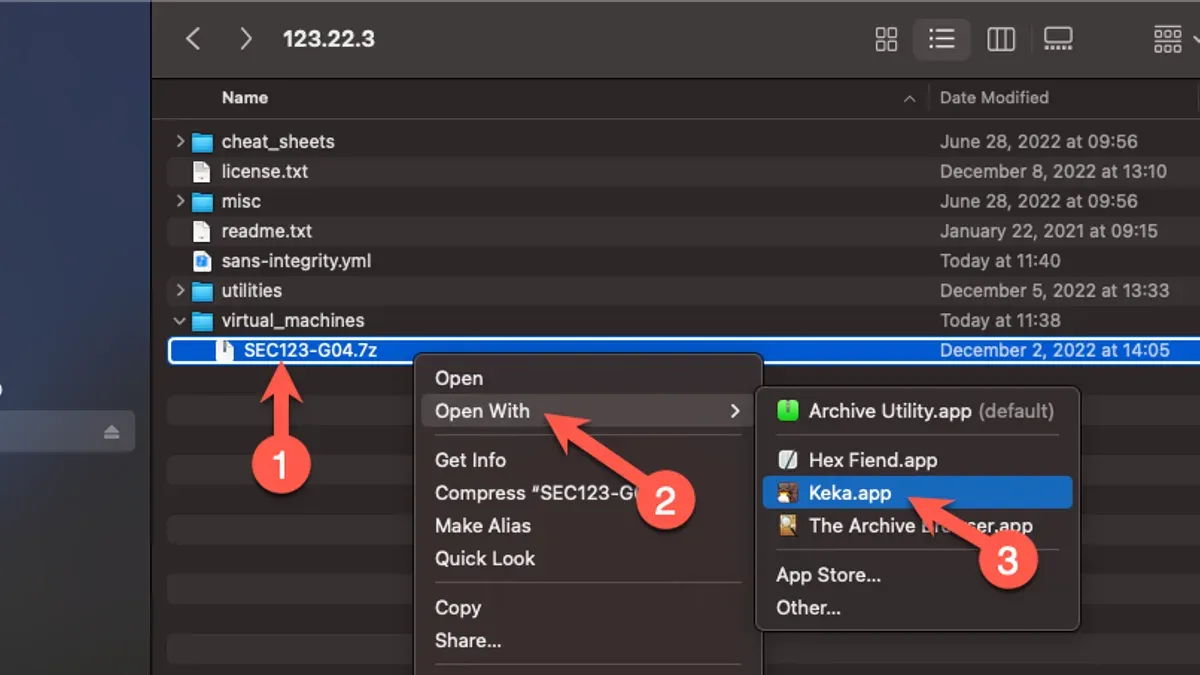
- Alternatively, right-click a file or folder in Finder, choose "Compress with Keka" from the context menu, and select the format and settings if prompted. The archive will be created next to the original item.
- To extract, double-click the archive file, or drag it onto the Keka window. Keka will unpack the contents in the same directory, displaying progress during extraction.
- For advanced options, open Keka’s preferences to set the compression level (ranging from fast to maximum) and enable password protection by entering a password before compressing.
Example: Compress a project folder to a password-protected 7zip archive by dragging the folder onto Keka, setting the compression level to "Maximum," and entering a password. To extract, double-click the archive and enter the password when prompted.
Is Keka safe for Mac? Security and privacy considerations
Keka is an open-source compression tool, which means its source code is publicly available on its official GitHub repository. This transparency allows independent developers and security experts to review the code for vulnerabilities or malicious behavior, enhancing trustworthiness.
The app does not include ads or bundled software, so you won’t encounter unwanted pop-ups or third-party installations during setup or use. Keka requests only necessary permissions to access files you choose to compress or extract, and it does not collect or transmit personal data, respecting user privacy.
Compared to other Mac compression apps, Keka’s open-source nature and minimal permission requests make it a secure option. User reviews commonly highlight its reliability and absence of malware or intrusive features, contrasting with some commercial tools that may include tracking or ads.
Can WinRAR work on Mac with Keka?
Keka supports extracting RAR files, which means you can open and decompress archives created by WinRAR without issue. However, Keka does not have the capability to create RAR archives because the RAR compression algorithm is proprietary and requires licensing.
If you receive RAR files or want to open WinRAR archives on your Mac, Keka provides an easy, free way to extract those files. Simply drag the RAR archive onto Keka or use the context menu to extract it. The files inside will be accessible as expected.
For creating RAR files on Mac, you will need alternative software like the official WinRAR for Mac (command-line version) or third-party apps that support RAR compression under license. These options often require purchase or have limitations in their free versions.
| Feature | Keka | WinRAR |
|---|---|---|
| Extract RAR files | Yes | Yes |
| Create RAR files | No | Yes |
| Other compression formats | 7z, Zip, Tar, Gzip, etc. | Zip, RAR, 7z, Tar, etc. |
| User interface | Graphical, drag-and-drop | Graphical and command-line |
Troubleshooting common issues during Keka installation and use
If Mac blocks Keka installation with a message like "Keka can’t be opened because Apple cannot check it for malicious software," you need to adjust security settings.
- Open System Preferences and go to Security & Privacy.
- In the General tab, look for a message about Keka being blocked.
- Click Allow Anyway.
- Try opening Keka again; if prompted, right-click the app and select Open to bypass Gatekeeper.
For extraction errors such as "The archive is corrupted," verify the archive integrity or re-download it if possible. Corrupt archives cannot be opened properly.
If Keka shows unsupported format errors or fails to compress, check that you are using compatible formats (e.g., ZIP, 7Z, TAR). Unsupported or encrypted files might cause issues.
For persistent problems, consult the official Keka Help page or join community forums for troubleshooting advice.
- How to Install Dropbox on Mac: A Clear Step-by-Step Guide
- How to Install and Sync MEGA on Your Mac: A Clear Step-by-Step Guide
- How to Install Transmission on Mac: A Clear Step-by-Step Guide
- How to Install Grammarly on Mac: A Clear Step-by-Step Guide
Frequently asked questions
How to install 7zip on mac?
7zip is not natively available for Mac, but you can install its command-line version, p7zip, using Homebrew. First, install Homebrew from brew.sh if you haven't. Then, open Terminal and run brew install p7zip. This gives you access to 7zip commands via Terminal, but no dedicated app interface.
How to install launchpad on mac?
Launchpad is a built-in feature on Mac and cannot be separately installed. If you don’t see it, try pressing the F4 key or using the Dock icon. You can also access Launchpad by pinching with your thumb and three fingers on the trackpad.
How to install 7zip on Mac
To install 7zip functionality on Mac, use the p7zip package through Homebrew. Open Terminal, then enter brew install p7zip. This installs 7zip tools usable from the command line, enabling compression and extraction of 7z files without a graphical interface.
How to install Launchpad on Mac
Launchpad is integrated into macOS and does not require installation. If it is missing, restart your Mac or check System Preferences under Dock & Menu Bar to ensure Launchpad is enabled. You can also access it via Spotlight by typing “Launchpad.”
Is Keka app safe for Mac
Keka is generally considered safe for Mac as it is open source and regularly updated. It does not require internet access, reducing exposure to online threats. However, always download Keka from the official website or the Mac App Store to avoid tampered versions.
Limitations of this guide and who should seek alternatives
This guide does not cover creating RAR archives, as Keka does not support this format natively. Users who require full RAR functionality, including creating and editing RAR files, should consider dedicated software such as WinRAR or other commercial tools designed specifically for that purpose.
The instructions assume you have a basic familiarity with the macOS interface, including navigating Finder, managing downloads, and adjusting security settings in System Preferences > Security & Privacy. Absolute beginners may need additional resources or support to fully understand these steps and ensure a smooth installation experience.
Next step to get started with Keka
To begin, download Keka directly from the official website to ensure you have the latest and safest version. After installation, try compressing a small folder or extracting a common archive format like ZIP to familiarize yourself with Keka’s interface and options. This hands-on approach will quickly highlight the practical benefits and any quirks specific to your Mac setup.



