How to Fix ‘An Error Occurred While Preparing the Installation’ on Mac
Learn how to fix ‘An Error Occurred While Preparing the Installation’ on Mac by adjusting date/time settings and repairing your startup disk.
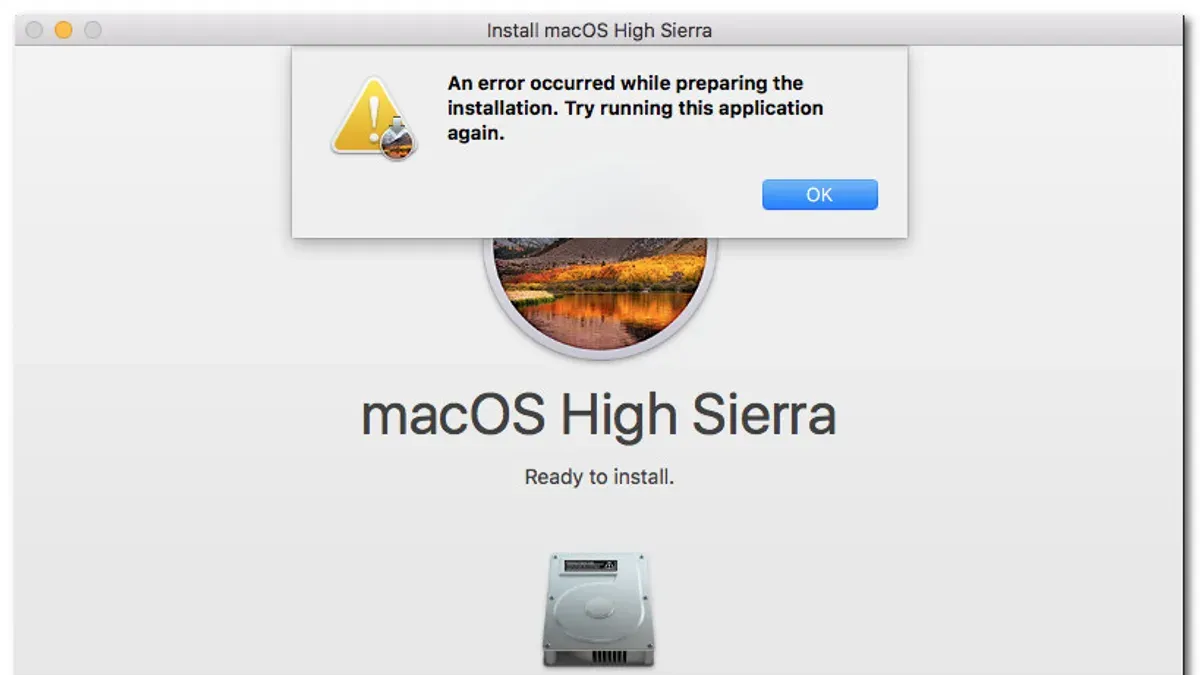
Another frequent cause is incorrect date and time settings on your Mac, which disrupt secure connections and certificate validation. Fixing this requires setting the right date and time manually via Recovery mode using the Terminal command date mmddHHMMyyyy.
Beyond date and time, repairing your startup disk using Disk Utility from macOS Recovery often resolves underlying disk errors that block installation.
Settings, menu paths and limits here were checked against Apple Support, MacPaw, Rocket Yard (full list at the end) in November 2026.
Set the Correct Date and Time on Your Mac
The most common cause of the installation error is an incorrect system date and time. During the installation, the macOS installer performs an eligibility verification that compares your Mac's system clock against its internal records. If the date or time is wrong, this verification fails, halting the installation with the error message.
- Click the Apple menu and open System Settings.
- Go to General and then select Date & Time.
- Enable Set Time and Date Automatically.
- Start your Mac in Recovery mode by holding the appropriate keys during startup.
- From the top menu, choose Utilities > Terminal.
- Enter the command
date mmddHHMMyyyyreplacing each placeholder with the correct month, day, hour (24-hour), minute, and year. For example, to set November 16, 14:30, 2026, enterdate 111614302026. - Press Return to apply the new date and time.
If the system clock was the cause, the eligibility verification will succeed, and the installation should proceed without that error.
Repair Your Startup Disk Using Disk Utility
To fix these issues, you must run First Aid on your startup disk through macOS Recovery.
- Shut down your Mac completely.
- If you have an Intel Mac, press the power button and immediately hold Command-R until the Apple logo or spinning globe appears. For Apple silicon Macs, press and hold the power button until startup options appear, then select Options and click Continue.
- In the macOS Recovery window, open Disk Utility.
- From the sidebar, select your startup disk—usually named “Macintosh HD”.
- Click First Aid and confirm you want to run it.
- Wait for the process to complete. Disk Utility will report if repairs were made or if the disk is healthy.
If errors persist or First Aid cannot repair the disk, deeper disk issues may exist. In that case, consider backing up your data and erasing the disk before reinstalling macOS.
Running Disk Utility First Aid from Recovery is a standard and safe way to fix disk-related installation blocks. Skipping this step when disk errors are suspected often leads to repeated installation failures.
More on using Disk Utility First Aid
Boot Your Mac in Safe Mode to Bypass Conflicting Software
This environment can help isolate and resolve installation errors caused by third-party software or conflicting extensions.
To enter Safe Mode on an Apple Silicon Mac:
- Shut down your Mac completely.
- Press and hold the power button until the “Loading startup options” screen appears.
- Select your startup disk.
- Hold the Shift key and click “Continue in Safe Mode.”
For Intel-based Macs, follow these steps:
- Shut down your Mac.
- Press and hold the Shift key.
- While holding Shift, press the power button to turn on your Mac.
- Release the Shift key when the login window appears.
- Log in to your account. You may need to log in twice to complete the process.
If the installation error no longer appears, it confirms that third-party software or extensions were causing the issue. Safe Mode’s restrictive loading environment helps bypass these conflicts, allowing the installation to proceed.
If the error persists while in Safe Mode, the cause is likely unrelated to software conflicts and requires further troubleshooting. Avoid making changes that risk data loss without proper backups.
Safe Mode is a critical step to isolate software interference during macOS installation and should be performed before more drastic measures.
Delete and Re-download the macOS Installer If It’s Corrupted
When the installer is damaged, verification fails, preventing successful installation. This issue often arises if you use an installer downloaded before repairing your disk or if the download itself was incomplete or interrupted.
This ensures the installer is intact and compatible with your Mac.
- Locate the existing macOS installer file on your Mac, typically found in the Applications folder.
- Move the installer to the Trash and empty it to remove it completely.
- After running disk repair tools like Disk Utility First Aid, visit the official Apple website or use the Mac App Store to download the latest compatible macOS installer.
- Once downloaded, launch the new installer and proceed with the installation.
If the error persists, confirm the installer file’s integrity by re-downloading again or consider other troubleshooting steps.
Deleting and re-downloading the installer after disk repair is a recommended approach when installation verification fails due to a corrupted installer file. This method avoids risks associated with using damaged or incomplete installation files and aligns with official guidance on resolving such errors. Learn more about handling corrupted installers here.
Revive or Restore Mac Firmware on Apple Silicon or Macs with T2 Chip
If you are using a Mac with Apple silicon or a Mac equipped with the T2 Security Chip, persistent installation errors may stem from corrupted or damaged firmware. Firmware controls essential hardware functions and must be operational for macOS installation to proceed smoothly.
This process can correct firmware corruption that blocks macOS installation or triggers repeated error messages.
Follow these steps carefully if previous fixes have failed and your Mac matches the hardware requirements:
- Use another Mac and a compatible cable to connect your affected Mac in DFU (Device Firmware Update) mode. The exact procedure to enter DFU mode varies by model and chip type.
- Launch Apple Configurator on the second Mac. This tool allows you to revive or restore the firmware of the connected Mac.
- Choose the Revive option first. This reinstalls the firmware without erasing user data.
- If reviving does not resolve the issue, proceed to Restore. Restoration erases all data and reinstalls firmware and macOS, so back up your data beforehand.
- After the process completes, disconnect and power on your Mac normally.
If problems persist, professional support from Apple is recommended as the firmware or hardware may require advanced intervention.
Firmware revival and restoration are critical recovery options exclusive to Apple silicon Macs and those with the T2 chip. They address installation failures caused by firmware corruption or damage that standard troubleshooting cannot fix. Proceed with caution, especially with the restore option, as it deletes all data on the Mac.
Learn more about reviving or restoring Mac firmware.
Erase Your Mac and Reinstall macOS as a Last Resort
This process deletes all your data and settings, so it is critical to back up your files beforehand. Time Machine is the recommended backup method to ensure your data can be restored after the reset.
To erase your Mac on Apple Silicon or Intel Macs with a T2 chip, go to the Apple menu, select System Settings, then General, followed by Transfer or Reset, and choose Erase All Content and Settings. This option securely wipes everything and restores factory settings without the need to boot into macOS Recovery manually.
Once the erase process is complete, your Mac will restart to the setup assistant. At this point, reinstall macOS using the appropriate macOS Recovery key combination if necessary. Follow the onscreen instructions to complete the installation.
After reinstalling the operating system, you can restore your data from the backup you created with Time Machine. Without a backup, erasing the Mac results in permanent data loss, so skipping this step is highly risky and not advised.
- Back up your Mac using Time Machine or another reliable method.
- Open System Settings → General → Transfer or Reset → Erase All Content and Settings.
- Confirm the erase and let your Mac reset to factory defaults.
- Reinstall macOS following the setup assistant or use macOS Recovery if needed.
- Restore your data from your backup after installation completes.
If problems persist after this step, professional service may be required.
Confirm the Installation Error Is Resolved and Next Steps if It Persists
For example, ensure your Mac's date and time are accurate before running Disk Utility or downloading a new installer. Skipping steps or changing the order may cause the error to continue.
Follow these steps to verify and proceed:
- Restart your Mac and check if it boots to the normal macOS environment without the error.
- If the error remains, review and apply the previous fixes one by one: set the correct date and time, repair the startup disk, boot in Safe Mode, delete and re-download the installer, revive or restore firmware (for Apple silicon or T2 chip Macs), and finally erase and reinstall macOS only after backing up your data.
- Maintain a stable internet connection throughout these attempts to allow the installer to verify eligibility and download necessary files.
- If all troubleshooting steps fail, contact Apple support or an authorized service provider to diagnose hardware or firmware issues beyond user repair.
Following this order is crucial because each step addresses a specific underlying cause. Installing macOS without correcting the system clock first often leads to immediate failure. Similarly, attempting installation before repairing disk errors or using Safe Mode can prolong the issue. Only erase your Mac as the last resort, ensuring you have a backup to avoid data loss.
What Common Pitfalls Cause This Installation Error?
The error “An error occurred while preparing the installation” often results from a few key missteps that disrupt the macOS installation process. Understanding these pitfalls helps you avoid repeating them and guides you toward the correct fixes.
Incorrect System Date and Time
The macOS installer verifies installation eligibility based on your Mac’s system clock. If your date or time is incorrect, the installer denies the process, triggering the error. This happens because the installer uses the system clock to check software validity and certificates.
To fix this, you must set the correct date and time before retrying installation. Use System Settings or boot into Recovery mode and run the Terminal command date mmddHHMMyyyy with the proper values to synchronize your clock. This adjustment ensures the eligibility verification passes.
Using a Corrupted Installer
Another frequent cause is trying to install using a damaged or incomplete macOS installer. Files downloaded earlier may become corrupted due to interrupted downloads or disk issues. Such corruption causes verification failures during installation.
The solution is to delete the existing installer and download a fresh copy after repairing your startup disk. This guarantees a clean installer without corrupted components, allowing the installation to proceed.
Not Backing Up Before Erasing Your Mac
Erasing your Mac is a last-resort fix but carries high risk. If you proceed without backing up, you lose all data and settings permanently. This mistake is common among users who rush to fix the error without data protection.
Before erasing, always create a full backup using Time Machine or another reliable method. Only erase your Mac via the “Erase All Content and Settings” option in System Settings if you have secured your data. This step avoids irreversible loss.
Summary Table of Common Pitfalls
| Symptom or Message | Cause | Fix |
|---|---|---|
| Installation fails with eligibility verification error | Incorrect system date/time | Set correct date/time using System Settings or Terminal in Recovery |
| Verification fails after launching installer | Corrupted or damaged macOS installer | Delete and re-download the installer after disk repair |
| Data lost after erasing Mac | No backup before erasing | Back up data fully before erasing via “Erase All Content and Settings” |
- How to Fix 'macOS Could Not Be Installed on Your Computer' Error
- How to Fix the Application Can't Be Opened on Mac Error
- How to Fix 'App Is Damaged and Can't Be Opened' on Mac
- How to Fix 'Cannot Be Opened Because the Developer Cannot Be Verified' on Mac
Frequently asked questions
How to fix an error occurred while preparing the installation macos sierra?
For macOS Sierra, this error often relates to incorrect system date and time or a corrupted installer. You should set the correct date and time in Recovery Mode using the Terminal command date mmddHHMMyyyy. If that does not resolve the issue, delete the installer and download a fresh copy compatible with Sierra.
Confirm the Installation Error Is Resolved and Next Steps if It Persists
After applying the relevant fixes, restart your Mac and attempt the macOS installation again. If the error no longer appears, proceed with the installation as usual. Should the issue persist, verify that you followed the troubleshooting steps in the correct order; for example, setting the correct date and time must precede any installation attempt, and repairing the startup disk should come before reinstalling macOS.
If these steps do not resolve the error, consider erasing your Mac using the “Erase All Content and Settings” option in System Settings, then reinstall macOS via Recovery. Avoid skipping steps like safe mode booting or re-downloading the installer, as doing so can cause repeated failures or corrupted installations.
Sources
- If an error occurred while updating or installing macOS - Apple Support — Apple Support
- Fixing ‘an error occurred while preparing the installation’ — MacPaw
- Tech Tip: ‘An Error Occurred While Preparing the Installation’ Fix — Rocket Yard
- 9 Ways to Fix an Error Occurred While Preparing the Installation — 4DDiG