How to Fix No Bootable Device on Mac: Step-by-Step Solutions
Resolve the no bootable device on Mac error by selecting the correct startup disk, repairing boot volumes, and adjusting security settings effectively.
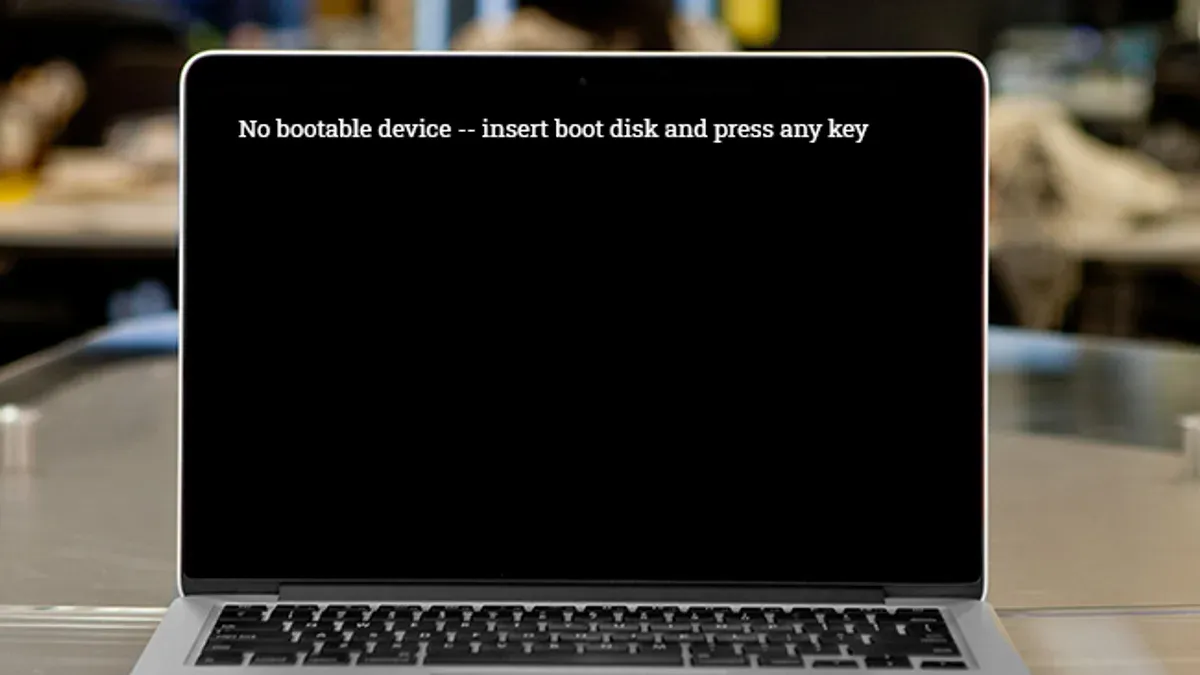
This misdirected boot attempt is a common cause of startup failure that can be resolved by selecting the correct startup disk, which is a crucial first step in any no bootable device on Mac fix.
When your Mac fails to find a valid boot device, it could be due to several underlying issues including corrupted boot volumes, security settings on T2-chip or Apple silicon Macs, or hardware problems like loose internal connections.
You will learn how to select the correct boot disk, repair disks via Recovery Mode, reset NVRAM where applicable, adjust security policies for external booting, and when to reinstall Windows or macOS—all while helping you recognize hardware-related causes that might require professional repair.
Last verified November 2026 against Stellar Data Recovery Blog, MacPaw, Darwin's Data (full list at the end).
Select the correct startup disk using Startup Manager
The 'No Bootable Device' error often happens because your Mac tries to boot from a corrupted or inaccessible Boot Camp partition or an external drive rather than the main macOS volume. To fix this, you need to manually select the proper startup disk using Startup Manager.
Keep holding until the Startup Manager screen appears, showing all available bootable volumes.
Highlight it using the arrow keys or mouse, then press Return or click Continue to boot from that selected disk.
External USB or Thunderbolt drives connected to your Mac can sometimes interfere by appearing in the boot list and taking priority if they are not bootable. Selecting the correct internal startup disk here prevents that confusion.
Run Disk Utility First Aid in macOS Recovery to repair boot volumes
Running Disk Utility's First Aid tool in macOS Recovery can detect and repair these disk errors to restore boot functionality.
- Power on your Mac. On Intel Macs, immediately hold down Command + R until the macOS Utilities window appears. On Apple silicon Macs, press and hold the power button until startup options show, then select Options and click Continue to enter Recovery Mode.
- In macOS Utilities, open Disk Utility. From the menu bar, select View and choose Show All Devices to reveal the full disk hierarchy.
- Locate and select your internal startup disk, typically named "Macintosh HD," or if you are troubleshooting Boot Camp, select the Boot Camp partition.
- Click the First Aid button in the toolbar, then confirm by clicking Run. Disk Utility will scan the selected volume for errors and attempt repairs if needed.
- Wait for the process to complete. A message indicating that the volume appears to be OK means First Aid has repaired errors preventing boot. If errors cannot be repaired, additional steps may be required.
Tip: Run First Aid on both the internal drive and any connected USB drives you intend to boot from, as either may have errors blocking startup.
Reset NVRAM or PRAM on Intel Macs to clear corrupted boot settings
Corrupted firmware settings can cause your Mac to fail recognizing the correct startup disk, resulting in a no bootable device error. Resetting the NVRAM (Non-Volatile Random-Access Memory) or PRAM (Parameter RAM) clears these stored settings without affecting your user data.
- Shut down your Intel-based Mac completely.
- Press the power button to turn it on, then immediately hold down the Option + Command + P + R keys simultaneously.
- Continue holding these keys for about 20 seconds. During this time, your Mac will restart, and you may hear the startup chime or see the Apple logo appear and disappear twice.
- Release the keys after the second startup sound or when the Apple logo appears for the second time. Your NVRAM and PRAM are now reset.
If your Mac was incorrectly booting from a non-bootable volume or had corrupted boot instructions, this reset often resolves the issue.
Tip: Resetting NVRAM only applies to Intel-based Macs; Apple silicon Macs use different methods for boot management.
Adjust Startup Security Utility on T2-chip and Apple silicon Macs to allow external boot
If your Mac uses a T2 security chip or Apple silicon, default security settings block booting from external USB drives or cloned disks. Adjusting these settings in Startup Security Utility is essential to allow external booting.
- Enter macOS Recovery:
- For Apple silicon Macs: Power off your Mac, then press and hold the power button until startup options appear. Select Options and click Continue.
- For Intel Macs with T2 chip: Power on the Mac and immediately hold down
Command + Runtil the Apple logo or spinning globe appears.
- In the top menu bar, open the Utilities menu and select Startup Security Utility. A window with security options will appear.
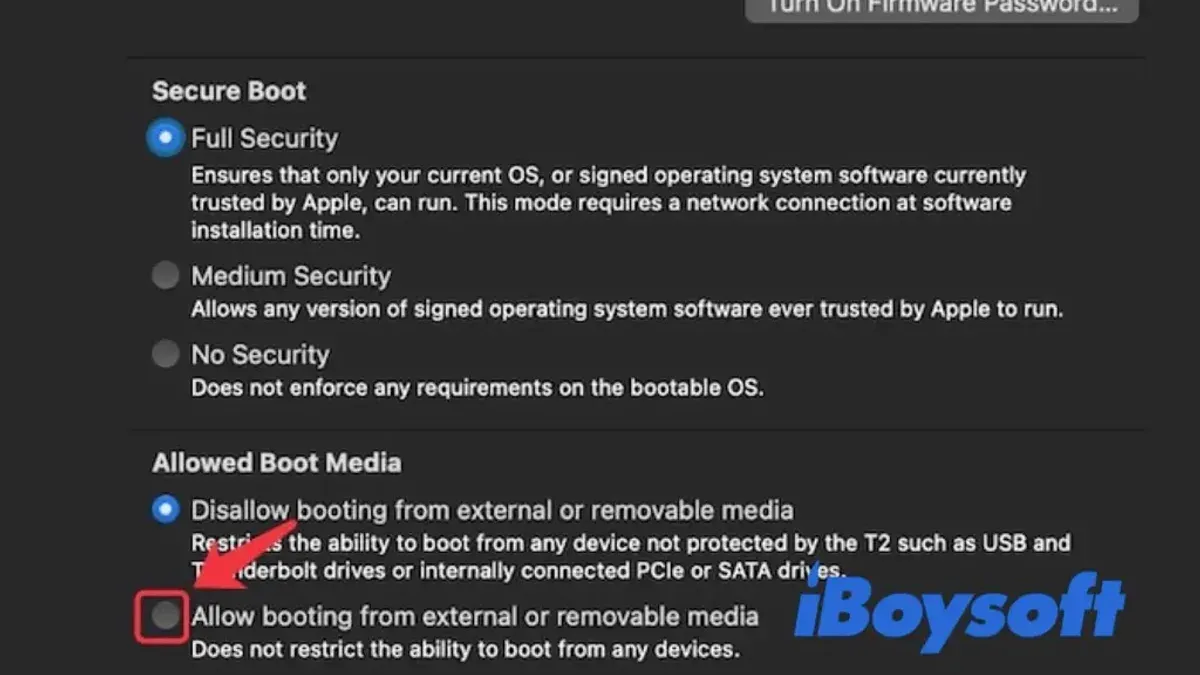
- Set Secure Boot to Medium Security. This setting balances security and flexibility by allowing the Mac to boot from trusted operating systems while permitting external booting.
- Enable Allow booting from external media or removable media by checking the appropriate box. This overrides the default block on external USB drives and cloned disks.
- Close the utility and restart your Mac. Your Mac should now recognize and boot from external USB installers or drives.
Without these changes, attempts to boot from USB installers or cloned drives will not succeed on T2 or Apple silicon Macs.
Tip: If you plan to frequently boot from external media, keeping Medium Security and external boot enabled is the recommended combination.
Learn more about Startup Security Utility.
- Restart your Mac to apply the changes.
Erase and reinstall Windows on Boot Camp partition if repair fails
If Disk Utility fails to repair your Boot Camp partition, the next step is to erase and reinstall Windows. Before proceeding, back up any important data from the Windows partition to avoid data loss.
- Start macOS Recovery and open Disk Utility.
- Select the BOOTCAMP partition from the sidebar and choose Erase. Confirm the erasure to remove the corrupted Windows partition.
- Exit Disk Utility and open Boot Camp Assistant.
- Use Boot Camp Assistant to remove Windows completely and restore your disk to macOS-only configuration. You should see confirmation that the Windows partition was removed and the disk space recovered.
- If you need Windows, run Boot Camp Assistant again to create a new Windows partition and reinstall Windows following the on-screen instructions.
This sequence of erasing the Boot Camp partition and managing it through Boot Camp Assistant resolves persistent boot errors caused by corrupted or damaged Windows partitions. Erasing the partition first ensures no residual corruption remains, while Boot Camp Assistant properly restores the disk and guides you through a clean Windows installation.
- Back up important data from the Windows partition.
- Erase the BOOTCAMP partition using Disk Utility in macOS Recovery.
- Use Boot Camp Assistant to remove Windows and restore the disk.
- Reinstall Windows via Boot Camp Assistant if required.
Tip: Do not skip backing up your Windows data before erasing the partition, as this process deletes all data on BOOTCAMP permanently.
Reinstall macOS from Recovery Mode without erasing user data
If corrupted system files cause your Mac’s boot failure, reinstalling macOS from Recovery Mode can replace those files without deleting your personal data. However, backing up your important files before you proceed is strongly recommended to prevent data loss in case of unexpected issues.
To reinstall macOS, follow these steps carefully:
- Power on your Mac and immediately hold down Command + R keys until the macOS Utilities window appears. This boots your Mac into Recovery Mode.
- In the macOS Utilities window, select “Reinstall macOS” and click Continue. This option reinstalls the operating system without erasing your user files or settings.
- Choose your internal startup disk (usually named “Macintosh HD”) as the target for installation. Confirm your selection to ensure macOS installs on the correct volume.
- Follow the on-screen prompts to complete the installation process. Your Mac will download the necessary files and reinstall macOS while preserving your data.
If problems persist, further troubleshooting is needed.
Tip: Even though this process does not erase data, a complete backup beforehand protects you if the drive has deeper issues.
- Back up your data before starting.
- Boot into Recovery Mode by holding Command + R at startup.
- Select “Reinstall macOS” and confirm the internal startup disk.
- Follow all prompts to complete the installation without erasing user files.
Check for hardware issues: internal drive connections and drive health
Your Mac cannot detect the startup disk if SATA or power cables inside are disconnected or compromised. Physical faults can block the system from recognizing any bootable volume.
Listen closely for unusual noises from your Mac’s drive area—clicking or grinding sounds indicate imminent failure. In such cases, avoid repeated boot attempts or repairs that could worsen damage and risk data loss. Instead, prioritize backing up your data with external bootable recovery tools before trying fixes.
If the internal drive appears detected and healthy, you can proceed with software repairs like running Disk Utility First Aid or resetting NVRAM. However, if hardware issues are suspected or the drive is failing, immediate data backup is crucial.
Follow these steps to check and address hardware issues:
- Power down your Mac and open the case if you are comfortable doing so or have a technician inspect it. Check internal SATA and power cables for looseness, disconnections, or visible damage. If cables are secure and intact, proceed to step 2.
- Listen for any abnormal drive noises during startup attempts. If present, consider the drive failing and prioritize data backup using an external bootable recovery USB or enclosure.
- If the drive is stable and detected, verify startup disk selection and run Disk Utility First Aid. If errors persist, consider professional diagnostics or drive replacement.
- Inspect internal SATA and power cables for secure connections and damage
- Listen for unusual drive noises indicating hardware failure
- Backup data immediately if drive failure is suspected
Tip: Avoid attempting software repairs before confirming hardware health to prevent worsening drive conditions.
Avoid common mistakes that prevent fixing the error
First, do not overlook external USB or Thunderbolt drives connected to your Mac. These devices can interfere with the boot order, causing the Mac to attempt booting from a non-bootable device. Disconnect all external drives before proceeding and check if the error resolves.
Second, always confirm you have selected the correct startup disk in Startup Manager. Booting from the wrong disk, especially a corrupted Boot Camp partition, leads to persistent boot failures. You should see your intended macOS or Windows volume listed and selectable. If it is not visible or selectable, the disk may require repair or reinstallation steps.
Third, on T2-chip and Apple silicon Macs, failing to adjust Startup Security Utility settings blocks booting from external or cloned drives. You must set Secure Boot to Medium Security and enable external boot before attempting to boot from USB drives. Without these changes, the Mac will refuse to start from any external device, causing confusion and delay.
Fourth, avoid running disk repairs repeatedly on a failing internal drive without backing up your data first. Continuous repair attempts can worsen drive health and increase the risk of permanent data loss. If disk errors persist after initial repairs, prioritize data backup and consider hardware diagnostics or professional service.
- Disconnect all external USB and Thunderbolt drives. You should see the error persist or clear when they are removed.
- Use Startup Manager to select the correct startup disk. The chosen disk should boot successfully or proceed to the next fix.
- On T2-chip or Apple silicon Macs, adjust Startup Security Utility settings to allow external boot. Confirm the settings apply and then attempt external boot if needed.
- Back up your data before repeating disk repairs on the same drive. Successful backup protects your files if the drive fails completely.
Order of operations that actually matters when fixing no bootable device on Mac
Begin by confirming the startup disk selection. On Intel Macs, hold the Option key at startup to access Startup Manager and choose the correct volume, such as Macintosh HD. This step verifies that the error isn't caused by an incorrect boot target.
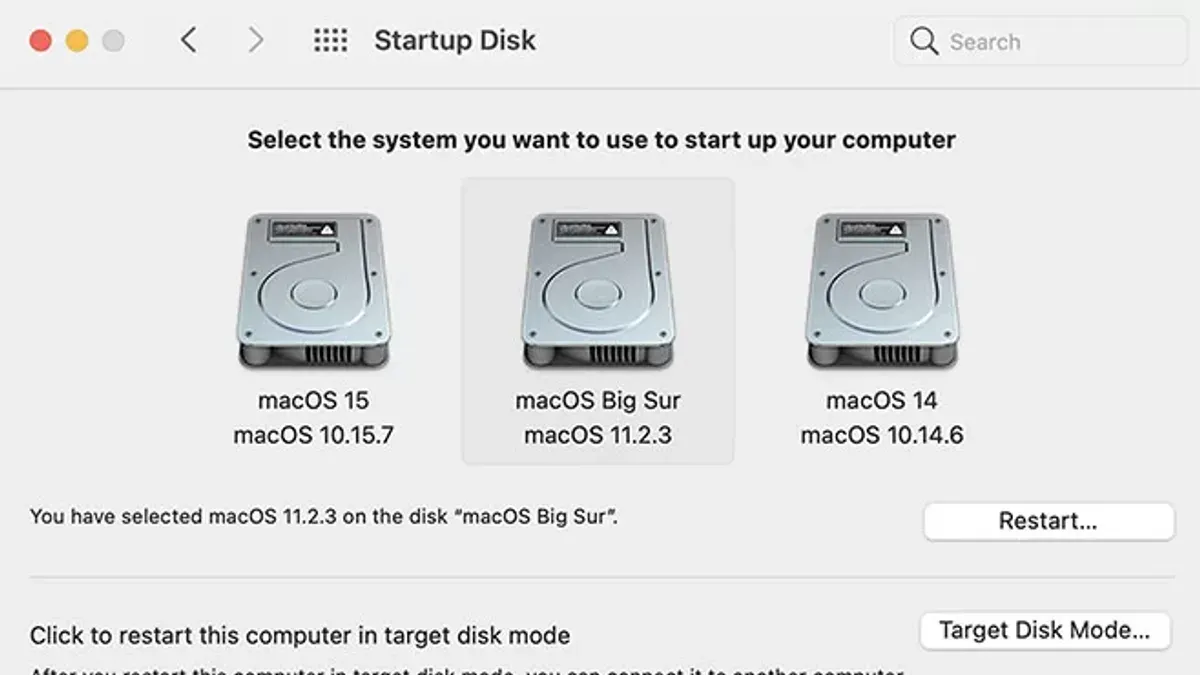
Next, boot into macOS Recovery Mode by holding Command + R at startup. Use Disk Utility to run First Aid on the startup disk or Boot Camp partition to repair any disk errors that can prevent booting.
If you have an Intel Mac, reset the NVRAM by holding Option + Command + P + R keys for about 20 seconds during startup. This clears corrupted boot settings that may cause the error without affecting your data.
For T2-chip and Apple silicon Macs, adjust the Startup Security Utility to permit booting from external drives if you plan to use USB or cloned drives. This setting must be correct before attempting to boot externally.
Only after repairing disk errors, resetting boot settings, and adjusting security should you consider reinstalling macOS from Recovery Mode or erasing and reinstalling Windows on a Boot Camp partition. Attempting these steps out of order risks wasting time or causing data loss.
Throughout this process, assess hardware health and connections. If the internal drive shows signs of failure, prioritize backing up data before further repairs or reinstallations.
Skipping or reordering may lead to persistent errors or overlooked causes.
When to seek professional help beyond software fixes
This article does not cover data recovery from physically damaged drives or advanced hardware repairs. If you suspect your Mac has a hardware failure, such as a failing internal drive or loose connections beyond basic checks, consulting an authorized service provider or technician is necessary before attempting any repairs yourself.
Attempting hardware fixes without proper knowledge may worsen the problem or void your warranty.
These steps often resolve the issue without risking data loss. If they do not, resetting NVRAM on Intel Macs or adjusting the Startup Security Utility on T2-chip and Apple silicon Macs can clear boot settings that block startup.
Sources
- Resolved ‘No Bootable Device’ Error on Mac? — Stellar Data Recovery Blog
- "The system cannot find any bootable devices": 6 fixes — MacPaw
- What do I do when my Mac says no bootable device? — Darwin's Data
- Fixed: (M1/M2/M3/M4) Mac/MacBook Not Detecting Bootable USB — iBoysoft
- How to Fix No Boot Device Found on PC & Mac (Step-by-Step) | Fix My PC Store — Fix My PC Store